1962 Mk1 Rebuild
#91
Posted 02 June 2009 - 01:46 PM
Your putting some serious gear in to this too, I'm soaked with my own drool.
That fact that it's a mk1 makes it even more special, It's great that your putting the seams back and sorting the front out and putting door bins in. You said you were putting external hinges back on as well didn't you?
The paddle shifts have to be one of my favourite bits, that's automotive porn.
There aren't going to be many four wheeled object in the world more fun to drive than yours when it's done.
I'm looking forward to the next bit of progress.
You sir have my utmost respect.
You given it a name yet?
#92
Posted 02 June 2009 - 10:10 PM
And yes, I do have a name for him.
I shall call him 'Lord Minimus'.
#93
Posted 03 June 2009 - 11:31 AM
Thanks for the kind words all. At this point, I think I might not put seams back on the car. I would like to, but the project is already taking way longer than I anticipated. I've got to limit the scope as much as possible and to do it right will take a lot of time. I suppose I could always add them later. We'll see.
I see where your coming from that it takes a lot of time but I think if you dont do what you originally had planned just because it takes longer you'll regret it later down the line.
But seriously cracking project none the less
#94
Posted 03 June 2009 - 06:40 PM
Seriously - been thoroughly enjoying reading your progress, especially like some others like the steering column - lovely work - looks so right - just like properly engineered stuff should! Keep it going!
#95
Posted 23 June 2009 - 06:39 AM
The bonnet, front grille, and mustache are now fitted....
...as are bullet mirrors...
...and door check straps.
The work I did on the front end helped give me the confidence to take on the final and most difficult body work my car needed. The boot had been smashed in at the very back, crumpling the rear boot floor. Someone had done a poor job of reversing this with a hammer. I might have let this go but the rear bumper-mounting flange was gone and test fitting of the rear boot lid revealed some warpage of the boot opening's lower surround. Time to fix all of this at once.
With the lower boot opening in place, it was much easier to align the boot floor.
And once those two were in, I was able to finally weld in the lower valence.
#96
Posted 23 June 2009 - 06:43 AM
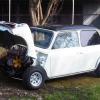
Here's what she looked like when I got her:
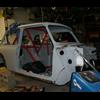
And here's what she looks like today:
What's left to do? Plenty, I'm afraid: all the wiring, most of the plumbing, fitting the engine and exhaust system, installing the Pro-Shift system, the bodywork and painting, as well as all the fine tuning once she's rolling and a hundred other miscellaneous items. Given everything on the list and my current rate of progress I am now going to estimate completion by the end of 2009.
#97
Posted 23 June 2009 - 06:47 AM
#98
Posted 23 June 2009 - 08:34 PM
Awesome! Can't wait to see it finished. This is my favourite thread for updates
#99
Posted 10 July 2009 - 01:27 AM
#100
Posted 10 July 2009 - 08:35 AM
your work is top nitch sire!
colour??
#101
Posted 11 July 2009 - 06:08 PM
Looks absolutely amazing. Do you have any other picture of the pedal setup? I'm thinking about moving my Tilton assembly over like you did. Also, how is the gas pedal linkage hooked up? I'd love to steal your idea
Chris,
I've been following your build. We are both attempting some similar things. Too bad you don't live in NorCal as we could more easily compare notes. After seeing your dash I wondered why I hadn't thought of doing it that way.
Regarding the pedals, I usually post more photos on my site and just hit the highlights here. There are a lot more pictures of the pedals on my site starting here:
http://www.joe250.co...p28/step28.html
If you need more photos or have questions, please feel free to email me.
Joe
#102
Posted 11 July 2009 - 06:09 PM
looks great, wonderful transformation!
your work is top nitch sire!
colour??
Thanks Ted! Color is still up in the air but right now I've settled on green with a white roof.
#103
Posted 31 July 2009 - 10:48 PM
I've been busy with other things the past month, so only a little bit of progress on the Mini:
-Slam Panel: This one came quite bent up and split at the bonnet latch. I could have lived with it but I'll have to relocate the slam panel support anyways to accomodate the R1 engine's exhaust header. Since I already had a new donor front clip, I carefully drilled out the spot welds and replaced the existing one.
Old slam panel out.
-Remote release: After I bought my nice new shiny chrome grill, I discovered that most old Mini's had a bonnet release latch up front and a 'special' grill with a cutout allowing access to said latch. Woops. I was ready to order a different grill but then found out that later Mini's came with a remote release and that it was relatively easy to retrofit one. I kept my grill and ordered a remote-release instead. Here's how it turned out. It just required a small hole be opened up in the front clip.
I've read many tales of Mini bonnets becoming unlatched and flying up while driving. Looking at the bonnet release, this didn't seem hard to believe as there's no force acting to keep the latch shut. Many racers and even some street drivers install leather straps or external latches to help keep the bonnet secure but I didn't want to mess with that. After wasting a lot of time rigging a spring to pull the latch shut and keep it shut, I finally rethought things and found a much simpler solution - a compression spring. I won't know how well it works until later but I think this will work.
-R1 Dash: As I stated earlier, it is simple to get all the information I need by just using the R1's dash. Speedometer, tachometer, coolant temperature, odometer, trip meter, turn signal indicator, and high-beam indicator functions are all included. Getting that information would be considerably harder, so I'll live with the anachronism. Here you can see the billet aluminum mount I created at the machine shop to hold the dash in-place behind the steering wheel. I offset the dash so that the tach is centered. This also places the trip meter buttons over to the left, making them a little more accessible.
-Gear indicator: Here's a little billet mount I made for the gear indicator.
-Contol box: I'm not completely finished with this yet, but it will house four different controls: the ignition unit, the kill switch/starter button, push-button reverse, and the exhaust bypass valve controller. I mounted it up high so that everything is out of the way, yet still accessible when I'm stapped into the driver's seat.
-Battery box: the aftermarket battery box that came with the car was brand new but fit horribly. After wasting some time mangling it up, I broke down and ordered an original Heritage box. Much better. I've tacked it into place for now and will finish welding it up shortly.
-Door kick panels: another small item that needed to be done. Rather than use rivets or sheetmetal screws, I thought I'd try out my new riv-nut gun. Worked out pretty well I think.
-Fiberglass panels - I have a few holes in the body that I need to cover up. Some I'll weld up but for the rear shelf, rear rotissarie hole, and shifter console I decided to fabricate some fiberglass covers. Now I just need to bolt them into place.
#104
Posted 01 August 2009 - 03:04 PM
Ed
#105
Posted 01 August 2009 - 03:33 PM
2 user(s) are reading this topic
0 members, 2 guests, 0 anonymous users