Firstly you will need the following equipment:
Tools:
• Screwdriver (philips)
• Wire cutters
• Self stripping tab connectors £2.50 for box of 25 (absolutly excellent, makes wiring a lot easier)
• Pair of grippers (form of fancy pliers lol)
• Wire strippers (for those who dont know it strips the casing arround the wire)
• Copan saw or jig saw
• Hand saw
• Cordless drill/hand drill
• Crafting Knife
Other Key Componants:
• MDF
• Carpet
• 2 Brackets
• Various sized drill bits for both wood and metal
• Speaker cable (should be supplied with the speakers)
• Electrical tape
• 3 bolts and nuts (i used the alan key nuts)
• Small Screws
• PVA glue or Wood glue, works just as good
• Block connectors
• 6 x 9 speakers or smaller, i used Sony Xplod F6935 3 way
NOTE BEFORE STARTING REMOVE THE REAR SEATS AND RUN THE SPEAKER CABLES THROUGH SO THEY ARE COMPLETLY HIDDEN AND ARE UNDER THE REAR SEAT
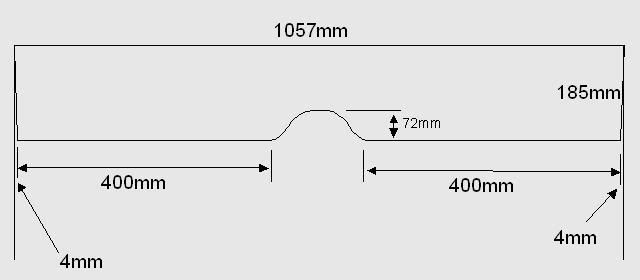
Ok now you have all the tools and componants to create the speaker board. Below i have supplied the two different speaker board dimentions. I used the template that has the bigger height dimentions as this covered the bottom of the seat. (the metal strip that the rear seat sit into)
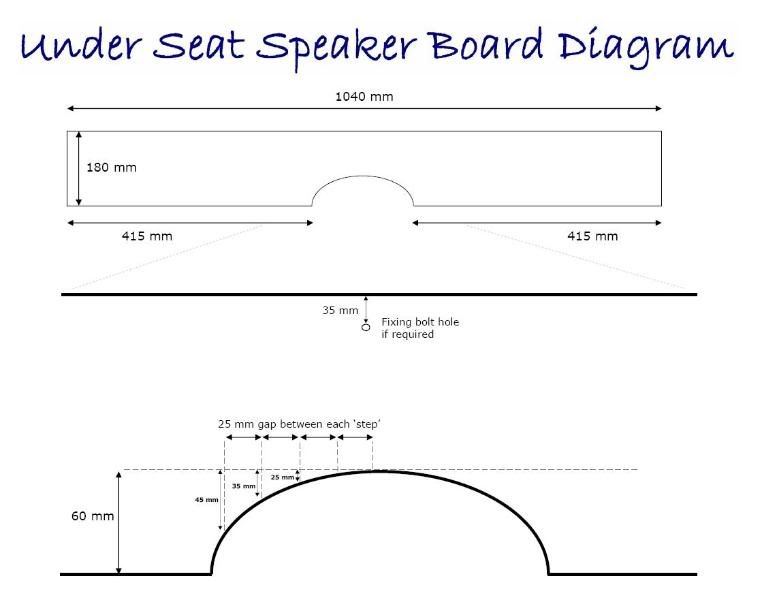
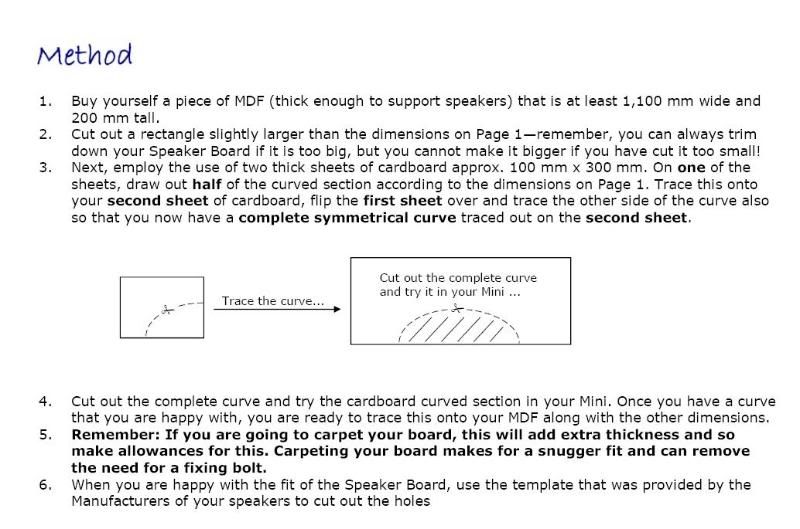
Ok now you have the templates either on screen or printed out begin to produce a cardboard template, this way you will ensure that the MDF version is completly perfect. Once the template is made you can begin to mark out the speaker holes. Your speakers may of come with a template so measure out on the template and make sure that the two speakers are 7cm's from each end, so this mean from the left 7 cms in, then draw round the speaker template, then same again but on the right hand side, this will make an even speaker layout.
Now the template will need one hole marked up in the centre, this hole will need to be lined up with the larger central hole for the seat bracket that is in the middle.
Once the template has been made you can now draw around this onto the MDF making sure that is the correct dimentions as theres always the chance the template is slightly out so double check. Once you have used the appropriate tools to cut the speaker board out test it witin the car to make sure that it fits and the center hole that is drilled out aligns up. Also make sure the top of the board ligns to the metal strip that the rear seat sits into.
Now one trick that i have learnt with making exact templates for awkward angles is using a piece of A4 paper. This is required to get the shape of under the seat. so get the piece of paper, and shape it to the side under the seat, you will get something that looks like this.
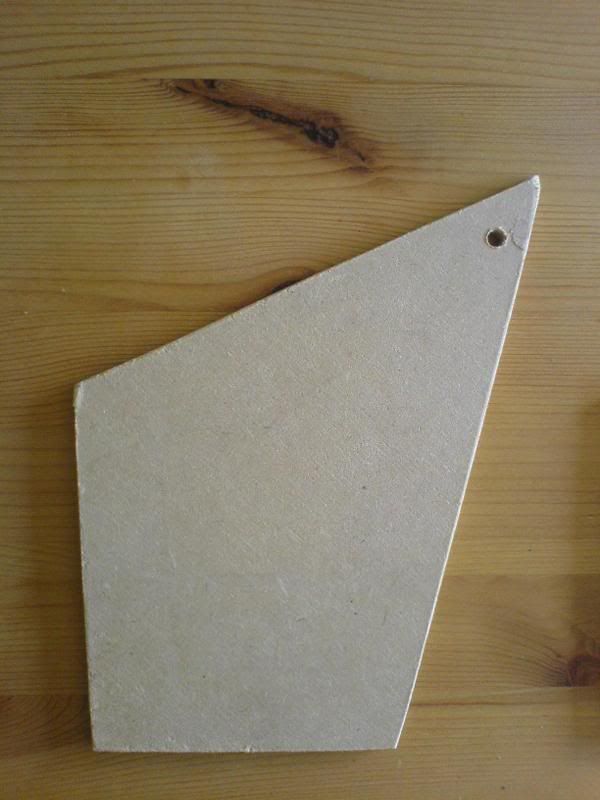
The hole located at the top right of this image you will notice in your mini that there is a hole in the door bin, this hole is neccesary in the side panels as they will be bolted into place. Now this shape shown above is not the final shape, this will need straightening up so that it is level at the front, this part i did by eye.
Once you have to identical side panels both with holes in the side u can then bolt them into place, making sure the alan key side of the bolt is in the door bin as this is neater.
Now you can carpet the speaker board, to do this lay the board down onto the carpet and draw around it, then measure 1inch of the outline, this gives it a good amount of carpet to fold over. Once the carpet is cut to size cover the front of the board with glue then place the carpet on, and fold the carpet over onto the back and then use small screws to fix it into place, i have found this very effective. Now for the speaker holes use a sharp crafting knife to cut exactly round the speaker holes.
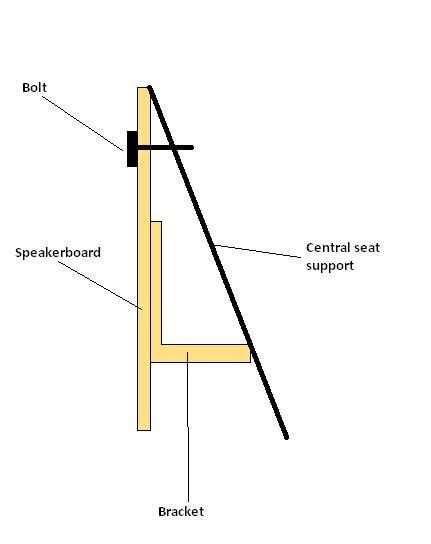
Once that is done you can now fix the brackets to the back of the speaker board, as this will fix to the sides that you installed earlier on, so make sure the brackets are in the correct place. Once this is done you will need to create a MDF bracket or wedge, this fits into the center of the speaker board exactly above the central arc. This is done to ensure the centre of the speaker board is not able to be pushed in at all when it is finally installed. Below is a quick image to show you what i mean:
Now you have done that you should have a completly flat speaker board that sits on the flat fronted side panels and the central bracket
(PLEASE NOTE YOU WILL HAVE TO WORK OUT THE SIZES TO MAKE IT FLAT AT THE FRONT OR HOW YOU PERSONALLY PREFER IT)
For fitting the speaker board make sure that the side panels are bolted into place, and that the speaker cables are run under the seat so they are hidden.
Now before fitting the front, you will need a hand drill with a drill bit that can go through metal, this is required to drill through the front metal beam that the seat sits behind. Basically you drill through this with a small drill bit, make about 3 on each side that are reasonably spaced, then put the speaker board into place and secure the central section using an alan key bolt, note this will be tough so some force may be reguired, this is only because the central support of the seat is angled, but it will go through, once it is then secure in place making sure the alan key side of the bolt is on the front. Now you can secure each end, so make sure the braket is on the side then screw into place. Now go back to the holes drilled earlier and screw through the holes and into the speaker board, this will hold it firmly into place.
Now you can fit the speakers into place, but do make sure your wiring is correct first. And thats how to do a speakerboard i hope this helps.
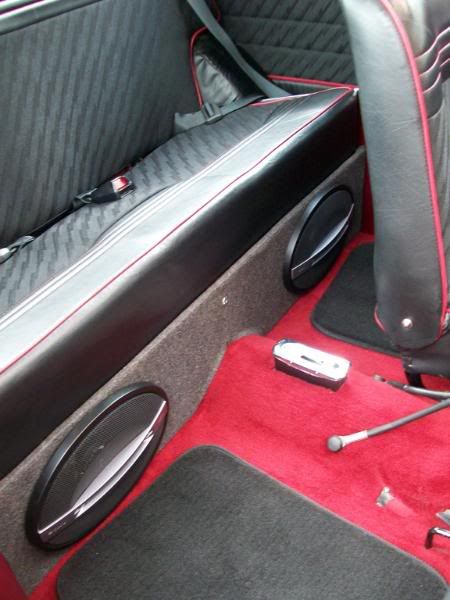
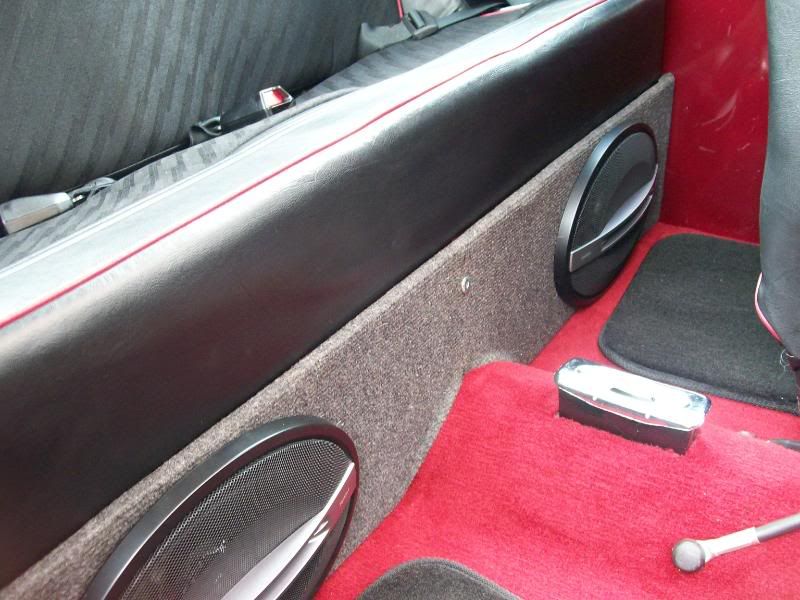
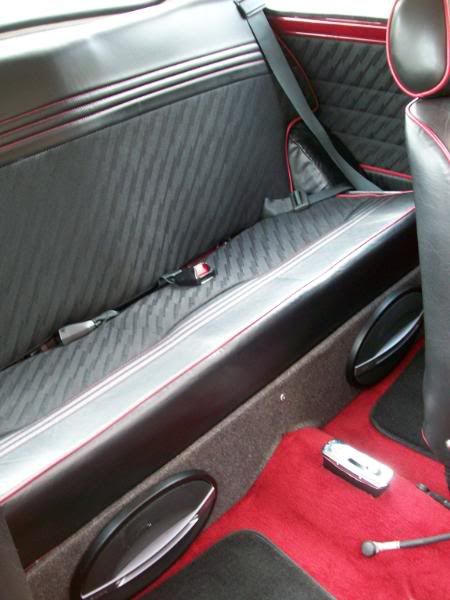
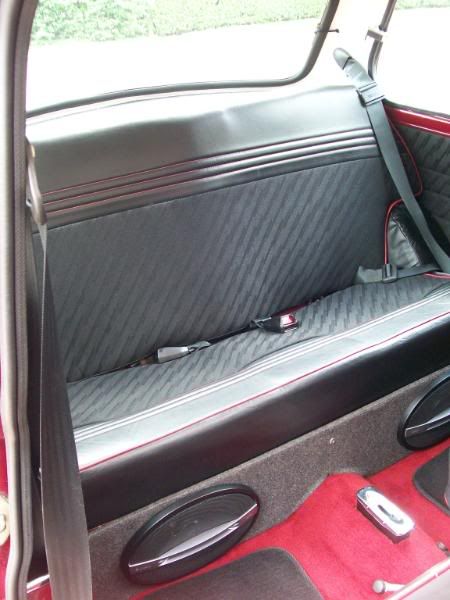
Below are images of my speaker board. Comment what you think and if this helped at all
Russell Mini Thirty