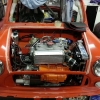
Some Hi Lo Fitting Troubles
#1

Posted 13 July 2008 - 10:18 PM
back ones no bother apart from i think i need new cones all round as they have got 35 years of sag under their belt and i guess i will have to bite the bullet especially as it appears someone has had a go before...
i have a brand new SP tool from minispares and on one side the threads were just knackered even 9 turns in it still pulled the threds out with the first turn of the clamp handle!
other side cranked it as tight as we dare remove the bump stomp at the bottom of the top arm and still couldnt get enough of a gap to get the old cone out!! fun..
not sure if uts to do with it being an auto seem to remember i read a topic ages ago about the cones on the front of an auto being different to the manual ones!?!? if so does anyone know the part numbers off by heart or am i gonna have to have one of those chats with minispares where they rummage around for a while and come up trumps?
oh and its damn scary thinking the threads could slip on the tool and take your fingers off any moment!!
#2

Posted 13 July 2008 - 10:27 PM
I had the forsight to get an upper arm repair kit and took the opportunity to re-bush the upper arm with new needle roller bearings and seals etc. = thats also a *horrid woman* of a job as the needle bearings are sods to get out (1 out of 4 drifted out, the others I had to destroy and collapse the out race with a pencil grinder!).
Thjere must be a special drifting tool for this, anyone know???
#3

Posted 13 July 2008 - 10:29 PM
I did mine last weekend and ended up taking the upper suspension arm out to get the cone and rubber out (I couldn't get the tool to engage with the threads either)!!!
I had the forsight to get an upper arm repair kit and took the opportunity to re-bush the upper arm with new needle roller bearings and seals etc. = thats also a *horrid woman* of a job as the needle bearings are sods to get out (1 out of 4 drifted out, the others I had to destroy and collapse the out race with a pencil grinder!).
Thjere must be a special drifting tool for this, anyone know???
dont mini spares do one?
I swear i have seen one advertised!
#4

Posted 13 July 2008 - 10:33 PM
#5

Posted 13 July 2008 - 10:39 PM
i remember doing the ones on my banshee (quad) and i had to do the same i.e smash collapse and dremel the living turkey out of them! swore i would never do it again!! ah well..
thanks for the help
any idea on the difference between auto cones and manual have tried a search but cant track the post down
#6

Posted 13 July 2008 - 10:41 PM
[attachment=63746:Front_suspensions.jpg]
#7

Posted 13 July 2008 - 10:45 PM
#8

Posted 13 July 2008 - 10:51 PM
there are a couple of other little things like upper ball joint to disconnect but that's straight forward (hopefully?).
I actually cut a part of the inner wing away (75mm high x 125mm long to make access easier) them pesky MPI's, there's no bloody space left to get your hands in anywhere!!!
#9

Posted 13 July 2008 - 10:53 PM
#10

Posted 13 July 2008 - 11:02 PM
just ordered all that gubbins so should be good to go for another round of mini swearing tennis!
nah ball joint is off, but yeah i think i might need a replacement top arm on one side as it popped out aa little too easy and looks ever so slightly elongated! but not enough to feel!
Maybe worth doing whilst its off as this follows a new engine install (again!)
#11

Posted 13 July 2008 - 11:09 PM
Wish I'd done all of mine while the engine was out at Guessworks' workshop!!!
#12

Posted 14 July 2008 - 12:37 AM
#13

Posted 14 July 2008 - 08:27 PM
they are definitely imperial threads as well but thanks for clearing up the cone difference of lack thereof.
#14

Posted 20 October 2008 - 02:38 PM
Once you have the shock absorber off and the little rebound rubber out of the way the whole thing is loose (un-erect!!!) and once the upper arm shaft is out the lot just drops away.
How do you get the upper arm shaft out though?! I've got the subframe out of the car, removed the bottom trumpet (the rubber cone is still in the subframe) and I've undone the bolts on the hexagonal plate, should this plate come off? I want to remove the upper arms before i take the subframe away to be shotblasted......
#15

Posted 20 October 2008 - 06:51 PM
Jack up the top arm once you have it removed from the hub.
Remove the small bump stop.... Philips screw.
Remove the 3/4 nut nearest the car body.
Remove the two 1/4 bolts the nearest one has a nut.
With a FLAT tyre lever knock the shaft towards the front of the car (Remove radiator its easier to work on that side and bend up the other side.)
Remove the top arm complete with knuckle.
Pull the rubber and the cone down and again use the flat tyre lever prise out the cone assembly.
Two ways to remove the ball joint from the trumpet
Put a round bar down through the hole in the rubber and drift out
OR place the small end on a steel block or some thing similar and slowly hammer round the bottom turning as you go.
Screw driver removes the plastic cup.
Top cone and rubber will be tight so hold the trumpet end and hit the rubber end off
To remove the bearings
Builders merchants have large wall bolts ......when you tighten up the bolt the outside expands.... get one where the outside just fits in side the bearing tighten the bolt to expand.......drift with a steel rod to remove do the same for the other side.
Fitting the bearings MAKE SURE you put the writing on the bearing to the outside.
Go to plumbers merchant and get a tin of pipe freeze.
Heat up all of the top arm with a heat gun.
Freeze the bearings with the pipe freeze and the bearings should just slip in but be quick.
if not use a wooden block to GENTLY hit them in.
Refitting
Place the rubber in first.. then the cone..... place the small thrust washer on with its rubber.....
Place the outer rubber seal on the housing well passed where it should go..
line up the hole .... slide in the shaft....place nut on the inside loosely .....
Next is the thick thrust washer...
Plate with two holes next followed by the other nut.....slide the seal once everything is in place over the thrust washer.
Jack up the top link insert the bump rubber.
Job done and dusted
1 user(s) are reading this topic
0 members, 1 guests, 0 anonymous users


