#1006

Posted 06 September 2010 - 08:16 AM
with the inner sill/heel board its definitely seam welded mate
#1007

Posted 06 September 2010 - 10:45 AM
Haha, it is getting a bit long now!coming along well, took me a while to read the whole lot though.
with the inner sill/heel board its definitely seam welded mate
Hum, I'll have a look and see what sort of access I have to that area from inside the car, I'd like it to be done as original if I can so I'd prefer to seam it but I'm not cutting out the rear bin just for that, decisions decisions.
#1008

Posted 06 September 2010 - 06:44 PM
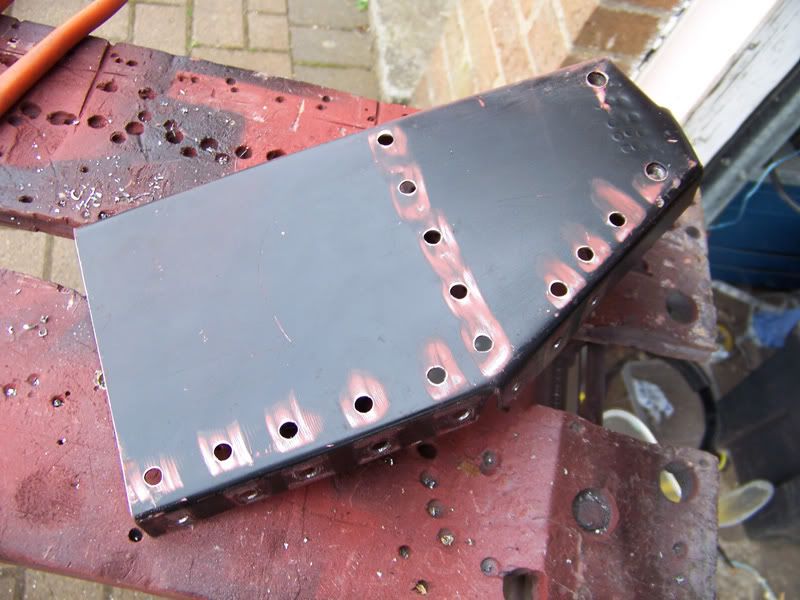
Holes for plug welding drilled.
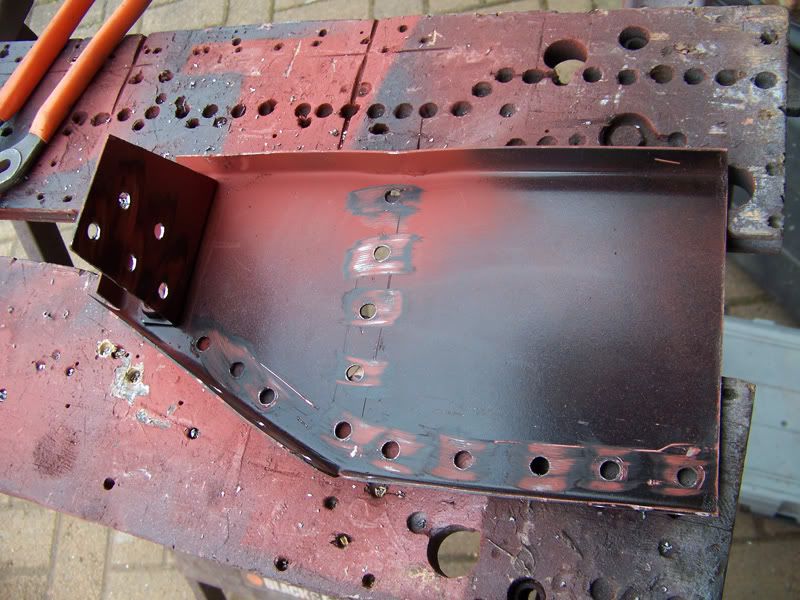
Back side.
Bare areas etched.
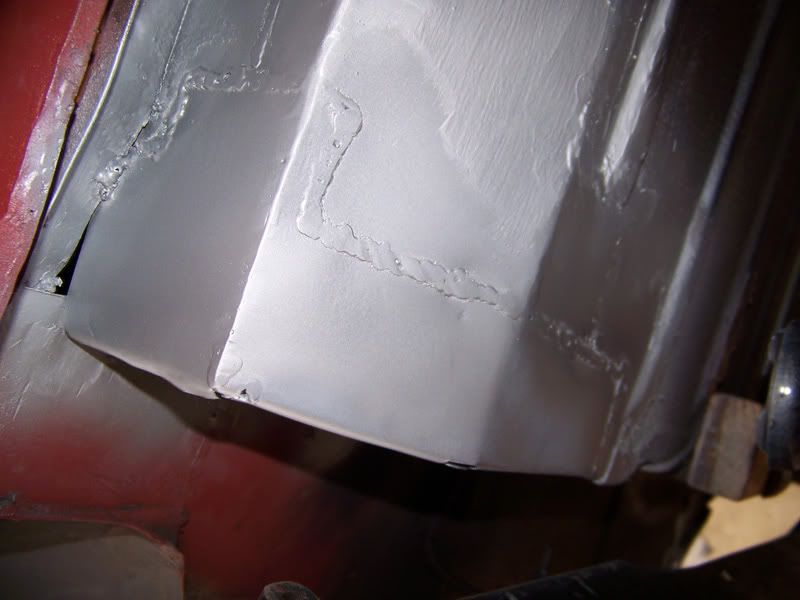
And then weld through primed.
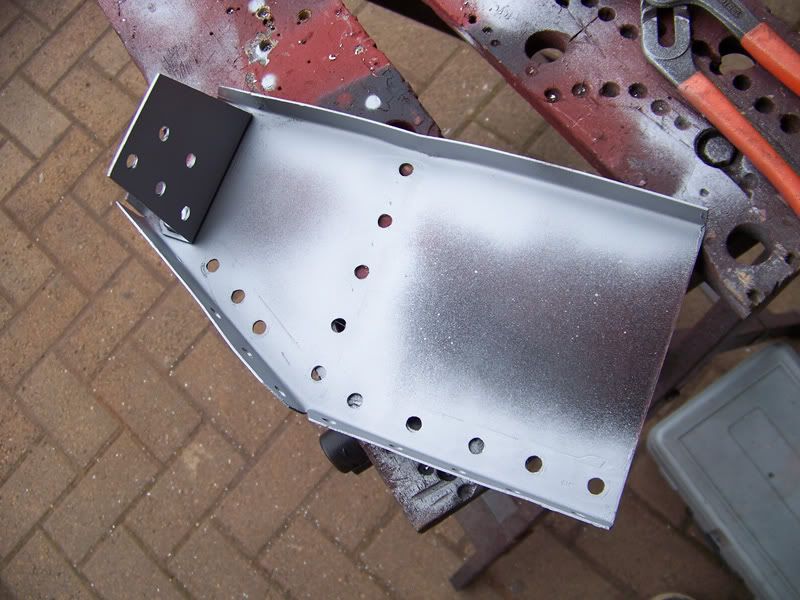
As well as the back of the heelboard.
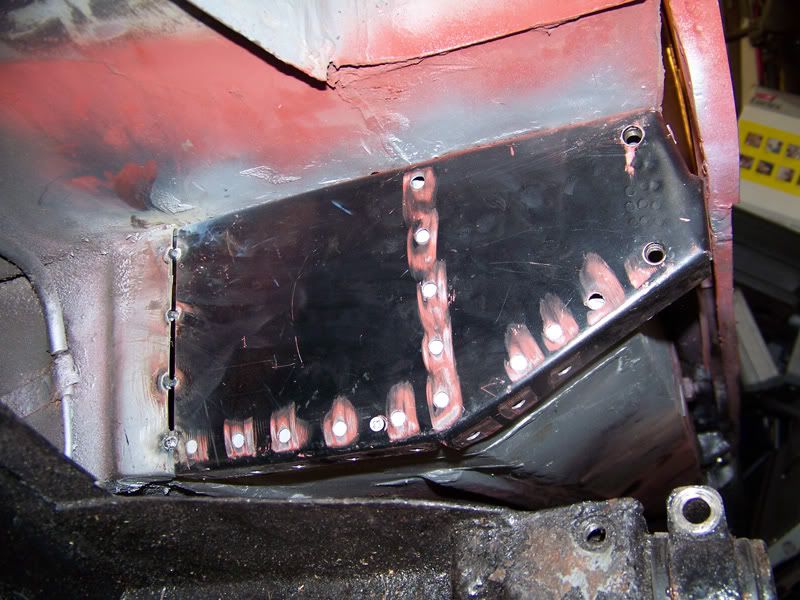
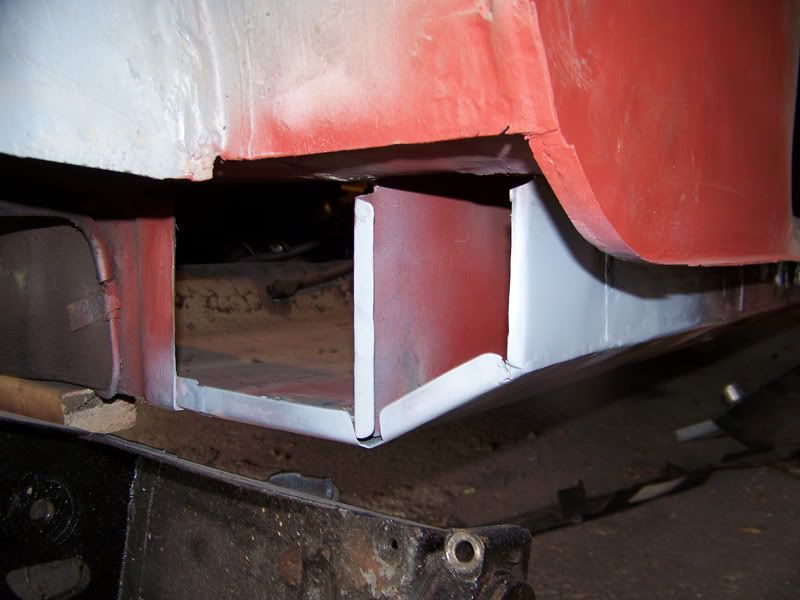
Tacked in place after checking with subframe.
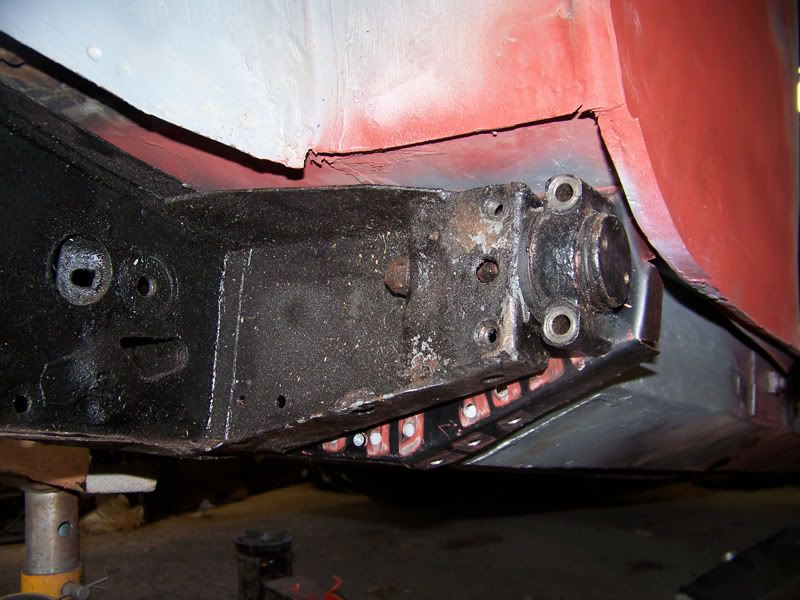
Double check, saves crying later!
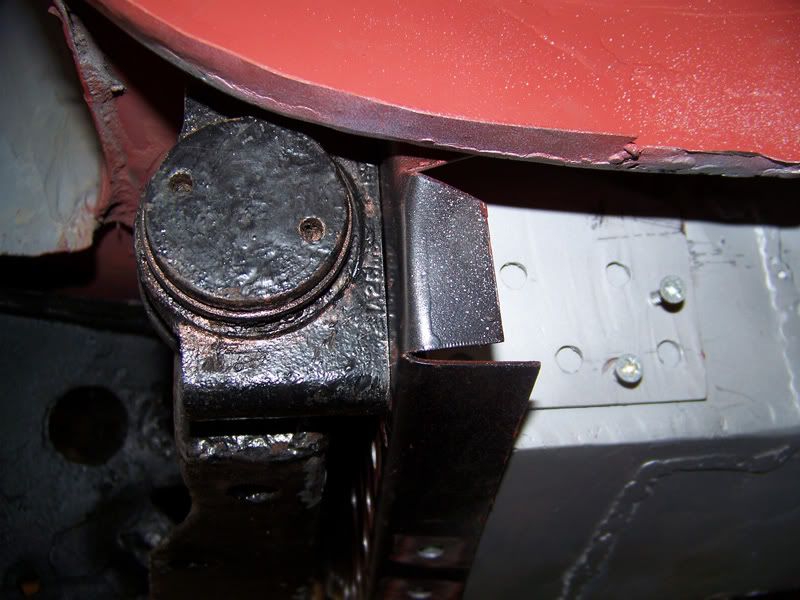
All looking good!
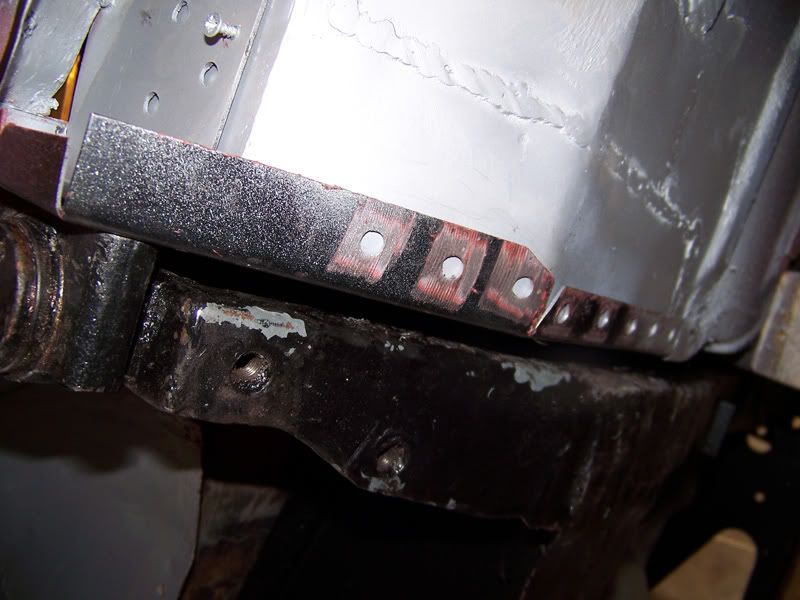
Underneath, meets the floor nice.
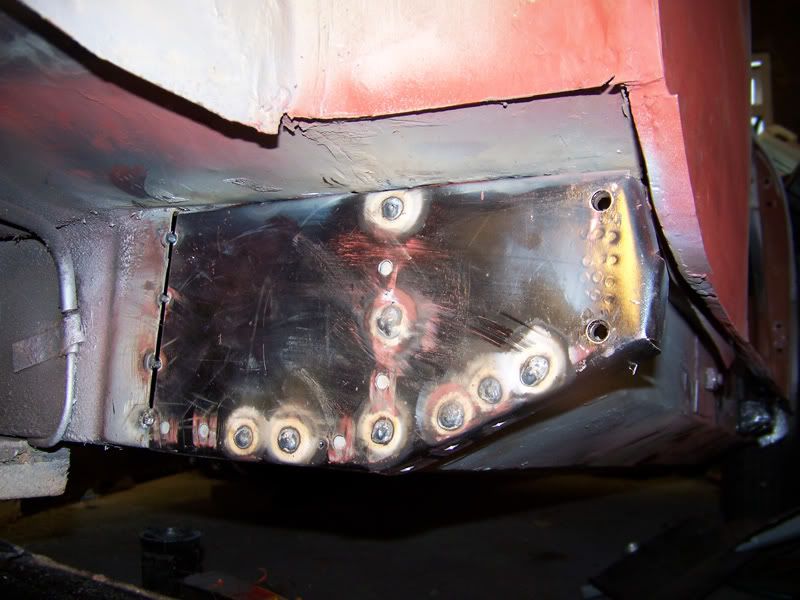
Started plug welding.
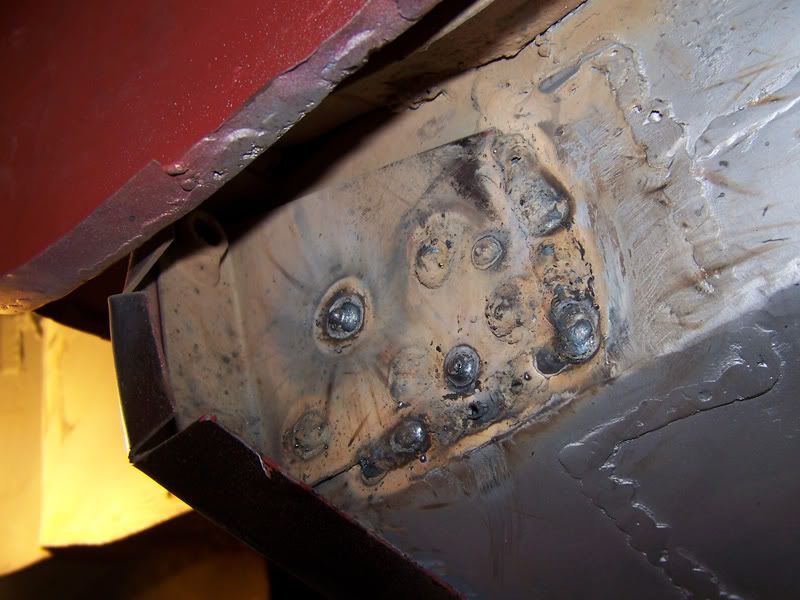
Made sure the strengthening bracket isn't going anywhere.
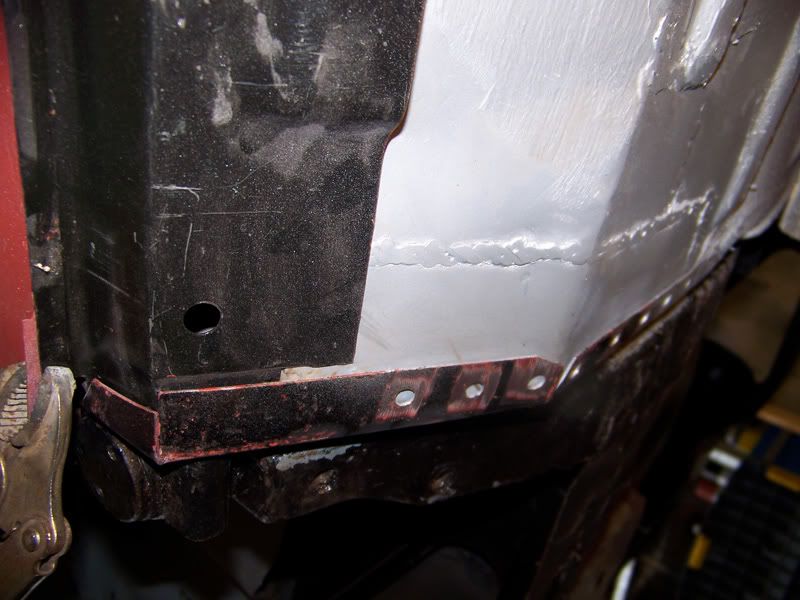
Offered the outer sill up to demonstratr why I didn't drill holes all the way up the heelboard lip.
I'll finish off the welding tomorrow, dress the welds and check the subframe one more time, then it's time to start on the other side. Getting close!
Thanks for looking
#1009

Posted 06 September 2010 - 07:53 PM
this is a great thread at the mo, and long may it continue. I have this repair to do myslf and these pics and descriptions are invaluable. Keep up the good work and lots of pics as you go. going very well you must be pleased with yourself.
Graham
#1010

Posted 06 September 2010 - 08:01 PM
I hope not! Haha. Well bodywork at least. I don't imagine this project log will end until I sell Elliot (which I don't think is going to happen), there's always something else to do or try with a Mini...and long may it continue.
I'll keep the pictures coming, I'm happy to hear that they're helping people.
#1011

Posted 06 September 2010 - 08:40 PM
Rinse and repeat on the other side!
#1012

Posted 06 September 2010 - 08:47 PM
#1013

Posted 06 September 2010 - 08:51 PM
No worries! I'd give you a hand if you were nearer, I think this is the best repair I've done on the car to date, I'm really pleased with how factory it's going to look when finished.Yeah these pictures are fantastic Adam, giving me some brilliant insight into how it'll all look when I get to this stage. Cheers!
Rinse and repeat on the other side!
As soon as I finish off the welding and tidy them up that's the plan sir!Nice one!! bet youre well chuffed! other side tomorrow!!?
I'm hoping that the passenger side won't take as long because I've got a much better idea about what I'm supposed to be doing with it. If I can be ready to start putting the sills on by this time next week, I'll be really pleased! In fact, I'll resemble a cheshire cat.
#1014

Posted 07 September 2010 - 07:39 PM
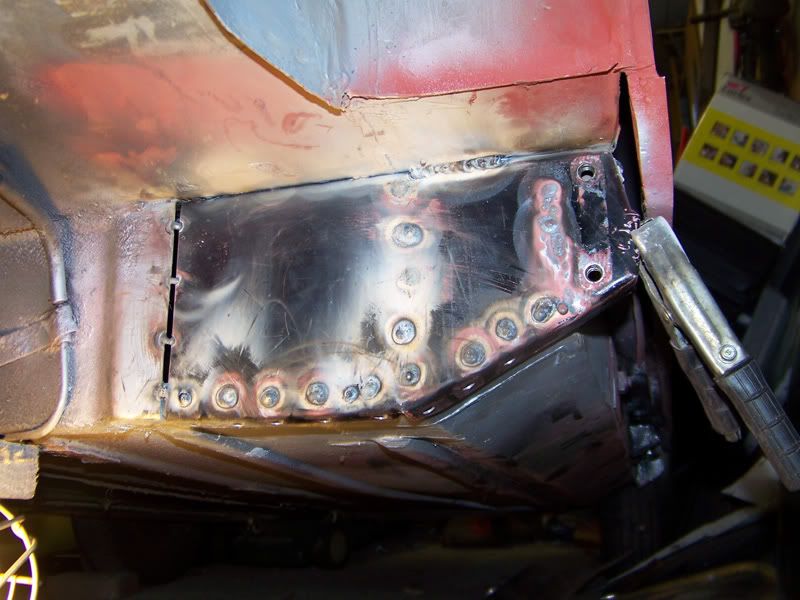
Finished plug welding, I got the seam welded up too but I don't have any pictures of that sadly.
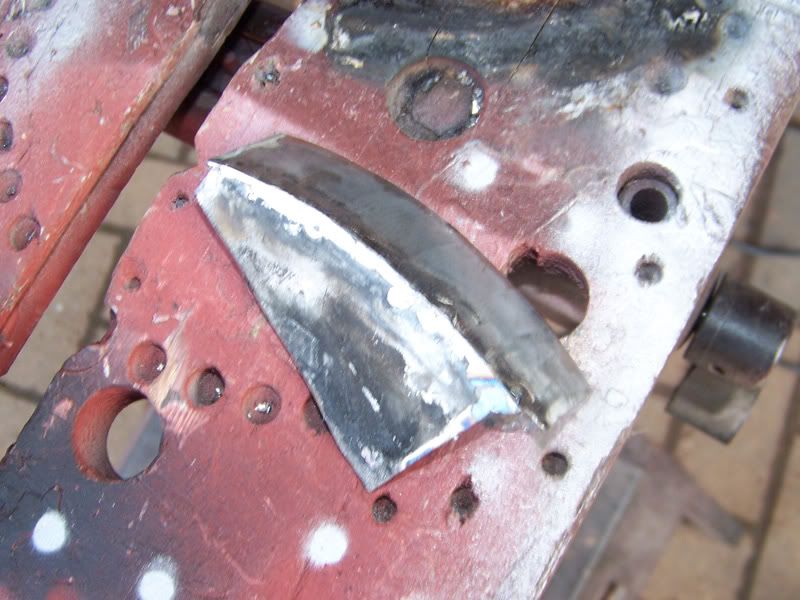
Started fabricating the quater closing panel.
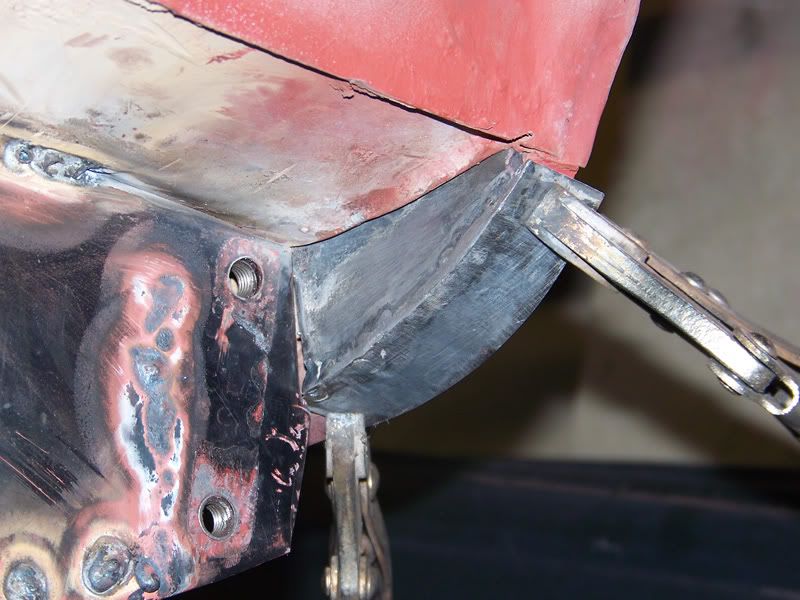
Fits ok, just needs welding in now.
More tomorrow, I'll force myself to be more productive.
Thanks for looking
#1015

Posted 07 September 2010 - 09:39 PM
More tomorrow, I'll force myself to be more productive.
You'd better! looking good chap!
#1016

Posted 07 September 2010 - 09:41 PM
#1017

Posted 07 September 2010 - 11:13 PM
Yeah Tom, sadly time consuming but neccesary little things
Right, I'm going to hit bed so I can get up and go to the garage tomorrow
#1018

Posted 08 September 2010 - 09:43 PM
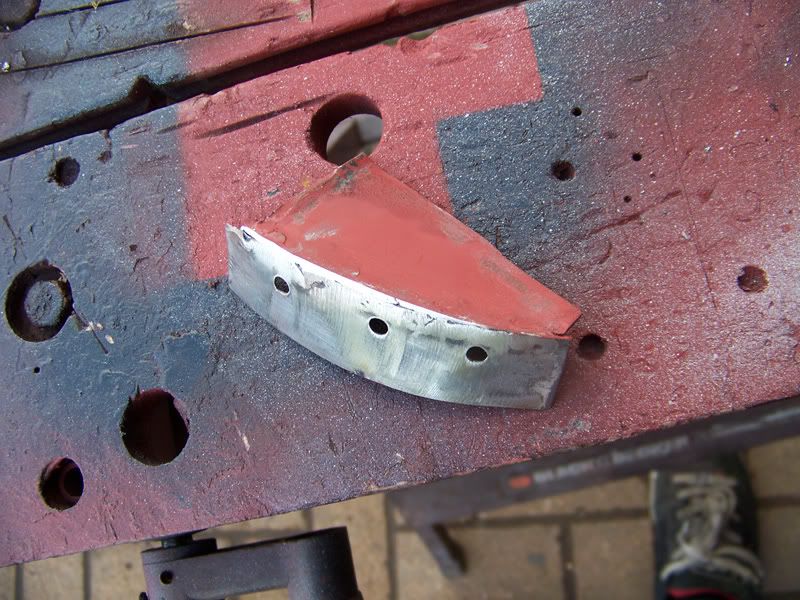
Finished up this bracket and made holes for plug welding.
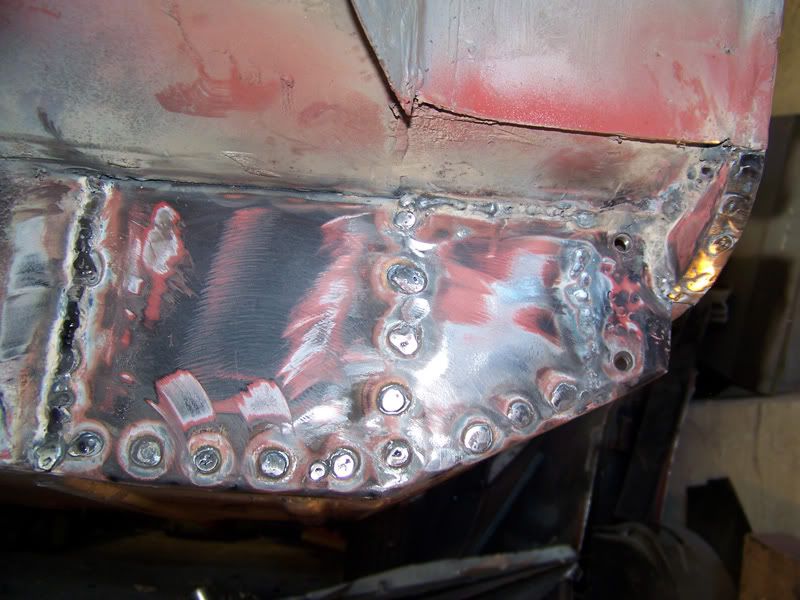
Got the closing bracket welded in.
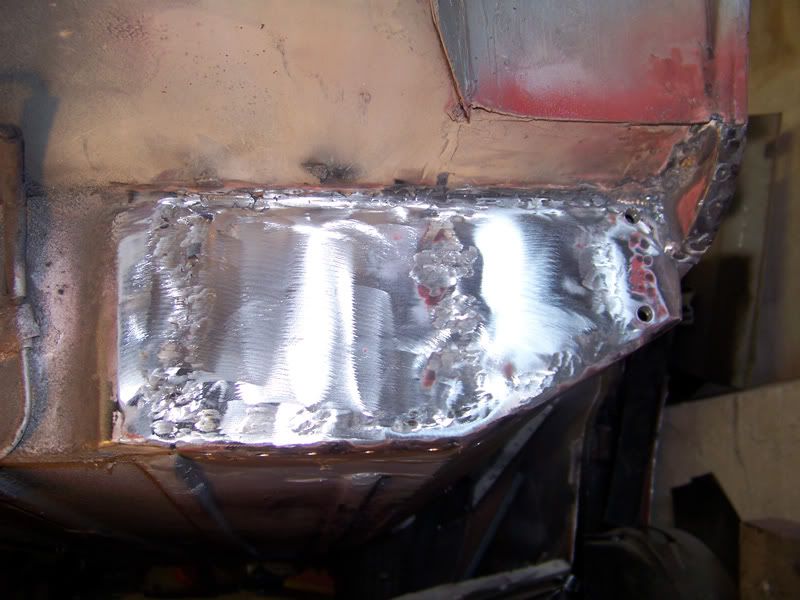
Dressed welds. I decided to seam weld along the top length of the repair section as I didn't think my plug welds on the seat base were too smart, just did this for extra strength.
The inside of the companion bin isn't amazingly pretty, i've dressed it as best I can, seam sealer will have to tidy the rest. No one will see it anyhow, as long as it's not going to start rotting I'm happy.
Not sure if I'll be going to the garage tomorrow as a good friend from Uni might be visiting. Next job is to check the subframe one last time and then I'll start cutting out the passenger side heelboard.
Thanks for looking
#1019

Posted 08 September 2010 - 09:47 PM
Hope i'm not confusing you with all the technical language there
#1020

Posted 08 September 2010 - 10:21 PM
I made mine from 2 pieces of steel cut from an old a-panel, welded together then dressed.
I don't know why but I can't look at that heelboard repair and feel happy with it, but I can't put my finger on why
Also tagged with one or more of these keywords: roundnose
Projects →
Mini Saloons →
Mini Cooper Project - Finally StartsStarted by piphatch , 08 Jan 2025 |
|
|
||
Projects →
Mini Saloons →
1965 Austin Mini Restoration - Canadian Mk1Started by DoubleEh , 14 Nov 2022 |
|
|
||
Projects →
Mini Saloons →
Project Joe - 1991 Mini Mayfair 998Started by Eggers , 02 Jun 2022 |
|

|
||
Projects →
Mini Saloons →
Mpi Dashboad ProblemStarted by mikeprez , 22 Dec 2021 |
|

|
||
Projects →
Mini Saloons →
1978 Oew - Willy The MiniStarted by smalltreegrower , 11 Nov 2021 |
|

|
1 user(s) are reading this topic
0 members, 1 guests, 0 anonymous users


