Looking great! Love orange and black! my uncle had a orange and black cooper s. He showed me pictures the other week and it looks the nuts! This will turn out to be equally gorjus!

#781

Posted 28 March 2010 - 04:27 PM
Looking great! Love orange and black! my uncle had a orange and black cooper s. He showed me pictures the other week and it looks the nuts! This will turn out to be equally gorjus!
#782

Posted 28 March 2010 - 06:27 PM
Thanks for the kind words guys, more progress tomorrow me thinks, but tonight I think some revision is in order!
#783

Posted 02 April 2010 - 07:14 PM
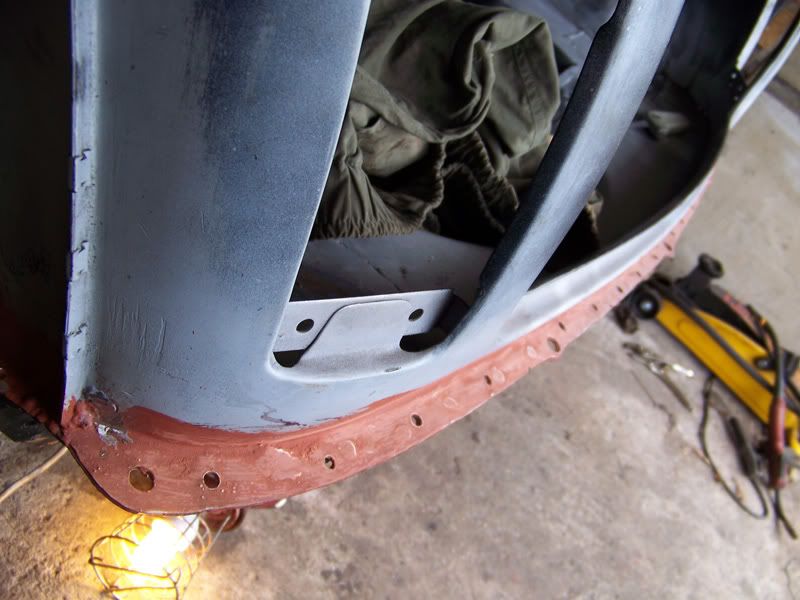
Holes drilled for plug welding.
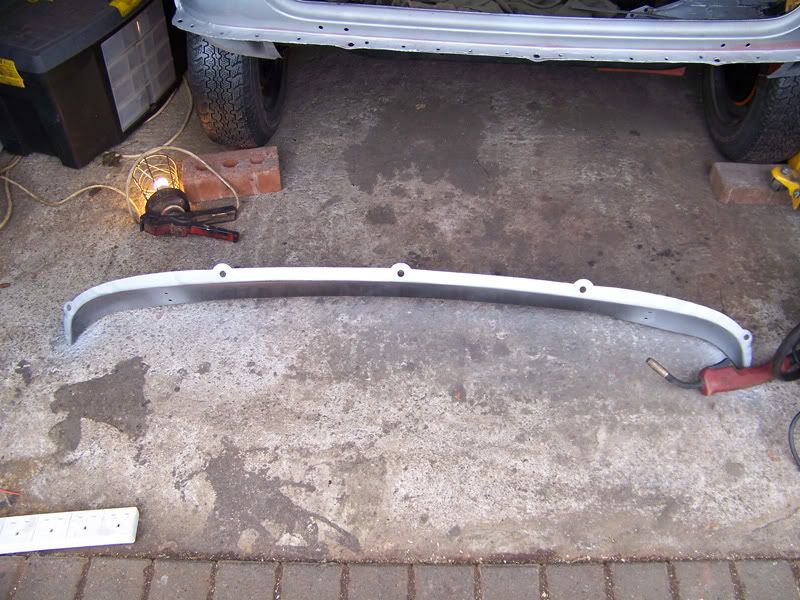
Weld through primer for the valance.
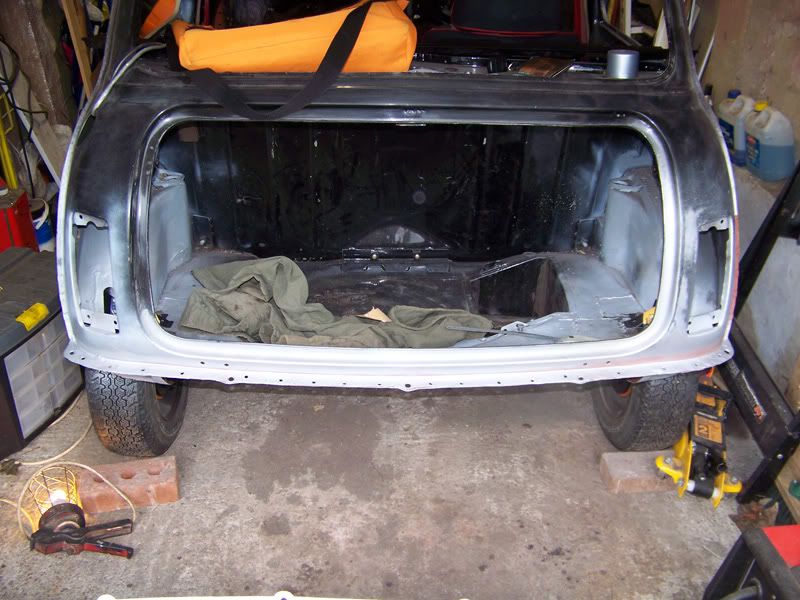
Weld through primer all round!
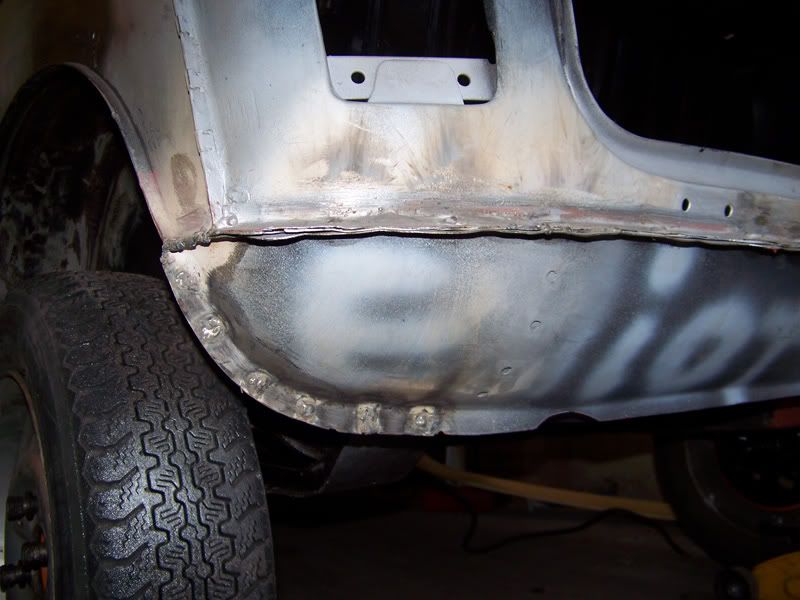
All welded up.
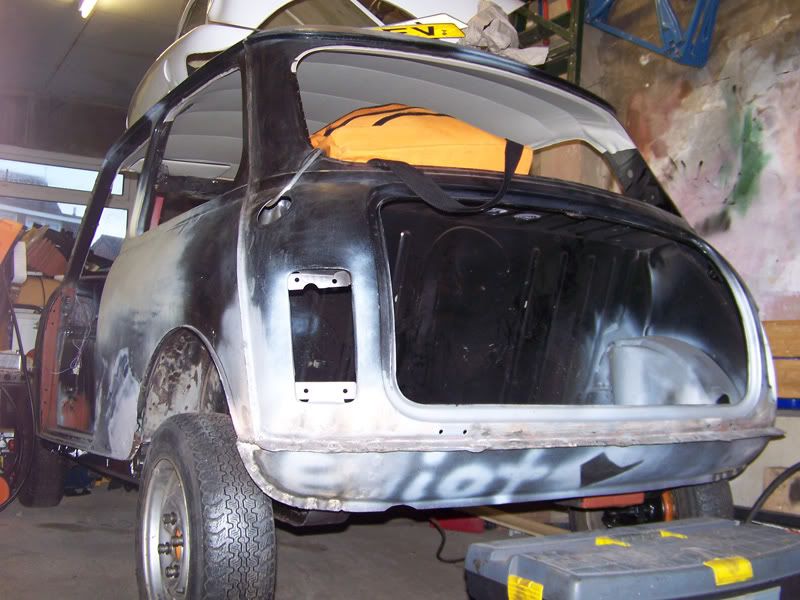
Overall shot.
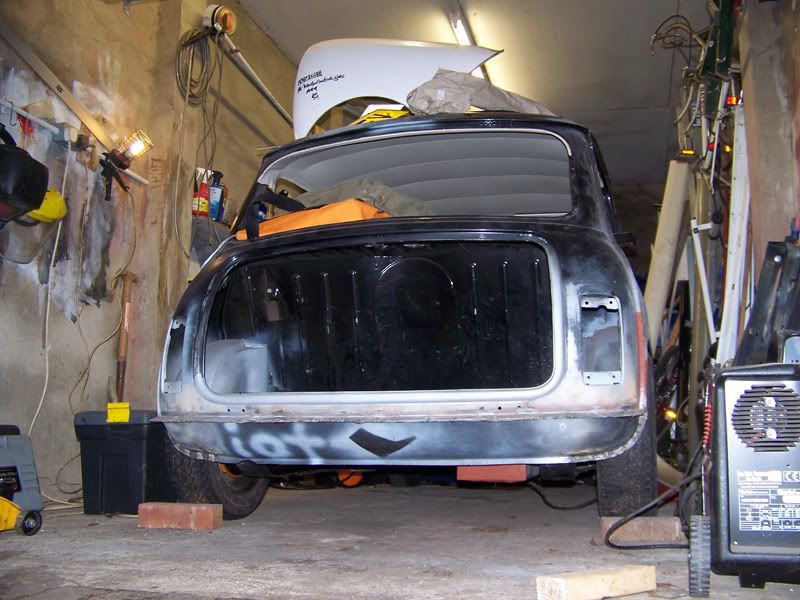
Hi-lo's wound down, just to see what it looked like.
Thanks for looking
#784

Posted 03 April 2010 - 08:24 PM
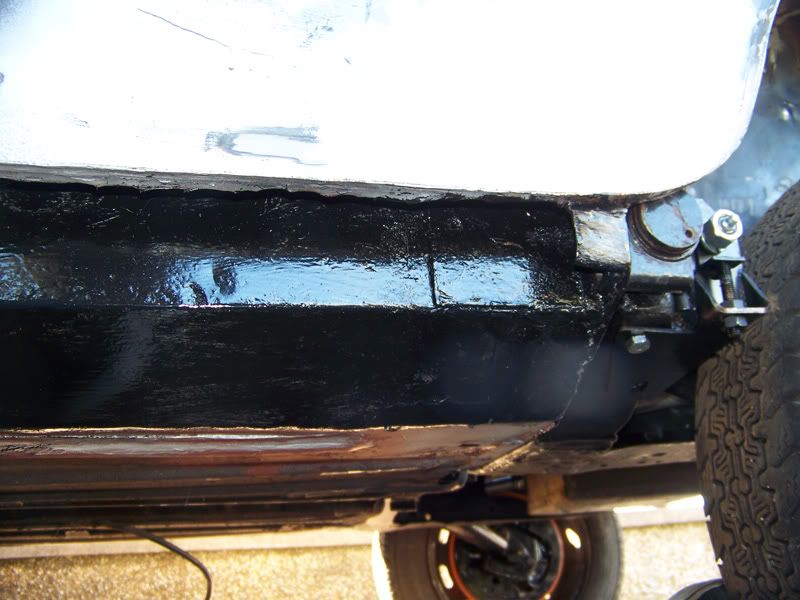
The flange where the sill will plug weld to was all messy so I set about cleaning that up.
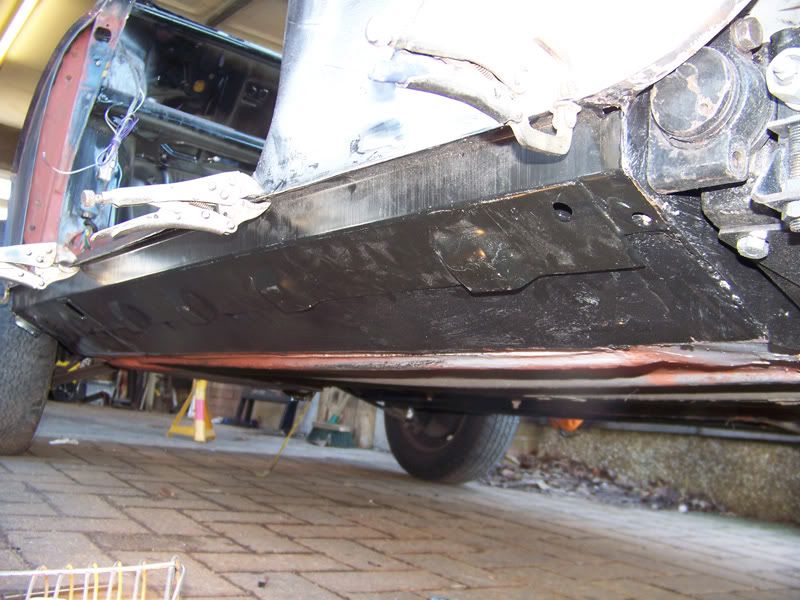
Test fitted the sill, all fits in place nicely.
Then after a I removed a piece of metal that was in the way of me putting the sill in place properly, I came across this:
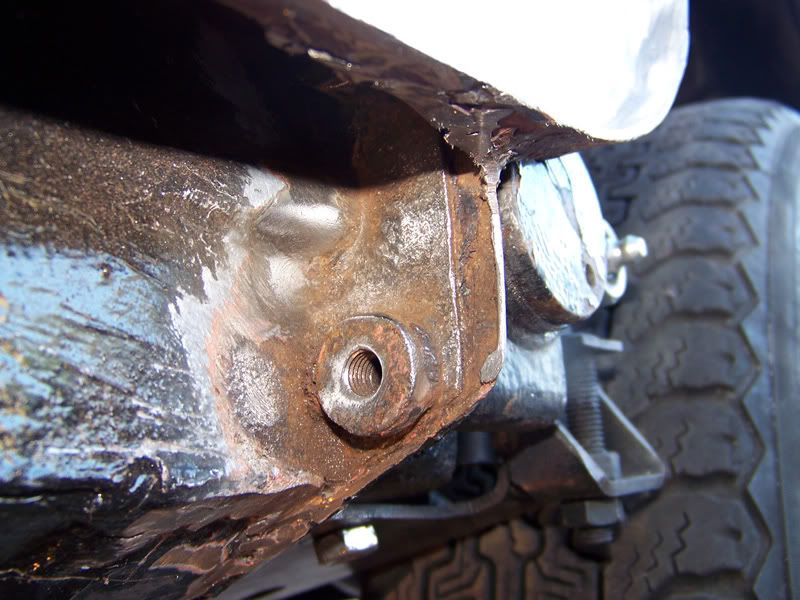
As you can see, rust has had its way here and I feel its probably crept between the subframe mounting sill to heel board bracket and the heel board itself, it'd be a complete false economy to weld the sills on leaving this like it is.
I've decided I think the best bet is to cut out a section of the heel board on both sides (in this area), leaving the bracket in place. Clean up the back of the bracket, treat with kurust all over, clean up again and replace the sheet metal on the back, plug welding to the bracket. After its painted, inject it all with waxoyl.
That should keep it all solid and happy for many many years. It's a minor set back and one I can't be bothered dealing with at the moment so I'm going to start work on the front end and the doors. I'll come back and do this before I fit the sills, which will now be the final job.
#785

Posted 03 April 2010 - 08:43 PM
#786

Posted 03 April 2010 - 08:58 PM
#787

Posted 03 April 2010 - 09:01 PM
I wouldn't be able to change the bracket easily now I've repaired the bottom of the rear quater would I? Wish I'd noticed this earlier.The way you propose doing it sounds about right, it would likely last a good few years as it is, as the metal in that area is quite thick. You can buy new subframe mounting brackets, if you wanted to go that far.
I'll leave it for now, I'll leave it as the last job and see how I feel about it then. But I'm leaning towards replacing the rear skin with fresh so I can clean up the back of the bracket and then i know it's all solid metal.
We shall see.
I have to thank you and Shifty (he got my by PM) for your inputs!
#788

Posted 03 April 2010 - 09:04 PM
#789

Posted 03 April 2010 - 09:06 PM
EDIT: Just remembered I have welding to do on a friends Mini, haha.
#790

Posted 04 April 2010 - 09:47 PM
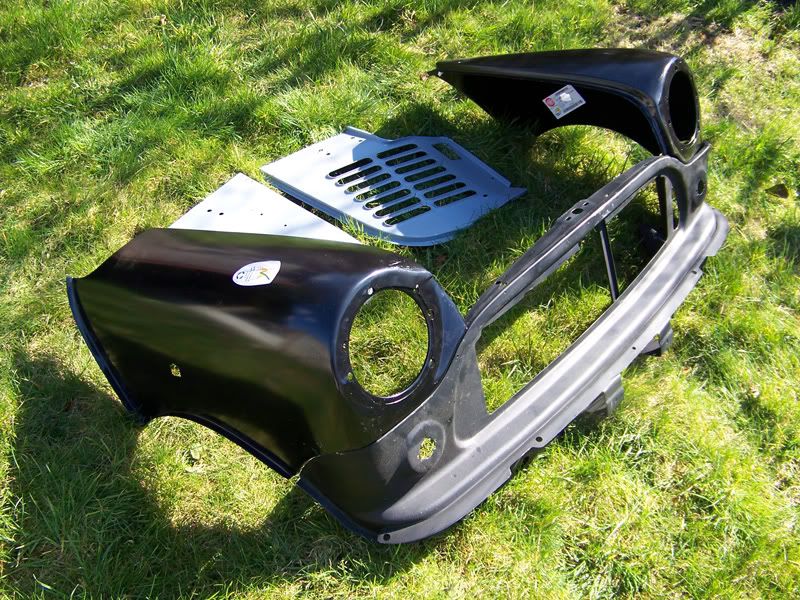
Wings, front panel, inner wings.
I'm going to order the bits I need to put the front panel on the front subframe so that I can sort out replacing the inner wings
Thanks for looking.
#791

Posted 04 April 2010 - 10:02 PM
shame about the heelboard but it doesnt look too bad...
Ed
#792

Posted 07 April 2010 - 05:35 PM
Nah I don't think it is really.looking good!!
shame about the heelboard but it doesnt look too bad...
Ed
I'm not sure what I'm going to do about it yet, seems daft to leave questionable metal in there at this point. Hmmm.
#793

Posted 07 April 2010 - 05:49 PM
I want to apologise as well, some of the pictures have a massive flare on them because I've managed to scratch the lens on my camera
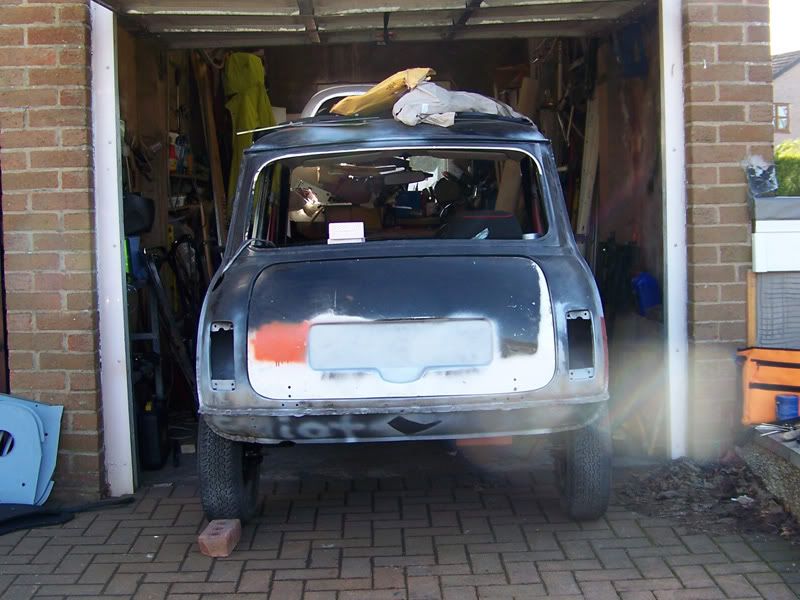
Rolled out the garage.
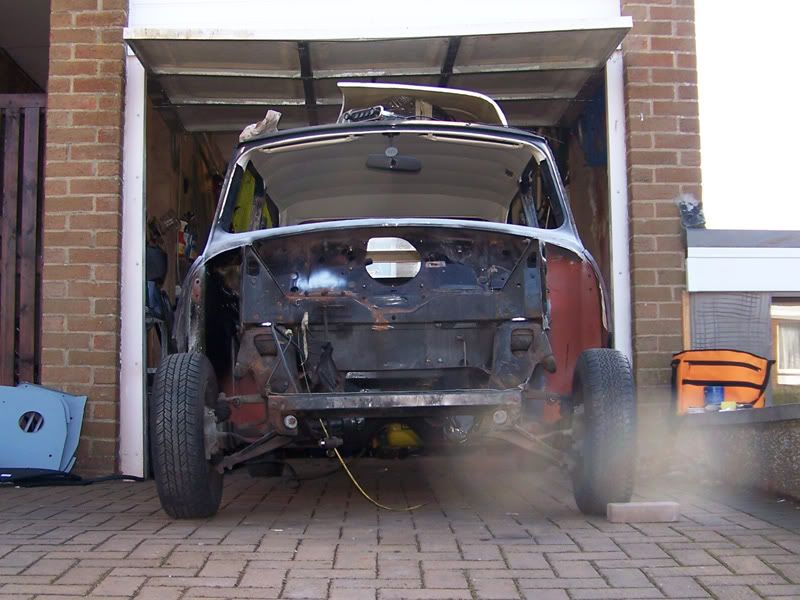
I wanted easy access to the front so I rolled it down the drive and turned it round. I tell you what, I was worried I wasn't going to get it back up the drive! They're alot heavier once you get on a bit of an incline.
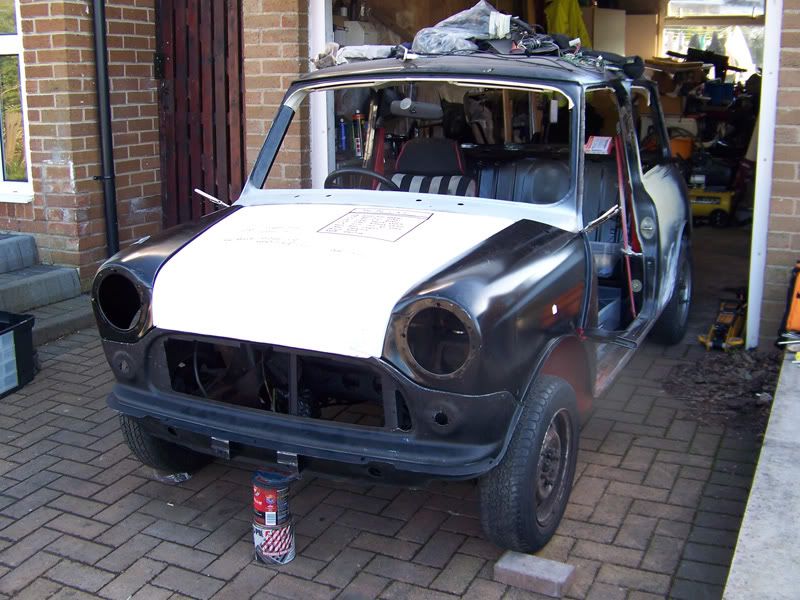
Front end roughly clamped in place.
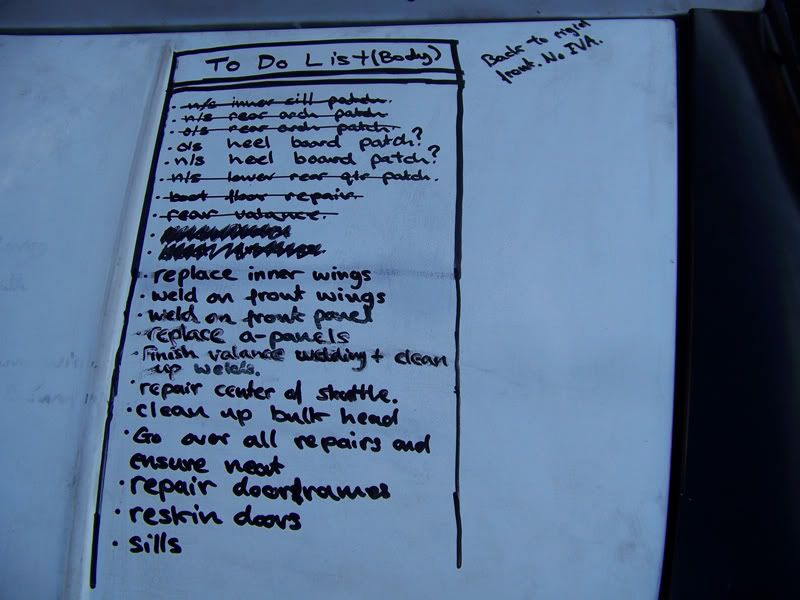
I crossed some things off my to do list and then added three times as many
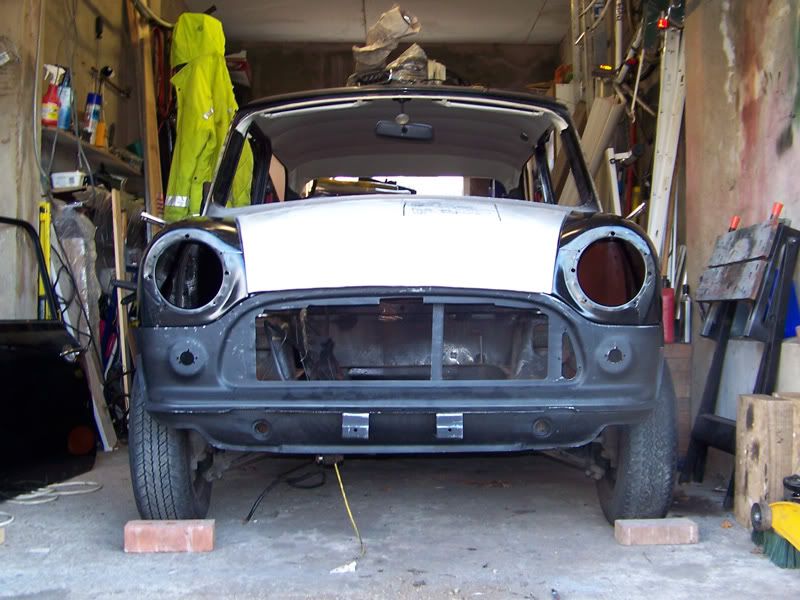
Tucked away back in the garage!
I'm waiting on some bits and bobs from Mini Spares before I can start work on putting the front back together properly.
Thanks for looking
#794

Posted 07 April 2010 - 08:49 PM
ive just read the whole of your thread from start to finish and its simply astonishing. ure skills have come on leaps and bounds, i can only hope that my skills will be half as good as yours are
i will be following your project closely as its really inspiring me to get on with mine albeit a tiny project in comparison
good luck with it all jeff
#795

Posted 07 April 2010 - 09:15 PM
Thanks for your comments Jeff, it's always nice to know that people enjoy reading my project logThe first thing im going to say is wow!!!
ive just read the whole of your thread from start to finish and its simply astonishing. ure skills have come on leaps and bounds, i can only hope that my skills will be half as good as yours are
i will be following your project closely as its really inspiring me to get on with mine albeit a tiny project in comparison
good luck with it all jeff
Ahh, but you see that's how all Mini projects start out! I was originally just patching up the boot floor and here we are now!
Also tagged with one or more of these keywords: roundnose
Projects →
Mini Saloons →
Mini Cooper Project - Finally StartsStarted by piphatch , 08 Jan 2025 |
|
|
||
Projects →
Mini Saloons →
1965 Austin Mini Restoration - Canadian Mk1Started by DoubleEh , 14 Nov 2022 |
|
|
||
Projects →
Mini Saloons →
Project Joe - 1991 Mini Mayfair 998Started by Eggers , 02 Jun 2022 |
|

|
||
Projects →
Mini Saloons →
Mpi Dashboad ProblemStarted by mikeprez , 22 Dec 2021 |
|

|
||
Projects →
Mini Saloons →
1978 Oew - Willy The MiniStarted by smalltreegrower , 11 Nov 2021 |
|

|
1 user(s) are reading this topic
0 members, 1 guests, 0 anonymous users


