

Looks good keep the progress coming!

1658 replies to this topic
#407

Deathrow
-
- TMF IT Specialist
-

- 5,744 posts
Have you tried turning it off and on again?
- Name: Adam
- Location: Manchester, UK
Posted 23 July 2009 - 07:21 PM
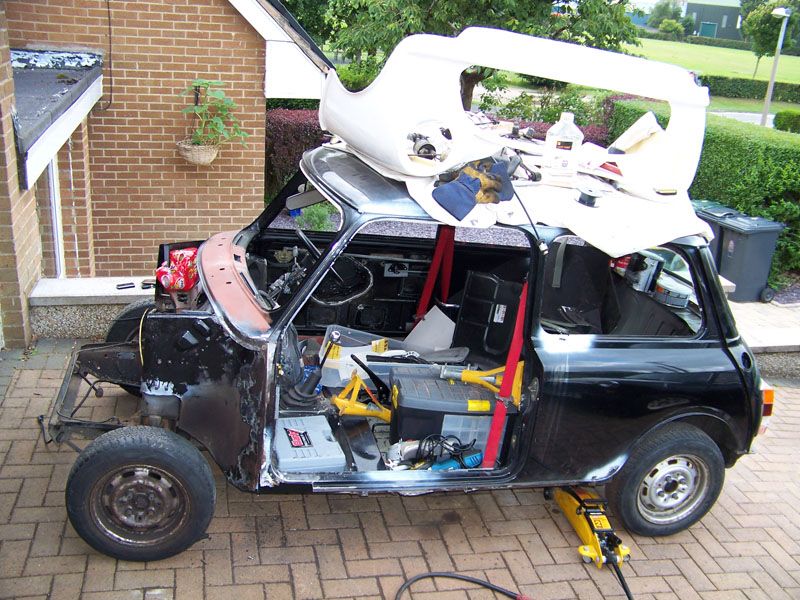
Righto, here is an update for the past few days  :
:
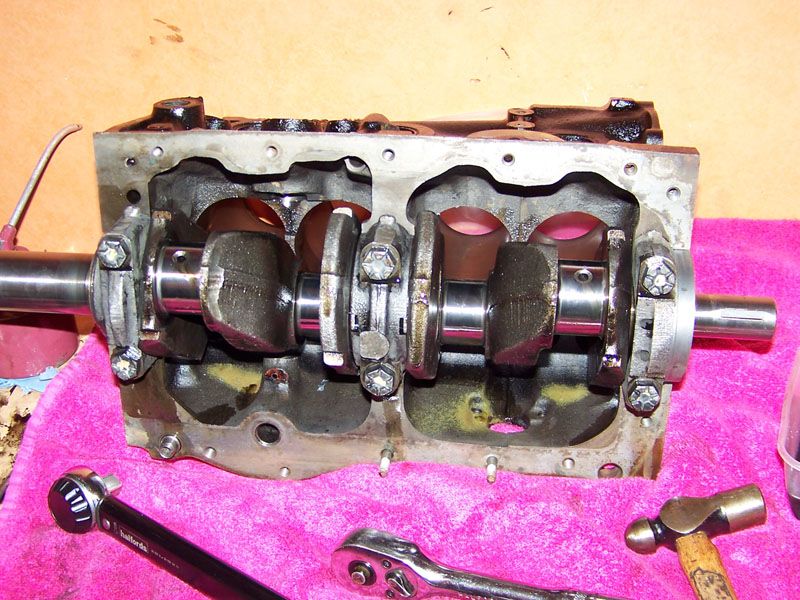
Crank back in the block.
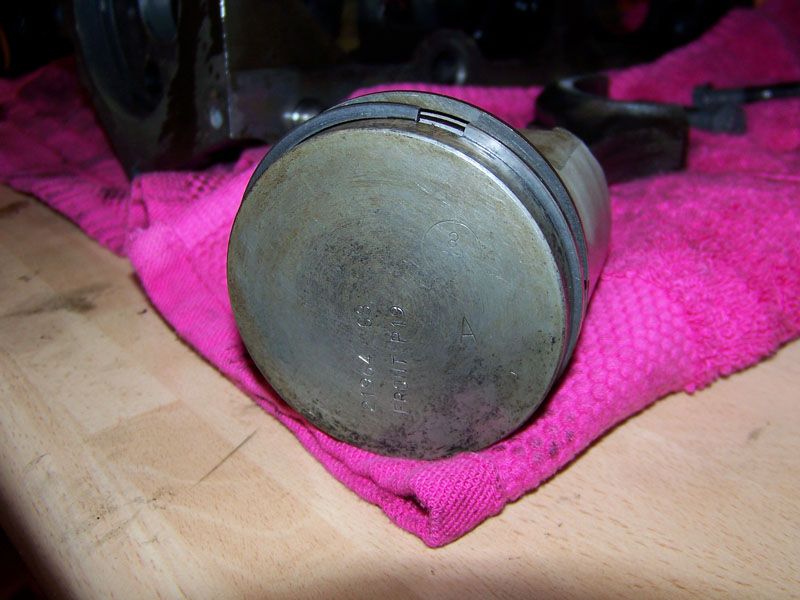
Pistons thoroughly cleaned.
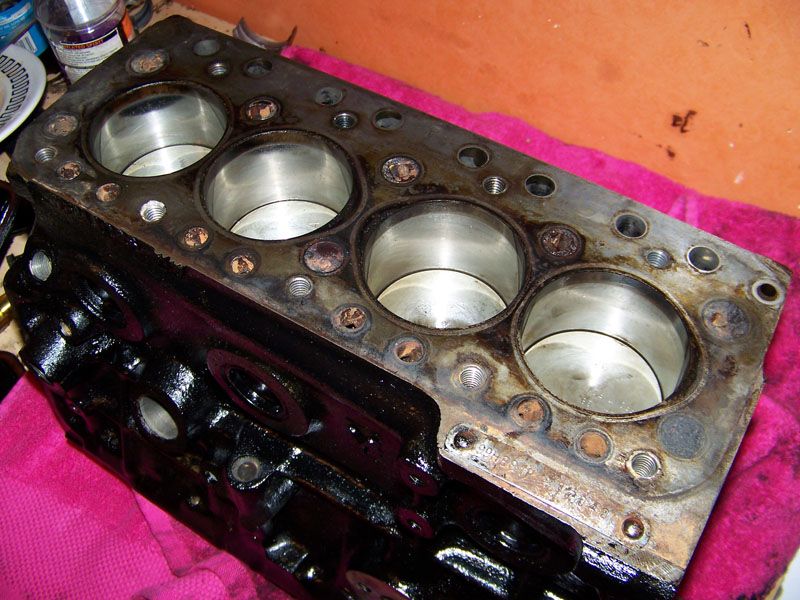
Pistons in.
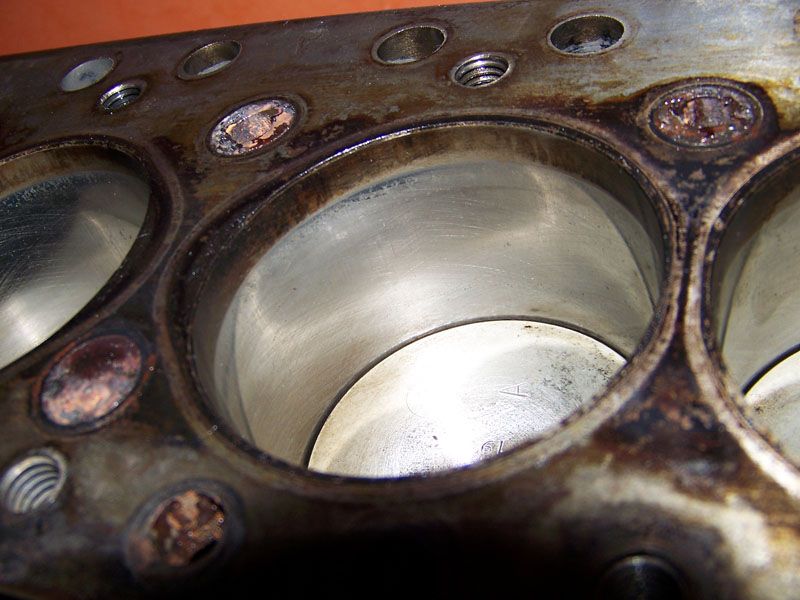
Bores all look good.
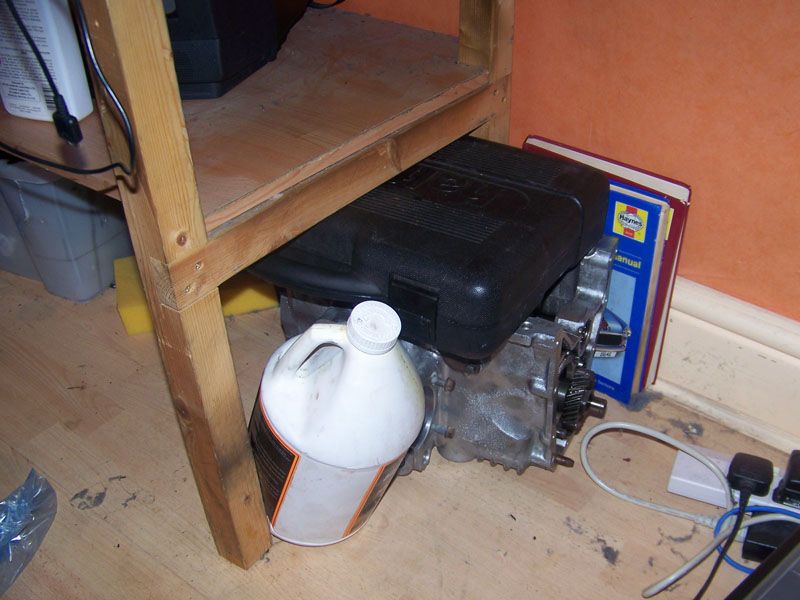
This is what I had to do to hold the gearbox while I tightened the two end bolts to 150ft/lbs.
My gaskets have also arrived, so I can get on with putting the rest of the engine back together. I'm going to either buy or make a valve compressor so I can whip the valves out of the head and clean the head properly before painting it and putting it back together.
Here's todays stuff:
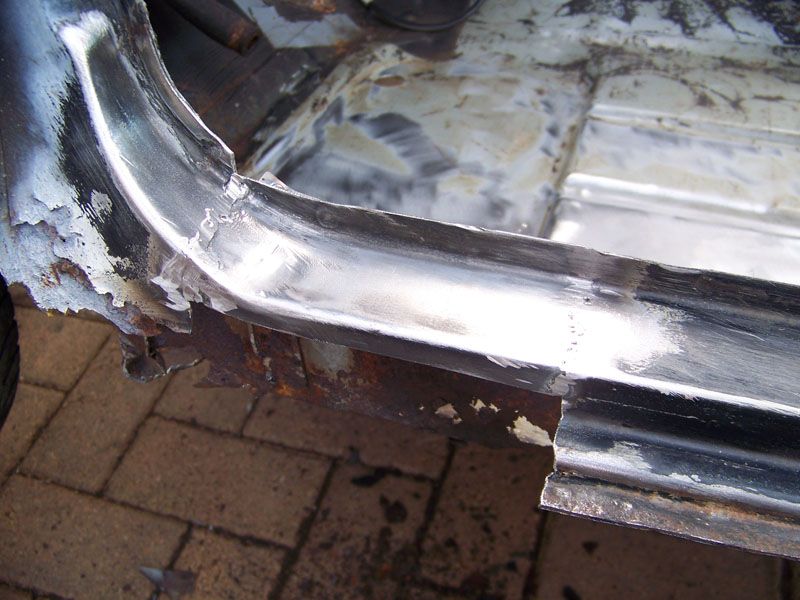
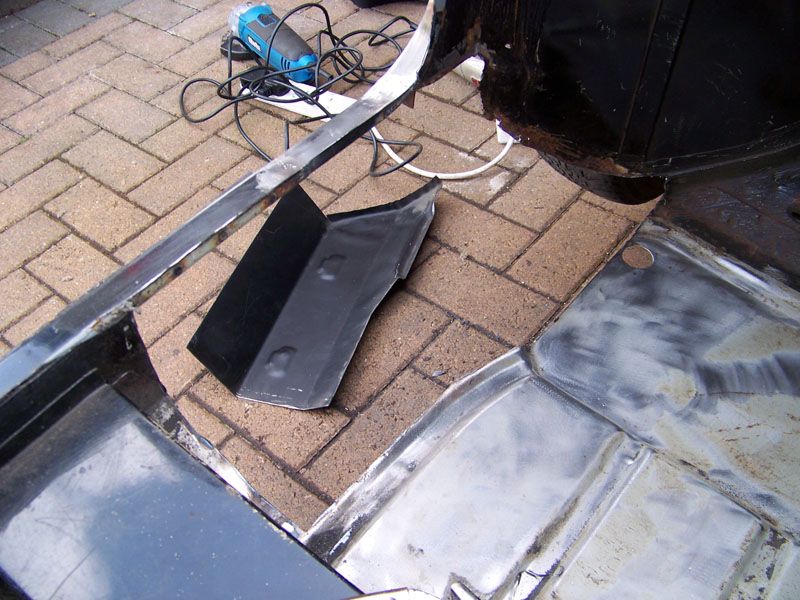
I started to repair the mess that was the passenger door step. Still much to do.
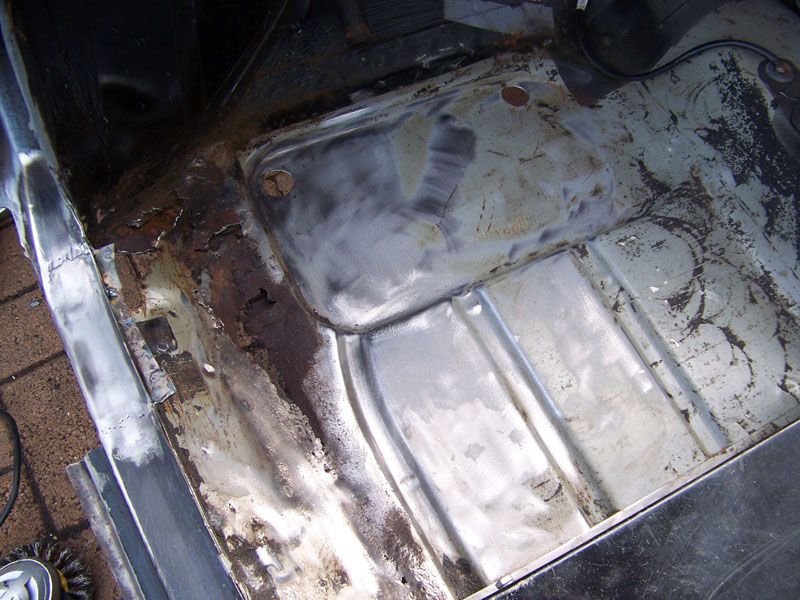
Floor cleaned with the wire knot wheel on the grinder.
Repair panel cut down to size.
If the weather is good tomorrow I shall get to work putting the floor repair in and then I'll make a start working on the flitch panel.
Thanks for looking, comments welcome as always.
:Crank back in the block.
Pistons thoroughly cleaned.
Pistons in.
Bores all look good
.This is what I had to do to hold the gearbox while I tightened the two end bolts to 150ft/lbs.
My gaskets have also arrived, so I can get on with putting the rest of the engine back together. I'm going to either buy or make a valve compressor so I can whip the valves out of the head and clean the head properly before painting it and putting it back together.
Here's todays stuff:
I started to repair the mess that was the passenger door step. Still much to do.
Floor cleaned with the wire knot wheel on the grinder.
Repair panel cut down to size.
If the weather is good tomorrow I shall get to work putting the floor repair in and then I'll make a start working on the flitch panel.
Thanks for looking, comments welcome as always
.
#408
GraemeC
-

- TMF+ Member
-
- 7,467 posts
Crazy About Mini's
- Location: Carnforth
Posted 23 July 2009 - 08:08 PM
Can lend you a valve compressor if you like 
#409
Saxo-Fiesta-Mini
-

- Members
-
- 2,889 posts
Up Into Fourth
- Local Club: LCMOC
Posted 23 July 2009 - 09:28 PM
yeh ive got one ya can borrow to if ya want
#410
Deathrow
-
- TMF IT Specialist
-
- 5,744 posts
Have you tried turning it off and on again?
- Name: Adam
- Location: Manchester, UK
Posted 24 July 2009 - 11:15 AM
Cheers Graeme, you're a starCan lend you a valve compressor if you like
.I'll give you a PM when I get to refurbing my cylinder head. Are you still wanting this roof?
Weather looks to have brightened up today so I shall be going to the garage to work on the floor and flitch
.Updates later, although my camera is very low on charge so I don't know how many pictures I'll be able to take.
#411
GraemeC
-
- TMF+ Member
-
- 7,467 posts
Crazy About Mini's
- Location: Carnforth
Posted 24 July 2009 - 04:00 PM
Yep I want the roof! Let me know when you need the compressor and I'll deliver it and take the roof away
#412
1987_ParkLane
-

- Members
-
- 2,671 posts
Up Into Fourth
- Location: N/A
- Local Club: The Mini Forum
Posted 24 July 2009 - 05:16 PM
Nice work my friend, is that a 998 block? Also how did the gearbox rebuild go? I am going to use the 1380 engine builder one to do mine, did you buy a rebuild kit?
#413
Deathrow
-
- TMF IT Specialist
-
- 5,744 posts
Have you tried turning it off and on again?
- Name: Adam
- Location: Manchester, UK
Posted 24 July 2009 - 05:45 PM
Even better!Yep I want the roof! Let me know when you need the compressor and I'll deliver it and take the roof away
Haha, just had a peak outside, next doors cat is sat under the roof because it's raining.
It is a 998 block, it's Elliot's original engine.Nice work my friend, is that a 998 block? Also how did the gearbox rebuild go? I am going to use the 1380 engine builder one to do mine, did you buy a rebuild kit?
The gearbox rebuild has gone well, aside from needing tools here and there that I didn't own the rebuild itself is pretty straight forward. I follwed the engine builder DVD to do it and it worked out very well. Nah I didn't get a rebuild kit, all I actually bought for it was baulk rings and new gaskets. I've just to clean the diff and put that back on the casing now.
I've got todays update but I've a few more urgent things to do (like a shower) before I write it up, so check back in about an hour to an hour and a half
.Thanks for the comments guys.
#414
1987_ParkLane
-
- Members
-
- 2,671 posts
Up Into Fourth
- Location: N/A
- Local Club: The Mini Forum
Posted 24 July 2009 - 05:54 PM
The gearbox rebuild has gone well, aside from needing tools here and there that I didn't own the rebuild itself is pretty straight forward. I follwed the engine builder DVD to do it and it worked out very well. Nah I didn't get a rebuild kit, all I actually bought for it was baulk rings and new gaskets. I've just to clean the diff and put that back on the casing now.
Sounds good, did you fit a centre oil pick up? What kind of extra tools did you need?
#415
Deathrow
-
- TMF IT Specialist
-
- 5,744 posts
Have you tried turning it off and on again?
- Name: Adam
- Location: Manchester, UK
Posted 24 July 2009 - 06:05 PM
Yeah I have fitted a center oil pickup, very straight forward. He highlights the only issue with the pickup pipe in the DVD and thats the fact it's a bit fiddly to get in.
Tools I needed but didn't have:
Internal circlip pliers.
External circlip pliers.
Mini ball joint socket (it's a 1 1/2" socket, but the ball joint socket is the perfect depth for it too).
1 1/8" socket (for the nut on the first motion shaft.
The only other thing I remember needing is a thing I had to make to drift the main bearing out, in the DVD he uses three C washers (from the crank nose, holding the primary gear) but I didn't have 3 of those, so I cut a section of box section and cut a slit in it and bent it to my needs. I can take a picture for you some time if you like.
Also, various size punches and drifts are good. He says you need a slide hammer to get the first motion shaft bearing out, but if you're carful you can get it out with a hammer and a drift.
If you have any more questions, feel free to ask. I tried to document it as well as I could so it would help others doing the same work. There's no reason you need to have a professional replace your baulk rings, it's easy enough to do yourself if you give yourself time.
Oh one thing though, which I can't stress enough. Once the shaft is loose, be very cautious with the syncho hubs! I blew my 3rd/4th gear synchro apart twice, I was lucky enough to find all the bits, twice, fortunatly.
#416
1987_ParkLane
-
- Members
-
- 2,671 posts
Up Into Fourth
- Location: N/A
- Local Club: The Mini Forum
Posted 24 July 2009 - 06:13 PM
Yeah I have fitted a center oil pickup, very straight forward. He highlights the only issue with the pickup pipe in the DVD and thats the fact it's a bit fiddly to get in.
Tools I needed but didn't have:
Internal circlip pliers.
External circlip pliers.
Mini ball joint socket (it's a 1 1/2" socket, but the ball joint socket is the perfect depth for it too).
1 1/8" socket (for the nut on the first motion shaft.
The only other thing I remember needing is a thing I had to make to drift the main bearing out, in the DVD he uses three C washers (from the crank nose, holding the primary gear) but I didn't have 3 of those, so I cut a section of box section and cut a slit in it and bent it to my needs. I can take a picture for you some time if you like.
Also, various size punches and drifts are good. He says you need a slide hammer to get the first motion shaft bearing out, but if you're carful you can get it out with a hammer and a drift.
If you have any more questions, feel free to ask. I tried to document it as well as I could so it would help others doing the same work. There's no reason you need to have a professional replace your baulk rings, it's easy enough to do yourself if you give yourself time.
Oh one thing though, which I can't stress enough. Once the shaft is loose, be very cautious with the syncho hubs! I blew my 3rd/4th gear synchro apart twice, I was lucky enough to find all the bits, twice, fortunatly.
Thanks so much for all that, I hoping to start stripping one of my gearboxes down over the weekend
 . Thanks for all the info .
#417
Scootay
-

- Noobies
-
- 14 posts
Learner Driver
Posted 24 July 2009 - 06:23 PM
Oh I know, the curb to get up to it is too harsh though. We were going to try with some car ramps but I feared the Police may have something to say about it.u should have had it on the skate ramp,that would have been kooler
nearly got my car up there though , till we realised it would pivet haha41
#418
Deathrow
-
- TMF IT Specialist
-
- 5,744 posts
Have you tried turning it off and on again?
- Name: Adam
- Location: Manchester, UK
Posted 24 July 2009 - 07:09 PM
Haha yeah, we weren't far off a bit of an issue.Oh I know, the curb to get up to it is too harsh though. We were going to try with some car ramps but I feared the Police may have something to say about it.u should have had it on the skate ramp,that would have been kooler
nearly got my car up there though , till we realised it would pivet haha41
Right, I'll write up todays stuff.
#419
Deathrow
-
- TMF IT Specialist
-
- 5,744 posts
Have you tried turning it off and on again?
- Name: Adam
- Location: Manchester, UK
Posted 24 July 2009 - 07:16 PM
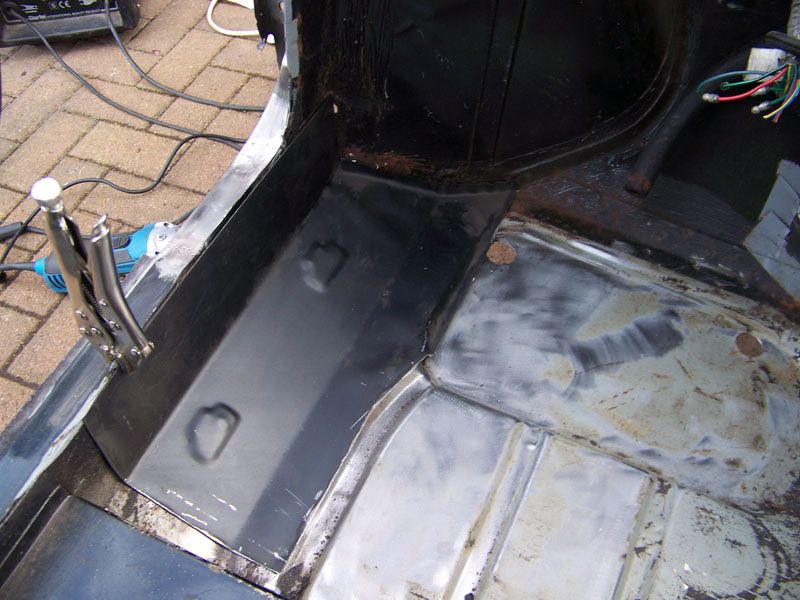
Here is todays work:
Chopped out the rust.
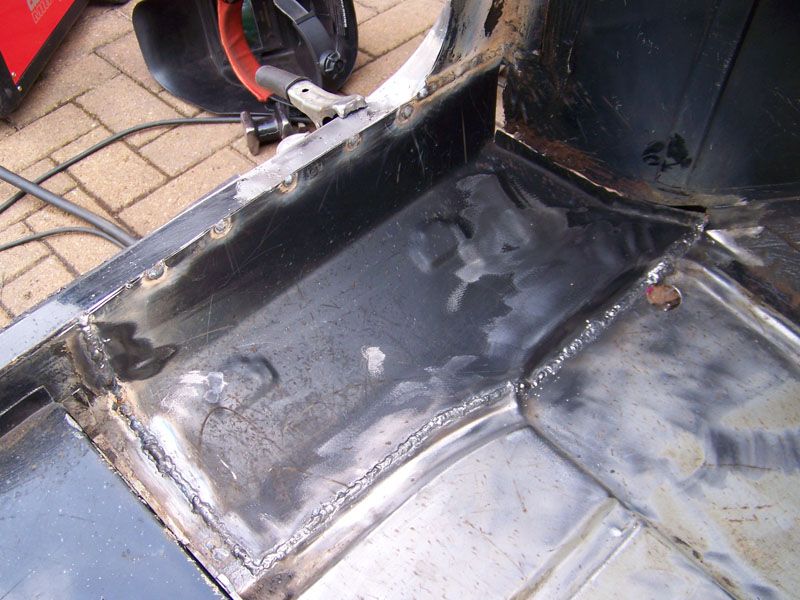
Welded in the repair section.
Welds roughly linished.
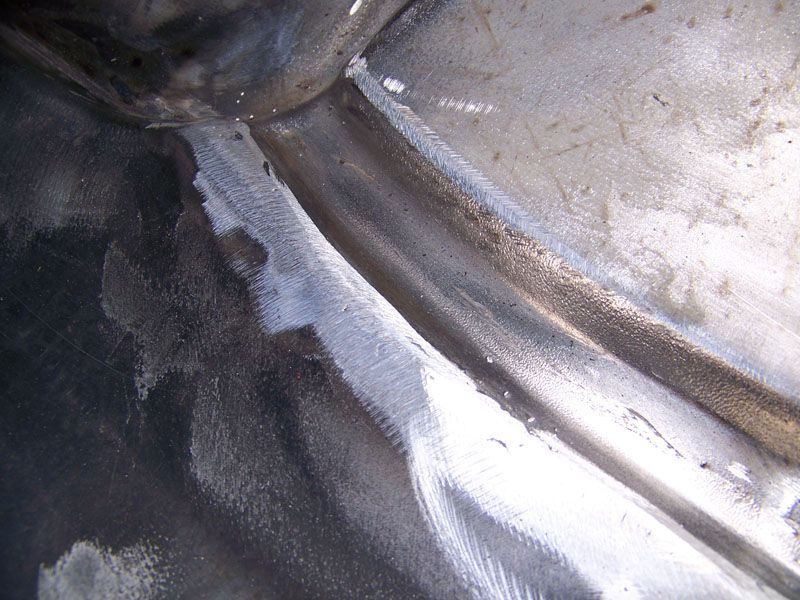
Close up.

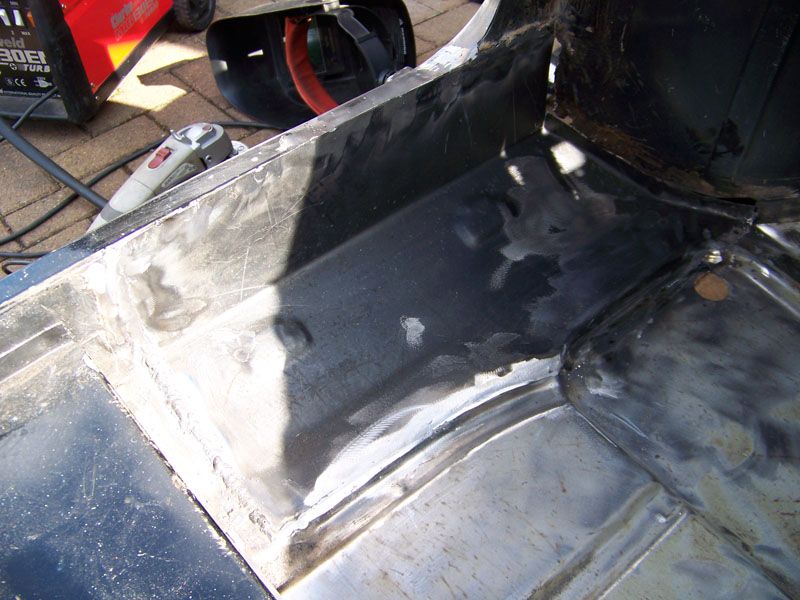
Hole in the door step.
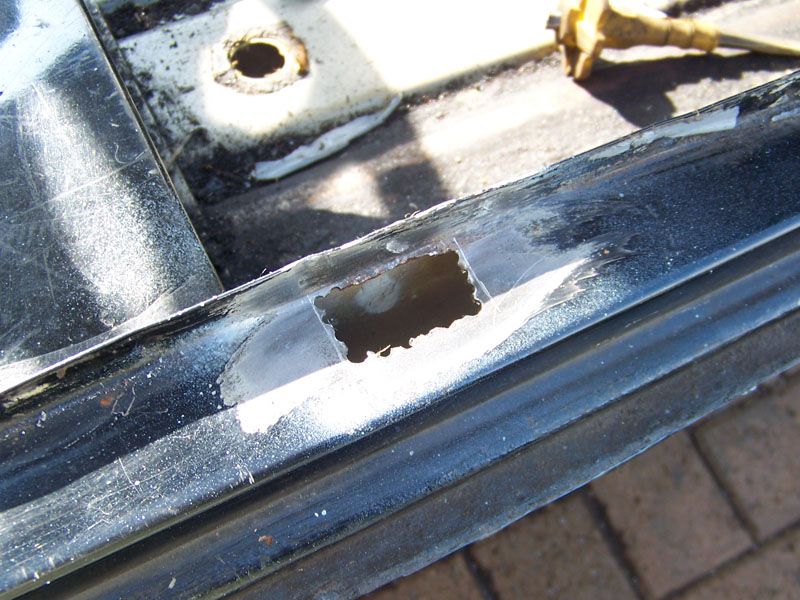
Drilling left me with this.
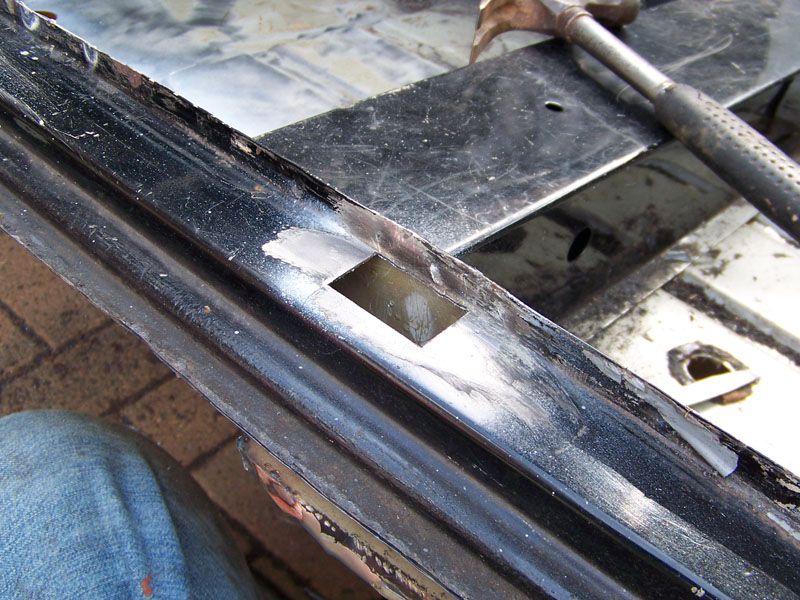
Then some filing.
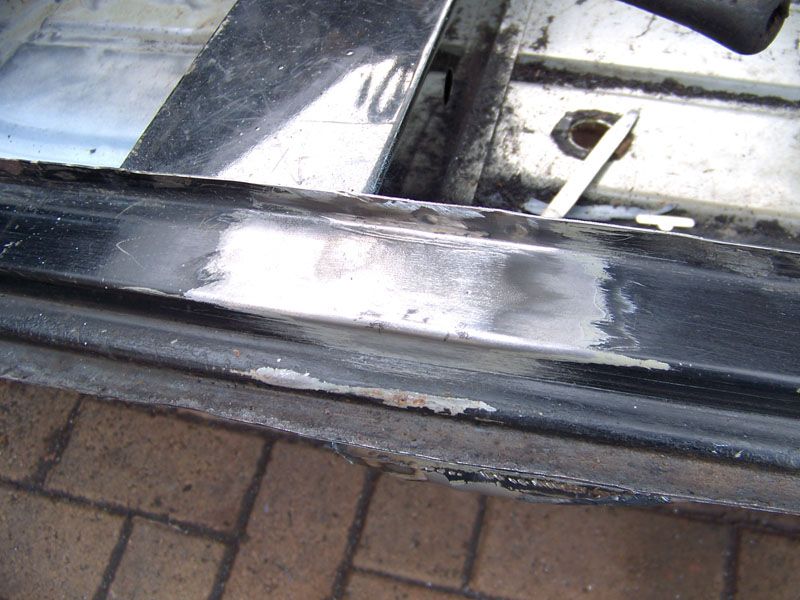
And finally.
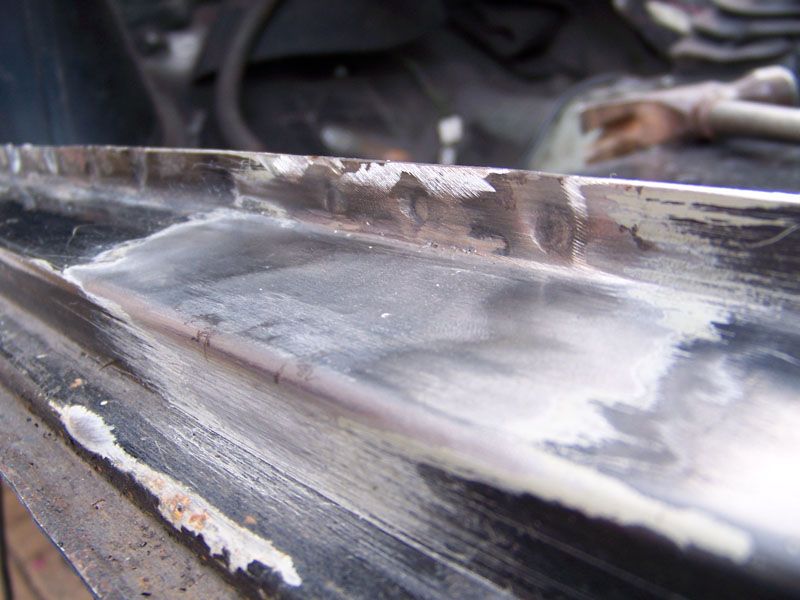
Close up.
How I left it today.
Thanks for looking, comments are welcome as usual. Going to go eat my tea now.
Chopped out the rust.
Welded in the repair section.
Welds roughly linished.
Close up.
Hole in the door step.
Drilling left me with this.
Then some filing.
And finally.
Close up.
How I left it today.
Thanks for looking, comments are welcome as usual. Going to go eat my tea now
.
#420
tedmcedd
-

- Traders
-
- 2,751 posts
Up Into Fourth
- Location: Huddersfield
Posted 24 July 2009 - 07:37 PM
your welds are looking amazing!!! what welder an wire are you using?? i tried mine the other day and i couldnt set it up right....
Ed
Ed


Also tagged with one or more of these keywords: roundnose
Projects →
Mini Saloons →
1976 Mini 1000 Le "stripey"Started by cafeclassic , 03 Sep 2025 |
|

|
||
Projects →
Mini Saloons →
Mini Cooper Project - Finally StartsStarted by piphatch , 08 Jan 2025 |
|

|
||
Projects →
Mini Saloons →
1965 Austin Mini Restoration - Canadian Mk1Started by DoubleEh , 14 Nov 2022 |
|

|
||
Projects →
Mini Saloons →
Project Joe - 1991 Mini Mayfair 998Started by Eggers , 02 Jun 2022 |
|

|
||
Projects →
Mini Saloons →
Mpi Dashboad ProblemStarted by mikeprez , 22 Dec 2021 |
|

|
1 user(s) are reading this topic
0 members, 1 guests, 0 anonymous users


