how you been going with it head gasket was easy enough just gotta dyno him again now

#226

Posted 21 April 2009 - 08:01 PM
how you been going with it head gasket was easy enough just gotta dyno him again now
#227

Posted 21 April 2009 - 10:26 PM
move the front/rear connections inside the car - instant waterproofing! Same goes for the fusebox. Refit the clevis pins with litle R clips as well, they're still horrible but at least they come out easier than a split pin!
#228

Posted 22 April 2009 - 01:08 AM
You're completely right Minivanman, it is the washer pump! It was that long ago that I disconnected it that it'd completely slipped my mind. Thanks for that.the connector is for the washer pump...
move the front/rear connections inside the car - instant waterproofing! Same goes for the fusebox. Refit the clevis pins with litle R clips as well, they're still horrible but at least they come out easier than a split pin!
I've never had any issue with water getting in to my electrics before, just didn't see the need for 9 bullets. I may well move them inside the car anyway, not sure about the fuse box though. It would make for a tidy bulkhead however!
Good plan on the R clips! Save laying on my back for another hour :/.
Weather is looking good so I may go do some work on Elliot tomorrow after my 11 o'clock lecture
#229

Posted 22 April 2009 - 02:14 PM
those shocks are tasty! i need to get myself some of those....
why not try and put the loom inside and up the inner wing, it would make it all super neat!
#230

Posted 22 April 2009 - 06:01 PM
I don't think it's going to be particularly messy as it is once I've tidied and sleeved everything up properly. The wiring will run down the bulkhead corner, down the remains of the inner wing and then be neatly attached to my brace bars. However, I know what a neat freak I am so I'd better just say we'll see what happens and leave it at that haha.all looking good!
those shocks are tasty! i need to get myself some of those....
why not try and put the loom inside and up the inner wing, it would make it all super neat!
Wiring wise I think the bit thats going to take the most doing is the side repeaters. Naturally, they used to run direct to the wings, now I'm going to have to modify the loom so they run down the full length of the front, through the removable connector and back to the wings so that they are on the same plug as the rest of the fronts electrics.
Yeah man the shocks are yummy, I compared the hardest and softest setting and theres a massive difference and theres plenty of adjustabilty in them too.
Right, I did go to the garage today but it has been one of those "Why am I even bothering with this?" days I'm affraid. You'll see why in the following pictures.
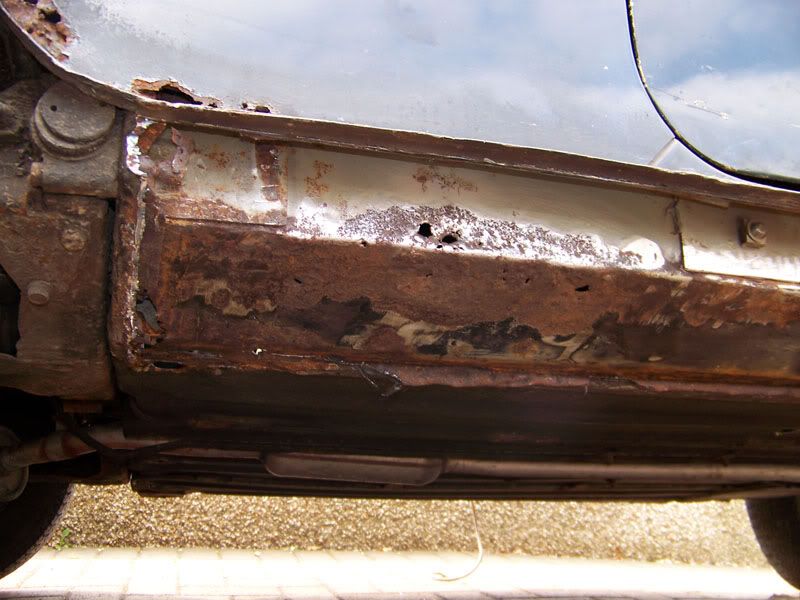
This is the bit I knew I would have to work on, no worries.
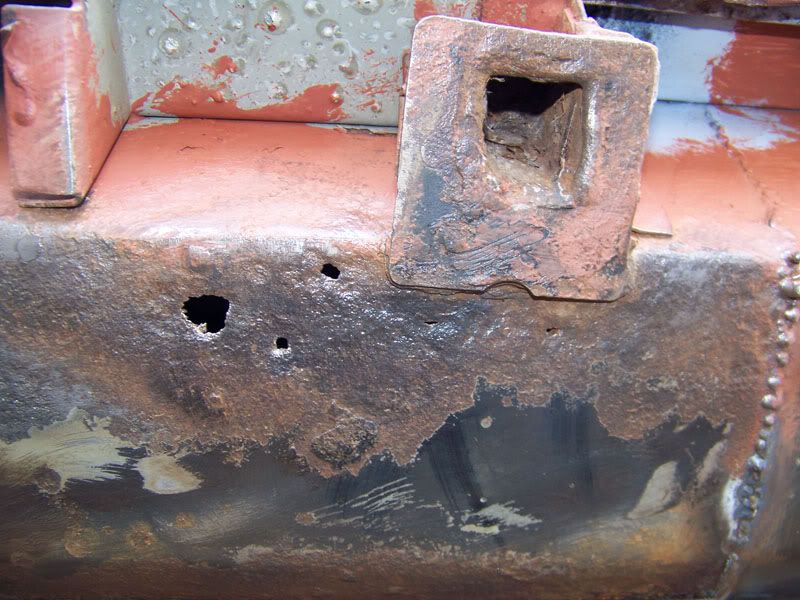
Then the wire wheel found this aswell.
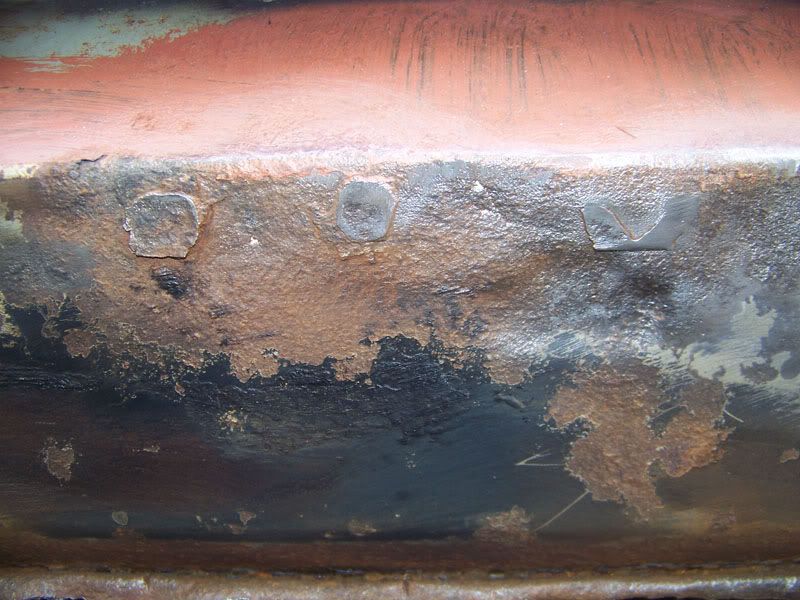
Oh, and this! It's hard to see, but there are pin holes there.
At this point I laid down on my back staring at the inner sill trying to make my mind up if i'd be better buying some sheet steel, folding it and replacing the whole ruddy thing in one go or if I'd be better off just patching away. I've decided to go with patching anyway. Then, as I was sick of looking at the sill I moved on to the rust in front of the rear arch.
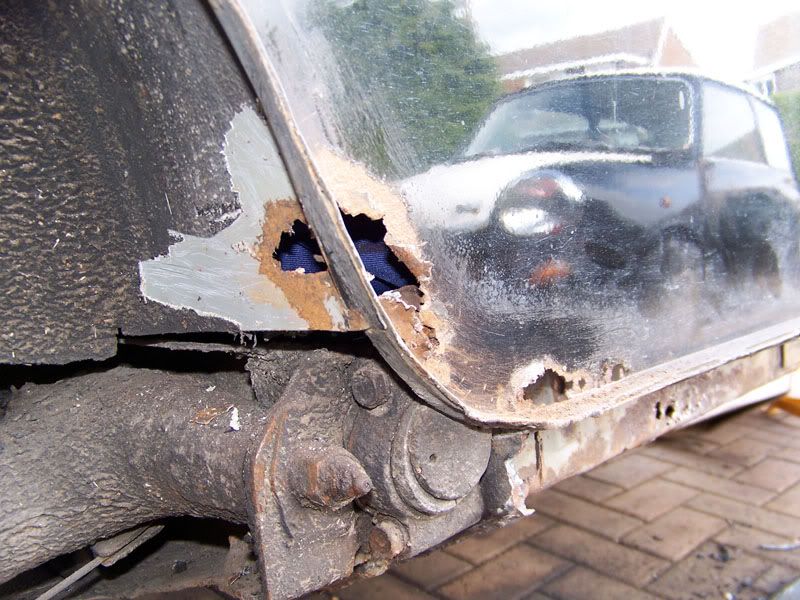
Which extends in to the rear arch, quite unamused and unsurpised at this point.
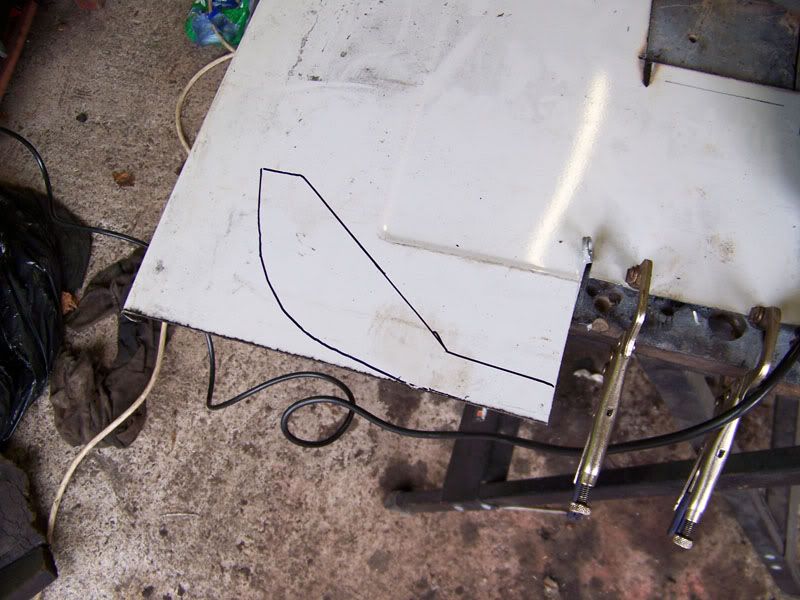
Made a card template and transferred it on to steel.
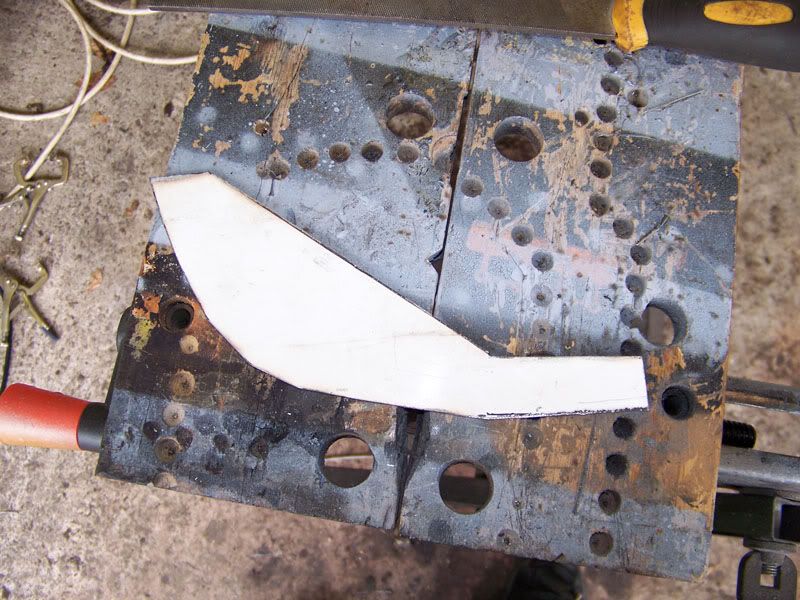
Cut out.
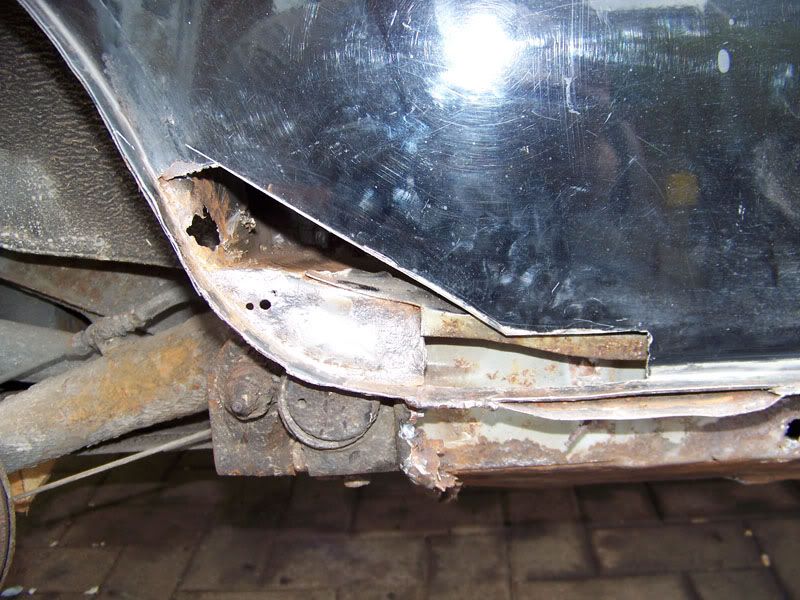
Cut out the offending area. Patch still needs some shaping before it's going to fit in this hole. EDIT: You can see why Minis rot out here, 2 holes in the closing panel which is effectively a splash zone in the wheel arch, well done! I'll be welding those up and filling that cavity with waxoyl.
Before I put the patch in I'll be making up a repair for the wheel arch, since I have better access with the bottom of the rear quater missing.
So yeah, not a very productive day and it's put me in a bit of a foul mood with it. Some days it's almost like Elliot is willing me to get her welded up and back on the tarmac but today it seemed like she would do anything and everything in her power (granted, she's a car so that's nothing) to stay stuck in the garage :/.
Edited by Deathrow, 23 April 2009 - 10:30 AM.
#231

Posted 22 April 2009 - 06:05 PM
makes me feel like im getting no where . . . well im not
well done mate, you get some good work done!
Joe
#232

Posted 23 April 2009 - 08:38 PM
#233

Posted 24 April 2009 - 06:07 PM
Yes we do, I feel good that I had the sense to say "Enough!" and walk away from it that day.Keep it up dude, we all have days like that!
Anyway, was back on it today and progress was much better, although the pictures don't show it all so I'll describe as we go.
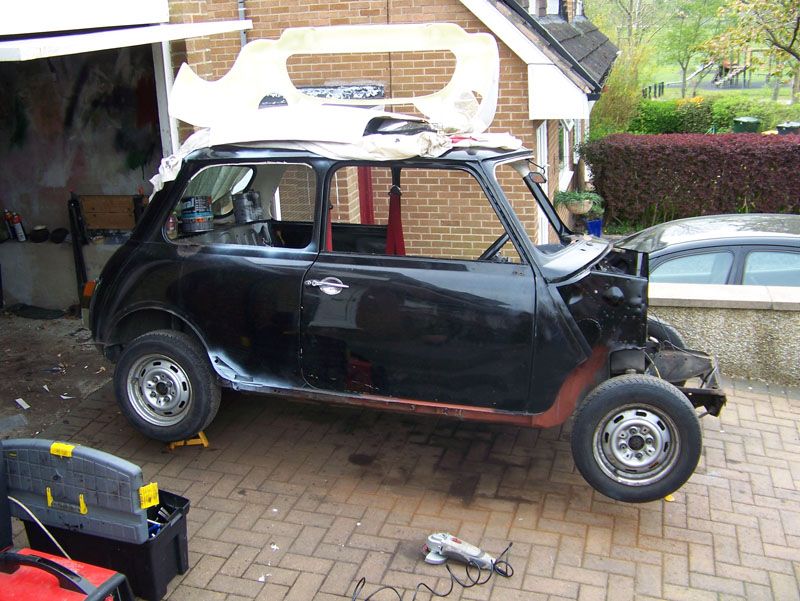
Jacked up and supported on axle stands.
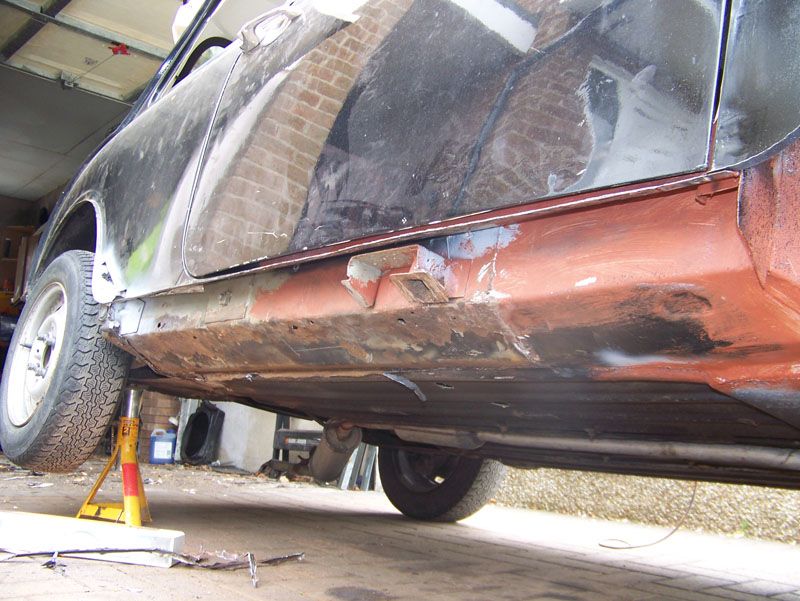
The evil inner sill.
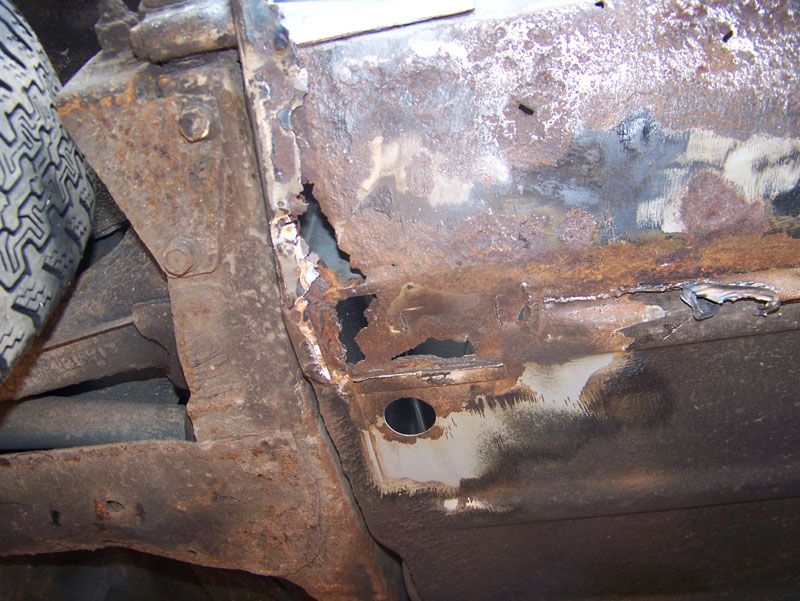
Rotten floor near heel board. Do I need to worry about the heel board flexing when I cut all the rot out, the patch will be as big as the template in the next picture.
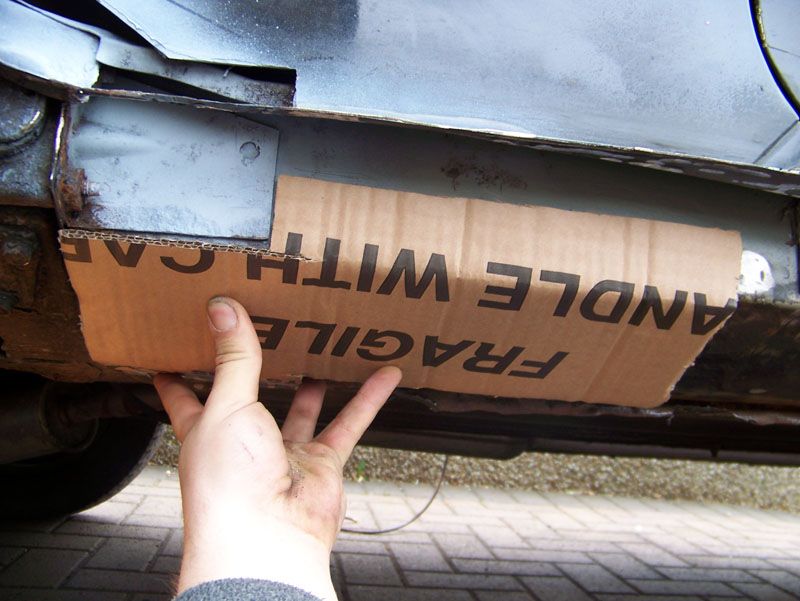
Template made to replace the lot in one go, not sure how well this will work with there being 2 folds in the panel, might have to have a seam in the middle, we'll see. Also, the text on the cardboard was a complete accident, although it is rather fitting haha.
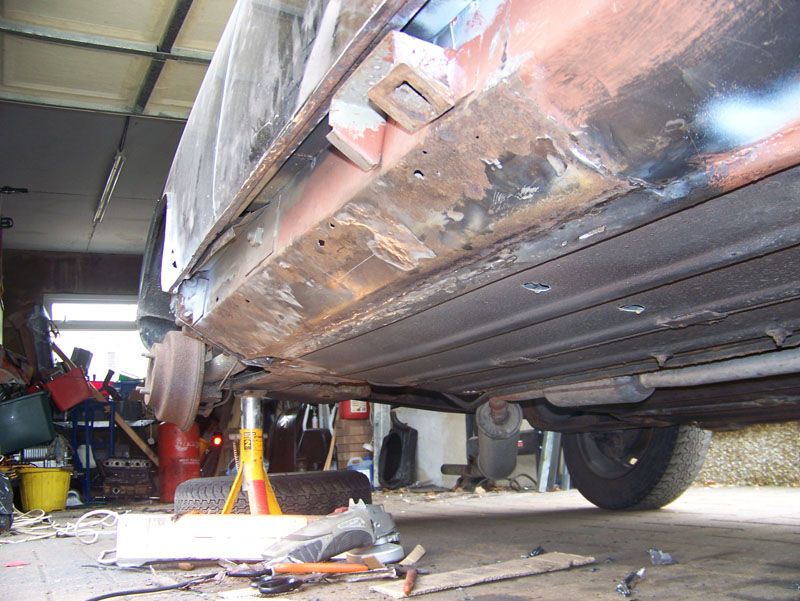
Remains of old sill removed from sill seam and oversill remains removed from the floor pan.
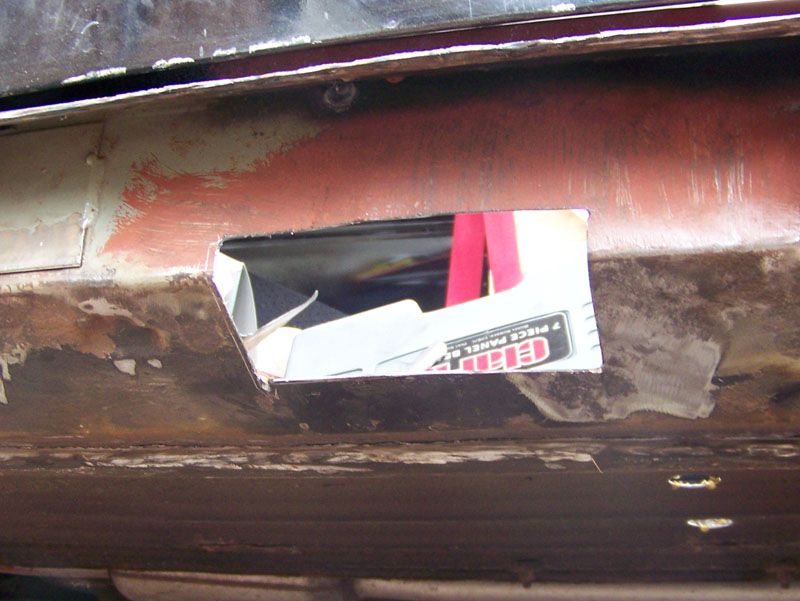
Middle bit of rot chopped out.
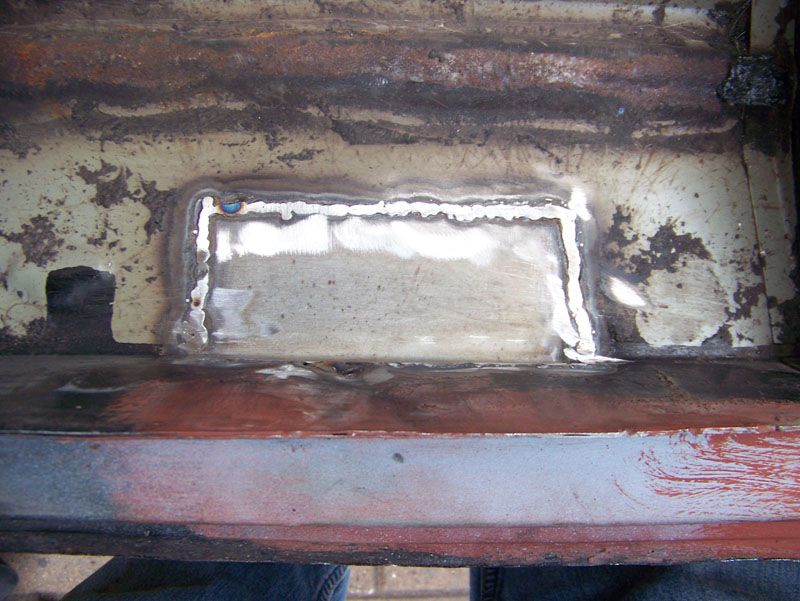
Patched, welded and ground back.
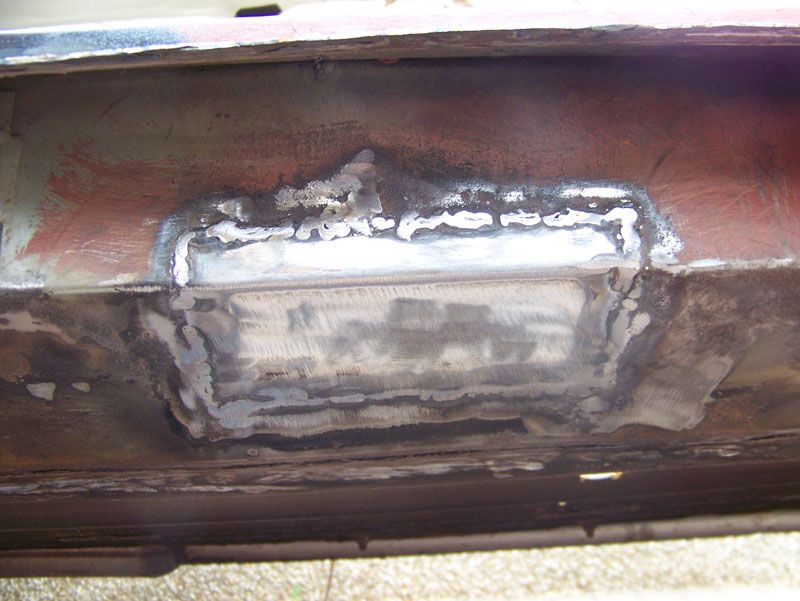
Under side.
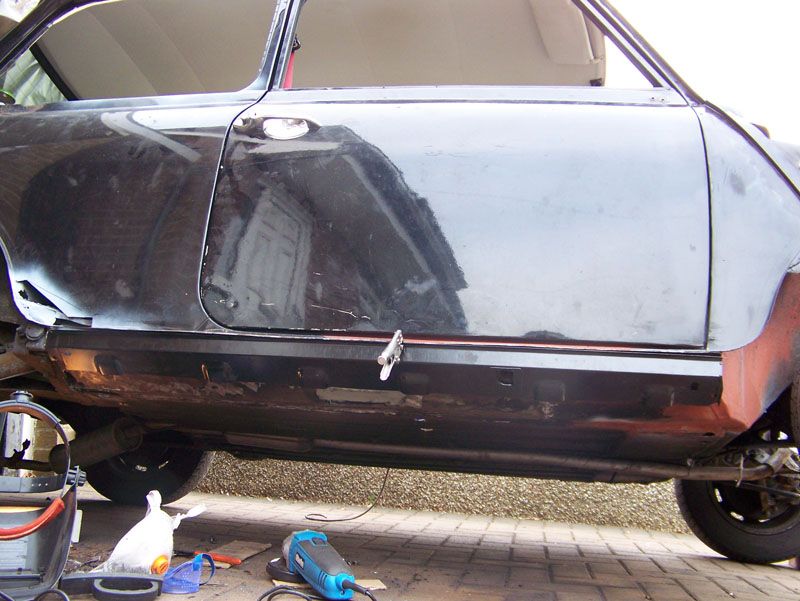
Added seam sealer and clamped the outer sill in place, mainly just for a bit of a feel good for me
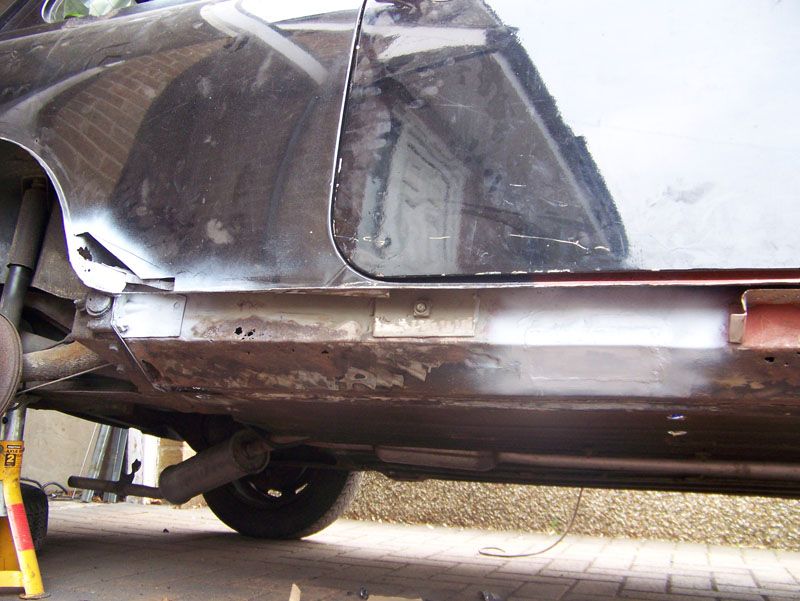
Patch etch primed.
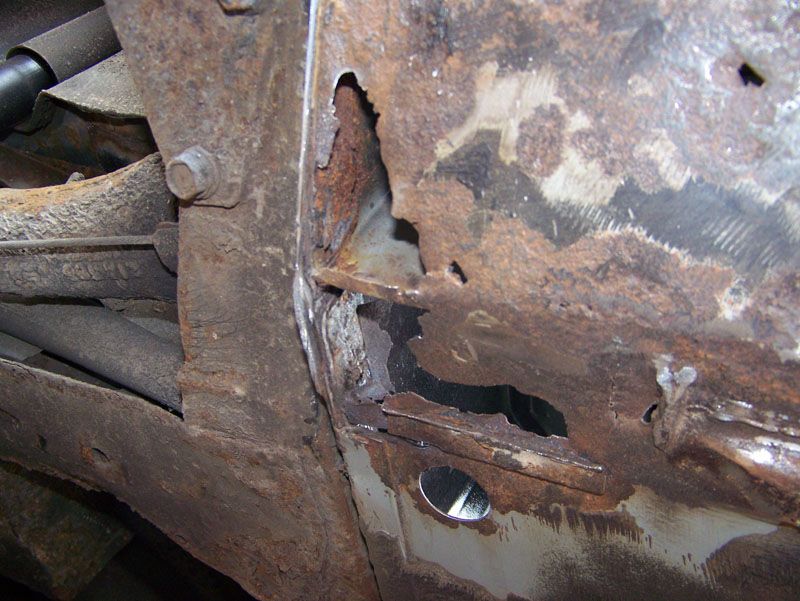
I'll add this just because it makes me laugh, oh dear.
I'll patch the section under the jacking point next time and then move on to the rear floor and inner sill. When those are done I need to fabricate a few brackets that I had to cut out at either end of the sill. I think they're for reinforcing the sill, but I don't really see the need, but I'm not an engineer so they'll be put back. After that the sill can go on and I can finish the rear quater.
Much happier with it today
#234

Posted 25 April 2009 - 09:19 PM
#235

Posted 26 April 2009 - 11:13 AM
My subframe was out about a year ago and it came out fine but I'll give the bolts a nice coating of oil as well
Thanks for looking Tom
#236

Posted 26 April 2009 - 11:16 AM
#237

Posted 26 April 2009 - 11:26 AM
i look forwrd to the next update!
Ed
#238

Posted 26 April 2009 - 02:30 PM
Keep up with me?! You're thread makes mine look like a leaflet compared to a novel!Can't keep up with you mate
looking forward to reading your progress later!
Thanks for watching though, always nice to hear peoples thoughts. Did you ever get that screw out of your rear drum?
Hehe, is that the rally car? Learning to weld is very rewardinggood progress!! can't wait to get back from uni and start on mine! im gonna be practising my welding too... need it to be good as i have many more holes on the mk2 than you have on elliot!!
i look forwrd to the next update!
Ed
#239

Posted 27 April 2009 - 09:12 AM
Hehe, is that the rally car?
certainly is
#240

Posted 27 April 2009 - 10:32 AM
Have you thought about blanking off the jacking point hole on the outersill? Unless you're going to use it that is!
Also tagged with one or more of these keywords: roundnose
Projects →
Mini Saloons →
Mini Cooper Project - Finally StartsStarted by piphatch , 08 Jan 2025 |
|
|
||
Projects →
Mini Saloons →
1965 Austin Mini Restoration - Canadian Mk1Started by DoubleEh , 14 Nov 2022 |
|
|
||
Projects →
Mini Saloons →
Project Joe - 1991 Mini Mayfair 998Started by Eggers , 02 Jun 2022 |
|

|
||
Projects →
Mini Saloons →
Mpi Dashboad ProblemStarted by mikeprez , 22 Dec 2021 |
|

|
||
Projects →
Mini Saloons →
1978 Oew - Willy The MiniStarted by smalltreegrower , 11 Nov 2021 |
|

|
1 user(s) are reading this topic
0 members, 1 guests, 0 anonymous users


