looking at going this way myself, really usefull info here..... get it done to save me all the headaches LOL.. brilliant work..


Bmh Shell Build [standard Length]
Started by
l_jonez
, Apr 29 2008 08:02 PM
73 replies to this topic
#46

camp freddy
-

- TMF+ Member
-

- 3,696 posts
Definitely Not Camp Or A Freddy
- Local Club: Wreake Mini Wanderers
Posted 01 February 2013 - 05:33 PM
#47
l_jonez
-
- Members
-
- 1,453 posts
One Carb Or Two?
- Local Club: south wales mini club
Posted 01 February 2013 - 08:25 PM
Funny enough me and the old man where talking about it this week. Hopefully we'll be digging out the frame etc soon in the hope of getting it finished for the summer.
#48
l_jonez
-
- Members
-
- 1,453 posts
One Carb Or Two?
- Local Club: south wales mini club
Posted 26 January 2014 - 08:00 PM
WOW almost exactly a year since my last post and exactly nothing has happened since 
today I picked up some new steel to modify the subframe slightly to gain some extra clearance and discovered that the welder has broke so new parts ordered and we should be up and running during the week and then we can finally get the ball rolling again, who would have thought that a "summer project" would last nearly 6 years
#49
coopdog
-

- TMF+ Member
-
- 4,506 posts
Up Into Fourth
- Location: South Wales
Posted 20 May 2014 - 09:02 AM
WOW almost exactly a year since my last post and exactly nothing has happened since
today I picked up some new steel to modify the subframe slightly to gain some extra clearance and discovered that the welder has broke so new parts ordered and we should be up and running during the week and then we can finally get the ball rolling again, who would have thought that a "summer project" would last nearly 6 years
any more? :L
#50
l_jonez
-
- Members
-
- 1,453 posts
One Carb Or Two?
- Local Club: south wales mini club
Posted 20 May 2014 - 09:13 AM
Ummm yep
The frame is finished now, radiator mounts have been finished. Bought a new much smaller Nippon denso alternator which is now in place just need to make a new tensioner.
The only major thing left is the driveshafts which might get done on the weekend.
Then its just clean and paint everything before it gets fitted into the mini.
Will fit new clutch and timing belt whilst I'm at it.
#51
pinkmini99
-

- Members
-
- 563 posts
Super Mini Mad
Posted 22 May 2014 - 01:53 AM
Nice work this is making me want to build one for myself
#52
l_jonez
-
- Members
-
- 1,453 posts
One Carb Or Two?
- Local Club: south wales mini club
Posted 05 June 2014 - 08:43 AM
Bit of an update,
The frame is all but finished just needs paint.
The alternator mounts are finished.
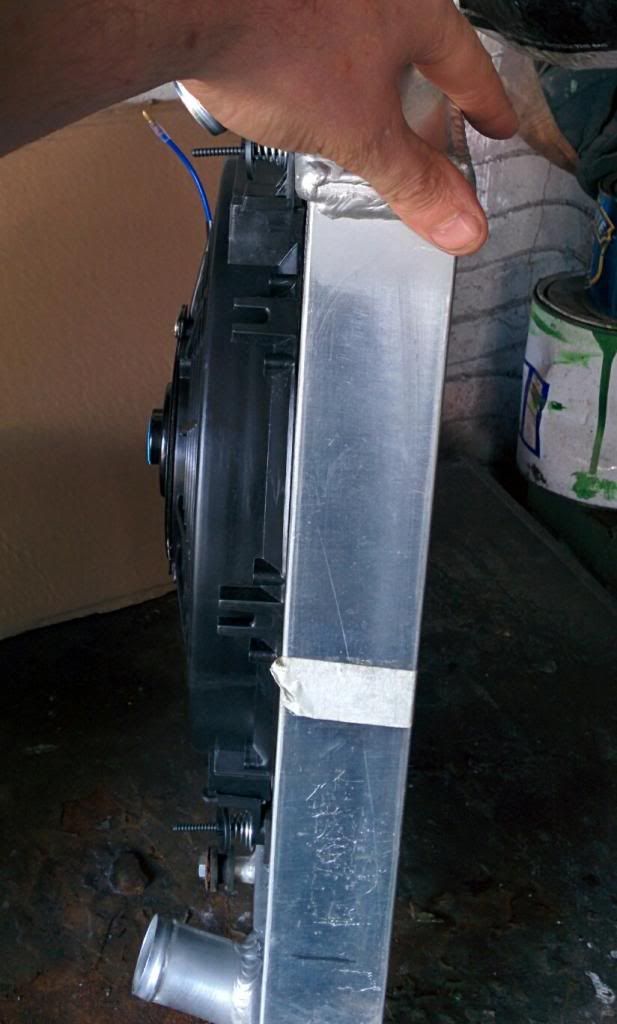
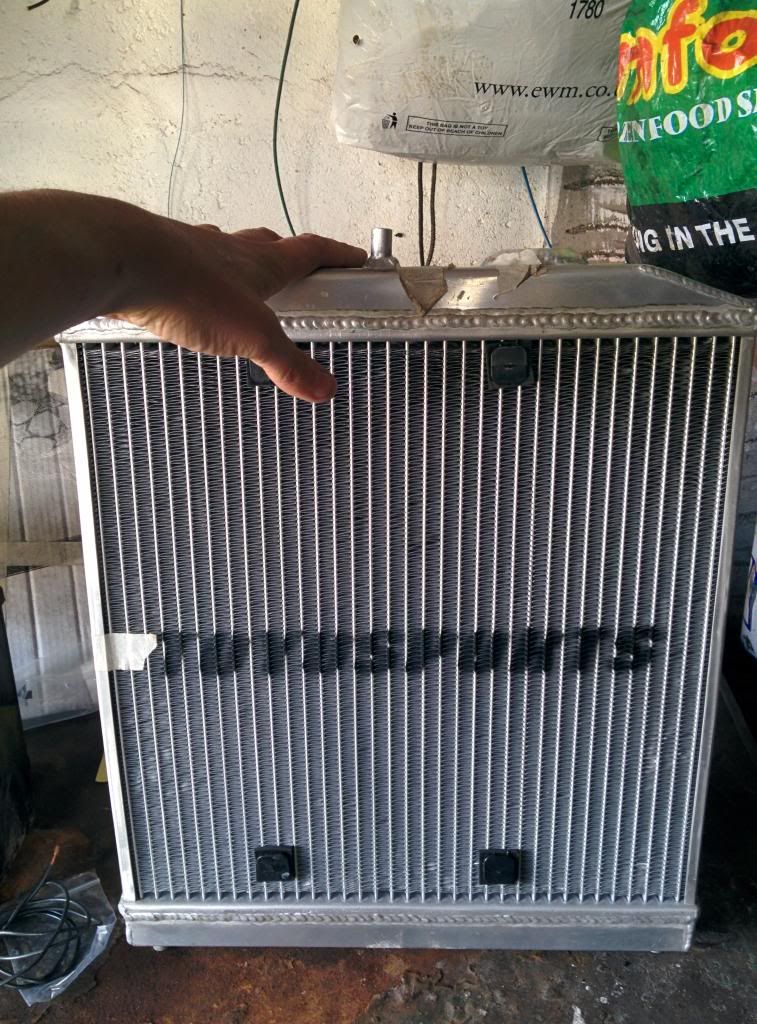
The rad + pipe work is done, rad fan is on order.
The wiring was finished a few years back.
Hopefully the last part to do is the drive shafts which will hopefully be sorted this weekend. We've mocked them up and they came out the same length as the all speed items so if it comes to it we can buy them.
Engine will be having a new timing belt and clutch before it goes in the mini
The frame is all but finished just needs paint.
The alternator mounts are finished.
The rad + pipe work is done, rad fan is on order.
The wiring was finished a few years back.
Hopefully the last part to do is the drive shafts which will hopefully be sorted this weekend. We've mocked them up and they came out the same length as the all speed items so if it comes to it we can buy them.
Engine will be having a new timing belt and clutch before it goes in the mini
#53
l_jonez
-
- Members
-
- 1,453 posts
One Carb Or Two?
- Local Club: south wales mini club
Posted 05 June 2014 - 08:18 PM
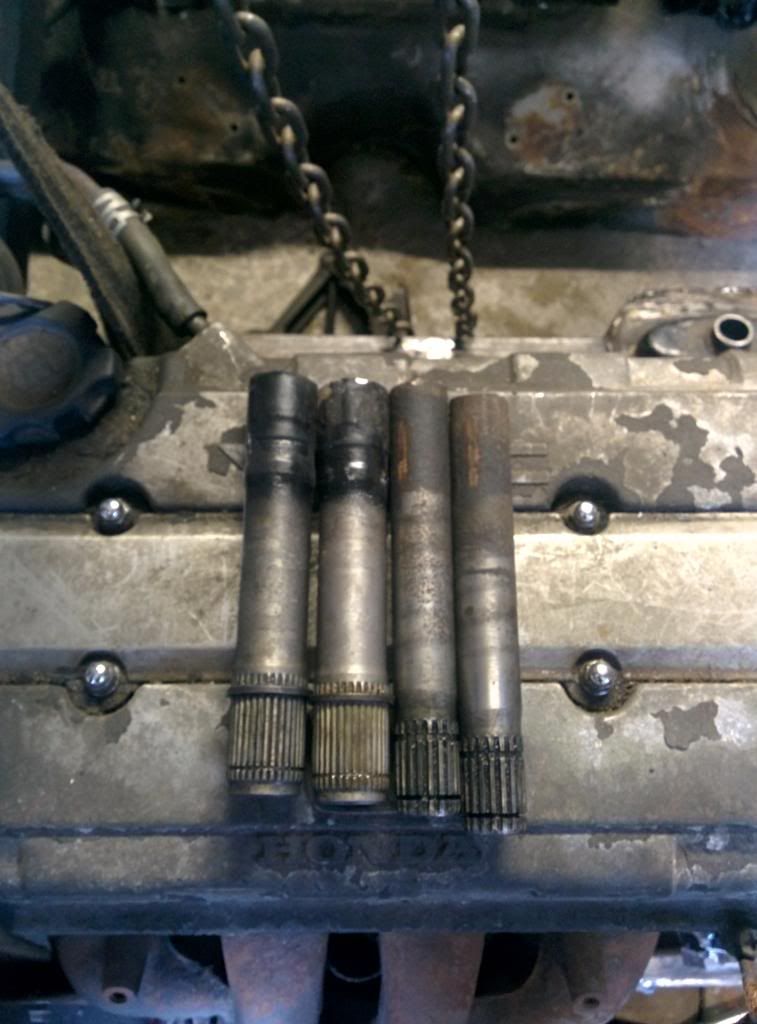
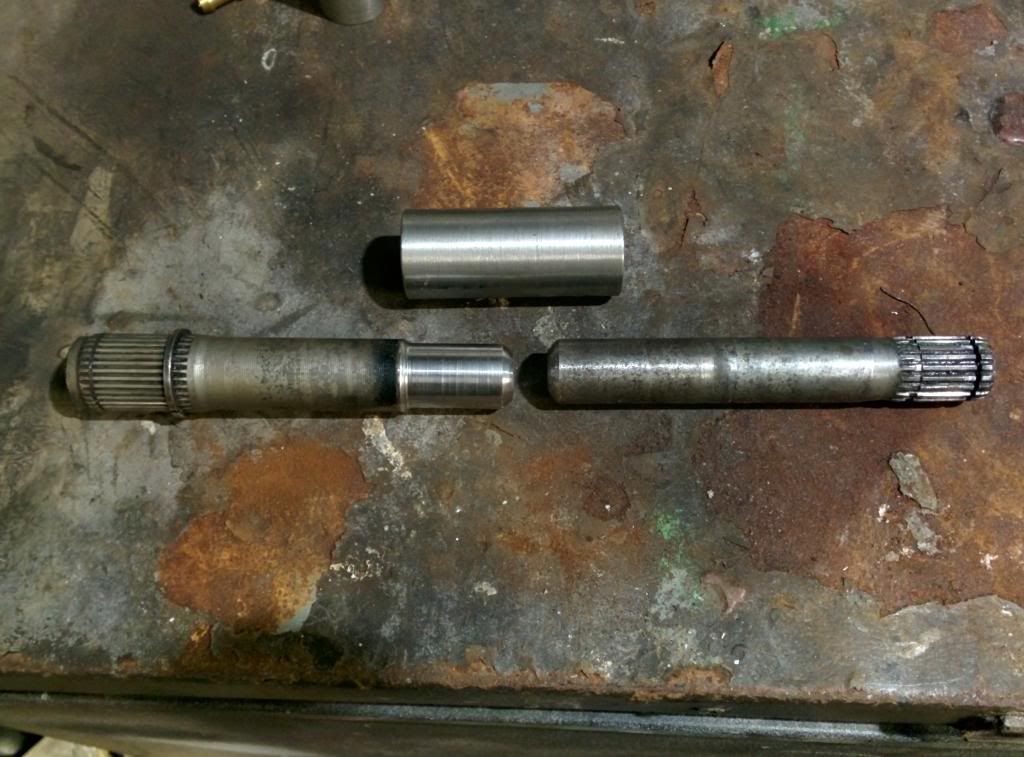
Shafts cut down ready to be welded

#54
l_jonez
-
- Members
-
- 1,453 posts
One Carb Or Two?
- Local Club: south wales mini club
Posted 07 June 2014 - 05:30 PM
Fan turned up so it was fitted within a few minutes 
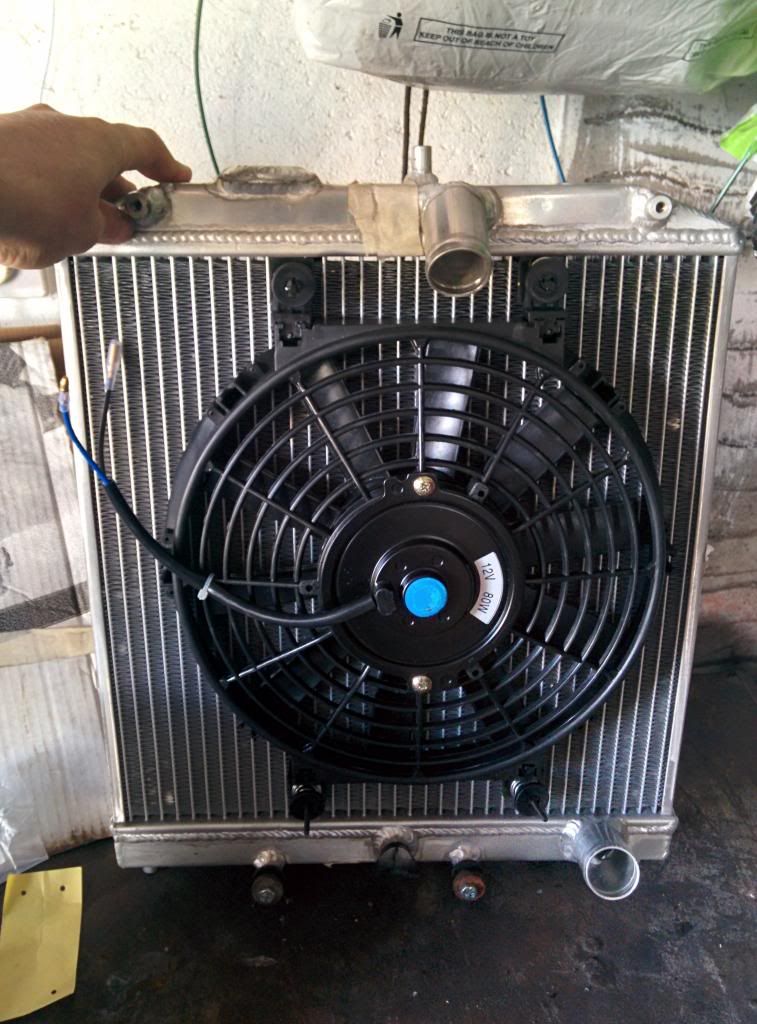
Must say I'm happy with the fan its reversible and only £18 delivered
its pretty much the same as a mini mpi fan so I'll be ordering another one for the Micra mini so that I can move the fan to the rear of the rad but that's a different story.


Must say I'm happy with the fan its reversible and only £18 delivered
its pretty much the same as a mini mpi fan so I'll be ordering another one for the Micra mini so that I can move the fan to the rear of the rad but that's a different story.
#55
BIGCVH
-

- Noobies
-
- 39 posts
On The Road
- Location: westyorkshire
Posted 23 June 2014 - 12:05 PM
wow fair play for fabbin everything yourself. and in a conventional round nose as apposed to the regular clubman
#56
l_jonez
-
- Members
-
- 1,453 posts
One Carb Or Two?
- Local Club: south wales mini club
Posted 23 June 2014 - 06:23 PM
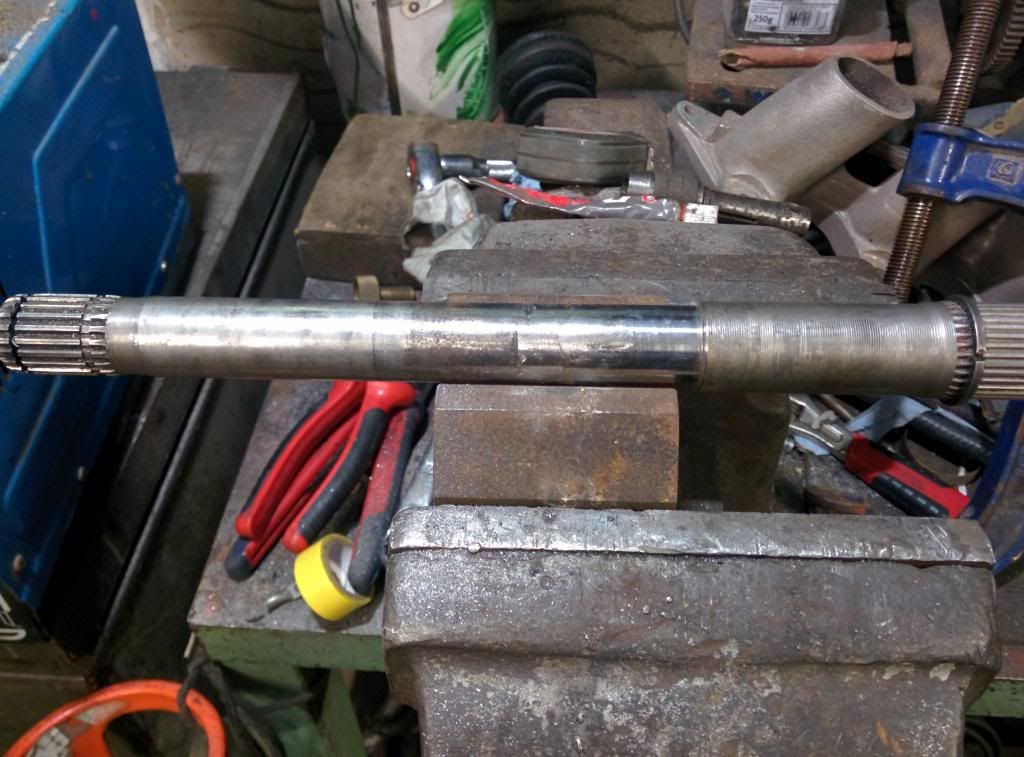
Shafts are now finished
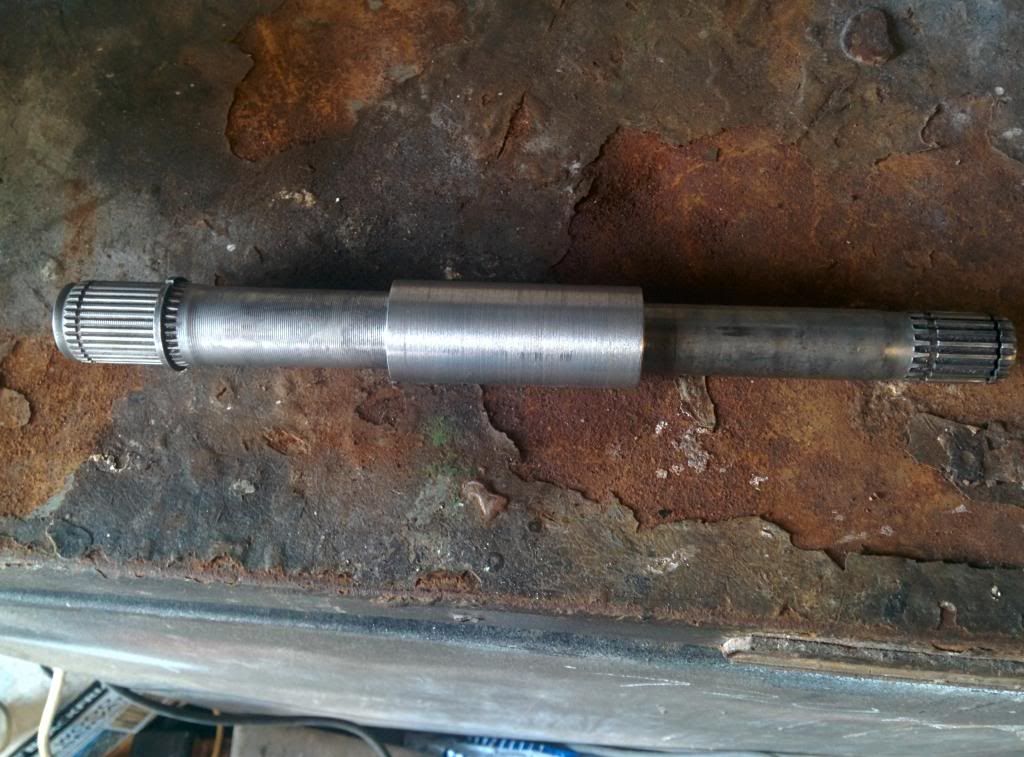
Faced off to length and the Honda shaft turned down and a sleeve made.
Two halves welded together and the weld turned down flush.
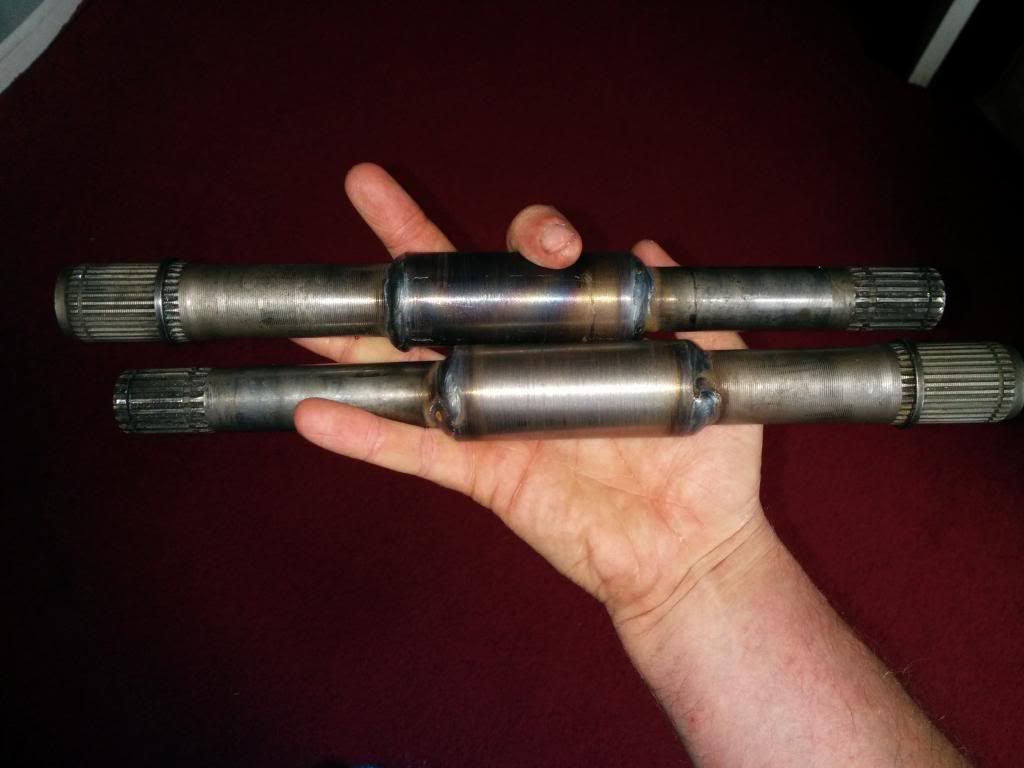
Sleeves slid on
Then welded
Also bought some 2mm gasket material (aluminium core) and made a new inlet gasket.
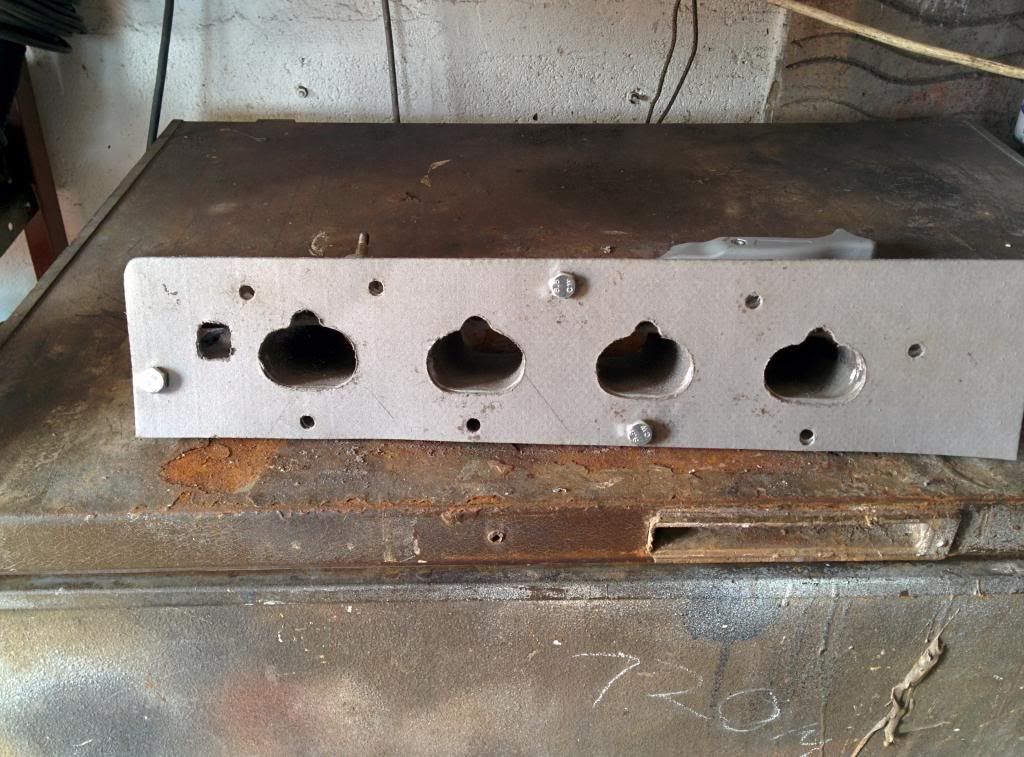
Then plugged the loom etc in and fired the engine up and run it until normal temp to make sure the cooling system works and there was no leaks etc
Faced off to length and the Honda shaft turned down and a sleeve made.

Two halves welded together and the weld turned down flush.

Sleeves slid on

Then welded

Also bought some 2mm gasket material (aluminium core) and made a new inlet gasket.

Then plugged the loom etc in and fired the engine up and run it until normal temp to make sure the cooling system works and there was no leaks etc
#57
mikko
-

- Noobies
-
- 119 posts
Mini Mad
- Location: belfast
Posted 23 July 2014 - 09:09 PM
has this shaft method been tried and tested? i dont like the idea of welds being the only thing holding that much torque
#58
l_jonez
-
- Members
-
- 1,453 posts
One Carb Or Two?
- Local Club: south wales mini club
Posted 23 July 2014 - 09:17 PM
A fair few people have used this method. A lot of them with bigger torque figures. Our shafts are the same length as all speeds so if they do break ( which I can't see happening) then I can buy some.
#59
danie garry
-

- Members
-
- 2,296 posts
I love BMW minis
- Location: malmo
- Local Club: IMOC-Irish Mini Owners Club
Posted 23 July 2014 - 09:40 PM
has this shaft method been tried and tested? i dont like the idea of welds being the only thing holding that much torque
A fair few people have used this method. A lot of them with bigger torque figures. Our shafts are the same length as all speeds so if they do break ( which I can't see happening) then I can buy some.
not trying to hijack here but just a shaft design in my head!
would a milling a slot through 1 half of the shaft and then a tongue on the other that would be like a big flat screw driver, weld all the joints and then sleeve it, more weld, more surface area in contact, stronger?
liking the build @l_jonez!
#60
l_jonez
-
- Members
-
- 1,453 posts
One Carb Or Two?
- Local Club: south wales mini club
Posted 24 July 2014 - 04:11 PM
I'd say in theory yes it would give a larger surface area but I'd imagine cutting a slot etc would result in less material/strength. I'm sure there's people on here that have a better understanding of stresses?
A guy on the 16v mini club machines both ends into a D shape welds and then sleeves. I would have done the same but the miller I have access to wasn't working at the time.
A guy on the 16v mini club machines both ends into a D shape welds and then sleeves. I would have done the same but the miller I have access to wasn't working at the time.


1 user(s) are reading this topic
0 members, 1 guests, 0 anonymous users


