Spring-time Spruce Up For The Mini Convertible
#1
Posted 27 April 2008 - 07:19 PM
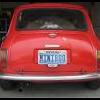
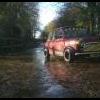
I just thought that I'd post a few pics of the work that I'vve been doing to our mini convertible.
We've owned it for well over 10 years now. It gets treated to a life of luxury really. It sits in a dry insulated garage most of the year and comes out on dry sunny days.
Since we've owned it we've never done any work to it, other than general servicing.
We try and use it most years but it didn't come out last summer. It has probably averaged less than 500miles per year since we've owned it.
The front suspension had been sitting REALLY low for a good few years and it wasn't handling anything like a mini should. So I managed to get dad to splash out on a few goodies.
We bought genuine Hi-Lo's all round, KYB Gas dampers all round, new rubber cones all round and a pair of new knuckles for the front.
While replacing these bits I wanted to have a proper clean up under the arches and under the boot floor. I'm also wanting to get the mini nearer a "show" standard. So, body painted wheel arches are on the cards and hopefully eventually painted sills instead of black underseal.
#2
Posted 27 April 2008 - 07:23 PM
The first job was to get rid of all ancilaries and start scraping off that underseal. It's a really horrible job that takes ages, especially when getting right up into the wings etc.
When I took off the damper mount (drivers side) it was really rusty. After getting rid of all of the rust... I was left with a bit of a hole...
That annoyed me a bit because I wasn't expecting to have to do any welding on this mini. Never mind. A repair patch was made and welded in.
#3
Posted 27 April 2008 - 07:42 PM
Bit of a b***h of a job and definately something that I wouldn't want to do if I was under any time pressure (e.g. if it was my daily driver and I had to get it done before Monday or something!)
As they were out and are unlikely to come out again for a very long time (I hope) I decided to give them a lick of paint.
They were painted with a couple of coats of hammerite Satin black. I prefer Satin black to gloss on a lot of things. Shiny isn't always best.
So, I got the top arms re-fitted with new knuckles, new rubber cones and the brand new Hi-Lo's.
Then I painted the underside of the wings with two coats of hammerite black and the inner wings in Azure Blue. Starting to look good and also clean enough to eat off!
With ancilaries cleaned up, re-fitted, dampers on wheels on job done (at the front).
The Hi-Lo's were set to their lowest position to make them easier to fit. I was a bit unsure how low the mini would sit in that setting. I drove the mini up and down the road a couple of times. It does handle a hell of a lot better now. Looking at the ride height, it is sitting a bit too low really. Pretty much as it was before I started the work. Dad likes it low but I think I'll be raising it a bit to stop the exhaust scraping on speed bumps and to protect the (standard height) dampers.
#4
Posted 27 April 2008 - 07:46 PM
#5
Posted 27 April 2008 - 07:51 PM
My mini (right) came back from it's acid dip last weekend, so I'm gonna be a bit tight on working space now.
The plan for the rear end is:
- Subframe off, inspect, clean up, paint (possibly).
- Clean up underside of boot floor and arches
- Paint underside of boot floor hammerite black
- Paint inside wheel arches Azure Blue
- Refit subframe with new springs and dampers.
- Tidy up inside boot (repaint floor)
- Paint fuel tank
When I get to painting the fuel tank I'm not sure about satin or gloss. Satin is original but gloss black can actually look quite good. Thoughts anyone?
Edited by edi57, 09 May 2008 - 05:07 PM.
#6
Posted 27 April 2008 - 07:53 PM
#7
Posted 27 April 2008 - 08:02 PM
It looked generally ok underneath...
I got the subframe out totally built up. I think it's a lot easier than taking it to bits in-situ. Especially with the help of a pair of jacks. The whole thing came out really nicely.
First inspection. Things look good, just a lot of cleaning to do.
Some surface rust above where the exhaust was...
Cleaning off the mud and underseal revealed more rust...
Unusually for a mini this rust is nothing to worry about. It is all surface rust only. Today I was using a stripping disc to remove it.
I'll post more pics when I'm a bit further with it. Holding a heavy drill above your body really aches your arms loads. I want to get a stripping disc for the angle griner, should speed things up a bit.
Let me know your thoughts so far everyone! I'll be taking this one along to MITP for definate and hopefully quite a few other events. I'm not gonna be around to do L2B this year tho.
#8
Posted 04 May 2008 - 09:55 PM
I decided to give myself a week off from projects/cars this week. So it's only today that I've continued with the open top min.
Anyway, with the underside de-rusted as much as poss, I sprayed rust eater over the whole lot just to neutralise any remaining pitting.
With that done, the underside had a good coating of U-Pol etch, then a good couple of coats of Azue Blue.
With that done, it's time to turn my attention to the subframe.
Radis arms off...
Subframe ready for a de-gunk and paint tomorrow.
#9
Posted 24 May 2008 - 06:46 AM
After spending absolutely ages scraping off underseal and getting the subframe as clean and possible it was ready to be smartened up a bit.
While the primer was drying on the subframe I painted the radius arms in black hammerite. Took a couple of coats.
The the subframe and all the other little bits (to the right) were sprayed in hammerite. It actually proved quite a tricky job trying to spray in all the little corners etc. Not helped by absolutely blazing heat that day. Ended up getting a bit sunburnt!
It was then left a few days to harden properly and then mounted with new bushes and nuts and bolts (courtesy of mini spares subframe mounting kit). Looking more like it I think!
Since then it has been a matter of bolting eveything else on. After the radius arms were mounted I decided to take a look inside the rear drums. Turns out that the cylinders were totally seized so they were replaced both sides with new shoes. I should have really done this while the arms were off the car but I put the job off as I've not services drums before.
Anway, pictured below is the subframe pictured with 100% services drums, new rubber spring, hi-lo's, new KYB dampers, braided Goodrich hoses and a new knuckle.
The fuel tank is now in, lines connected. All brake lines connected, bleed nipples open and ready for bleeding. I'm going to get the exhaust on today.
Yesterday while I was fitting the last few bits to the rear (mentioned above) dad was servicing the front brakes. We found they were in terrible condition! The cylinders had been leaking really badly and the drums were full of brake fluid and convered in dirt!
Before picture..
So once again, new cylinders and shoes all round with a good clean-up in-between. I don't have an after picture because dad put the drum back on before I could take a look at things. Sometimes I'm a bit warey of the standard of dads work sometimes, but hopefully he's done this properly.
Anyway, if all goes well I'll have it on it's wheel and ready for an MOT by the end of today.
I had originally wanted to paint sills and paint boot floor. But I'm really wanting to get moving on my Mk1 Cooper and also the good weather appears to be here and it's a shame to have our summer mini sitting inside at such a time!
#10
Posted 31 May 2008 - 09:25 PM
First thing this morning before the cleaning began:
After a good day's work it's now looking like this, ready for summer!
Let me know what you think!
Edited by edi57, 01 June 2008 - 05:58 PM.
#11
Posted 03 June 2008 - 05:38 PM
The only comment was that one of the tyres is getting a little low on tread...nothing else could be faulted!
#12
Posted 05 August 2008 - 09:01 PM
A couple of weeks ago I was just about to adjust the front brakes when I saw this....
Split rubber! Not what you want...especially when we're having a rare heatwave!
Anyway, dismantle lower suspension, hub off, split driveshaft from gearbox, replace split CV boot, then put everything back together.
That side went fine and I had replaced the pot joint oil seal at the same time. This mini has lots of little oil leaks so that was one fixed.
It also gave me a chance to replace lower arm bushes, tie rod bushes and repaint those tie rods/lower arms. Great stuff!
I thought that as that side was so easy I may as well replace the boots on the other side and replace the oil seal (which very much needed doing!). So, I placed another order with MiniSpares....I was waiting quite a few days only to find out that there was a problem with payment...and dad hadn't checked his emails. Meanwhile the mini has been off the road and we've been missing out on rare hot sunny days!
Anyway, parts finally arrived today. Got a proper pot joint splitter as for some reason I was struggling to remove this side with big screwdrivers.... and this is where I have got to! As per this topic, it's proving to be a real pain! Just not wanting to budge!
While I've been waiting around for the parts I have however kept occupied. I have...
- Flushed cooling system (in an attempt to try and resolve the cooling problem)
- Fitted new thermostat
- Bled the front brakes
- Adjusted the tappet clearances
- Greased grease nipples
- and painted the rocker cover!
I had de-rusted the rocker cover, and resprayed it a medium gloss black, just as it would have been originally.
Applied a Leyland Special Tuning sticker that I got from MiniSpares! Very in keeping with the era of the mini and I think it's quite funny considering that this is a bog standard 998 Auto!
...Now showing up the rest of the engine bay!
The plan for next year is to drop the engine to give the bay/engine a good old scrub and paint. Very much needed.
#13
Posted 07 May 2009 - 09:29 PM
We got the Mini taxed last weekend and I set about trying to get a few jobs done on the Mini ready for what will hopefully be a good summer.
Last year I managed to replace the pot joint seal on the drivers side, but the passenger side pot joint really did not want to budge. I had wanted to get the car up on some ramps so that I could take a good swing at the pot joint splitter. My good friend Pete has access to some ramps, so that's where I went last Thursday.
It was a bit scary getting the Mini onto the ramps... they're designed for bigger cars than the Mini, therefore the Mini was almost too narrow for them! With the Mini in the air I got the oil drained and started to have a go at splitting the joint. In the end I had a sledge hammer hitting the splitter tool and the joint still would not split. Instead I was left with a bent splitter. I've now come to the conclusion that the circlip must be stuck in a really bad way, therefore I'm not going to be able to cure that leak unless the engine comes out.
I cured the two other leaks though. 1 - Leaky oil pressure sensor, 2 - Leaky oil filter canister.
More annoyances from last year was that the car wouldn't idle correctly in cooler temperatures (e.g. summer evenings... below about 12c).. it would stall... and as it's an automatic, that made if very difficult to drive around town. Also, the car would overheat in town traffic.
So, after the oil change etc was done we checked the timing, which appeared to be spot on and adjusted the points gap (wasn't big enough). We also used a Gunsons ColourTune to take a look at the mixture. We found that it had been running way too rich. Also, it had looked like the HT leads had never been replaced, so a new set was thrown on.
With those bits and pieces done the car is now an absolute dream to drive. It idles perfectly at junctions whether or not the outside air temperature cold. Temperature gauge is precisely on the Normal mark all the time and it even feels a little more powerful.
The drivers side window hasn't been right for years. You would wind the handle down... and the glass would stay where it was until you pushed it down... but you could wind it up. Yesterday I took the door to bits to find that the runners were just laying in the bottom of the door. No wonder! That's also now fixed.
With Dad taking this mini on the BH2N trip this year I'm certainly feeling that this Mini is really coming together, just at the right time.
We've also been discovering the practicality of this Mini. I managed to give Pete a lift home with his bike on the top. I don't know of many convertibles that can carry a bike with just the spare hand of a passenger!
#14
Posted 07 May 2009 - 09:47 PM
1 user(s) are reading this topic
0 members, 1 guests, 0 anonymous users