Going For The Magic Number...
#1
Posted 13 April 2008 - 06:11 PM
It might look a bit like a full rebuild and if any of the mods deem it nessasary then I guess it might be moved to a different section....however.... like I said the objective is 100BHP out of a standard Rover MEMS. Sprocket reached 100BHP at the hard cut and has told me that it was looking too lean for comfort so developing on from his initial work and taking it a bit further heres where we start....
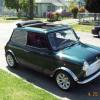
A Mini Cooper 1996 N plate 1275cc SPi... in fairly standard trim ...... we've all seen one eh?
DSCF0946.jpg 70.35K 74 downloads
DSCF0945.jpg 69.65K 62 downloads
DSCF0947.jpg 66.55K 45 downloads
DSCF0948.jpg 68.01K 44 downloads
DSCF0950.jpg 86.22K 83 downloads
You can see from the general state of Mini that it needs a new door skin, new wings and a new front panel... so a bit of body work to do then as well as the engine.... should keep me busy then....
A couple of hours later and we get to this state
DSCF0966.jpg 93.18K 135 downloads
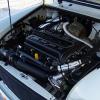
Basicly the engine is stripped... manifolds off, all engine loom out, steady disconected, ECU out, headlights disconected, Brake servo out, Spots and Fogs off, bumpers off, clutch disconnected,rad out, horn off, Head off, the only bits to do are disconect the rod change, pop the drive shafts and unhook the engine mounts... Should make a start on that tommorrow night after work.
I need the block stripped for its rebore by the weekend as step one on the way to the goal is 1380cc.... you cant beat CC's for HP generation.
.......... more tommorrow.....
DaveRob
#2
Posted 13 April 2008 - 10:39 PM
Just so you know, the engine i built with the Kent 274 scatter cam was dyno'd and gave 80.5bhp and 64lbft.
That is a 1293 Cooper SPi engine, 10:1 compression, 29/35mm valves, standard head, standard inlet manifold, standard throttle body, standard bottom end, 57i induction kit, standard Cooper ECU MNE 101070, standard injector, maniflow LCB, RC40 single box exhaust and the Kent 274sp cam. With that spec, other than the stage 1 kit, the only non standard parts are the cam and the bigger inlet valve. There is a lightened flywheel but its effects wont show on the dyno and the straight cut drops, again wont show on the flywheel figure, but it will on the at the wheel figure. Both these items were not necisary and would not affect the final figures.
http://s126.photobuc...nt=53400385.flv
The injector needs to be replaced with a bigger one as the fueling started to max out at the top end resulting in the fueling startingf to lean, which is not good!! Easy fix though
You can actualy see where the injector maxes out in this video clip as there is a couple of puffs of black smoke from the exhaust, after that it started to lean off
Now who said that tuning an injection engine is more difficult and more expensive than a carb engine?? What is different with this engine and tuining a carb engine?? Nothing!!
Looking forward to seeing this engine running Rob. Youve only got 11 weeks till British Mini Showdown
#3
Posted 14 April 2008 - 07:13 AM
Rob
#4
Posted 15 April 2008 - 10:56 AM
Need engine out by the weekend and stripped to crank. Rebore to 1380 next week using Minispares Mega pistons. update soon
Rob
#5
Posted 26 April 2008 - 04:44 PM
Engine out and stripped..... booked in for offset rebore to 1380cc using Mega pistons from MiniSpares
New parts ready for reassembly pics follow
New Camshaft... Kent 274SP...scatter pattern cam with a very wide touque profile across the rev range and shouldnt hassle my emmisions to much
DSCF0967.jpg 112.74K 51 downloads
Duplex alloy lightened verneir timing gear.....
DSCF0968.jpg 62.59K 46 downloads
ARP rod bolts..... no letting go with these
DSCF0969.jpg 64.38K 36 downloads
New shells and thrusts..
DSCF0970.jpg 72.91K 33 downloads
To go with.... Wedged bladed Tuffted crossdrilled lightened and fully balanced crank..
DSCF0974.jpg 103.99K 54 downloads
At one end of the crank we have...Fully lightened and dynamically balanced clutch...
DSCF0971.jpg 69.41K 32 downloads
With Orange Diaphram and AP racing bonded clutch
DSCF0972.jpg 66.11K 32 downloads
At the other end of the crank is the S damper setup with the machined pully for my relocated crank sensor
DSCF0973.jpg 70.42K 36 downloads
On top is going the new flowed and ported head... 36x31 valves with double springs, ported and matched to the manifold doweled for location...
DSCF0975.jpg 69.83K 68 downloads
DSCF0976.jpg 62.72K 54 downloads
DSCF0977.jpg 79.38K 47 downloads
And on top of that goes the 1.5 Rollers over the valve train
DSCF0978.jpg 91.47K 50 downloads
Other parts needed to go for 100BHP .... and essential to stop things going lean
A new injector with a higher capacity flowrate... this is the Rover 1.4K16SPi injector from the 16 valve metro
DSCF0979.jpg 83.16K 68 downloads
Their are mods to the throttle body to go along with this but more on that later...
and for the ECU......like I said its a standard Rover unit ..... just its from the Metro GTA also and is pin for pin compatible with the Mini SPi SINGLE plug loom.... but the Metro engine had fueling maps to cover its standard output of 106BHP......
DSCF0980.jpg 76.04K 53 downloads
The part number is
DSCF0981.jpg 36.75K 72 downloads
So... to make a list of stuff so far ready for assembly to achieve a min 100BHP we have
1380cc
11:1 compression ratio with decked block and 7cc Mega Pistons, head buretted to get CR right
Head is 36mm inlet 31mm exhaust, fully gas flowed
Inlet manifold ported to match the head and doweled to the head for positive location
rover 1.4K16SPi injector
1.5:1 rockers with valve springs matched to their use
Kent 274 Scatter Pattern camshaft timed in correctly using lightened vernier gears
Revised ECU...... however I do plan to test the standard ECU for performance when I get the car to the rolling road
Other work needing doing is
Rebore throttle body, details later
Lightened cam followers
Maniflow Big bore LCB
2" exhaust system
Center main strap with HT bolts
Maniflow Big bore LCB
2" exhaust system
If I can fit it in in time Ill be doing a dry deck system....
Updates soon ......... suggestions and comments more than welcome......
Rob
#6
Posted 27 April 2008 - 12:45 PM
Word of warning on the large bore LCB, if i havent already mentioned it. The center branch will foul the water pipe on the inlet manifold, and judginng by the other topic, it may fould the inlet itself.
The water pipe issue can be resolvd reasonably easily, but im now not sure about the clearance of the inlet manifold :S
This spec engine needs the large bore LCB but if it doest fit, its no good anyway
Something we could may be discuss
Maybe speak to maniflow direct and explain the situation, they may be able to form a center branch more like the injection one, but with larger tube, then all you need be concerned about is the water pipe on the manifold
#7
Posted 27 April 2008 - 01:14 PM
However I have had to reshape the centre branch quite a bit - not acceptable if you're going for max power - and you can't file enough off the manifold without risking breaking through.
Cheers
Steve
#8
Posted 27 April 2008 - 01:25 PM
http://www.specialis...oduct_info-null
and also noted this comment on the home page
"We specialise in low volume bespoke components "
so if Maniflow cant help maybe SC can..... any thoughts???
Rob
#9
Posted 27 April 2008 - 06:08 PM
I also saw the post re the fouling manifold...... I had thought of this...
http://www.specialis...oduct_info-null
and also noted this comment on the home page
"We specialise in low volume bespoke components "
so if Maniflow cant help maybe SC can..... any thoughts???
Rob
You may well find that manifold is made by maniflow anyway, my 16v one was anyway.
Maniflow should be able to help, its not as if the large bore LCB is a cheap item to start with, you may be able to persuade them to shape the center branch much like the injection one but in the larger tube at little or no extra cost. Just explain to them that the engine needs it and everything other than their injection LCB wont fit. like i said, it only neeeds to miss the inlet manifold casting, the coolant pipe can be got round in other ways.
Its a bit of an expensive item to buy and then find that there is NO way its goinng to fit no matter how much perswasion you give it, andwas the reason i brought the subject up, i had never thought that it might hit the inlet casting itself, but was aware of the coolant pipe.
Speak to maniflow, thats th best and easiest option
#10
Posted 27 April 2008 - 11:33 PM
#11
Posted 28 April 2008 - 05:59 AM
#12
Posted 11 November 2008 - 06:37 PM
#13
Posted 12 November 2008 - 09:13 AM
Gearbox stripped and rebuilt from the ground up..... new bearings, shims, spacers, center pick up, X pin diff, all lock tabs changed and all fixings drilled to take bigger metric box to block fixings. Block completly stripped to the cast iron then offset bored to 1380 and honed. All oil ways and waterways for block to head transfer tapped and plugged with brass taper plugs for complete dry deck. Oil gallery plugs tapped for brass taper plugs. gearbox to block fixings tapped in metric. Main center cap machined flat for steel strap. Pistons assembled to end over end balanced rods and dry fit to block after finally working out that Id mixed up a couple of rod caps.... (thanks for that one Sprocket ).... Block decked to give 11:1 CR and drilled for 11 stud
Every nut bolt and component of the subframe and running gear has been stripped to its component parts and dipped then plated for corrosion protection. If I can get some paint on the engine bay then I can assemble the running gear back to the shell.... but I need a good weekend without rain so I can get the Mini inside to spray the engine bay and under arches which are currently preped and primed ready
Next stage is
Finish the shell.........grrrrrrr
As the gearbox is finished and sitting in its black bin bag to keep it clean Ill be starting on assembling the block now. I still have some body work attend to but the main areas are done just a couple of sills to fit and a patch in the drivers floor to do.... if it stops raining here Ill get on with that but as the garage is full of Mini engine parts, compressors, welders, gas bottles etc lol I can only work outside on the body shell at the moment.
Ill post some pics up at the weekend if I can....
This has turned into a marathon run and far more work than I though but hey.... its a hobby lol...... especially as Ive done all the machining work myself with the exception of the purchased head....but even that has been tapped and faced for the dry deck by me so effectivly all I bought in the end was the port grinding and the bigger valves. As always Kudos to Sprocket for his advice as I go.
by the way..........welcome back Sprocket lol
Rob
#14
Posted 14 November 2008 - 08:42 PM
What's a dry deck?
Cheers
Steve
#15
Posted 14 November 2008 - 09:07 PM
2 user(s) are reading this topic
0 members, 2 guests, 0 anonymous users