Headlining Fitting Instructions
#16

Posted 02 March 2008 - 03:01 PM
#17

Posted 02 March 2008 - 03:08 PM
#18

Posted 02 March 2008 - 03:15 PM
*wonders if Chris is reading...*
#19

Posted 02 March 2008 - 11:24 PM
oh right is that so? have to remember that, all my seals and headlining are getting replaced in the near future...
*wonders if Chris is reading...*
oh dear, here we go again
#20

Posted 06 March 2008 - 09:36 PM
#21

Posted 27 March 2008 - 12:32 PM
Initial thoughts were to fit the headlining with all the bars in place as normal and once dry/taught cut the bars/headlining which cover the webasto hole and glue the headlining around the webasto hole using the same method as used for the windscreen/rear quarters etc.
Can anyone elaborate?
#22

Posted 28 March 2008 - 05:24 PM
My clubby has a webatso roof fitted and for this for starters you will need to visit your local sunroof specialist and get the rubber trim which will fit on the inside of the roof opening (unless you already have it)Anyone fitted a headlining on a car with a webasto roof? I've got to do mine next week and I'm a little unsure on how to tackle fixing the headlining when there's a damn great hole in the roof......?
Initial thoughts were to fit the headlining with all the bars in place as normal and once dry/taught cut the bars/headlining which cover the webasto hole and glue the headlining around the webasto hole using the same method as used for the windscreen/rear quarters etc.
Can anyone elaborate?
If you look at the inside of the car of the frame for the webatso roof you will see a slight recess just below the roof.What i did i lined my bars up across the roof and just marked about 1/2cm in from the outter edge of where the recess starts and then using a pair of tin spins cut these ends of the bars off and then use a pair of pliers to flatten the ends out so they will fit inside the gap.
Place these ends of the bars into the lining as you would do normally and feel in the sleeves where the bar finishes and slice open the sleeve about 1 cm before the end. Fit the headlining into the car as stated in the guide above and then slide the flat end of the bar into the recess.
Fit the rest of the headlining as normal (make sure your roof is open/removed) and then with a helper, make a X in the headling in the roof opening about 2 inch in from each of the corners and then apply glue onto the lip.Then get your helper to pull the lining up and out of the roof and pull back against itself nice and tight, then with yourself inside the car, knock on the rubber trim and then cut the excess material off afterwards
#23

Posted 07 April 2008 - 11:38 AM
Oh - I think my roof is a Britax rather than a webasto but I'm sure the same applies. I don't remember removing a rubber seal when I took the roof off, it was masticed on the outside. This is probably down to it being bodged when fitted in the first place tho'.
Edited by sherly, 07 April 2008 - 11:41 AM.
#24

Posted 10 April 2008 - 06:32 AM
#25

Posted 19 April 2008 - 05:15 AM
not in correct order
Yellow
yellow
orange
brown
red
Nothing.
do you know wa=hat order they go in?
thanks
#26

Posted 19 April 2008 - 09:56 PM
The 2 yellow bars will be the white ones in my how-to and if its correct the red bar will be the first bar at the front, as for the rest i cant really say, might be best speaking to whoever you bought the kit off and see what they say regarding the correct order.
#27

Posted 12 May 2008 - 10:08 PM
So may well end up updating this thread later on this year with pictures for more ease of reading and to let you all see how its done
#28

Posted 22 August 2008 - 09:29 PM
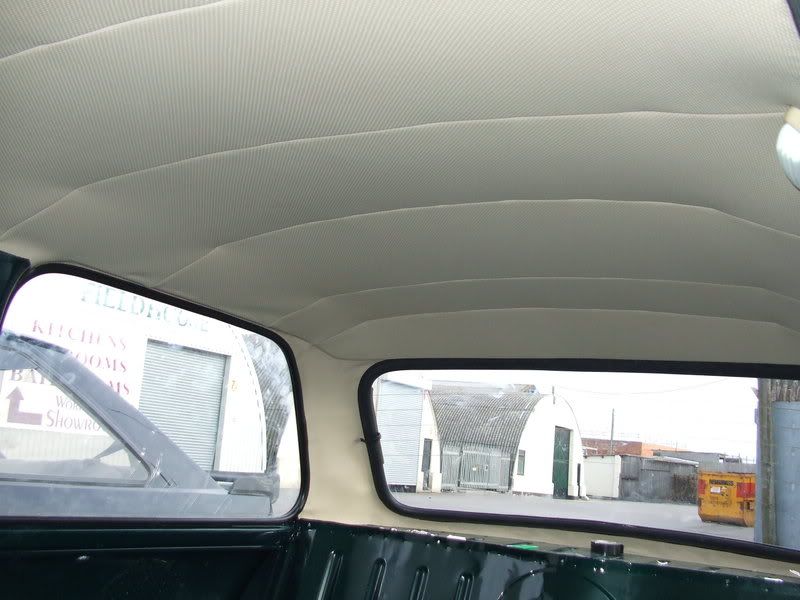
Fitted mine yesterday, forgot the instructions on here, so made it up as I went along! I used "timebond" evo stick glue stuff, worked great, put it on either side and leave for 5 mins, then attach. Even when pulled tight it didn't come undone, I had a load of bulldog clips, but they weren't really needed.
Peter, where did you get your headlining from as it looks to be perforated...
is it the newton commercial one for an innocenti mini?
would that be ok to use in my 92 Cooper?
cheers
#29

Posted 22 August 2008 - 11:54 PM
#30

Posted 26 August 2008 - 02:42 PM
also i did the whole thing on my own and i think a 2nd person would have been very helpful! anyway heres some pics.


1 user(s) are reading this topic
0 members, 1 guests, 0 anonymous users


