Someone told me a while ago on here that it's easy to make a cone compressor tool, using a M14 threaded bolt or something?
Could anyone explain how to make one?
Cheers


Making a cone compressor
Started by
Pavel
, Mar 13 2005 10:58 PM
27 replies to this topic
#2

998dave
-

- TMF+ Member
-

- 4,566 posts
998cc's Of Dave Goodness
- Name: Dave
- Location: Essex
Posted 13 March 2005 - 11:47 PM
oooh, sounds interesting, I want to know too!
#3
Purple Tom
-

- TMF+ Member
-
- 4,921 posts
Up Into Fourth
- Location: Derbyshire
- Local Club: TMF
Posted 14 March 2005 - 12:58 AM
i'll get my home made one out in the morning and have a look for you dude
#4
dklawson
-

- TMF+ Member
-
- 10,923 posts
Moved Into The Garage
- Name: Doug
- Location: Durham, NC - USA
- Local Club: none
Posted 14 March 2005 - 06:36 PM
You need a length of pipe, some heavy washers, a length of M14 threaded rod and at least 3 nuts to fit the rod.
I welded mine together for safety but you can risk not doing this... but be careful. Weld a large, thick fender washer on each end of an 8-10" length of pipe about 1" OD. The fender washers need to be thick and at least 2" in diameter. This will give you what looks like a pipe with a flange on each end. Cut a piece of threaded rod about 16" long. Put two nuts on one of the cut ends and JAM them together tightly using two wrenches. Run the third (free) nut up the shaft, stopping about 2" from the jam nuts. Oil the threaded rod and follow the free nut with a thrust washer. Insert all of this through the pipe.
In the engine compartment, remove any of the cover plates or electrical bits blocking your access to the tower bolts and the rubber cone access hole. Place the pipe assembly down on the bulkhead, threading the M14 rod into the cone. Make sure it's well engaged... thread it at least 10 turns into the cone. Oil the threaded rod (if you didn't do it earlier) and run the free nut down against the thrust washer which should be resting on top of the pipe assembly. Hold the jam nuts with one wrench while tightening the free running nut down on the thrust washer. That's it.
Go slow, work carefully, wear safety glasses. NEVER put your face above a cone compressor (store bought or homemade). You can jack up the front wheel for the cone you're working on. JACK UP THE WHEEL, not the corner of the car. You want the lower suspension arm compressing the cone to minimize the work the cone compressor is doing.
#5
mighty_mini
-

- Members
-
- 2,499 posts
Sambo Spoon
Posted 14 March 2005 - 11:23 PM
i did this too. better than paying £30  but i would say dont use it too much if the rod is cheap. as i made two, and my first one started to crack im sure of it.
but i would say dont use it too much if the rod is cheap. as i made two, and my first one started to crack im sure of it.
#6
Guess-Works.com
-

- Traders
-
- 19,838 posts
Gearbox Guru
- Local Club: Rugby Classic Mini Owners Club
Posted 15 March 2005 - 08:51 AM
Great until you have an imperial threaded cone :nugget:
#7
Pickup76
-
- Traders
-
- 1,191 posts
Ring Runner 2005
- Location: Peterborough
Posted 15 March 2005 - 09:01 AM
yeh done that, stupid minis! both of mine are on different systemsGreat until you have an imperial threaded cone :nugget:
really annoying.
#8
roberts
-

- Traders
-
- 3,295 posts
Optimise Automotive
- Location: Newcastle-under-Lyme, Staffordshire
Posted 15 March 2005 - 10:27 AM
i wouldnt risk it!!
they because it it fails, yourll scratch ya wing!
they build up a hell of a tension!
they because it it fails, yourll scratch ya wing!
they build up a hell of a tension!
#9
Jammy
-

- Members
-
- 25,397 posts
Moved Into The Garage
Posted 15 March 2005 - 11:31 AM
Yea, at least If you got one from MiniSpares and it fails you have a chance of getting them pay for any damage caused, mayb!?
#10
Guess-Works.com
-
- Traders
-
- 19,838 posts
Gearbox Guru
- Local Club: Rugby Classic Mini Owners Club
Posted 15 March 2005 - 12:34 PM
I have a Sykes & Pickavant one ( had it years ) which has served me well.

Actually same goes for the Flywheel puller, I know I've had that for 15+ years.

Actually same goes for the Flywheel puller, I know I've had that for 15+ years.
#11
dklawson
-
- TMF+ Member
-
- 10,923 posts
Moved Into The Garage
- Name: Doug
- Location: Durham, NC - USA
- Local Club: none
Posted 15 March 2005 - 01:29 PM
Regarding the homemade tools failing....
First: Notice I mentioned jacking up the wheel/suspension arm for the cone you want to remove. This reduces the work for either a homemade or bought compressor.
Second: Threaded rod is available in different grades. Buy good quality rod. For DIN standard stuff, buy rod rated at least grade 8.8... 10.9 if you can find it. For the imperial stuff, buy grade B-7 if you can find it, it's tougher than grade 2.
Third: Don't expect wherever you bought a professional tool to do anything more than direct you to the place who made it. If you buy a tool from MiniSpares and it causes you damage, they'll send you to the manufacturer.
Well executed homemade tools don't have to be a compromise or unsafe if you DON'T cut corners.
by the way, if you have a Mini old enough to still have imperial (1/2-20) threads in the cones... expect the threads to be full of rust and crud making a cone compressor a mute point.
#12
newenglandmini
-

- Members
-
- 646 posts
Super Mini Mad
- Location: Connecticut
Posted 12 January 2014 - 10:35 PM
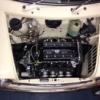
Doug, I have determined that my rear cones have 1/2" AF threads. I presume that they are original. I've inspected the rear cones and they have clean threads. I assume the front cones are 1/2" AF as well. Since the Minispares economy tool is compatible only with metric cones, I plan to make a copy of your tool. Your description is clear, but I would appreciate your posting a picture for reference.
 DSCN4821.JPG 53.36K
44 downloads
DSCN4821.JPG 53.36K
44 downloads
Edited by newenglandmini, 12 January 2014 - 10:49 PM.
#13
Cooperman
-

- TMF+ Member
-
- 23,276 posts
Uncle Cooperman, Voted Mr TMF 2011
- Location: Cambs.
- Local Club: MCR, HAMOC, Chelmsford M.C.
Posted 12 January 2014 - 10:42 PM
I bought a garage full of old Mini bits and there was an original UNF BMC/Churchill Tower Tool in one of the boxes. Result.
#14
dklawson
-
- TMF+ Member
-
- 10,923 posts
Moved Into The Garage
- Name: Doug
- Location: Durham, NC - USA
- Local Club: none
Posted 13 January 2014 - 12:36 AM
The early cone thread will be 1/2 UNF (1/2-20), "AF" is a term typically applied to the head of a bolt or nut (Across Flats).
I'll look for my cone compressor tomorrow evening and try and post a picture for you. In the meantime, you may want to review the old thread linked below and the pictures of the homemade spring compressor shown in the July 17th post there.
http://www.theminifo...crunchie/page-2
#15
newenglandmini
-
- Members
-
- 646 posts
Super Mini Mad
- Location: Connecticut
Posted 13 January 2014 - 01:33 PM
Thx Doug. The link is sufficient...same design as yours. One additional question. I'm removing my front subframe intact (with powertrain) and I'm going to disassemble the front suspension to replace all of the bushings and joints. Will I still need the cone tool to replace the cones?


1 user(s) are reading this topic
0 members, 1 guests, 0 anonymous users


