'72 Clubman Resto
#16

Posted 08 January 2008 - 09:49 AM
good job mate !~
keep on going
#17

Posted 11 February 2008 - 12:47 AM
managed to get a few hours on the lil beasty, so the following was done:
Both subframes now removed. No hassle at all to speak of, one rounded off bolt but just hammered on a 12mm socket.
his new bed, comfy no?

He was then tucked in, I was amazed by how easy it was to throw about. I literally picked up the front end and pulled the subby out with my other hand. Then rolled him over :shock:

Once he started dozing off I tickled his belly with a tickling stick and a lump hammer. I'm not sure he liked it...

A bit more investigating and there has been some dodgy plate work donein the past. My guess is some very quick mot butchery. Its all getting chopped out, i want as few a plates as possible. The bottom will look as good as the top hopefully :-D

I've decided i'm not going to rush this one so if i miss a couple of shows who cares, the lil fella will feel the benefit. It was great to get stuck into a proper project of my own again, especially as i dont have to throw it all back together to drive it home at the end of the day.
I gotta buy some bits to get the welder back on track then its time to really get cracking
#18

Posted 11 February 2008 - 04:14 AM
#19

Posted 19 April 2008 - 09:38 PM
The rotten areas on the drivers side have all been cut out and are awaiting welding. I've spent more than i expected to overhauling the ol'mans mig welder (bought 10 years ago and used twice, 14k of wire scrap
Anyway, got all the panels ready. Also got other parts amassed, metro flanges, 8.4 hubs for the fiesta set up (need to check that starmags clear, anyone know?)
The plan tommorow is to have a play with the welder for an hour or so before commiting to any of the panels, then weld it up over the following week.
I'm moving 80 miles in the next two months so its do or die time! Its got to be at least welded and painted and have rebuilt running gear in that time
#20

Posted 25 July 2008 - 12:12 PM
100 miles later and the car is now nestling in my workshop, somewhere under a thick layer of sawdust
Hopefully being fifteen yards away rather than 15 miles will help things along.
Haven't done any welding yet as some helpful tea leaf decided to steal the big gas bottle
However have a friend sourcing me another. He's also a welder by trade, with that in mind i've been spending a lot of time looking into the vauxhall c16se conversion. I'm most definately going for it, i've already sold the 1275 a series that was destined for the clubby. It's just whether to take the easy route and go for the allspeed frame or make my own. It doesn't exactly look difficult, just may be time consuming. It would be nice however to lay claim to all the work.
Plans for the interior are also developing nicely
Edited by bert998, 25 July 2008 - 12:13 PM.
#21

Posted 26 July 2008 - 08:19 AM
You might be interested in a prototype of someone elses that we are borrowing shortly....
#22

Posted 09 October 2008 - 04:13 PM
#23

Posted 10 October 2008 - 03:06 PM
Hopfully i should be able to get it in without losing too much of the inner wings, going to make the slam panel removable too.
Chopped the front end off too, found more rot
Was very hard to walk away and return to work
Attached Files
#24

Posted 10 October 2008 - 07:54 PM
That should have soom zoom zoom!
#25

Posted 09 November 2008 - 03:50 PM
Firstly I needed something to lift the engine about with. I'm not really a fan of engine hoists, they take up a lot of room and I dont like the method of lowering the hoist. They are rather hit or miss when you only need to move the engine slightly.
So i picked up a set of chain blocks locally and went about reinforcing the metal runners on the garage roof.
I welded a solid bar (weightlifting bar) to the roof, but with the engine attached there was still a little flex in the roof, as this is a rented property the idea of the roof panels cracking didnt exactly float my boat! So i went to see my dad and nicked two acro props from him (the kind of thing you see on building sites). With those in place I had a very solid platform to work with.

Not the best pic but you get the idea. The most valuable part of this is that I can take it all down in about 2 mins and leave it in the garden, if I left a engine hoist out it would soon go walkies
As you can see ive lost the inner wings
It was something I didnt want to do but having cut out all the metal that was necessary to clear the engine/subby they looked silly to be honest, so i cut them off.
I cleaned the subby up as it was manky, covered in oil and *rubbish*. Luckily whenever the car was shultzed the subframe was doused to and it has preserved the frame very well.
I duly started chopping it up to make clearance for the engine. I wasnt too concerned about chopping the front off as i have another subframe to use later on in the build to line up the tie rod points etc on a jig I will make.
I then mount ed it in the car to try and keep everything straight, using the car itself as a jig of sorts.

I tacked a brace in between the towers then started trimming the frame, as I trimmed it back I welded any joins that weren't already welded in an attempt to improve the integrity of the frame.
You may notice my nice wooden bulkhead to subframe bushes
I seem to have lost one of the original metal ones, so I just made these up quickly out of ply to get the subby in, they are the same thickness as the originals so there shouldn't be a problem. Obviously I wont be using these on the road!

I spent a long time trying to find the best position for the engine,in the end i trimmed quite a chunk out of the frame where the hole is for the rack. Basically I just opened the hole up so the engine doesnt foul it.
i'm quite happy with its location now, the driveshafts aren't perfectly aligned with the hubs but theres not a lot in it. Hopefully it wont prove to be a problem?


I've got to look into the inlet manifold as theres is an issue with clearance with the bulkhead. I'd rather not chop it, i've seen a few aftermarket inlets that are more upswept, hopefully one of those will clear.
Edited by bert998, 09 November 2008 - 03:53 PM.
#26

Posted 25 November 2008 - 04:45 PM
#27

Posted 09 April 2009 - 10:11 PM
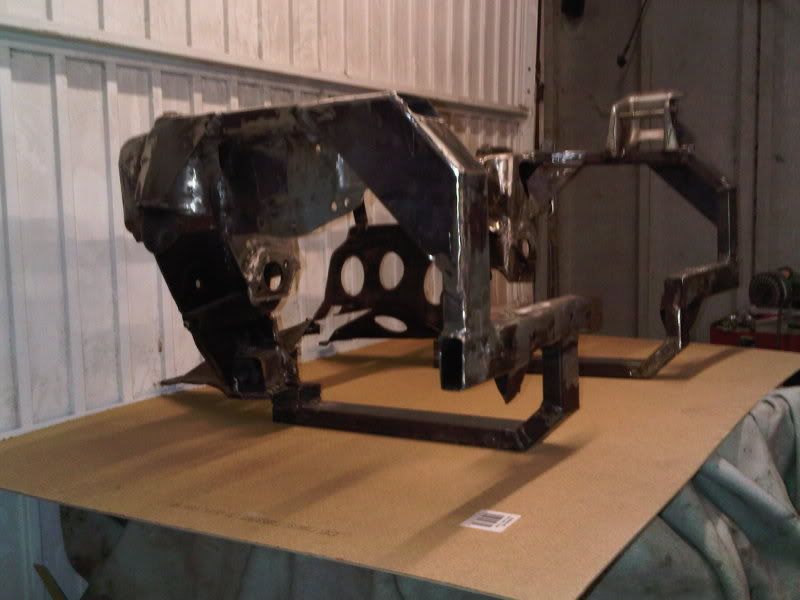
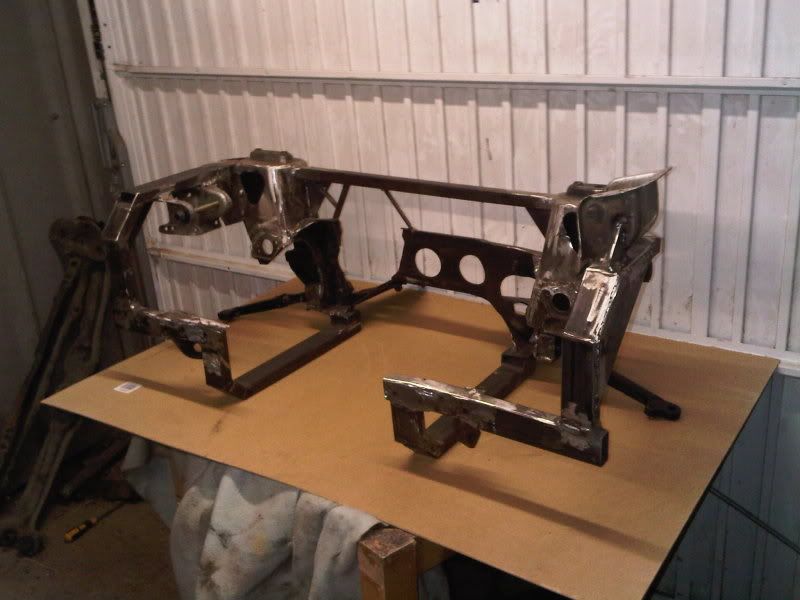
Ive got the subframe pretty much laid out now. Ive managed to reuse the main two stock honda mounts, i purposely made the guy in the scrapyard cut around these with the burning gear rather than through them. Works well i think, one less thing to work out if nothing else!


I plan to use the large gussets in the pic below to mount the brace bars too. I've been toying with the idea of making a plate to integrate the brace bars into the damper mounting point (as I have to source/fabricate damper mounts anyway). Is this a good/bad idea? Are the damper mounting bolts upto the job? At the end of the day most of the brace bars i've seen mount directly through the single skin of the inner wing, so they cant put that much stress on the are can they?

Also banged the lower arm mounts in, need to get some suitable bolts for these and drill the frame out.

Got a land rover mount in the post for the rear mount, half mocked up already, just waiting on that.
Feels good to actually get some time on it
Edited by bert998, 09 April 2009 - 10:13 PM.
#28

Posted 14 April 2009 - 09:22 PM
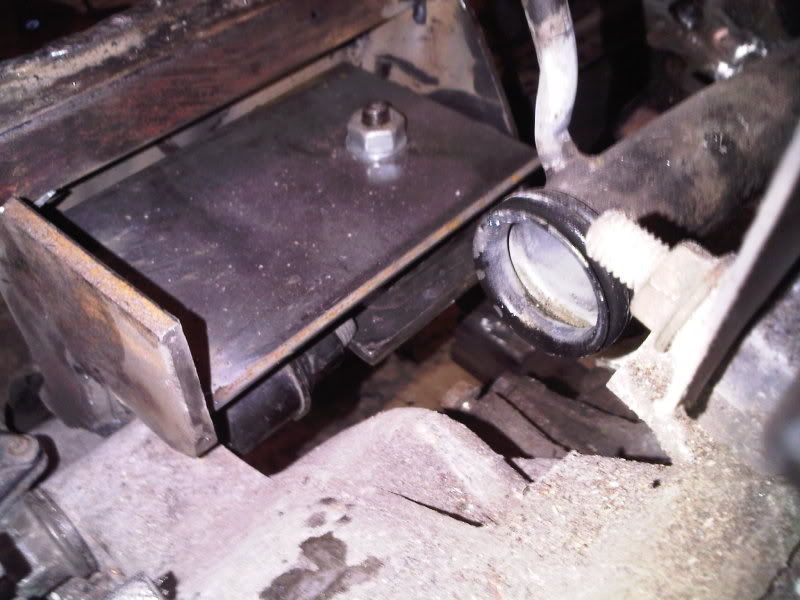
Got some thick plate as didnt want the mount flexing, its about 9mm.
Only problem was my mig welder wasnt man enough for the job, had the power on high and wasnt happy with the penetration. Ended having to dig my ol' mans 30 year old arc welder out. Did the job lovely, just not going to win any awards for it. Not that my efforts with the mig are much prettier
I didnt get very good pics but heres the jist of the evenings antics.
Started off trimming the stock honda mount so it cleared the subrame.
After checking all was good I beefed the plate up.

Then welded a large plate to the rear of the subby to run the mounting. This also stiffens the frame up too as a brucey bonus.
I've gone for a land rover mount as that seems to be what a fair few builds have gone with. You cant really see where I am now but here is the mount, half finished.


Next time im on it i'll be adding strengthening to minimise the risk of it all flexing under load.
The mounts a bit of a biggie and involves taking the stat of to fit it. That doesnt bother me though, i'd rather pop two bolts out than run a mount that i felt was going to be over stressed.
#29

Posted 01 July 2009 - 05:30 PM


conversion includes
modified twin bolt subframe
honda d15b2 engine and all ancillaries
honda loom
driveshafts for modifying
honda clocks/dials
honda stalks
honda radiator
also included in the sale is a vtec e gearbox which has longer gearing for better cruising ability.
#30

Posted 01 July 2009 - 08:02 PM
1 user(s) are reading this topic
0 members, 1 guests, 0 anonymous users


