'86 City Refurb
#31

Posted 03 October 2007 - 07:44 PM
#32

Posted 17 October 2007 - 03:26 PM
Got the roll cage in and bolted down, new seatbelts in, rear door cards, arch cover, back seat cover, carpet underlay, and carpets in on sunday.
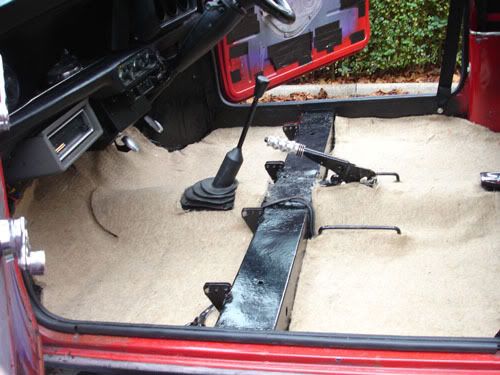
Then on monday night i fitted the seats, pedals, steering wheel, interior mirror, sun visors and door cards.
So now the end result is:
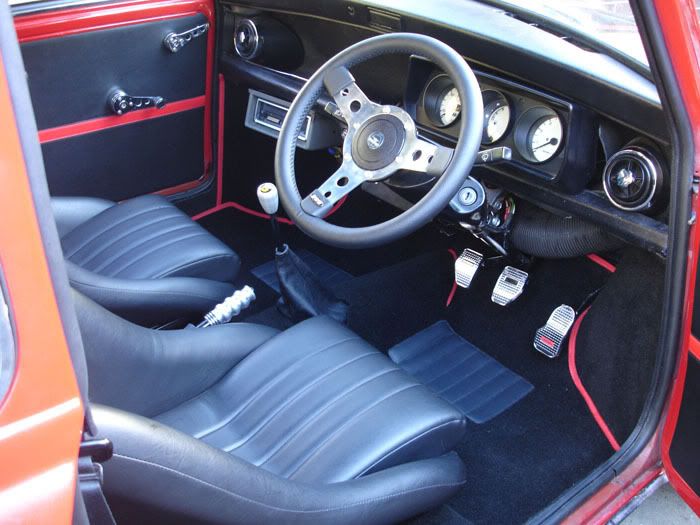
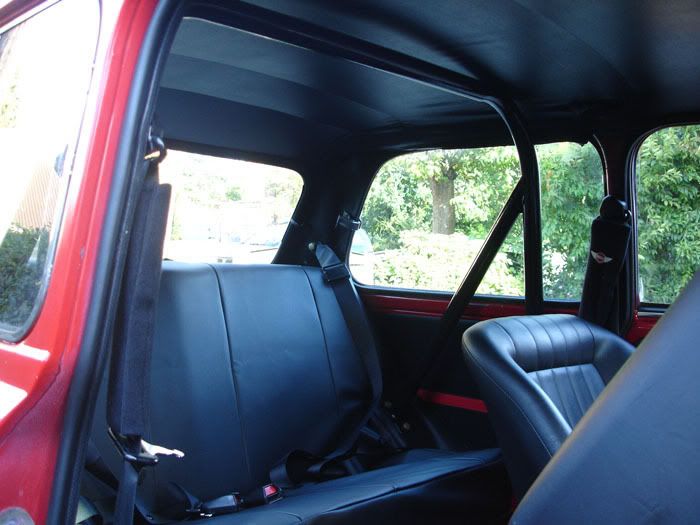
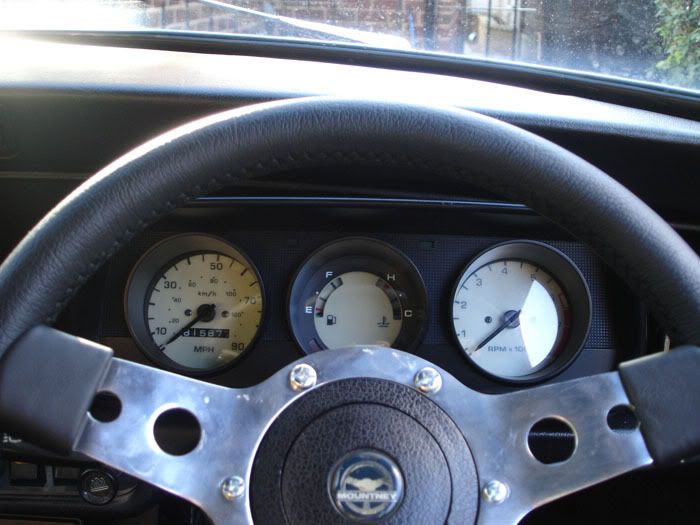
By the way i did paint the headlining and sun visors in emulsion and it worked a treat:
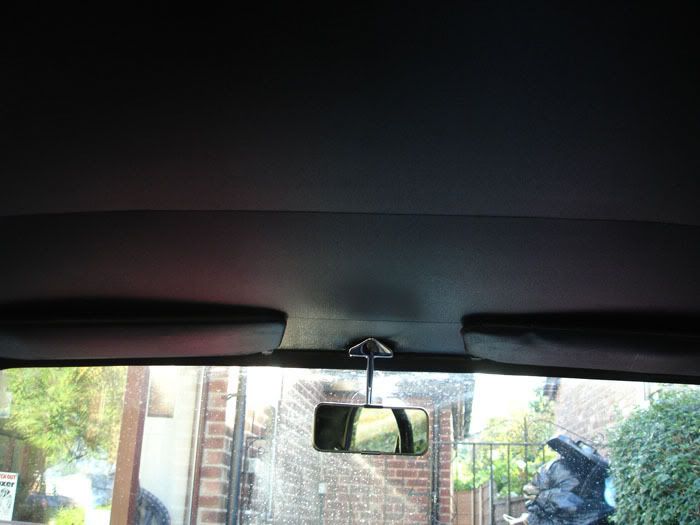
So there you have it, my interiors pretty much sorted. There still a few bits and bos that need doing but most of its done
#33

Posted 09 February 2008 - 10:02 PM
Ermmm where the start....
The engine. Basically i somehow sheared a rocker cover stud off inside the head as i was screwing it in. Then in the process of taking the rockers off and drilling and extracting the stud - I must of disturbed the head gasket - Which then blew when we took it out for a test drive after fitting a new stud. So decided that while the heads off i'll get round to doing some stuff i'v been putting off since i bought the car. So tings like take the rad out and flush that out, replace the bottom hose, top hose and waterpump bypass hose. Then once that done im going to drop the oil, change/clean the filters and fit the new driveshaft oil seals i bought ages ago.
As for the head, i might just clean up the standard head and refit that with new gaskets or if i can get hold of one i might be fitting a 12G295 head - Depending on my insurance.
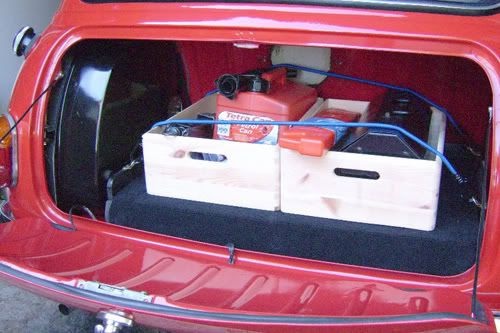
Then i've got some new ICE to fit - Starting with a boot kit, which i will be modifying to house my current denon amp, my new kenwood amp for my 6x9 subs - They'll be going under the back seats in a speaker board. I'm also planning on getting some rainbow 13cm components. The crossovers for these will also be mounted on the back piece of the boot board. The components will then be mounted in door speaker pockets. The base piece of the boot board kit will be modified to fit some form of secure boot tidy box/kit sort of thing and it'll also have some sort of flap/access planel so i can remove/refit my dis-car-nect battery cut out switch easily.
Something like this:
Then i've also got some 7" ring rally giant spotlamps to fit and a ring high level back brake light for the back window.
Then after all thats fitted i'm planning on sorting out the bodywork issue. Theres some pretty major microbeading going on on the bonnet and wings:

And some rust around the headlight:

Then in the future i'll be looking at fibreglass/CF bonnet and bootlid and a clifford alarm
So there we go - Thats what'll be happening over the next month or so.
#34

Posted 09 February 2008 - 10:30 PM
#35

Posted 10 February 2008 - 12:00 AM
#36

Posted 30 May 2008 - 09:29 PM
Luckily my mate had a loverly 300watt sexy chromed up amp from his written off golf that he sold me for £20
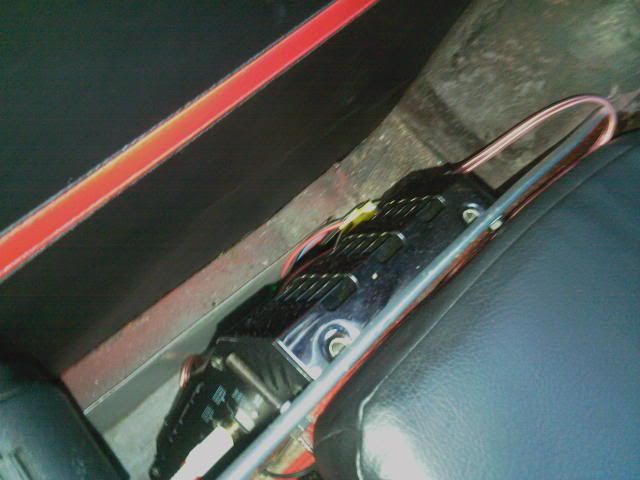
So now the back shelf looks abit tidier:
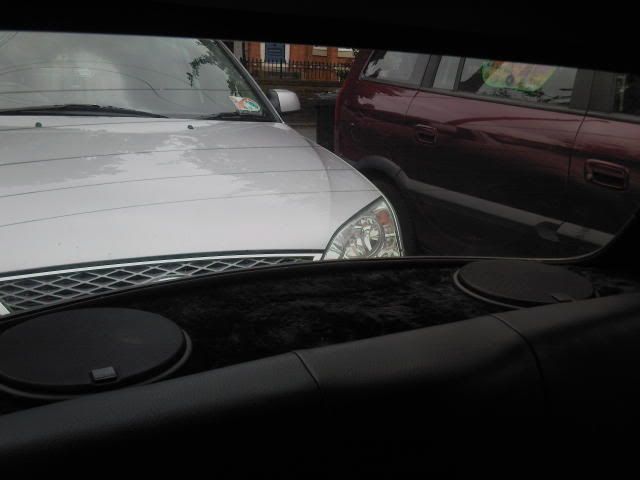
The new amp sounds great - Very loud and very bassy - People can't believe i've only got 2 speakers on the back shelf haha
I was looking into a 1275cc metro engine and very nearly bought one after i rang my insurance company and was pleased to find my insurance would only go up £80! But after having a chat with my dad he reckoned i should spend my money on bodywork - Get the car in mint condition and get it exactly how i want it. Then just enjoy driving for a couple of years while i build up my no claims bonus. Then in my third year of uni where i take a year out on fully paid work placement i'll hae the money to build up a nice big motor - at the moment i'm thinking 1380
The Microblistering on the paint has spread and now the front end and roof feel like sand paper and is a pretty much matt finish. So the car is booked in for a full respray in July. So in preparation....
Firstly - Rust. The passenger side sill is completly shot and i didn't fancy doing it myself so thats booked into the garage next thursday for a new one welding on - £80 which isn't too bad. Then the bonnet which is twisted and rusty - That'll be getting replaced. I was going to get a fibreglass one but wanted to keep the hinge mounts which i found worked out cheaper just to buy a brand new steel one. So i'll be ordering one of those soon.
I've also just received my new/used bootlid. Mine has a coulple of tiny bits of rust but since i'm a perfectionist i wanted a rust free one. A new non gen one was £50 but i found an absolute mint genuine one off a mini thirty which i got for £29 inc postage
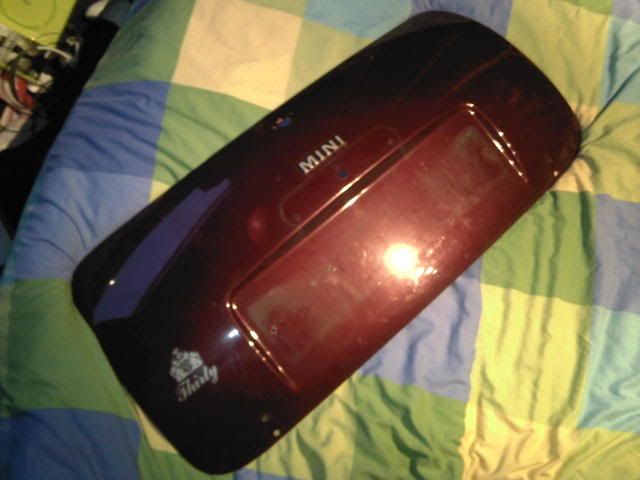
I'm also on the look out for some new doors - Again mine aren't really too bad (theres no rust on the outer skins) but since i can get mint condition ones pretty cheap i may aswel. So i'll have some mint condition doors to go on. I'll also be ordering some SPA F1 mirrors because i can't see i thing out of my bullet mirrors. Then i've ordered some bilt hamber labs rust treatment - Which sounds like legendary stuff. So i'll be using that to treat the tiny rust bubbles on the wing, along the rear panel under the back screen and under the parcel shelf inside the bootlid.
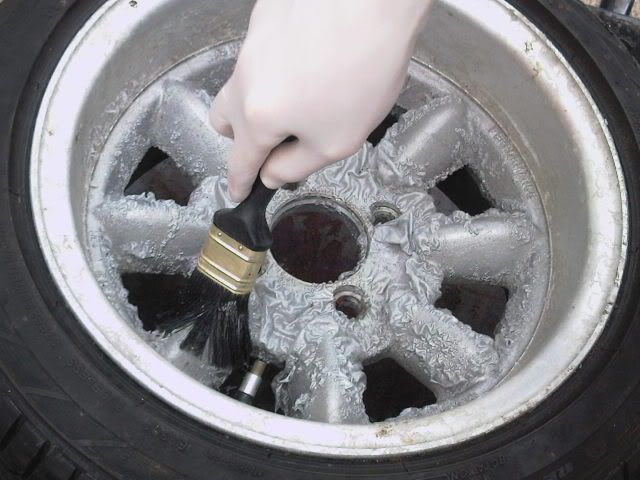
I've also just bought some great condition, uncurbed 13x7 deep dish rims which i picked up for £150 with 4 brand new tyres and one brand new spare tyre. However the lacquer is peeling on them so i'm refurbing them:
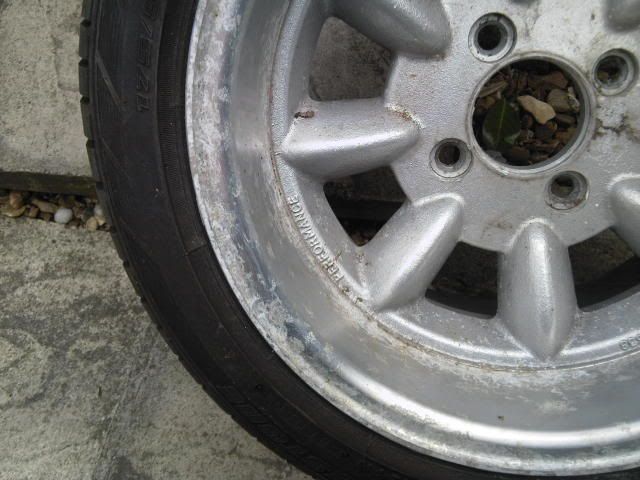
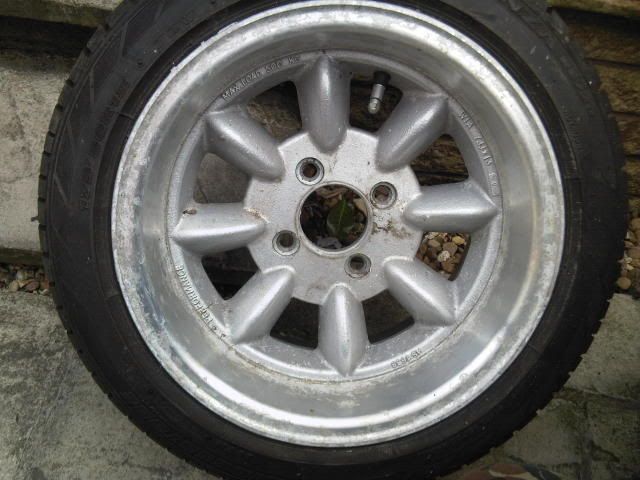
I've bought some etch primer, a load of sand paper, paint and some lacquer to redo the wheels. I'm spraying the centres Ford solar gold metallic and polishing up the rim with fine wet&dry and wirewool. So basically i'll have a brand new set of wheels that only cost me £180
So far i've just stripped the paint and lacquer off with nitromors - A horrible job to do. I found that it took ages to scrape the old paint off after nitromorsing it and in the end resorted to blasting the bubbling paint and lacquer off with the jet washer at ultra-close range - Which was much more effective
Heres a little trial fit of a wheel to get an idea of how wide they were:
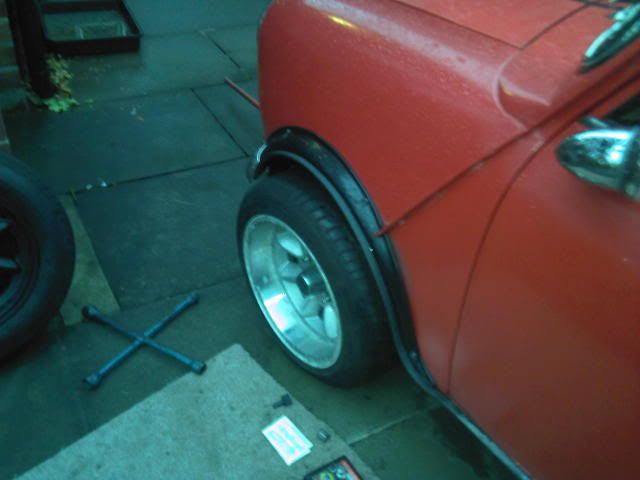
They stick out about another 2 inches from the the current arches - Which means they stick out 4 inches overall. So i've bought my personal fave mini arches - Miglias! Got them from ABS motorsport and with my TMF discount plus an extra 10% discount because it was the companies birthday i got them for £75. So basically postage and VAT free
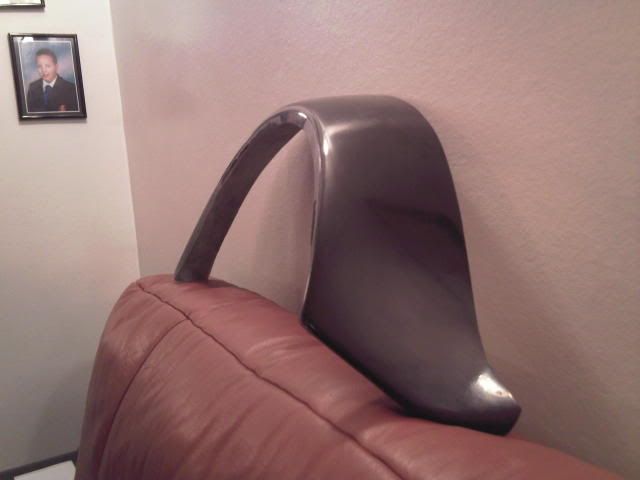
Bit unsure about the brackets though Unless i can find some good pictures of them - I may end up just spending £30 on the minispeed stainless bracket kit so i don't have to mess about making my own.
So on sunday and next week while my cars in for welding i'll be polishing up the outer rim of the wheels and masking them up for respraying.
Then once the cars back i'll pump the new sill full of waxoyl and paint the outside of it. Before taking my car off the road and into my nanas garage for lots of painting stripping, rust treating, sanding and filler work getting the car ready for its respray on the 5th July. The car will be sprayed a deep gloss black colour and should look loverly
I'm also looking into subtly tinting the rear windows
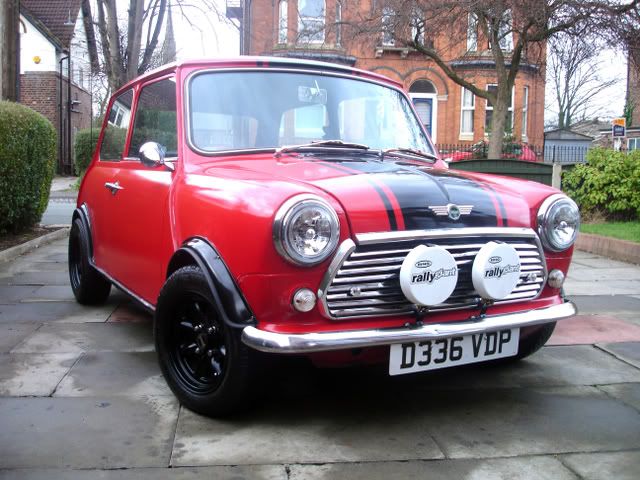
Oh and for those who haven't seen my new spotlights:
#37

Posted 31 May 2008 - 10:01 AM
#38

Posted 31 May 2008 - 03:35 PM
#39

Posted 31 May 2008 - 08:58 PM
#40

Posted 09 June 2008 - 09:49 PM
So i took the card back to the garage and explained he'd done this when welding and that a new pair of front cards would cost £40. He apologised and said he didn't realise he'd done it - Which to me means he wasn't paying much attension to fire precautions! Anyway he said the boss of the garage is the only one who will be able to give me any money back but hes conveniently gone away till the 21st. The MOT is due on the 27th so i'm hoping they'll MOT it for very little if not for free.
Hopefully though that won't make them too picky when doing the MOT...
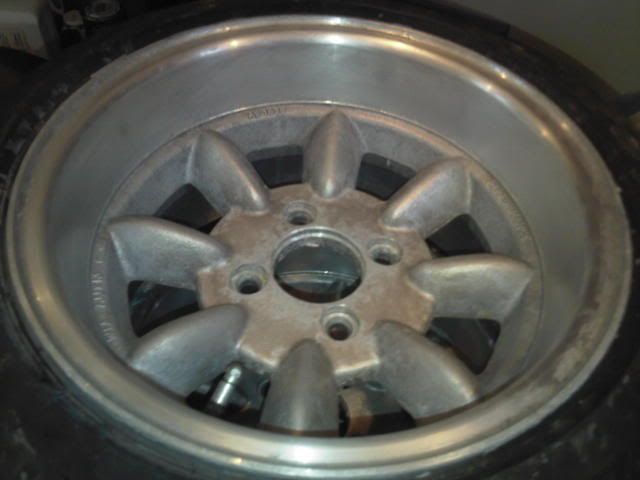
Anyway a quick update on the little bits i've done. I've now got about 40% of the sanding done on the outer rim of the wheels. I've used 400 wet and dry around the rim which has removed most of the grimey corrosion stains/marks but not completly dulled the shine. So i've got some more work to do finishing off with the 400 then i've got 600, 1200 and wire wool to use after that to polish up the dish. At the mo they look like so:
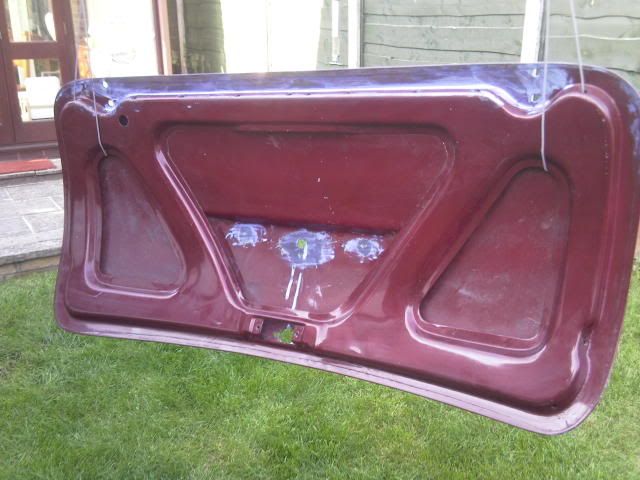
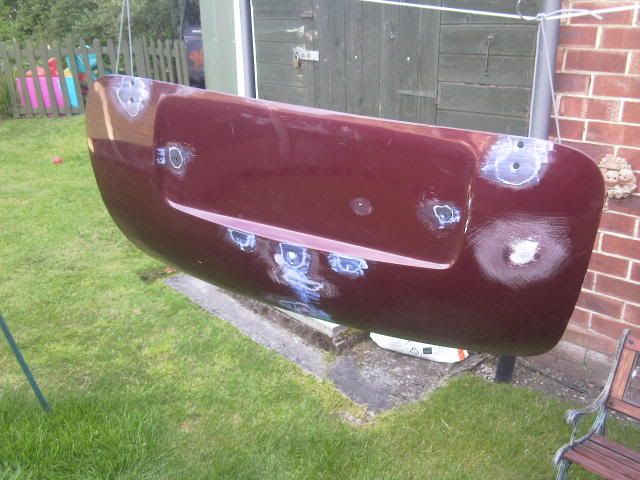
I've also made a start on the bootlid. There were very tiny rust bubbles on some parts of the boot so i've sanded them down to bare metal and used the new bilt hamber hydrate 80 rust converter/protector i've got on those parts. So far i'm pretty impressed with that stuff it looks just like kurust but is thicker - Its not watery which meant i could apply it with the boot hung up verticaly on the line. Its also dryed and left a nice thick, sandable layer of rust protection over the bare metal. So tommorow i'll give those areas a quick sand with fine wet&dry and give them a lick of primer and a quick coat of paint to protect the areas until the respray.
The inside of the boot i'll be respraying myself so i'll have to scrub all the waxoyl from inside the bootlid and get that all sanded etc.
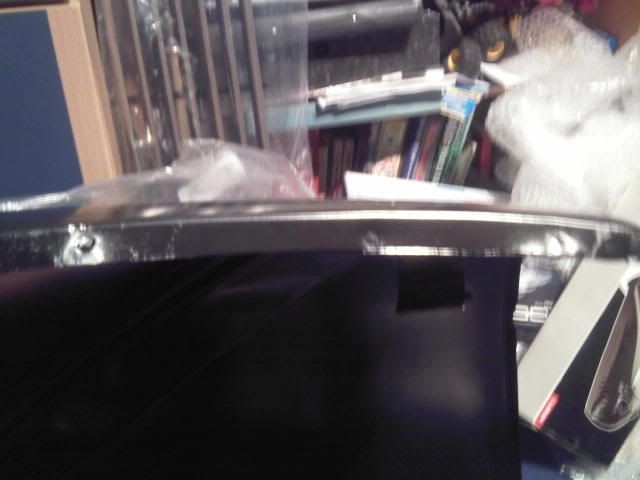
I also got my new bonnet today. Its a non genny item which to be honest shows in terms of the weld quality and shaping of the supports. However the outside is straight and smooth which is all that matters. Anyway i got straight to work on that and drilled the spotwelds out to remove the lip:
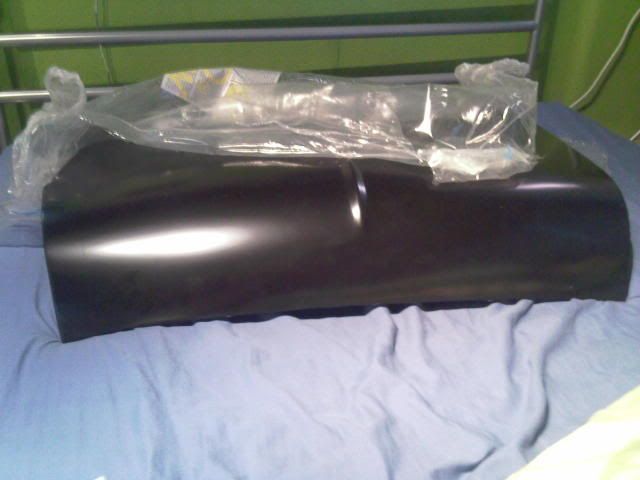
But doing that has damaged the front of the bonnet slightly and left holes from where i drilled through the welds so i'm not too sure about what to do with them since i can't weld...
#41

Posted 13 June 2008 - 11:37 AM
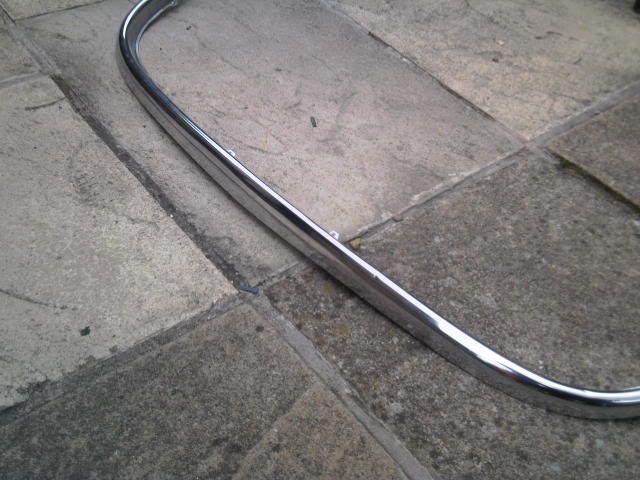
As you can see it looks great on the outside, the chrome is really good:
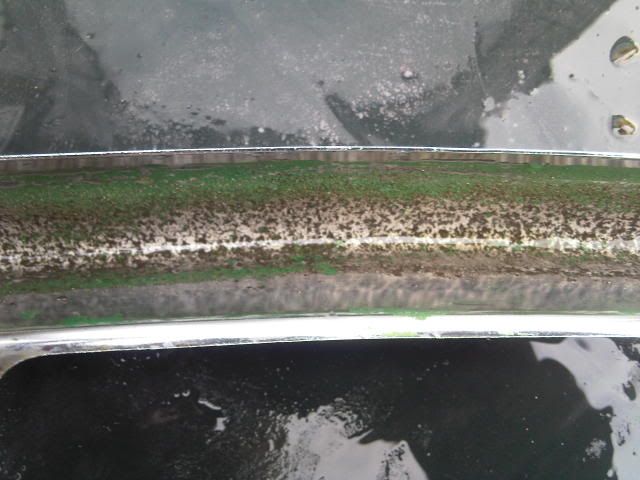
But when you look closer, particularly on the underside:
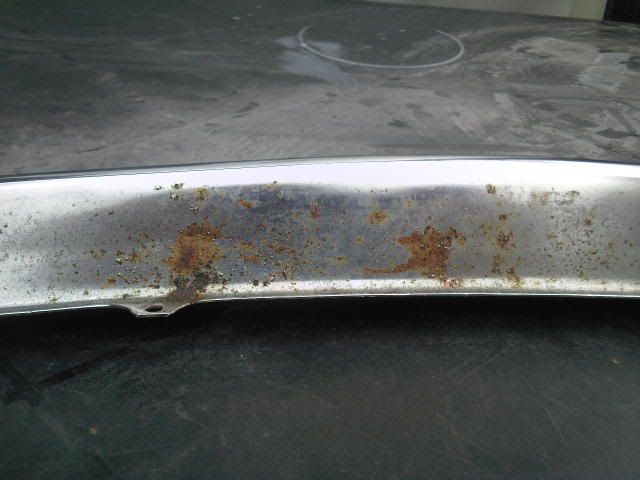
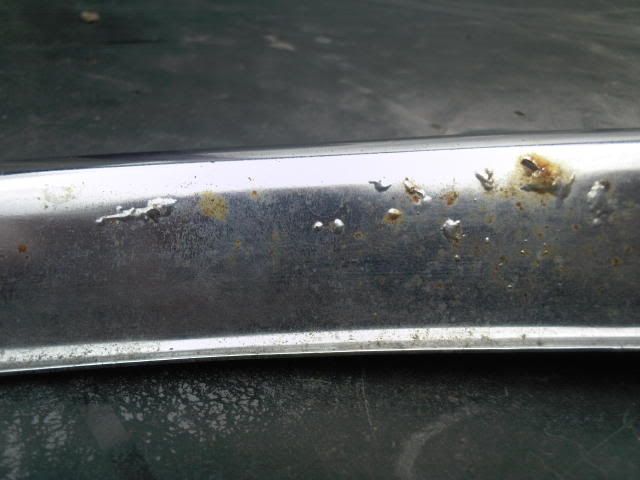
The rust is pretty bad. So i decided to just clean it up as best I could until i could afford a new one. After i scraped all the inside with a wire brush and screwdriver it looked like this:
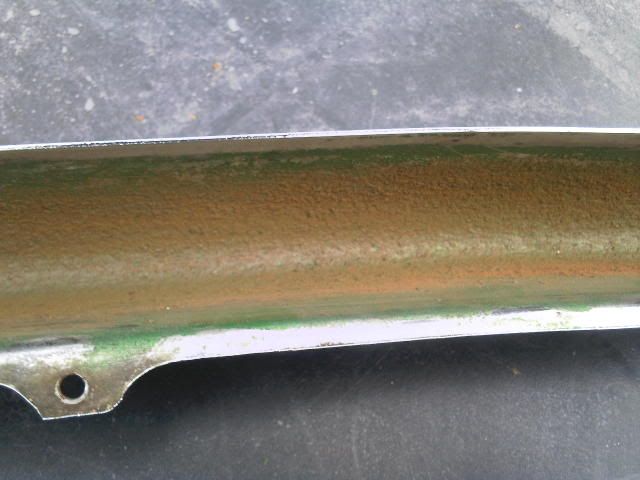
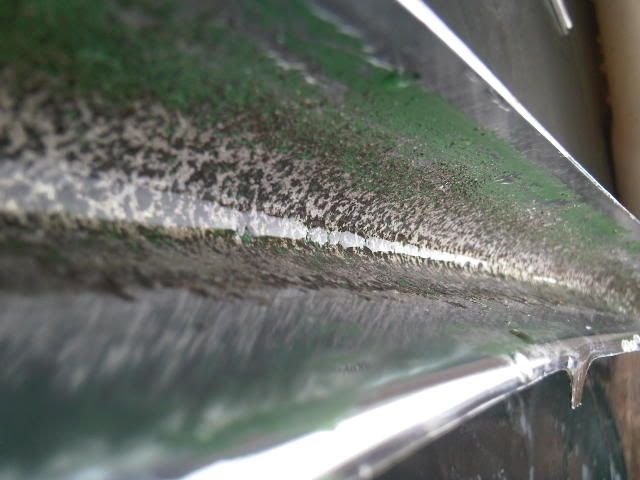
The worst bits looked like this:
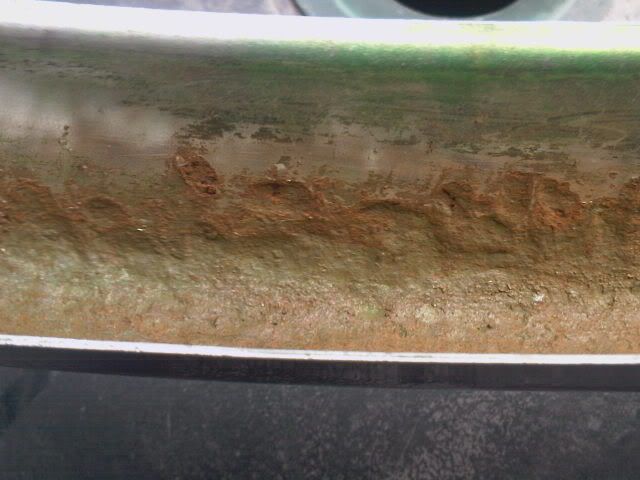
So i decided to use the bilt hamber deox gel to test it out. So i basically filled the moustach with the gel. It does say it should all be a uniform thickness layer but because of the shape of the grill that wasn't really possible. Anyway it says it can be removed after 3 hours but for heavy rust can be left for 12-48 hours. So i wrapped it in cling film like it says on the tin to stop it drying and left it for about 18 hours.
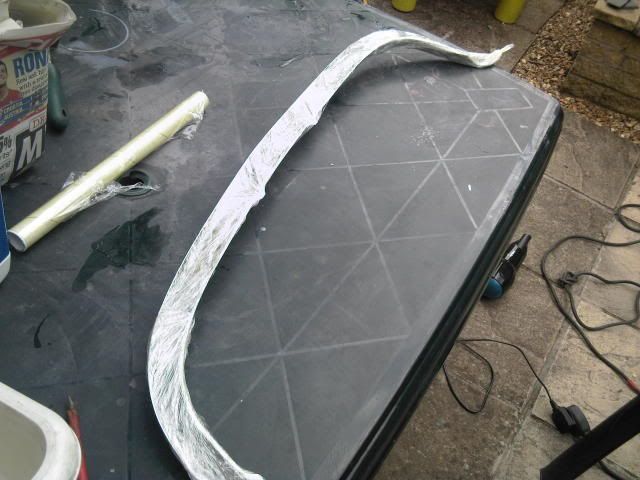
I came back to it today and removed the cling film and the gel looked discusting!
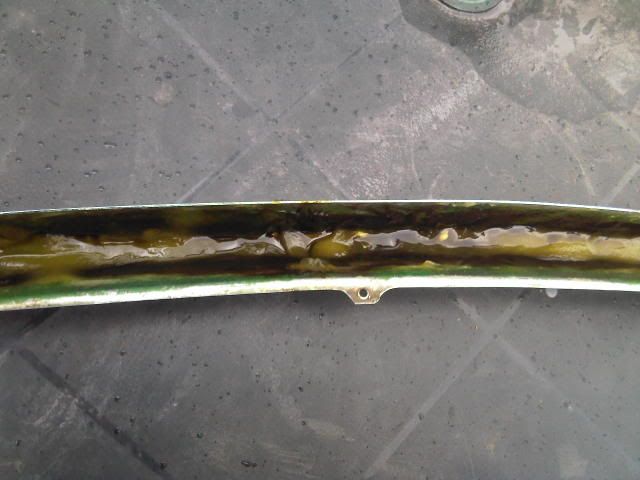
But following the instructions i adgitated the gel with a wire brush and washed it away with soapy water.
So as you can see the results were quite good i thought:
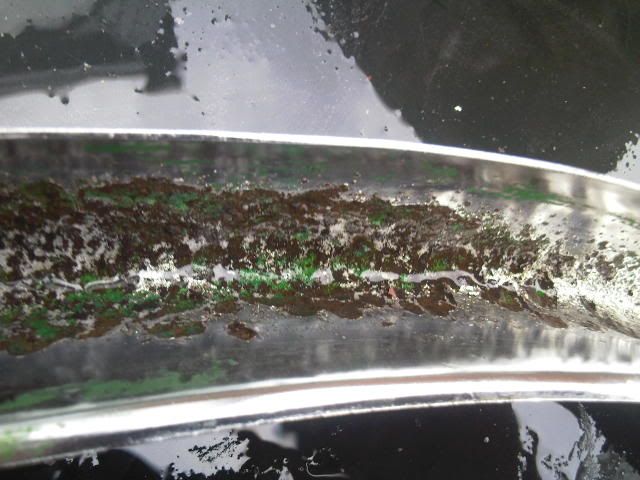
I think to get rid of the pitted rust i'd need to give it another application and work it into the pits better. It does say 2 applications may be required for pitted rust.
However i decided to just give it a coat of hydrate 80, hammerite and underseal and see how long it lasts.
I'm pretty impressed with the stuff its really cleaned up the rust well and has actually removed alot of it!
#42

Posted 19 June 2008 - 09:16 PM
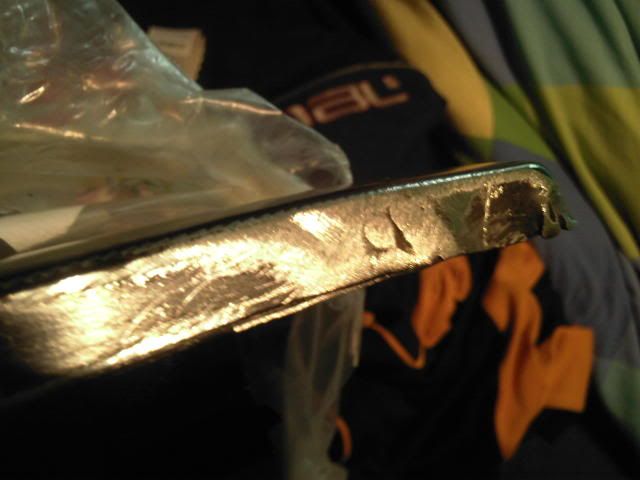
Other than that the only update i've got is that i've painted the inside of the moustache and my dads mate welded up the holes from drilling the spotwelds out of the new bonnet so i've cleaned those up and they're pretty much ready for paint:
Edited by minimadmike, 19 June 2008 - 09:17 PM.
#43

Posted 01 July 2008 - 07:21 PM
Took my car for its MOT. It failed on a balljoint and headlight allignment. The garage sorted the headlights for free but i took the car away to do the balljoint. So i took the hub off etc and put a new lower ball joint on and got that all greased up. Took it back today for a retest (which cost me £25!!) and it passed. So now its got 12 months MOT on it with very little work which is great
Had a couple of advisories which were slight play in one of the other balljoints and deteriorated and leaking flexi exhaust connection. So i'll look at getting those sorted soon.
Anyway once i picked up my MOT i drove straight to my nanas house, got the car in the garage and stripped most of the parts off the car ready to start work.
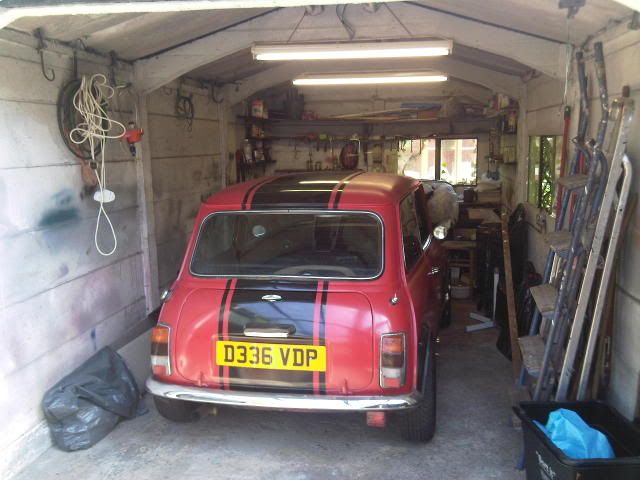
Everything went pretty well most bits came off without too much trouble. I snapped the mounting tabs of one of the rear quater windows though and damaged the indicator wiring abit but nothing too serious. Anyway i got the grinder and sander out and started hacking at the suspect areas.
Theres always been a thick chunk of filler in one of the corners of the roof - It was almost certainly covering a hole:
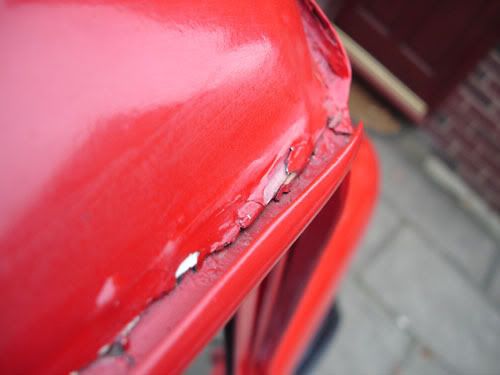
So i took the grinder to it and as i guessed there a gaping hole
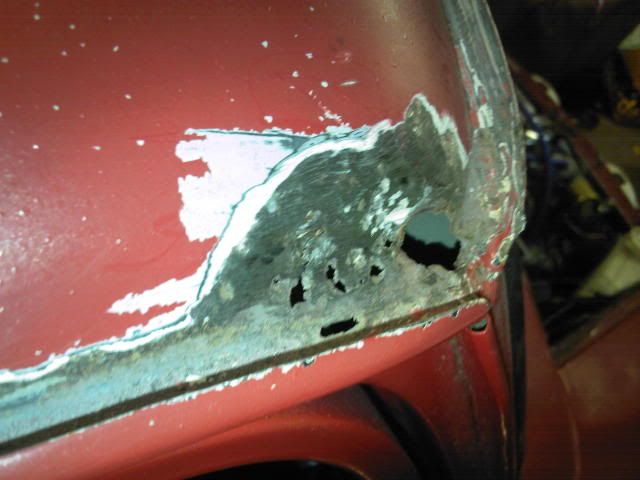
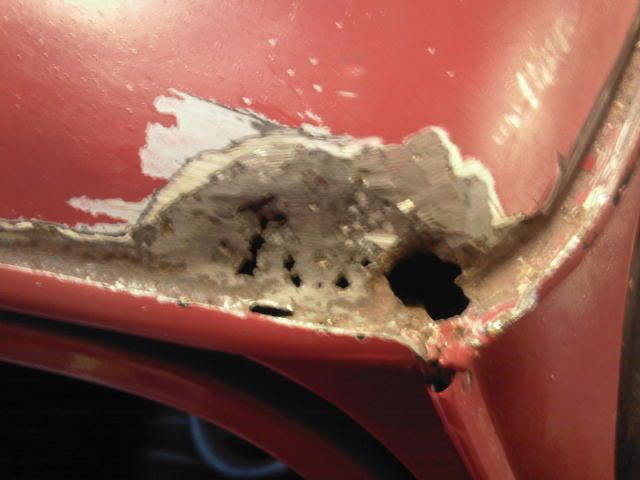
On the plus side though once i'd cleaned it up with the grinder i tested the metal around it with a hammer and it is completly solid and strong and the small holes aren't too bad.
Unfortunatly i can't weld, and even if i could i doubt i could make a good job of that, with the curve of the roof and things and i don't have a spare £100+ to pay a mobile welder to come and do it, so i'll just have to make a better job of filling it again.
I plan to rust treat and paint the holes from inside and outside; then if i can get it in there, i'll fibreglass from the inside to cover the holes. Then from the outside i'll use abit of alloy mesh and filler to reinforce and smooth the area off again.
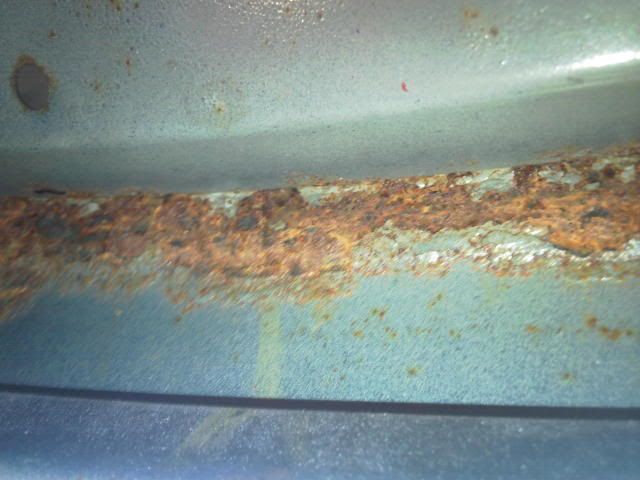
The next bad bit was below the rear window. I took the window out and parts of the lip fell off and disintegrated when i pulled off the seal. Once i removed that and the parcel shelf cover and cleaned up the area with the grinder i could see thwe true condition of the area.
Looking up at the parcel shelf from inside the boot you see this:
Then above the parcel shelf, the spot welded join and window seal lip is in pretty bad shape:
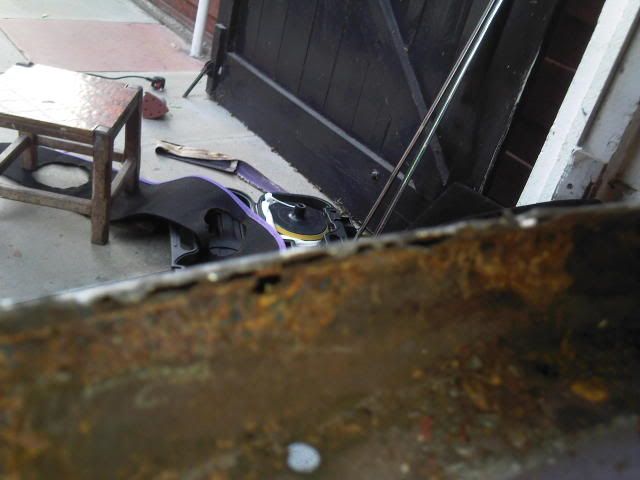
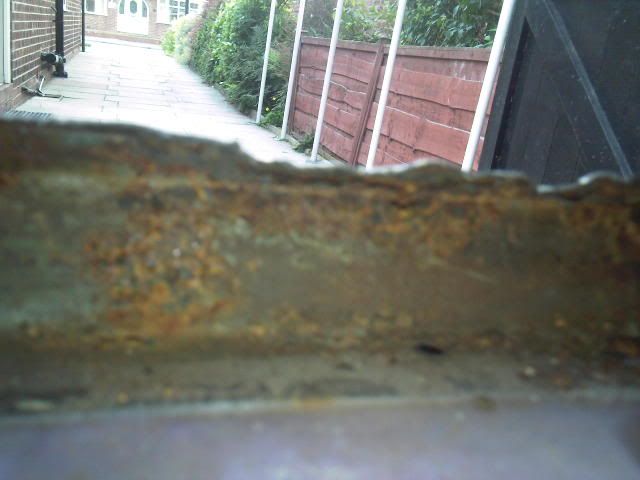
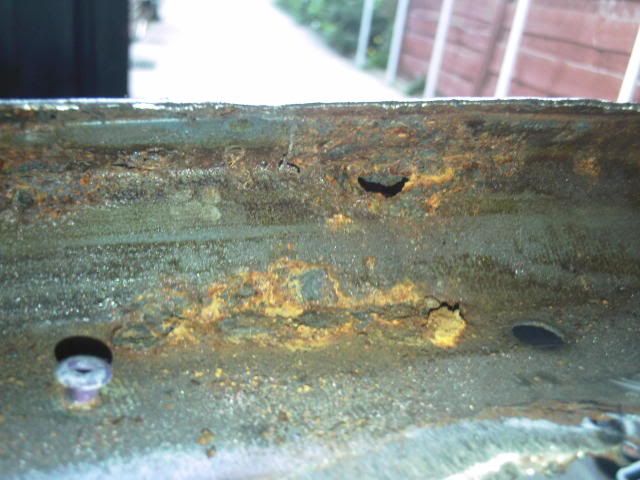
hmmmm Not got much to say about that really. Not sure what to do with it.
Tommorow i'm going to grind and wirebrush the area and get rid of all the loose stuff then i'll take it from there. The parcel shelf i'll have to just again rust treat it and paint it as best i can as i havent got the money, time or skill to cut all the area out and weld in repair patches/panels. This will have to be done at a later date after the respray.
However since i've lost about 4 inches of the window lip altogether i think i'll have to come up with something for that. I may have to just clamp some metal behind it and try and plug weld it into place and use filler in all the gaps or something or if it comes to it i'll have to resort to bodging it with fibreglass and mesh reinforced filler.
I don't want to have to do that but i can't see what else i can do at this stage - The cars due to be sprayed on Saturday!
Anyway i'll see how i get on tommorow with it and update this in the evening...
#44

Posted 01 July 2008 - 10:35 PM
Mike.
#45

Posted 01 July 2008 - 10:52 PM
Fingers crossed everything will be ok for the respray....
1 user(s) are reading this topic
0 members, 1 guests, 0 anonymous users


