Jump to content


Photo
- - - - -

'86 City Refurb


  • Please log in to reply
375 replies to this topic

#361 mike.

mike.

    Crazy About Mini's

  • Members
  • PipPipPipPipPipPipPipPipPipPip
  • 6,176 posts

Posted 05 June 2012 - 09:22 PM

At last an update,and a good one too. The mini is basically done now, just need to sort insurance, book an MOT, then once thats passed, tax and test drives :D

As usual with this car, I had some set backs I didn't expect! But they're sorted now.

Firstly I finished off all the jobs underneath the car, main one was rubbing down under the boot floor. So that got a good rub down, a few spots needed wire brushing to remove some surface rust, then was treated with hydrate 80, a coat of hammerite and once that was all dry, it all got a coat of underseal. Once that was done I wanted to waxoyl everywhere that needs it on the car - Easier said than done trying to get waxoyl to flow and spray nicely when its cold :/ Ended up thinning it 50/50 with whitespirit, sitting the can in boiling water for 30 mins before spraying, and then putting it in fresh boiling water whilst spraying; even then it wasn't spraying in a decent 360 pattern like it should out of the extension probe but it was good enough.

Everywhere got done with the waxoyl, all round the subframes and crevices and gaps between the shell, rear valance box sections, sills, scuttle closers inside and out, inside the doors, door posts and then inside the bulkhead crossmember and behind where i've has the shock mounts repaired. So for rust proofing its sorted - Although because the waxoyl was thinned so much with white spirit I was basically high on vapours whilst doing this and it took about 3 days to air the garage out!

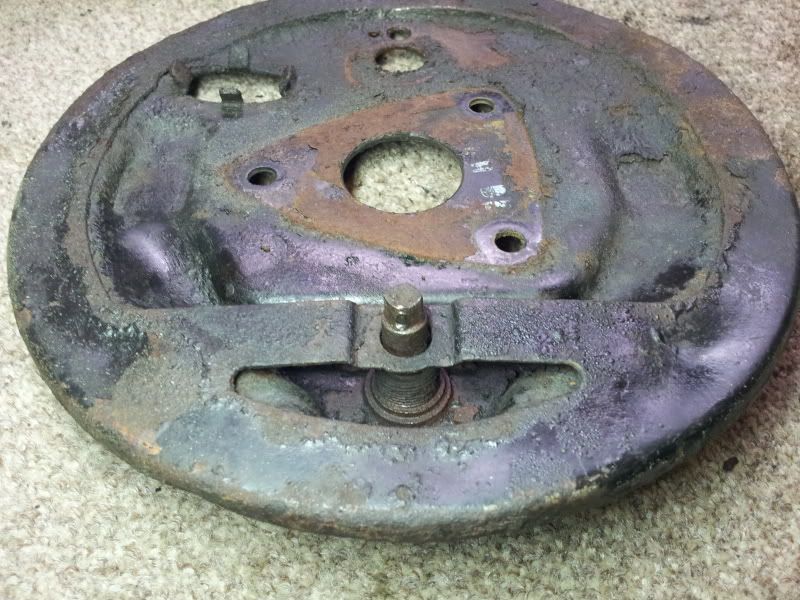
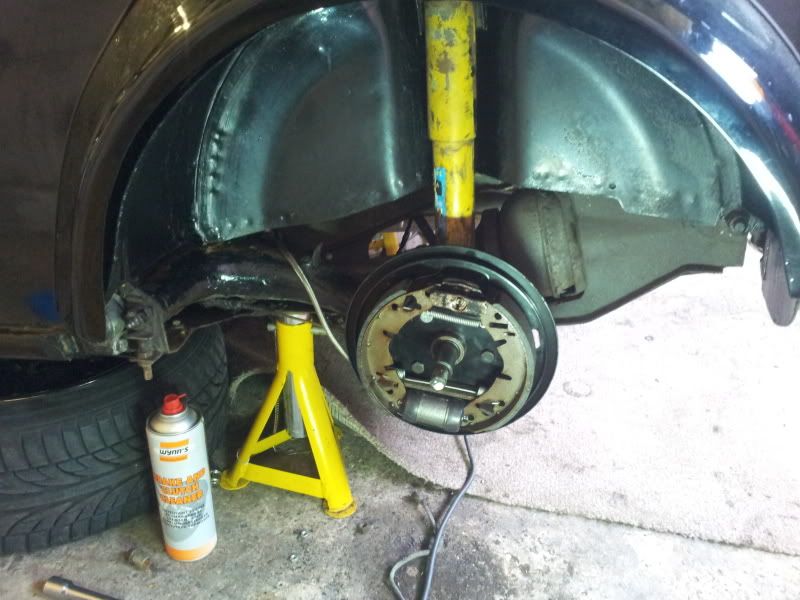
Once that done I fitted all the fresh air vent ducts and intake for the heater etc and got the car back on its wheels and off the stands. I was then going round the car checking everything mechanical before I got carried away with shiney bits and interior - Good job I did as I found some play in the rear drivers wheel bearing. So then set about fixing that and found the adjuster on the drum was seized solid! It was stiff before but did move, I guess I should of took it apart and greased it then before it had chance to seize in. I tried for ages to free it, tried penetrating oil, blowtorch/quenching the adjuster to try and free it off but nothing worked and after a while the adjuster rounded off >_<

So I took it all apart and it was no wonder it was seized really once I had a proper look at the backplate:
Posted Image

Psssshh - So new backplates and adjusters were bought from minisport for both sides, just those bits as the shoes and cylinders didn't look that old. Built up the new backplate and fitted the drivers side, went round to the passenger side and find the shoes on that sides were much more worn, 2mm shoe material left max and the cylinder was seeping fluid a bit :mmkay: Basically should of just gone all out and bought all new back brakes in the first place. Went off to moss and got new cylinders and shoes for both sides, and also got a set of extended goodridge braided hoses as the standard rubber ones looked shabby and the cooper unions were seized on when I took them off.

So ended up replacing the rear brakes completely, only bits I reused were the handbrake levers as they just needed a clean up. But at least now the minis got new brakes and braided brake hoses all round, so should be nice once bedded in and the hoses will give me nice pedal feel too. Just need to remember everythings new the first time I drive it as I won't be stopping in a hurry!
Posted Image

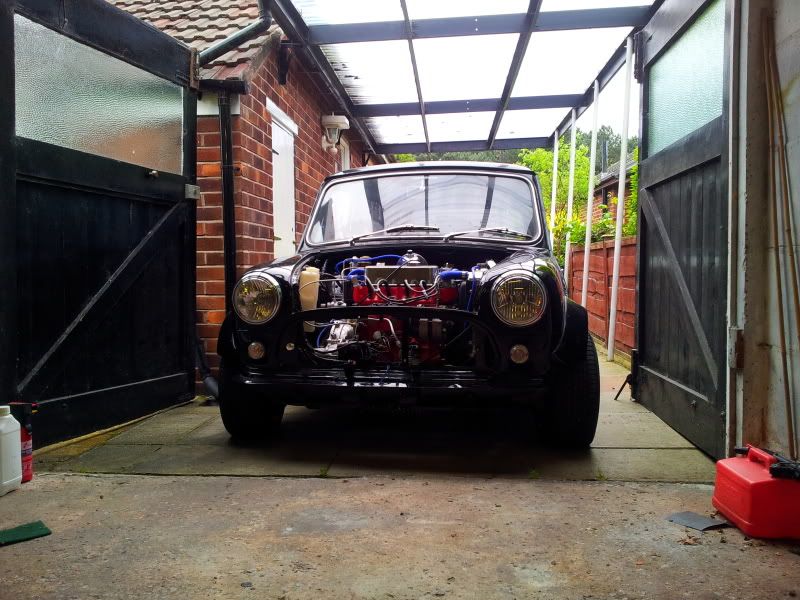
After that I spent a while adjusting the clutch as it didn't feel right at all. Ended up giving it a quick bleed, didn't see any air in it so I think it was all down to the adjustment. I then adjusted the stop nut on the clutch arm to below the gap it says in the hanyes and the clutch felt spot on after that. So slapped the drivers seat in and reversed it out of the garage - Was the first time its moved under its own power since the new engine got put it :lol: But the clutch feels good and gearbox worked ok in 1st and reverse at least so thats good!
Posted Image

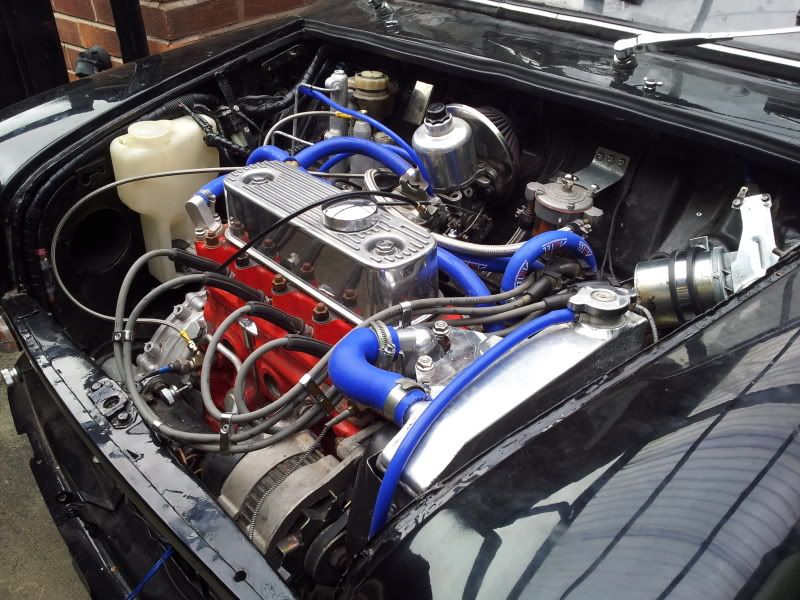
Last couple of bits finished in the engine bay, washer bottle in, wiper motor polished up and strapped down, washer jets fitted and plumbed, wipers put on too. I ditched the bit fresh air scoop for the heater since it takes up half the engine bay and looks poo while its at it. Instead drilled a couple of holes in the inner wing and cable tied the pipe to the wing. That way its still gona get fresh air but its just not in the way.
Posted Image

Engine/bulkhead could still do with a wipe down and shiny bits a polish but that can wait.

Moving onto the interior I had a few bits to wire. Cig lighter re-wired to my new fusebox, oil pressure/water temp gauge wired into the sidelights so thats illuminated at night, warning light for the fuel pump too so I know if the inertia switch has been tripped. The radio/speakers/amps install i'm going to leave till a later date because i've changed my mind again about that lol But put the basic wiring in place from the fuse box into the car to put the radio in later. Also fitted a toggle switch to the fuel pump feed so the fuel pumps not constantly on if i'm just sat with engine off/ignition on listening to the radio of something. I put the switch in the lower dashrail where the heater cable would of been so its nice and neat.

Then fitted the rear view mirror, sun visors and trimmed the last bits of excess off the headlining and since the car was back on its wheels I could move it over in the garage enough to get the passenger door open and the central locking wiring routed through into the car. So that was the last job that needed doing before the door cards could go on.

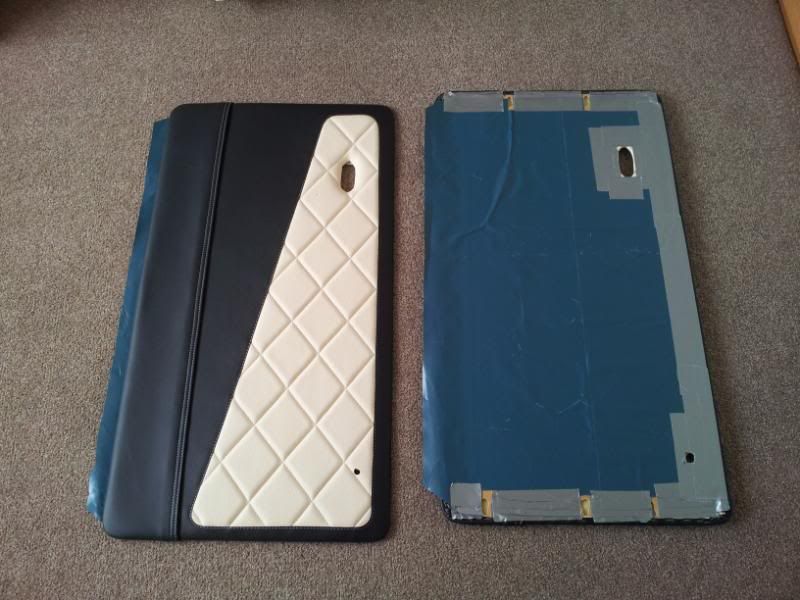
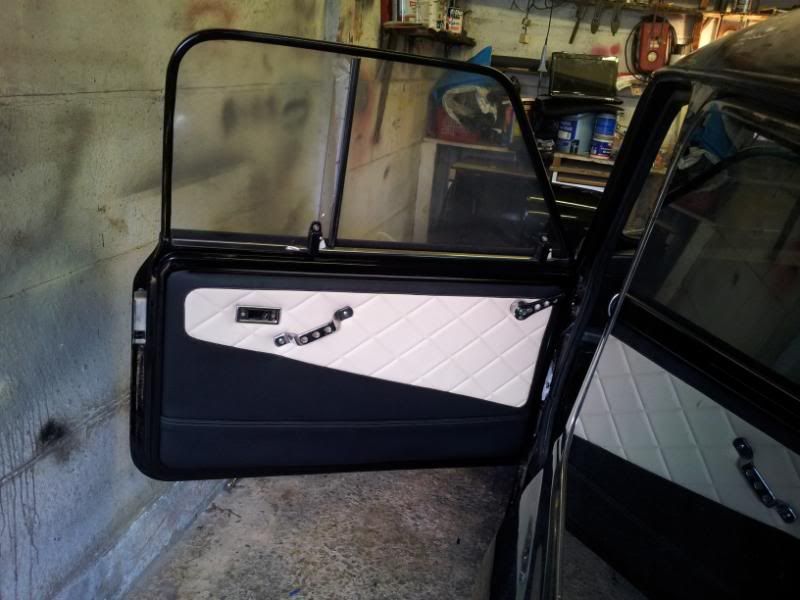
Since with these streetfighter doors, all the water that hits the window drains into the doors and since the inner door is cut away it all comes into contact with the back of the doorcard. So I used some old roofing damp proof course stuff for this. Cut it to shape and stuck it to the back of the door cards with double sides vinyl flooring tape which was really strong, and then went round the edges with duck tape to finish it off. I left an inch overlap at the bottom that I could tuck into the bottom of the door, so all the water drains off into the door and not into the car:
Posted Image

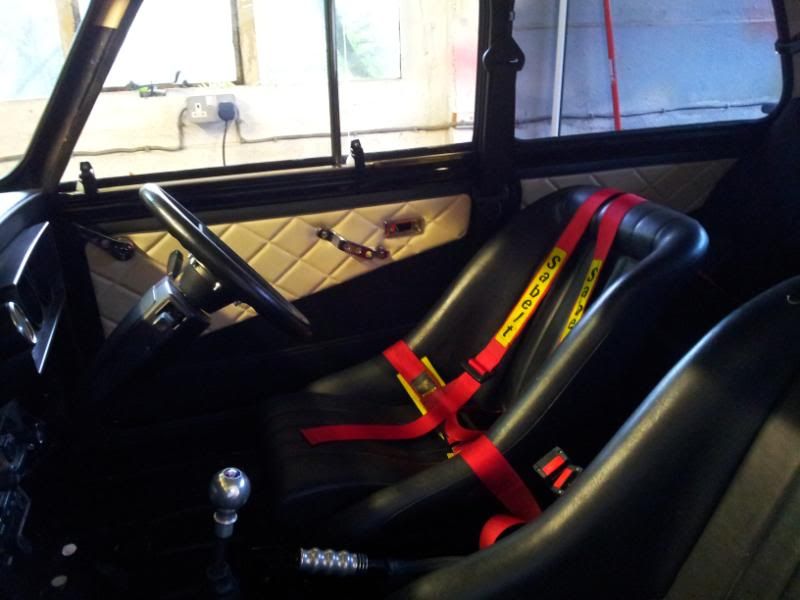
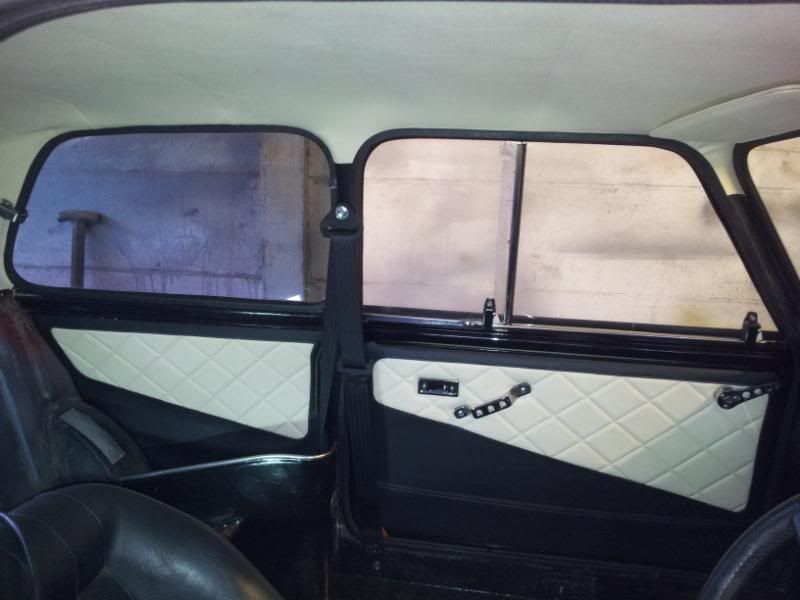
Then got them fitted to the car! I used rivnuts to screw the lock surround into since the door cards were so thick. They weren't the best fit in the world these door cards and it didn't help that the plastic clips take so much force to pop them into the holes in the doors, because the inner door is cut away, the metal just flexed before they'd pop in. So the bottom of the door card isn't actually clipped in, but the rest of the clips are in and the handles hold it in place anyway so its not going anywhere:
Posted Image

Posted Image

Happy with those :-)

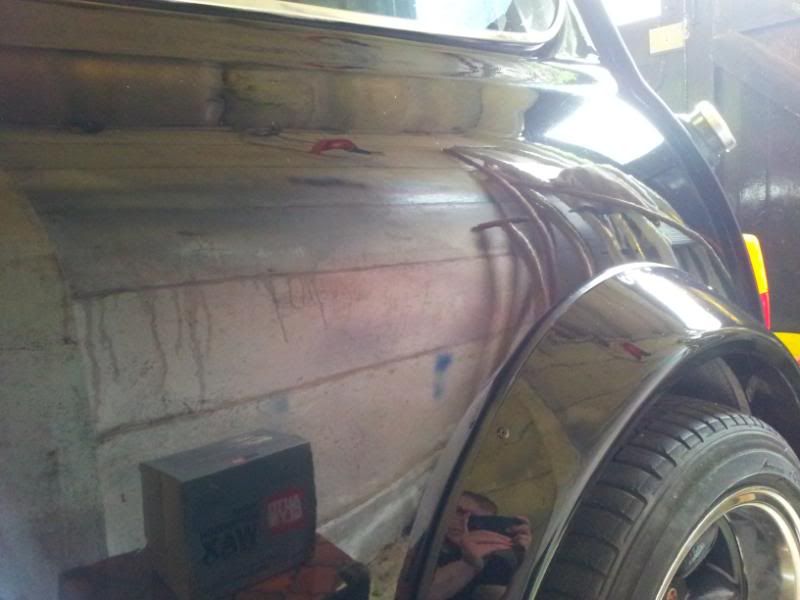
After that I spent a full day with a mate giving the car a proper wax, polish and wax. Spent the whole day on it and even then didn't get round to cleaning the glass!

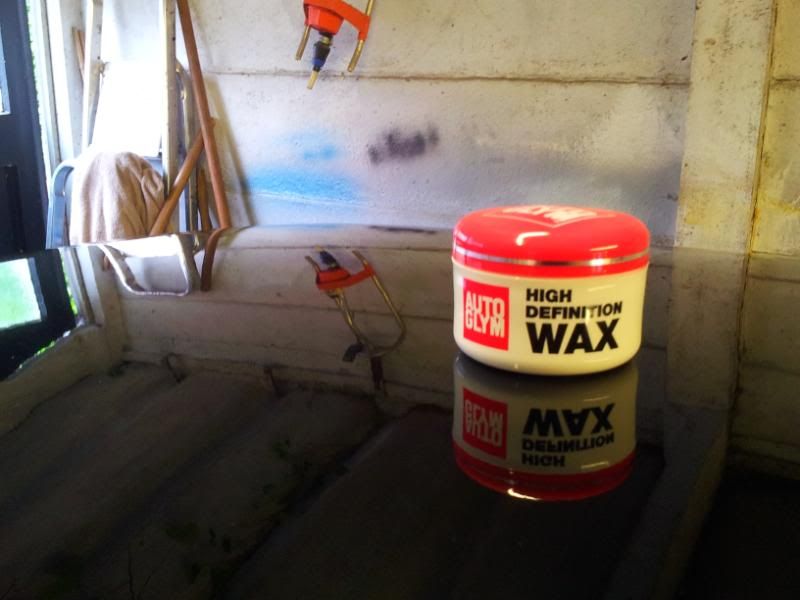
But it was worth it! We used autoglym ultradeep shine polish for most of the car, and paint renovator for the scratches and swirl marks. Most of which are gone now, just the odd ones that aren't worth the effort remain. Polished all the chrome with autosol, sealed the wheels with autoglym wheel sealer an shined the tyres too. Then we gave it a coat of autoglym HD wax which really brought out nice shine and reflections, the paint feels like glass now and this wax pot wouldn't even stay put on the roof, just kept sliding off! :mrcool:
Posted Image

Posted Image

The paint isn't all perfection though, theres a few spots of the micro blistering coming back through the paint again - Don't know what a bodyshops problem is with going to bare metal when i've asked them to. Obviously think I don't know what i'm talking about. But i'm just past caring now about the paint, its shined up nice for the most part, but next paintwork it needs doing i'll be doing it myself!

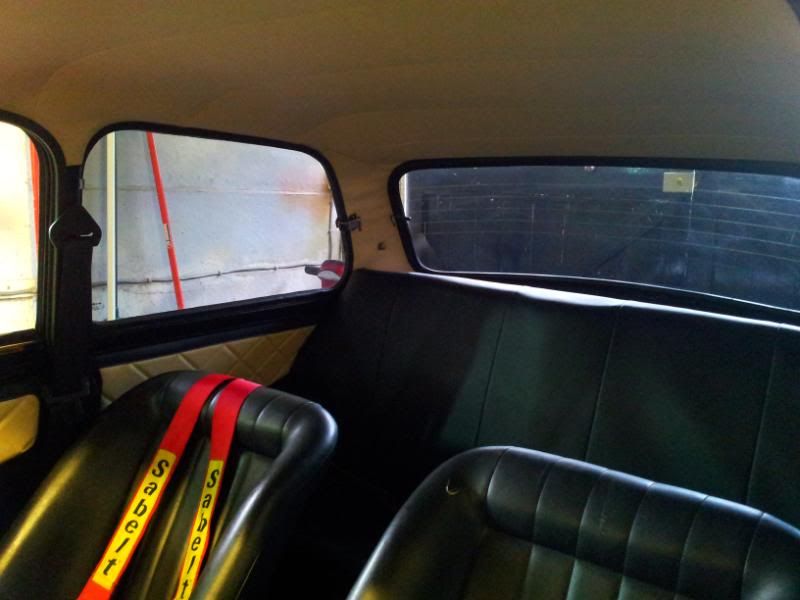
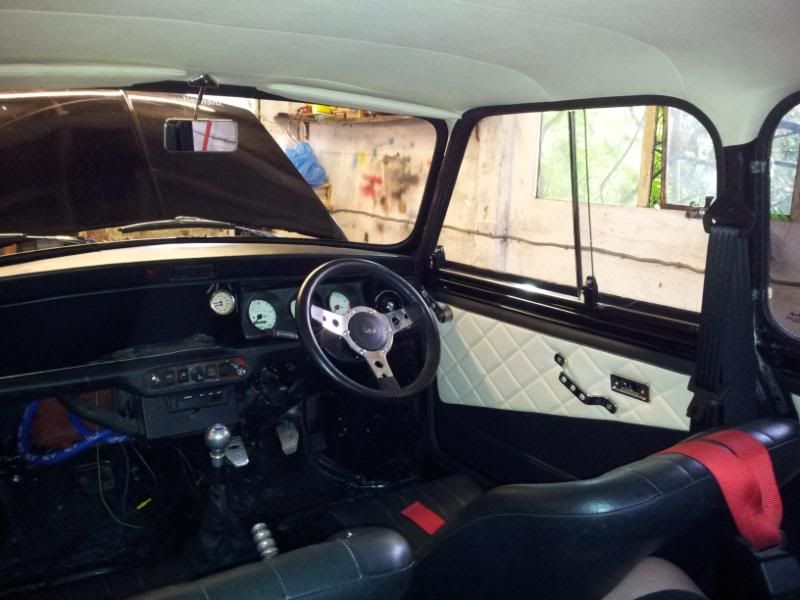
Then got the back seats and wheel arch covers in place, fitted the new seatbelts and refitted my harness on the drivers side. I'm leaving the carpets out for now as i've still got a water leak problem - Its the sliding windows, think I cut the seals a couple of mill too short when I first fitted them, but obviously 2mm is a lot when you trying to seal out water! But it'll do for now and i'll get some more of the sliding window rubber stuff and re-do them at some point once the cars back at home.

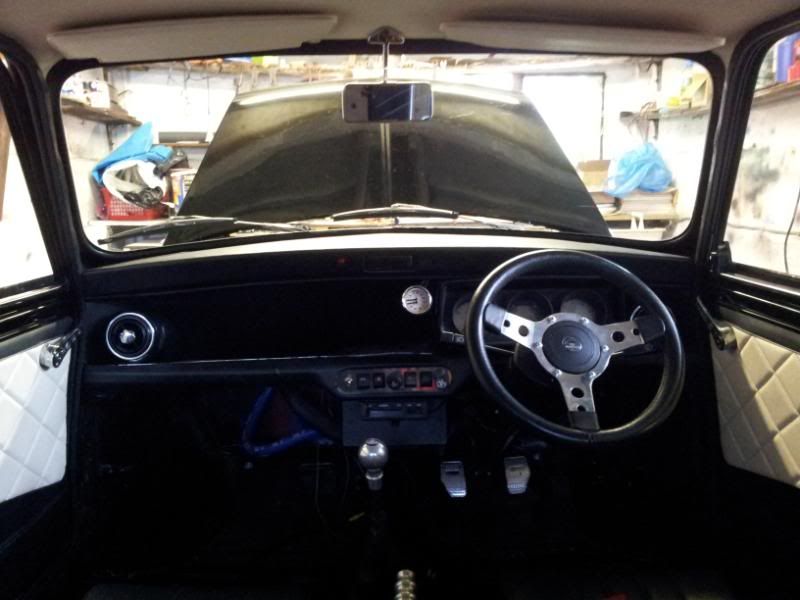
So basically thats the interior for now. Parcel shelf is staying out until I decide where i'm mounting my speakers, and just need to make a new base piece to go on the lower dashrail to meet with the dash lining to finish off the dash. That'll just be wood covered carpet slotted into place when its done. The heater hoses are a bit long too so i'll trim them a bit at some point so they're not dangling down so much:
Posted Image

Posted Image

Posted Image

Posted Image

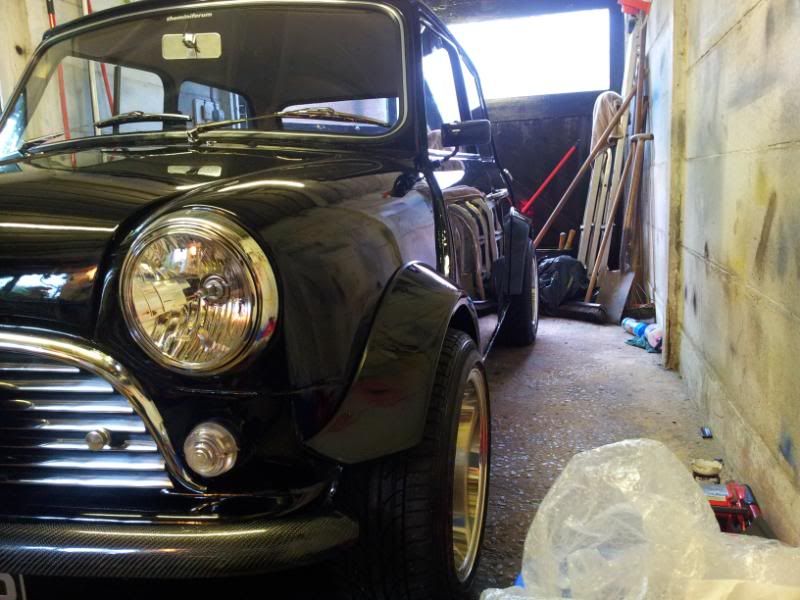
Then it was time for the shiny bits on the outside, last finished touches

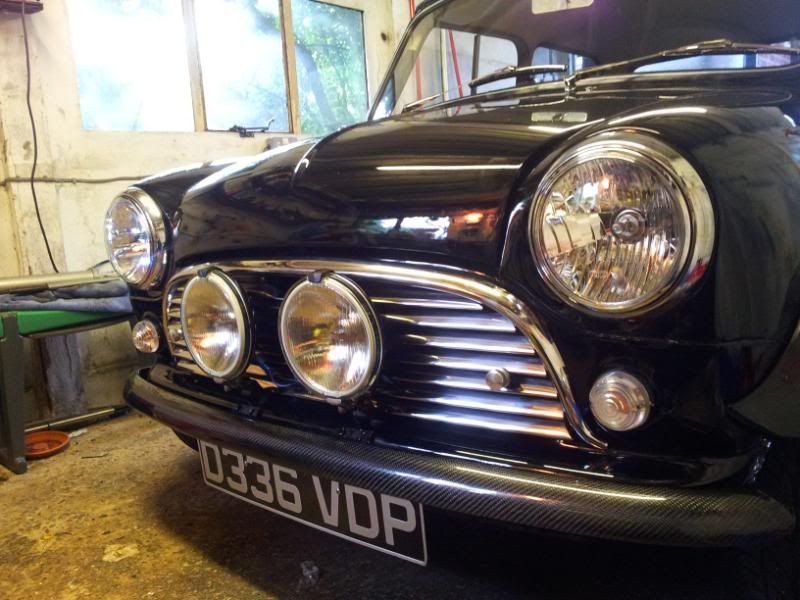
Mirrors on and adjusted, grill moustache is fitted with rivnuts, so officially no self tappers going into the bodywork aside the numberplates because I ran out of rivnuts and grill just on grill buttons again. Spotlights on and wired up and working nice - Forgot how bright they are - The heat they give off is immense! Numberplates on and the finishing touch - Exposed weave carbon bumpers :mrcool:
Posted Image

Posted Image

Posted Image

So for now its finished!

Tomorrow will consist of ringing round insurance companies to find the best agreed value quote, then ringing round seeing who will do me an MOT the quickest! I'm starting a new job on 13th of June so i'm hoping to get the mini on the road so I can get some driving in it before I start working again :D

Edited by mike., 06 June 2012 - 12:05 AM.


#362 oliver122

oliver122

    One Carb Or Two?

  • TMF+ Member
  • PipPipPipPipPipPipPip
  • 1,007 posts
  • Location: Stoke-on-Trent

Posted 06 June 2012 - 12:36 PM

nice build mate just been through the lot , would be intrested in what your engine is making , as im in the process of doing abit of a rebuild on my mini

#363 jb93

jb93

    TMF Noddy Badge holder officially.

  • Members
  • PipPipPipPipPipPipPipPipPip
  • 2,439 posts
  • Location: .

Posted 06 June 2012 - 12:39 PM

Looks spot on buddy :thumbsup:

#364 mike.

mike.

    Crazy About Mini's

  • Members
  • PipPipPipPipPipPipPipPipPipPip
  • 6,176 posts

Posted 06 June 2012 - 01:10 PM

Yeah i'm intrigued to see what the engine makes, although i'm not too fussed about a pub talk bhp figure as long as its decently quick and drives nice.

It runs ok at the mo, sounds like its go a couple of flatish spots through the revs but once its been out on the road and had some miles on it without issues i'll research some rolling roads. Need to find one that can map the megajolt aswell as being experienced in minis and carbs...

Thanks for the comments! Just sorted the insurance on it, cost me £710 fully comp so not bad at all I don't think, and got the MOT booked for tomorrow morning - eeeek hopefully it gets through it ok - and gets to the mot place ok for that matter as its never been driven since all this works been done! I might take it for a bit of a test drive round the block now its insured just to make sure theres no blatant problem and the brakes/clutch work ok.

#365 mike.

mike.

    Crazy About Mini's

  • Members
  • PipPipPipPipPipPipPipPipPipPip
  • 6,176 posts

Posted 07 June 2012 - 10:06 AM

Well slight delay for the MOT, the LED sidelight bulbs were causing problems, flicking on/off and then giving up at some points. Just crap quality bulbs I think, but they weren't exactly the cheapest bulbs out there. So switched the bulbs over to normal bulbs and they've been fine since.

I took it round the block a few times, couple of problems, the speedo doesn't work, so likely to be a snapped cable I think. Because its really long the cable which means is bent and twisted around behind the engine to take up the slack, so probably put strain on the inner cable. I'm gona take the speedo end off and see if I can see the inner turning whilst driving to confirm that. But you don't need a speedo for the MOT anyway and i've got a GPS speedo app on my phone so that'll do me for now.

Main problem was the further I drove the harder it was getting to select gears, until eventually I couldn't get it in gear at all, and the clutch didn't feel right. Took one look under the bonnet and could see that the over throw nuts looked like they'd backed off, which they had. So it was pushed back to the garage and looked at. I readjusted the clutch and it felt fine again, but i've not got a big enough spanner to do up the stop nut and locknut tight (don't know what spanner I used a few months ago when I first set those nuts?!), so gona get the spanner I need today and some locktight and sort that; then test drive again. If its ok, its off for the MOT!

Edited by mike., 07 June 2012 - 10:07 AM.


#366 mike.

mike.

    Crazy About Mini's

  • Members
  • PipPipPipPipPipPipPipPipPipPip
  • 6,176 posts

Posted 08 June 2012 - 03:08 PM

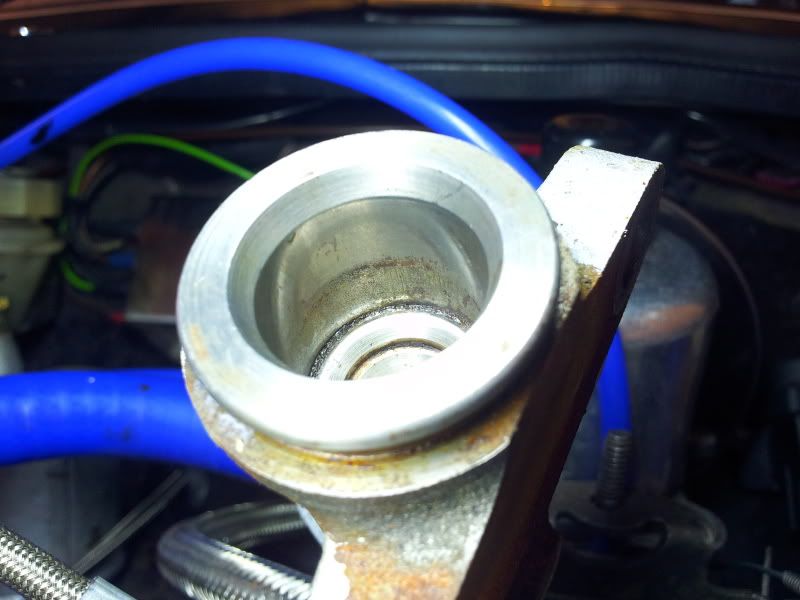
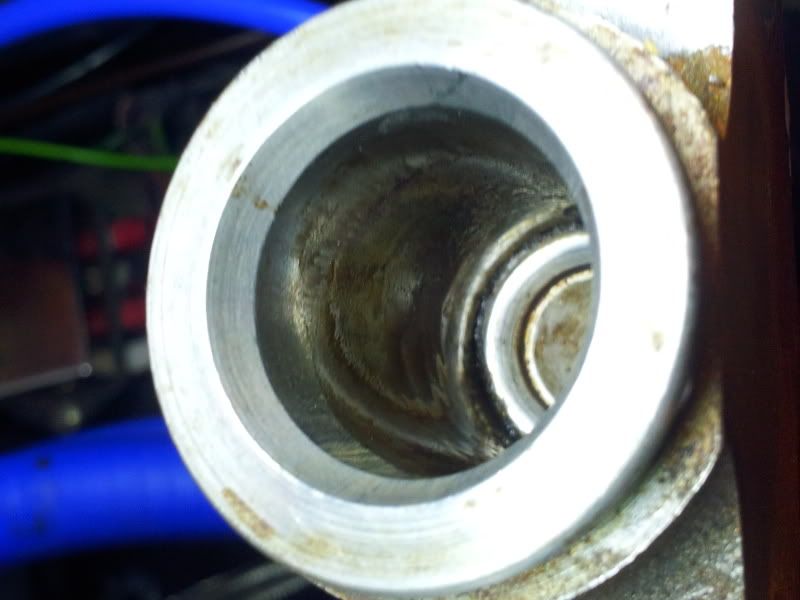
Another update, the clutch is fixed! Took a while to diagnose because I just couldn't work out what was wrong, everything apart from the clutch arm and the master cylinder were new... I popped the dust cover off the slave cylinder and the bore was dry so didn't suspect those seals. But later in the day when I was losing hope, I took it full off and gave it a proper inspection:

The bore looked ok with only very slight scoring which couldn't be felt with a finger nail:

Posted Image

But as I pumped the clutch in and out you could see fluid being left on the bore:

Posted Image

Not sure why it was dry when I checked it earlier though, maybe the seals were just on the way out. Like I say it was new but it has been sat there for a couple of years I suppose!

So I got a new one and some new copper sealing washers and a litre of fluid, fitted it and bled out all the old fluid and air and took it for a drive. Feels much better now and drove for 15 mins without issue! So problem solved hopefully :D

Earliest I can get it MOT'd now though is monday, so i'll update then!

Posted Image

#367 jb93

jb93

    TMF Noddy Badge holder officially.

  • Members
  • PipPipPipPipPipPipPipPipPip
  • 2,439 posts
  • Location: .

Posted 04 September 2012 - 02:56 PM

Great work as always :thumbsup:

What make are your spotlights? Are they Ring Rally Giants?

#368 mike.

mike.

    Crazy About Mini's

  • Members
  • PipPipPipPipPipPipPipPipPipPip
  • 6,176 posts

Posted 04 September 2012 - 05:08 PM

Yep ring rally giants! They're good and bright and cheap too. Only problem is the covers for them go brittle after a while but no big issue really, I didn't use them that much anyway

#369 jb93

jb93

    TMF Noddy Badge holder officially.

  • Members
  • PipPipPipPipPipPipPipPipPip
  • 2,439 posts
  • Location: .

Posted 04 September 2012 - 07:07 PM

Yep ring rally giants! They're good and bright and cheap too. Only problem is the covers for them go brittle after a while but no big issue really, I didn't use them that much anyway


Just ordered some to replace my Wipacs :D

#370 mike.

mike.

    Crazy About Mini's

  • Members
  • PipPipPipPipPipPipPipPipPipPip
  • 6,176 posts

Posted 22 November 2012 - 09:10 PM

Thought i'd give this an update, realised I've not touched this thread really since its MOT.

The car passed its MOT with no advisories and its been on the road for nearly 6 months now!

Although still had a number of issues with it!

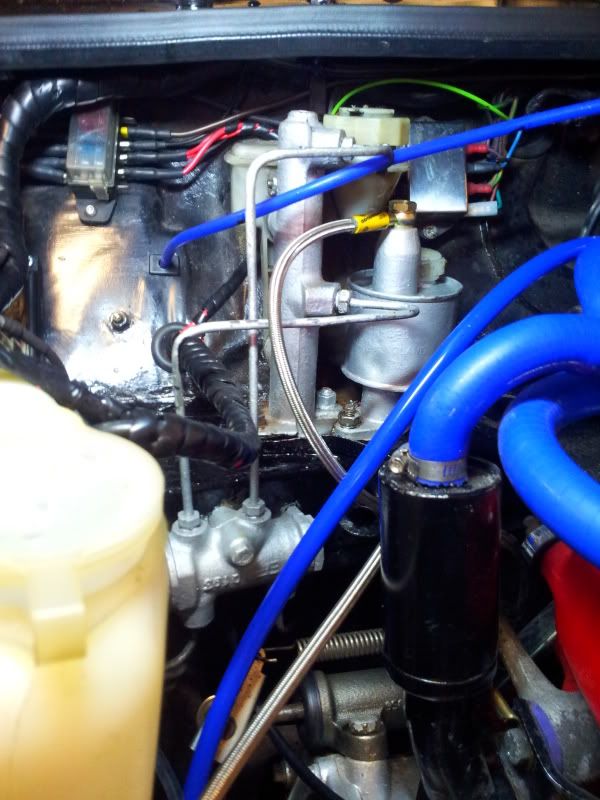
First was the fuel regulator, it was pissing fuel which stripped some paint off the bulkhead and was leading to a bit of rough running! I googled that a bit and found that the plastic bowl they use for it doesn't react well with the fuel - Who's idea was it to make something designed to hold fuel out of plastic thats not resistance to fuel?! Anyway, spoke to the manufacturer and they sent me a glass version for free so i'll let them off!

Next issue was a clicking noise from the front of the car, it was loud too but only in reverse which was weird. Ended up replacing both the CV joints which was a bit of a pain to have to do but it sorted that clicking. Once that was sorted I could hear a quieter clicking noise coming from the back! Even worse was whilst checking it all I could hear clicking from the drivers side read hub, yet play on the passenger side!

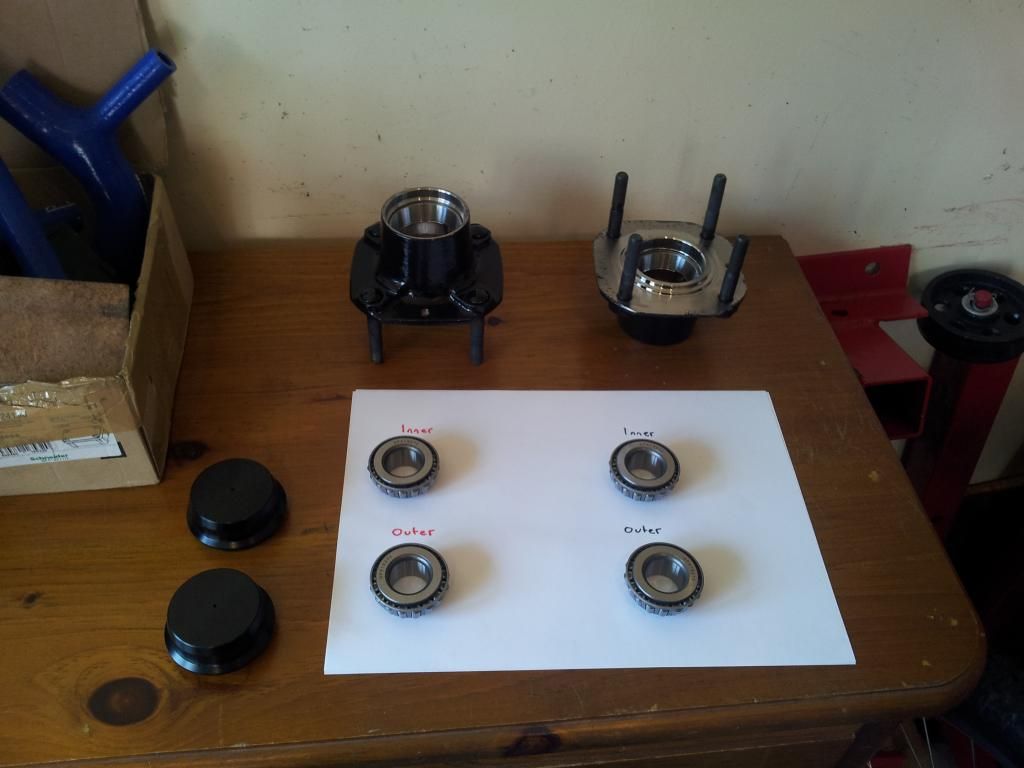
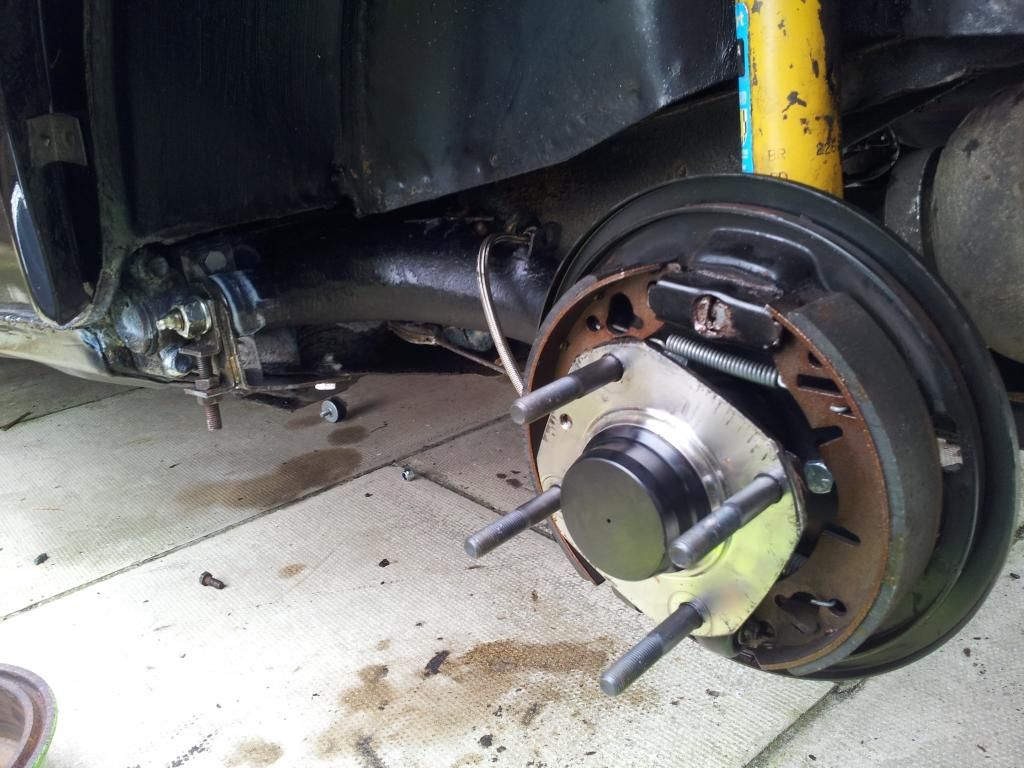
It turned out that I had a wheel bearing problem on one side and radius arm play on the other! So just decided to put it all right in one go. Took both rad arms off and sent them for refurbing, and got a pair of brand new rear hubs, taper roller bearings and some alloy hub caps:

Posted Image

They also gave me problems due to a dodgy batch of faulty non gen wheel bearings, but after switching bearings about 3 times I got it together:

Posted Image

Doing this meant I had to reset my camber brackets at the rear. I've set them both equal but I can tell by eye i'm not running as much negative camber as before, its probably more positive now. I need to get my tracking done anyway so may take it up to minisport to get it all set up properly.

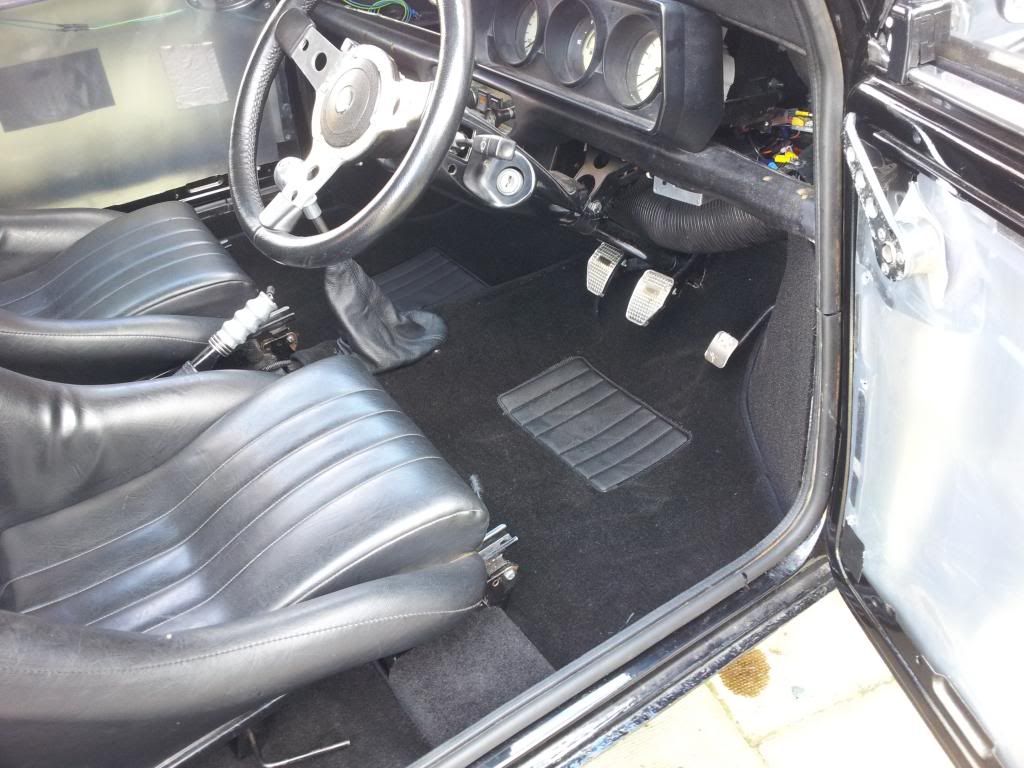
Next job was finishing the interior, as it was I had no carpets, no soundproofing and plenty of unsealed holes in the bulkhead and it was LOUD! I mean like gritting my teeth and shouting on the motorway. Even when crusing I had to raise my voice so it was no good really.

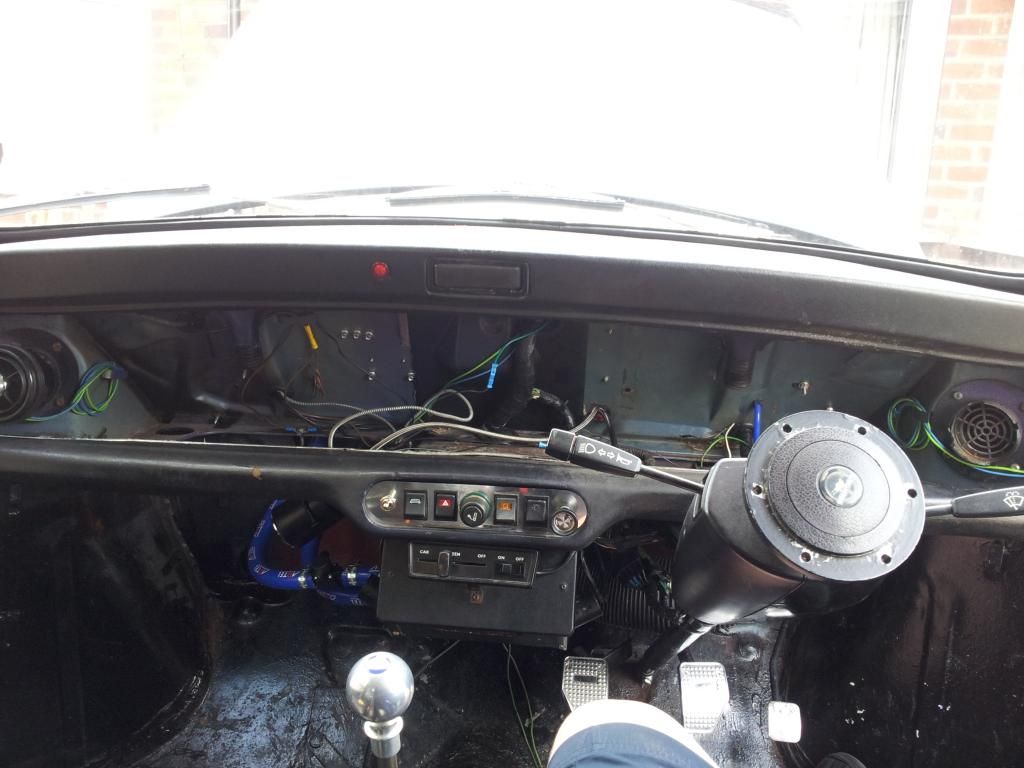
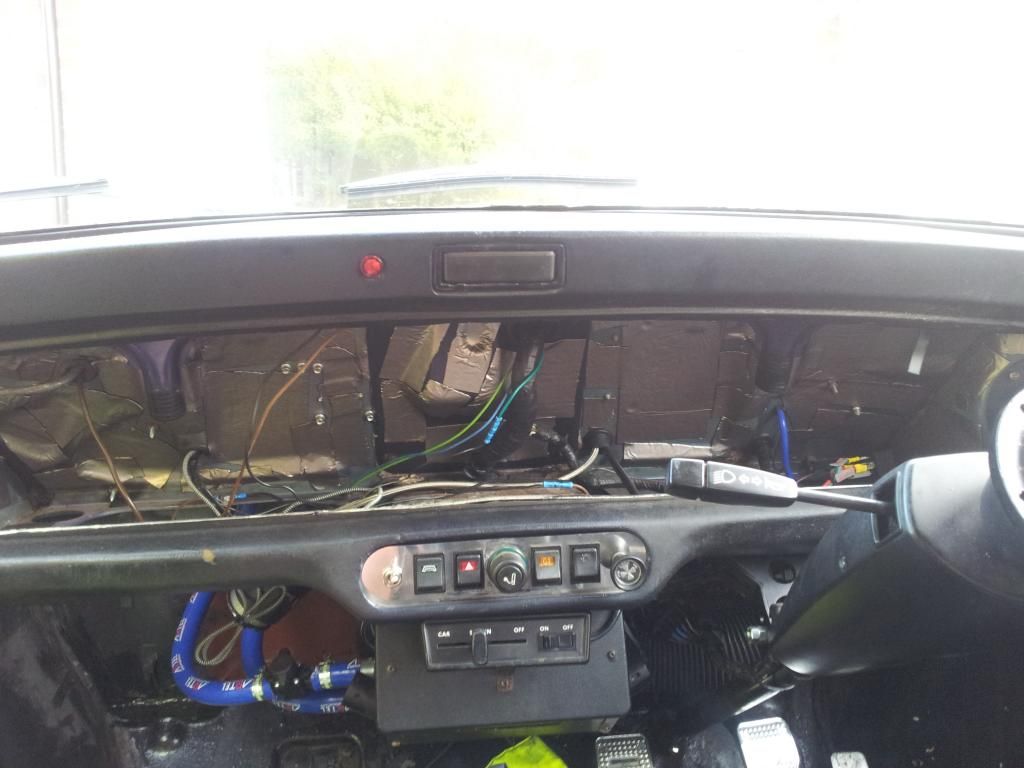
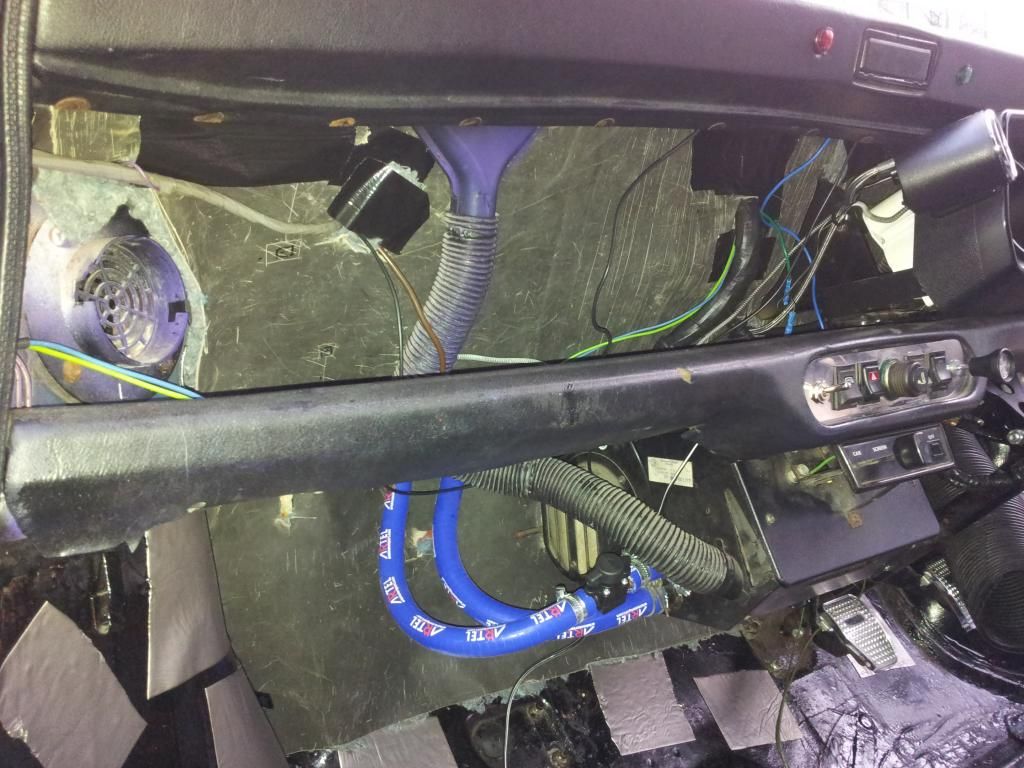
So stripped the bulkhead down:

Posted Image

I then sealed up any holes in the bulkhead and added loads of strips of flashing tape to help absorb some noise and stop vibration:

Posted Image

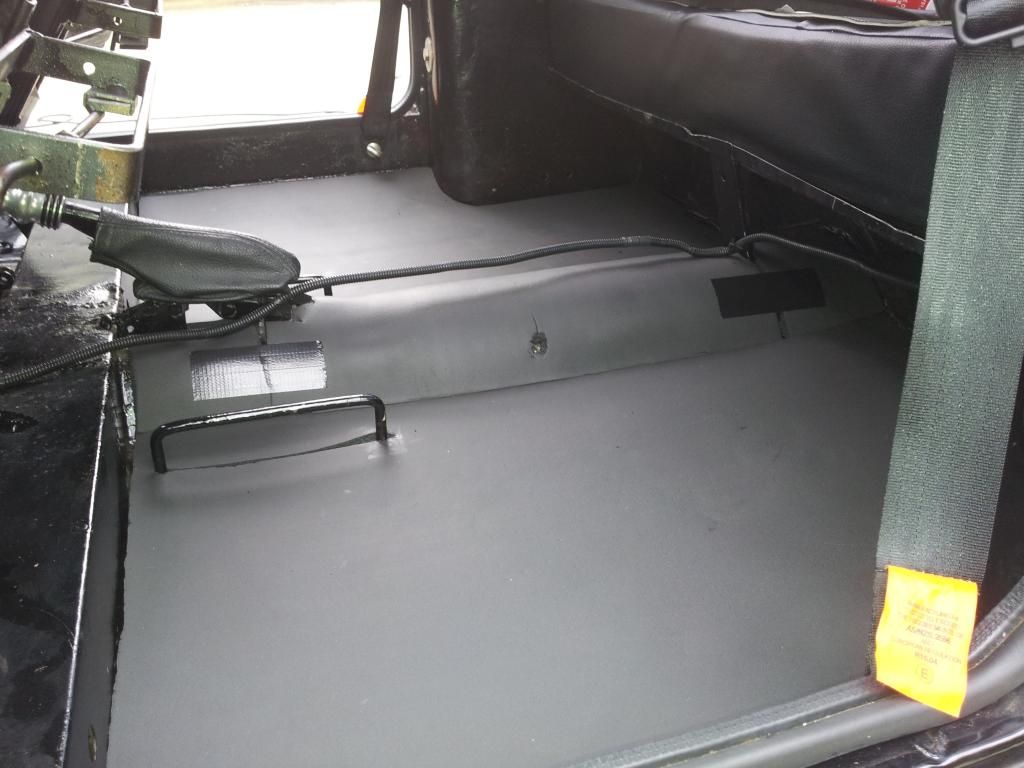
Next I had added a square metre of sound insulation made of a 10mm layer of felt and a 2mm layer of bitumen type material together:

Posted Image

Then I used some industrial pipe lagging to make underlay out of. Its waterproof dense closed cell foam so works well for underlay. I had 4 metres at 0.5m wide which was just enough to covered everywhere I wanted:

Posted Image

Posted Image

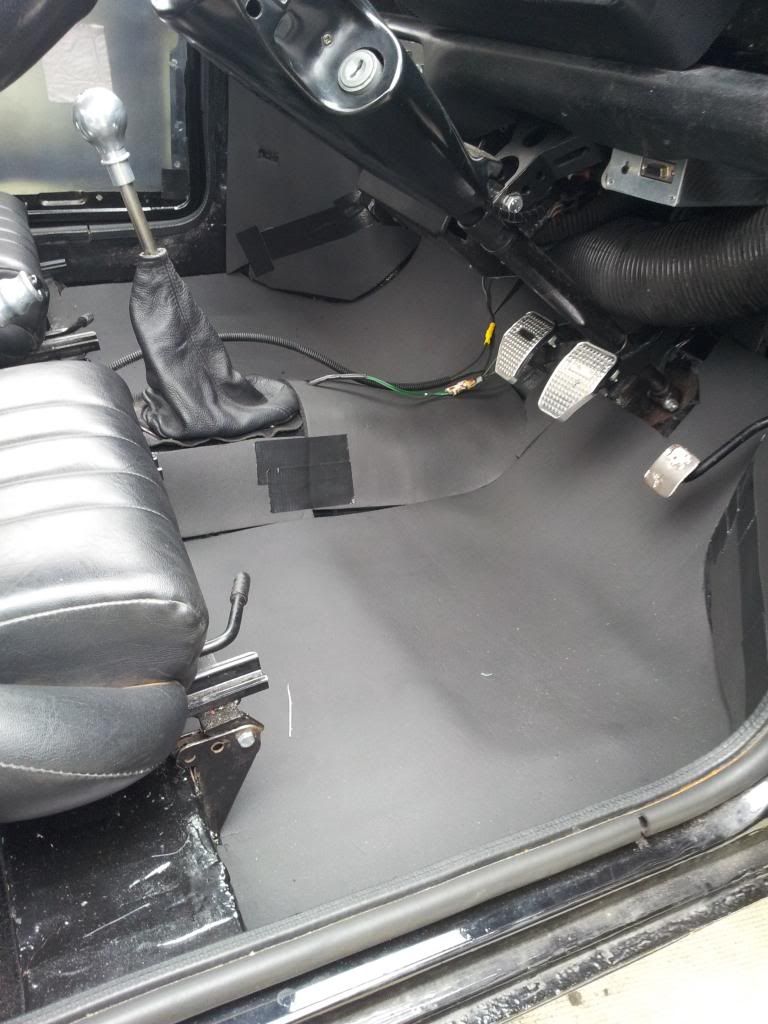
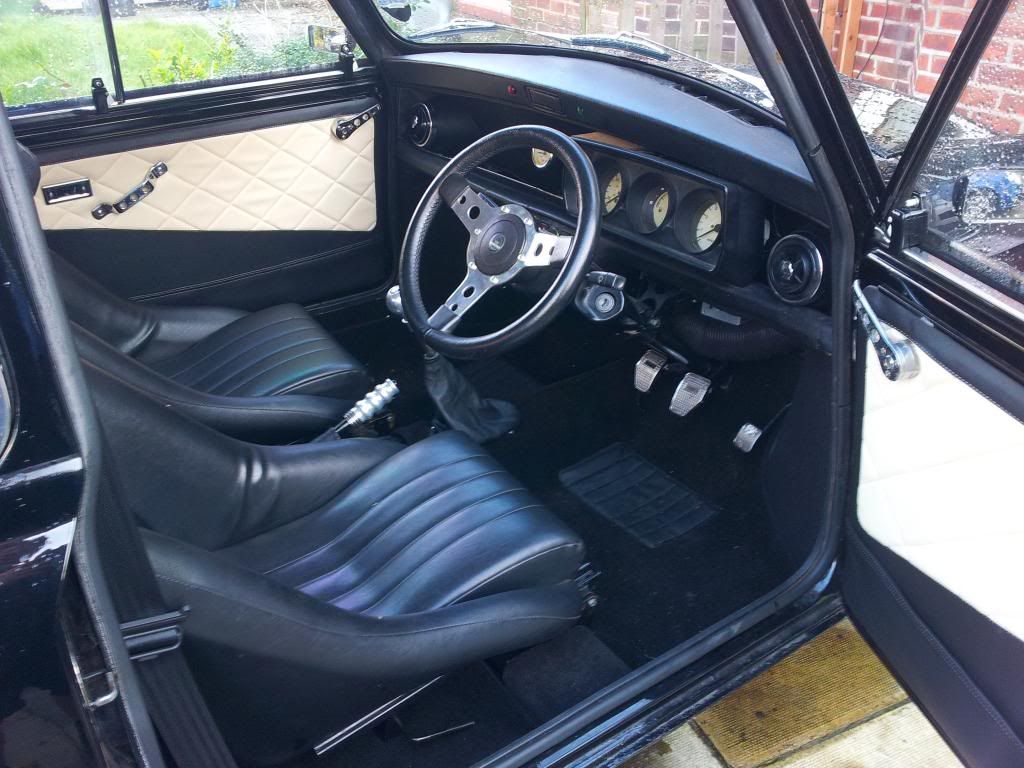
Then the carpets went in on top:

Posted Image

You can also see the door cards came off again. This was because I had water leaking from the sliding windows and also from behind the door cards. You can see I used a layer of damp proof membrane plastic over the door and the sliding window runners had to come out and be refitted with some sealant added and so far i've had no leaks. Once that was done the cards when back in:

Posted Image

Last interior jobs are to make a base for the dash to sit on the dashrail and also need to sort a parcel shelf out to mount my speakers on. I'm not too fussed about sounds at the moment anyway as I need to source an amp first.

Only other minor problem i'm having is with the clutch, I just can't seem to get 1st gear 1st time. I've tried adjusting it and it works fine in all the other gears so i'm not sure. Only bit of the clutch which is old now is the arm itself, so i'm going to replace that and re-adjust to see if it fixes it.

I'm also going to give the engine a going over with an oil/filter change and tappet adjustment etc and hopefully keep putting the miles in! Eventually i'll get it rolling roaded but for now its running nice with no real flat spots so i'm happy!

Edited by mike., 22 November 2012 - 09:25 PM.


#371 steven

steven

    One Carb Or Two?

  • Banned from Buying/Selling
  • PipPipPipPipPipPipPip
  • 1,195 posts
  • Location: Uk

Posted 22 November 2012 - 09:31 PM

such a lovely mini :thumbsup:

#372 Mini-Mad-Craig

Mini-Mad-Craig

    Crazy About Metro's

  • Members
  • PipPipPipPipPipPipPipPipPipPip
  • 9,298 posts
  • Location: Travelling in a fried out Kombi

Posted 10 December 2012 - 03:42 PM

I have followed this since the day you posted the thread mate, must have been one of the first I read when I signed up to TMF. You should be proud of this, its turned out more awesome than I could ever have imagined.

#373 mike.

mike.

    Crazy About Mini's

  • Members
  • PipPipPipPipPipPipPipPipPipPip
  • 6,176 posts

Posted 17 December 2012 - 06:13 PM

Thanks for the kind words guys, its come a long way since I bought it!

Its off the road at the mo as I discovered a crack near the clutch pivot which I think is causing my gear selection problems. The tax was out in december so decided to sorn it since I won't get chance to fix it till new year anyway!

#374 Andy_

Andy_

    Stage One Kit Fitted

  • Noobies
  • PipPipPip
  • 72 posts

Posted 06 March 2013 - 08:24 AM

What a transformation. Class project :)

#375 webby0121

webby0121

    Mini Mad

  • Noobies
  • PipPipPipPip
  • 117 posts
  • Location: westmidlands

Posted 23 March 2013 - 12:48 AM

Just looked through this project, Totally awsome! and how did you get the mini in your signature?


2 user(s) are reading this topic

0 members, 2 guests, 0 anonymous users