Jump to content


Photo
- - - - -

'86 City Refurb


  • Please log in to reply
375 replies to this topic

#346 mike.

mike.

    Crazy About Mini's

  • Members
  • PipPipPipPipPipPipPipPipPipPip
  • 6,176 posts

Posted 14 August 2011 - 01:47 PM

Also, here what my to do list is looking like at the mo:

• Prepare inner wings/shock mounts for welding
• Make patches/repair pieces to be welded
• Order square bar to fabricate new shock mount threads
• Try fitting steering rack limiters again
• Fit new track rod ends/steering rack boots
• Rewire and remount MJ system
• Order and fit return spring pieces for clutch and bleed/adjust clutch
• Check manifold gaskets for blowing/leaks - Well i've fitted a new gasket so i'm hoping its sealed now
• Remove current bottom pulley and source/fit suitable one
• Paint under passenger wing with POR15
• Clean/rub down under sills and floors and paint/seal
• Check interior for leaks - i've now found the the leak i've been having in heavy rain, its from the sliding windows, I think i've cut the seals slightly short so need to look into that
• Wire in rear lights and mount/wire in fog light
• Check fuel pump wiring/mounting and strap down fuel tank
• Re-route and rewire headlight and indicator wiring
• Fit new headlights and indicators
• Check relays, fuses, plugs and wiring for problems
• Wire in spotlights and test all electrics
• Clean out interior, wipe out floors and touch up paint on floors/sills
• Remove radio/amp wiring
• Mount MJ unit properly
• Wire in alarm system and central locking
• Fit new carpets, seatbelts/harness
• Remount/replace heating and air vent ducting
• Fit arches – With rivnuts preferably
• Polish and spray remaining 2 alloy wheels
• Fit interior – Seats, gaiters, dash lining, visors, mirror etc
• Fit exterior parts – Mirrors, wipers, bumpers, grill
• Try fitting bonnet struts
• Touch up paint in engine bay

#347 mike.

mike.

    Crazy About Mini's

  • Members
  • PipPipPipPipPipPipPipPipPipPip
  • 6,176 posts

Posted 15 August 2011 - 08:56 PM

Not done a huge amount today, spent most of the day trying to fit these bloody KAD steering rack limiters. This is my 3rd set now - At least this set they sent me free because of the problems I keep having with them. I'm now trying to them without heating them up first as KAD reckon the heat may have distorted them.

Getting them on without heating them is no easy task though, I must of spent at least an hour and a half trying to get them over the rack. I was using circlip pliers to prise them open and then having to pretty much punch them on once they were open enough. Left me with a cut of cuts and bruises but i've got them on now, even if they are a little bit battered and scratched! Still though, now they've been opened far enough to get them over the rack, they don't go back to the original closed up shape and the plastic cable ties your supposed to use to close them up just snap before they clamp the limiter tight. So at the moment, i've got them clamped shut with jubilee clips and i'm planning on leaving them like that for a few days to see if they close up again. If not, they're going in the bin.

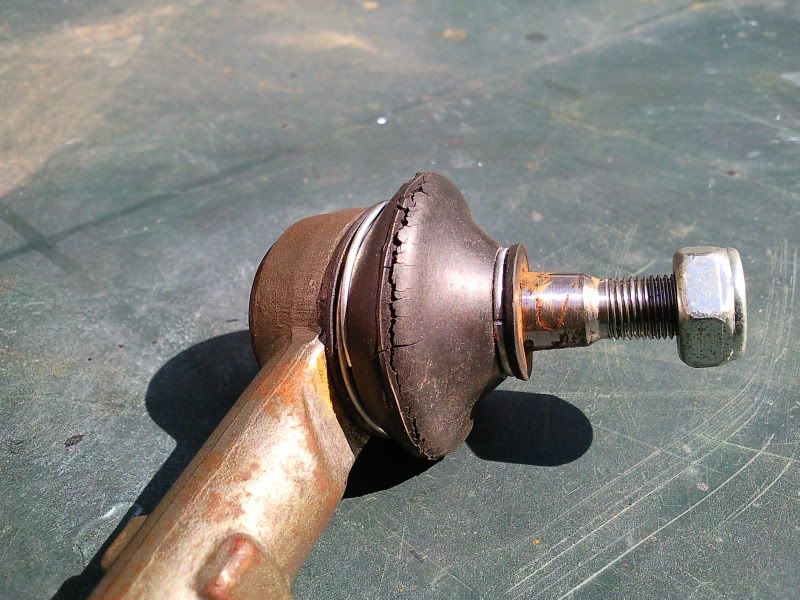
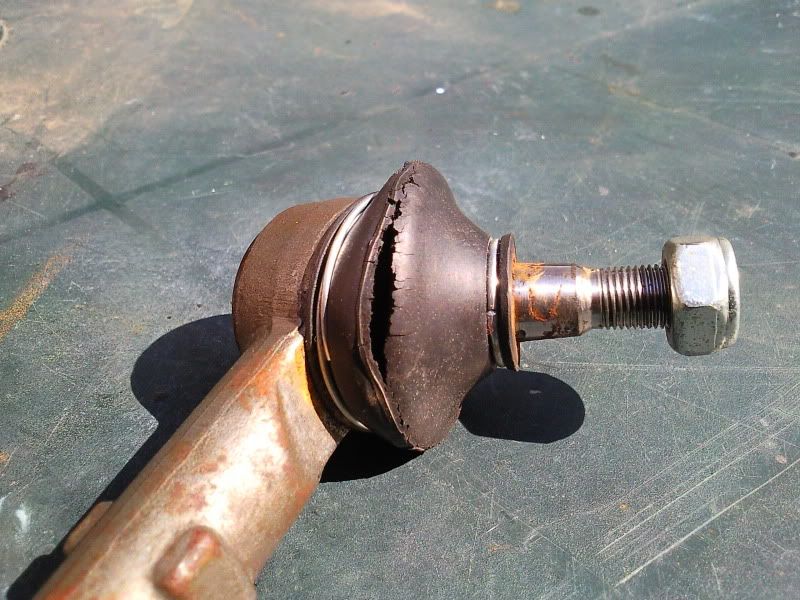
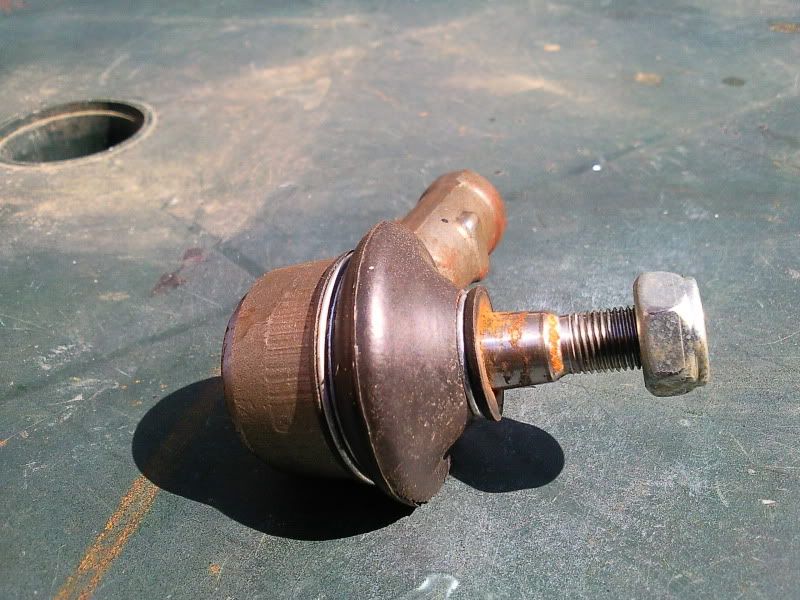
Another pain in the arse is the track rod ends! I noticed they're knackered already! These a brand new, been on the car no more than 4 weeks and the rubber looks like its just perished and split! I don't know if this is because the cars up on stands and the rubber boots have been sort of flex'd past their tolerance and just ripped open, but it looks like they've weathered aswell, so theres £15odd down the drain:

Posted Image

Posted Image

The other side of the rubber is fine:

Posted Image

?????

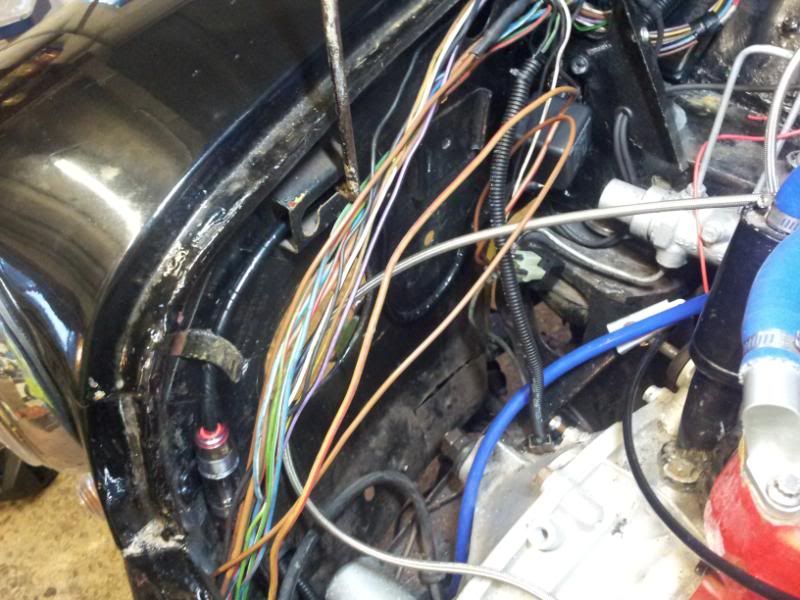
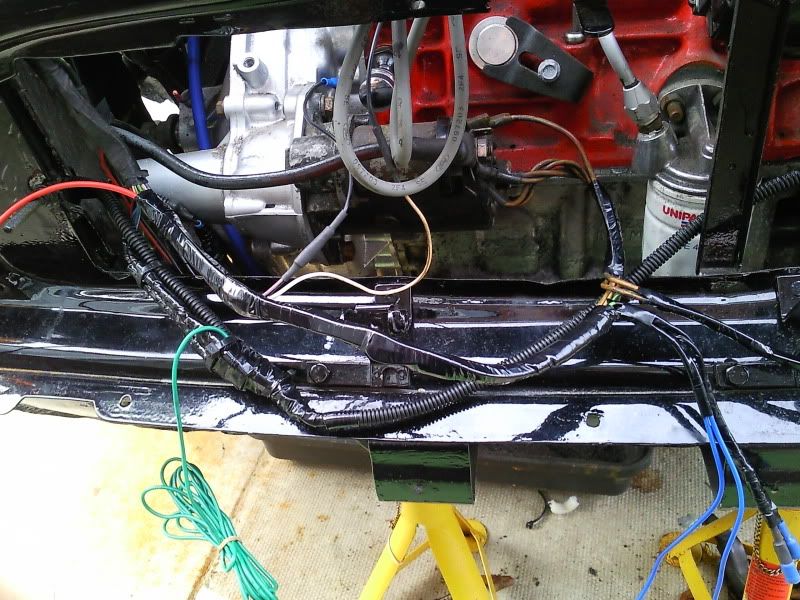
Apart from the above, i've done what I hope is the last of the wiring down round the front panel now i've got all the lights wired in. I've wrapped all the loom in non adhesive PVC loom tape, the extra bits of red/blue/green wire i've added are the power and switch wires for my spotlight. I thought i'd incorporate them in with the cars loom to keep it all neat and avoid having any extra loose wires running around the engine bay:

Posted Image

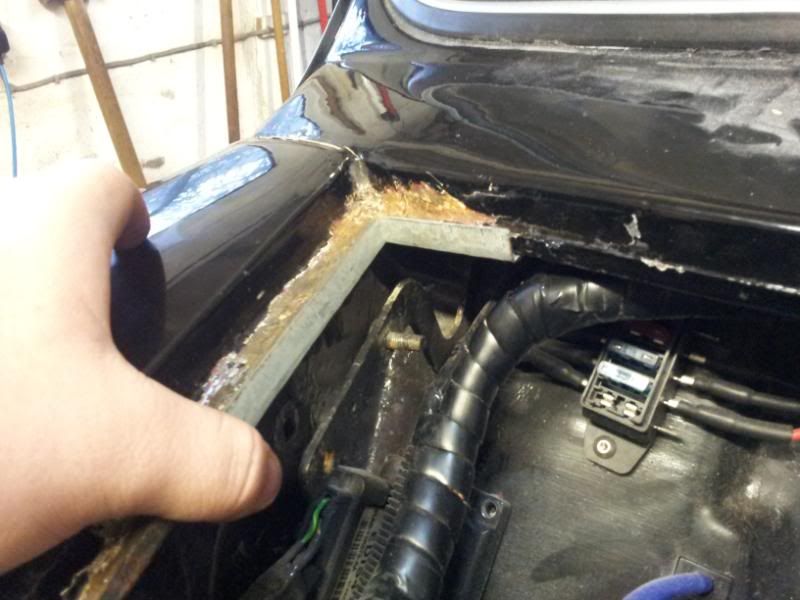
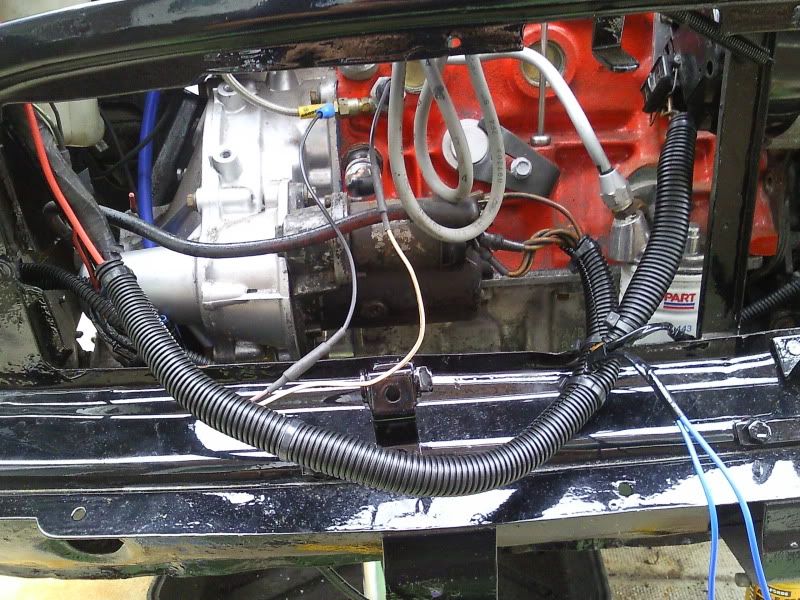
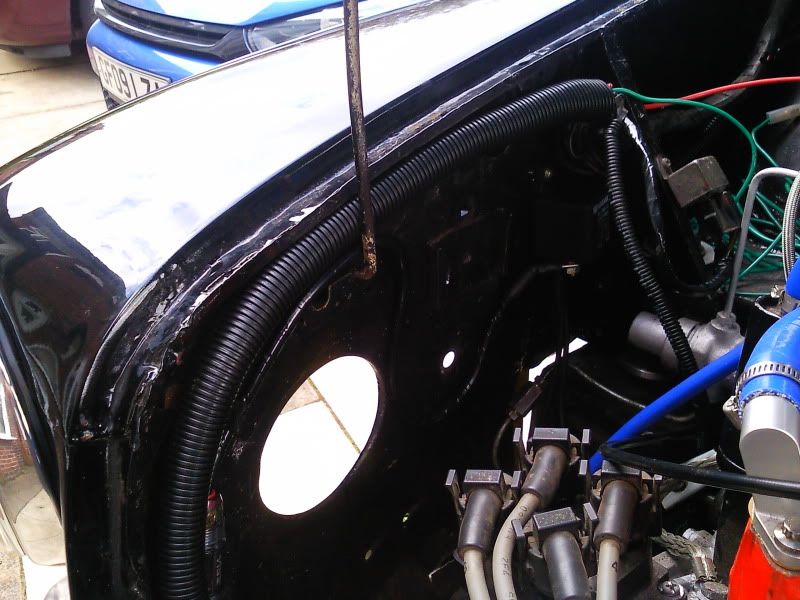
Then tucked all the headlamp wiring away and wrapped the loom in conduit which looks nice and neat. Think i'll be giving the rest of the loom the same treatment wherever its visible:

Posted Image

I've also ran my fuel pump wiring from the engine bay to the boot, I've ran that through conduit aswell and under the seat cross member so its out of the way, just need to wire that into the new fuse box and connect the relay up for the new fuse box so its all ready to go.

Next job is to finish the MJ loom - I hope I can remember what I was doing as I sort of left it half finished like I do with everything!

#348 mike.

mike.

    Crazy About Mini's

  • Members
  • PipPipPipPipPipPipPipPipPipPip
  • 6,176 posts

Posted 19 August 2011 - 02:40 PM

Another little update, minispares saw my post about the track rod ends and sent me a new pair free of charge on next day delivery - Cannot fault minispares at all!

Ran the spotlight wiring up the loom and wrapped it in conduit, looks nice and neat:

Posted Image

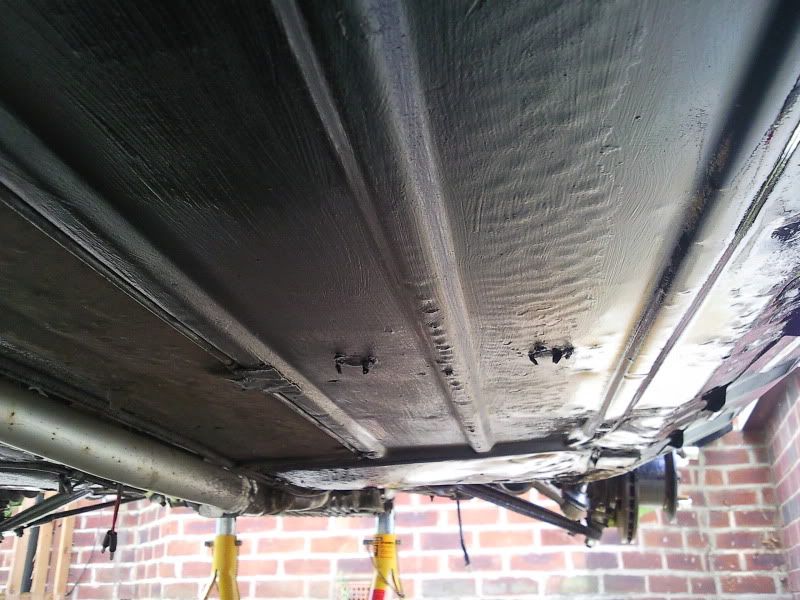
Rubbed down and cleaned under the floor/sills and painted them with por15 and then gave it all a coat of underseal. Didn't go all the way to the tunnel as thats already got a good coating on it:

Posted Image

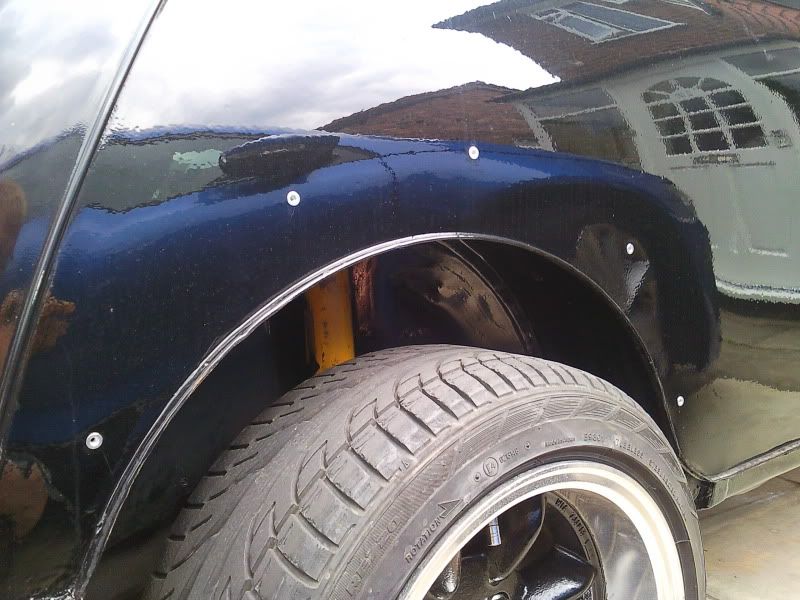
Drilled out all the arch holes, painted/sealed them and installed rivnuts:

Posted Image

This will mean that apart from the grill surround, every exterior part of the car will be rivnutted rather than paint chewing self tappers. I'm hoping the rivnuts work ok for the arches as the bolt have to go in at a bit of an angle because of the angle of the L shape brackets on the arches so it might be a bit of a fiddle but once they're on they're on.

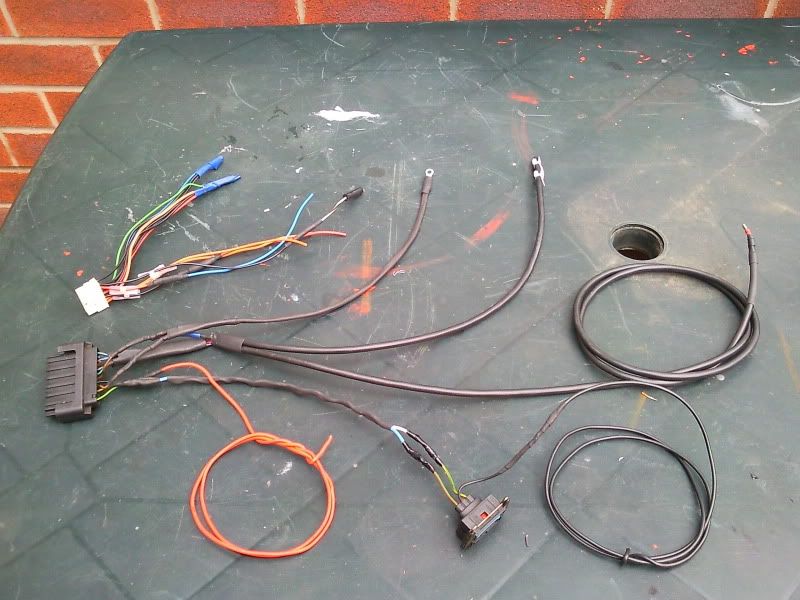
Near enough finished the MJ wiring loom mk2 now. I've just got to sort out the circuit board soldering for the rev limiter and fit that first then I can plug connect it all up and test it. If it works i'll wrap it all up nicely in conduit and loom tape and route it all through the car properly - Then i've still got the job of finding another trigger wheel set up as the one I got sold by SD minis doesn't have a damper built in, so will damage the crank eventually.

Posted Image

#349 mike.

mike.

    Crazy About Mini's

  • Members
  • PipPipPipPipPipPipPipPipPipPip
  • 6,176 posts

Posted 23 August 2011 - 06:38 PM

After reading m44k ts project thread and in particular his MJ install, I decided he had a way better place to mount the coil than I did.

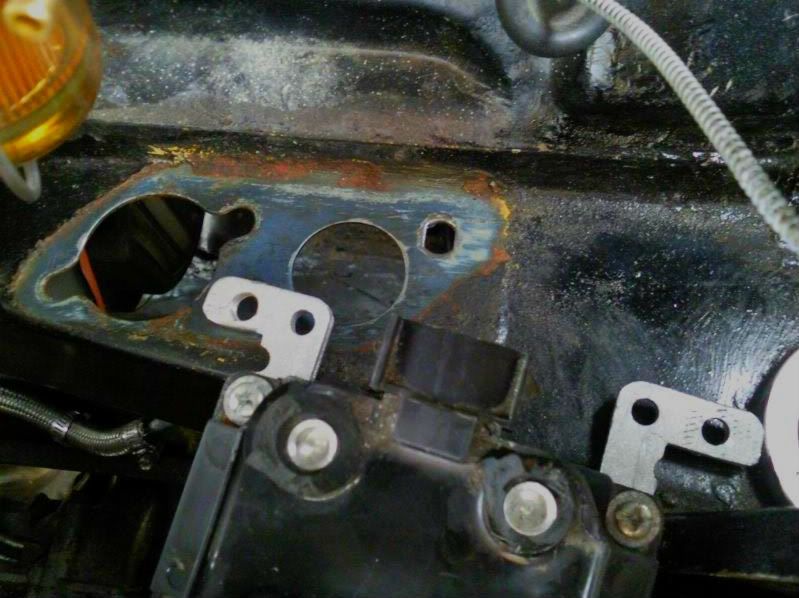
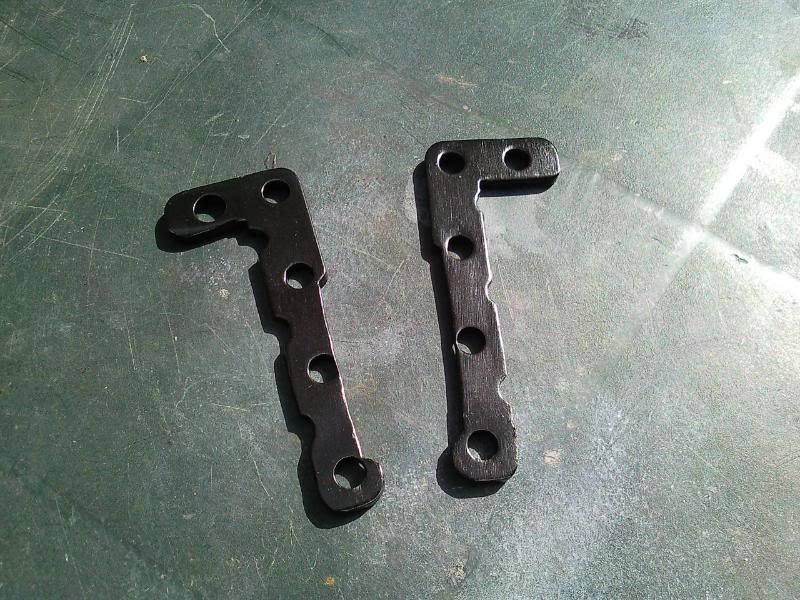
Since I had some seat adjuster brackets lying around, I gave his mounting idea a go and it's going to work a treat by the looks of it.

Test fitting coil with the new brackets, it allows me to use one of the bolts for the bulkhead blanking plate and the rest i'll either use screws or rivnuts if I can get the gun in there. You can also see the original city e blue colour my car originally was!

Posted Image

Once happy with the fit I primed and sprayed the brackets satin black:

Posted Image

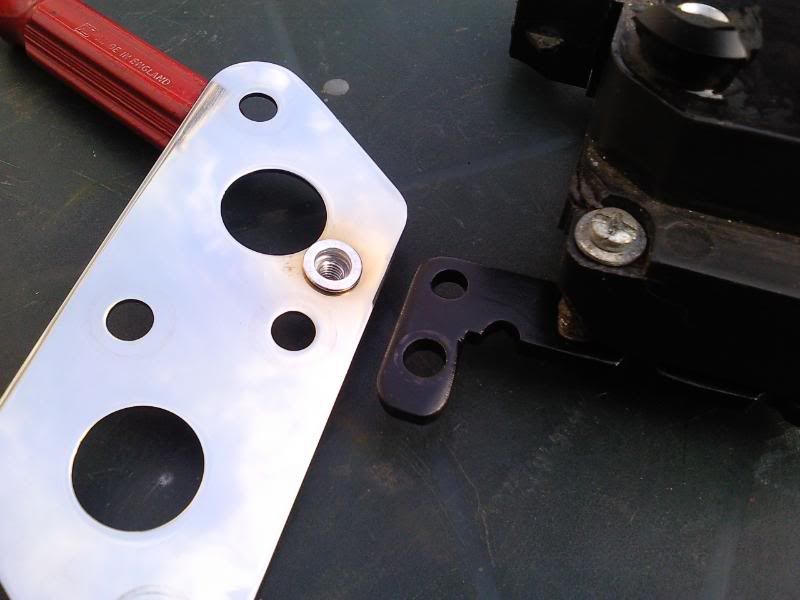
Got a new bulkhead plate from smiffys bits as mine was pretty rusty and had been sat under the ultimate engine steady bracket I had in place before. Drilled a hole in that and put an M6 rivnut through it:

Posted Image

I've extended the coil wiring on my MJ loom and just need to drill a couple more holes for the other bracket and it'll be ready to mount.

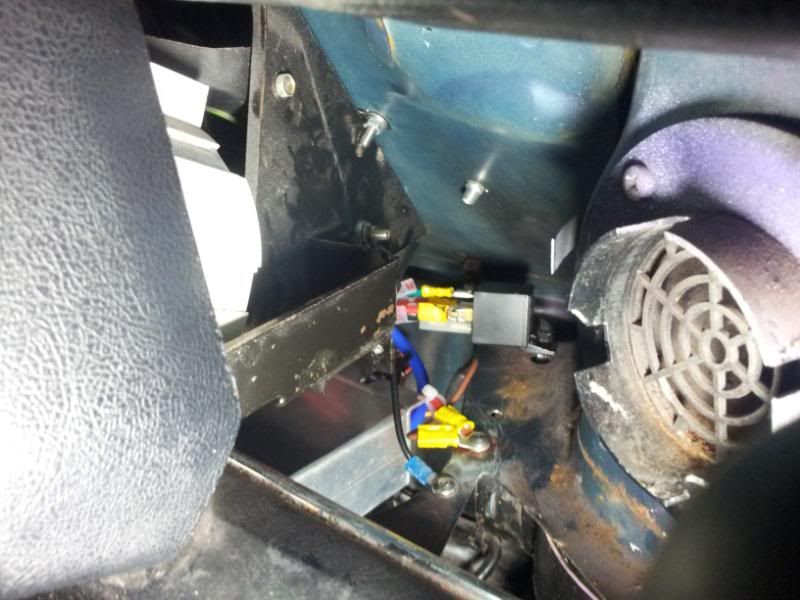
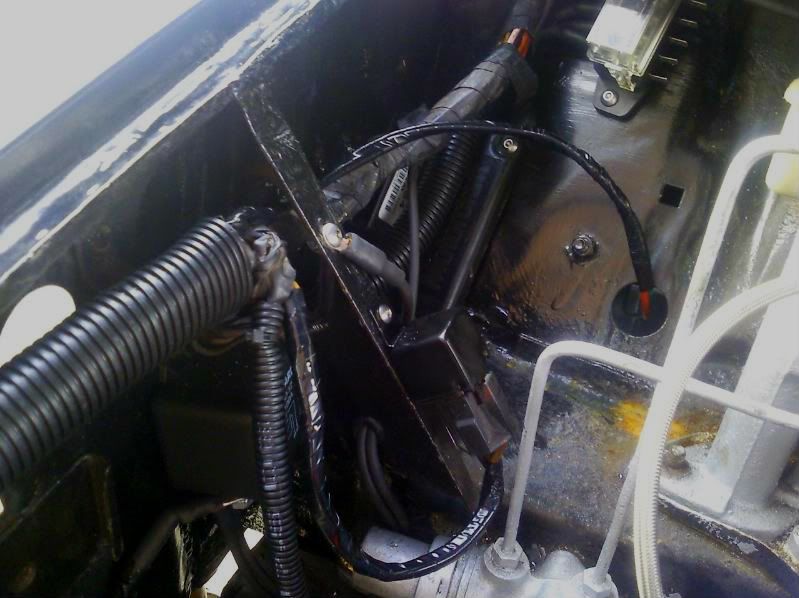
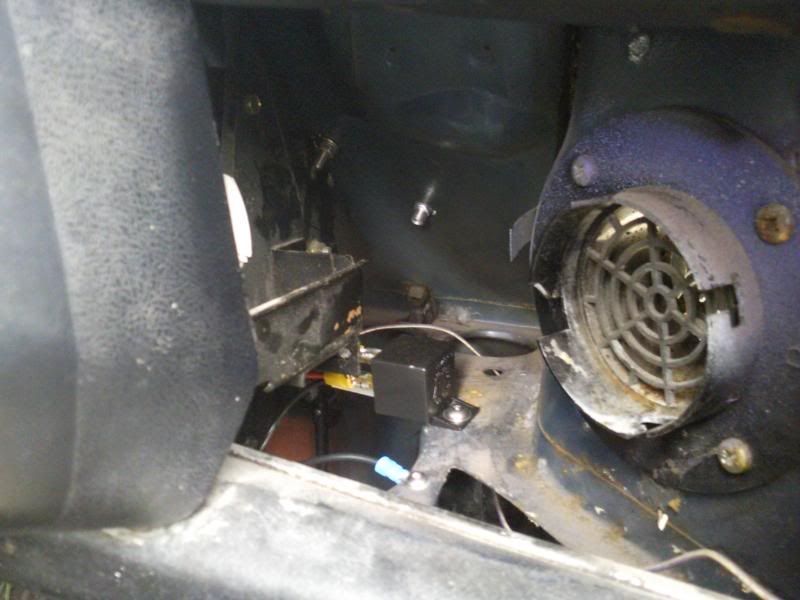
I'm desperately trying to keep all the wiring neat and out of sight but its not easy. I took the relay off and sprayed that black and fitted it with a rivnut, Routed the switch and earth wiring for the fuse box relay through the triangle piece of the bulkhead so thats pretty tidy; wrapped the spotlight wiring in loom tape and mounted the spotlight relay inside the car next to the clock so its out of the way. Also you can spot my mounting place for the EDIS module. Pretty happy with that as its out of the way and hidden underneath the wiring loom anyway. Hopefully once the MJ loom is in I can try and route it all so it looks like its supposed to be there because theres no way i'm going to be able to hide it all:

Posted Image

#350 mike.

mike.

    Crazy About Mini's

  • Members
  • PipPipPipPipPipPipPipPipPipPip
  • 6,176 posts

Posted 30 August 2011 - 05:03 PM

Done a bit more but nothing massive - Don't know where the time is going the weeks are just flying by!

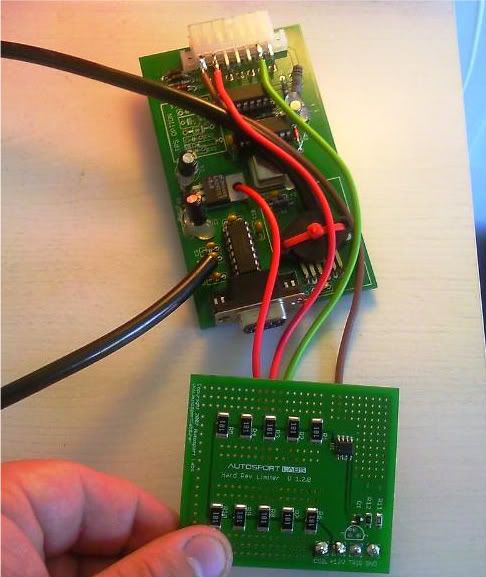
I've wired in the hard cut rev limiter into the MJ - Decided to wire it and mount it fully internally which is a bit trickier than just splicing the wires externally and mounting it elsewhere but after a bit of head scratching i've done it.

Posted Image

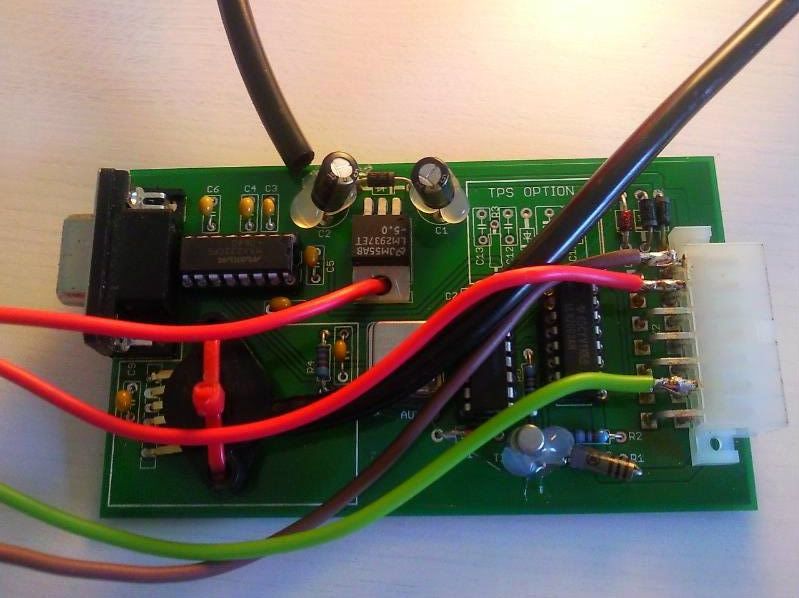
The 12v wire is soldered onto the 12v input pin from the molex connector on the underside of the board and routed through the voltage regulator mounting hole, the rest are just piggybacked onto the molex pins. The coil connection is soldered onto the TPS pick up pin - As my MJ is a map version this pin is unused:

Posted Image

Then this all slides into the MJ housing nicely. So now I just need to run the wiring and plug it all in and the Mj is ready to test. Need to sort out my fuel tank mounting first though as I don't want to fill it with fuel to get the engine going again, just to have to syphon it out to get my fuel tank strapped down properly.

A pic of where i've mounted the spotlight relay - Next to the clocks so its out of the way and hidden:

Posted Image

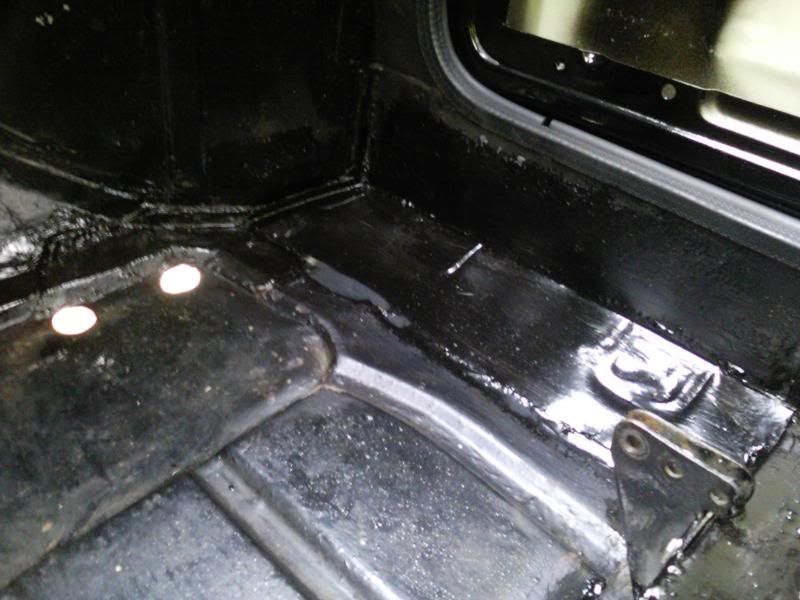
Also wire brushed and wiped the floors out and used hydrate 80 to treat all the areas i've had welded so all along the new inner sills and in the rear bins etc and then painted with hammerite:

Posted Image

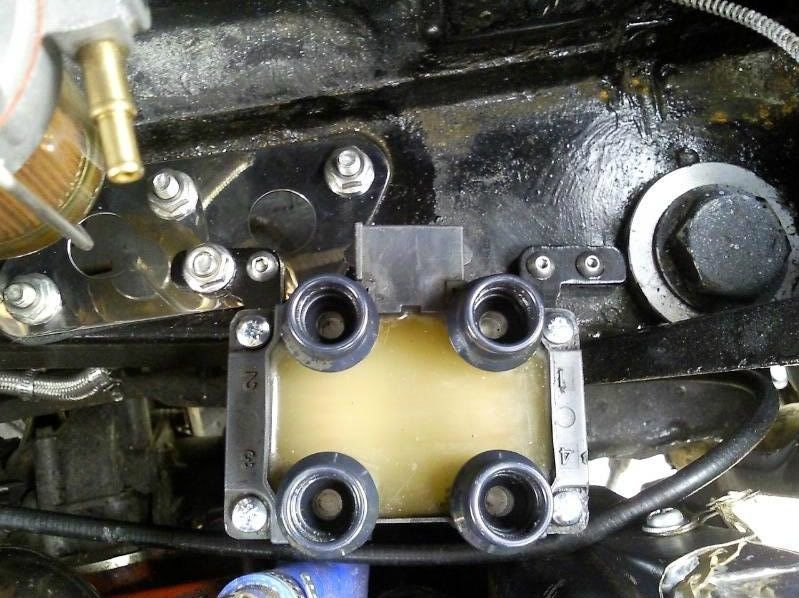
You may have noticed in the last pics I posted of my coil mounting brackets that the coil was looking a bit worse for wear. Basically it fell off the counter in the garage and a couple of plastic bits that the HT leads mount to broke clean off - It then got thrown at a wall for p**sing me off and got damaged further... So i've been waiting for this replacement to come through the post which arrived today. The top of it is bare plastic not black like my last one but you can't really tell once its got the leads on. So anyway, got it mounted in the new position with the brackets I made and mounted it with stainless bolts and nyloc nuts too. Mounting it here lets me use one of the bulkhead blanking plate bolts and the rest are rivnuts. You can also see the stainless plate i've fitted:

Posted Image

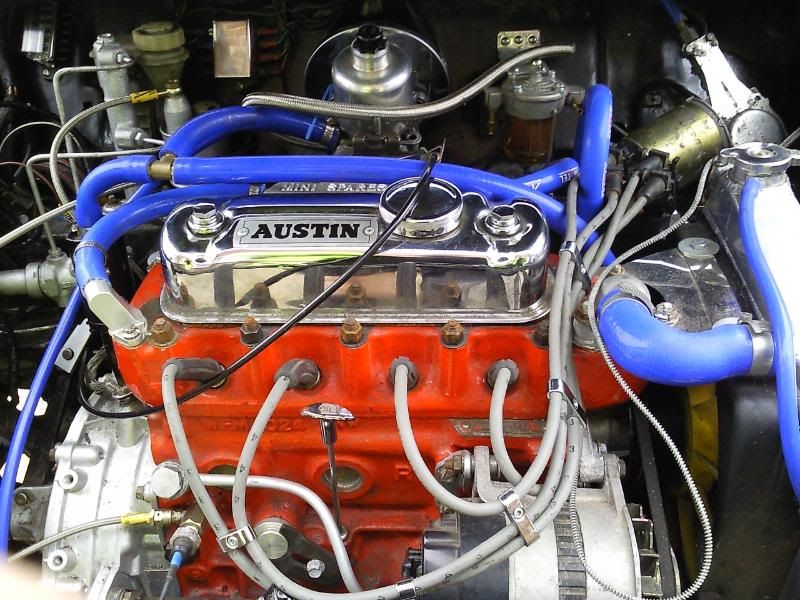
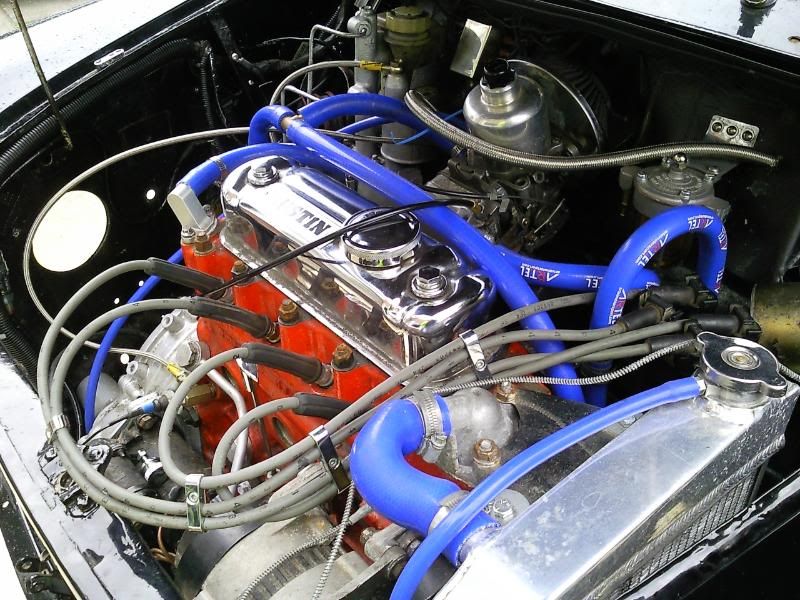
Then with the leads attached along with some little chrome HT lead clamps:

Posted Image

Posted Image

Makes quite a neat mounting place for it and its up and away from any rain/moisture coming through the grill too!

Hopefully if I get a couple of weeks of no rain i'll be at a near enough MOT ready stage!

Edited by mike., 30 August 2011 - 05:07 PM.


#351 carboy001

carboy001

    One Carb Or Two?

  • TMF+ Member
  • PipPipPipPipPipPipPip
  • 1,065 posts

Posted 09 January 2012 - 11:27 PM

Where's this at now Mike? Any updates?

Cheers
Chris

#352 jules_perox

jules_perox

    Learner Driver

  • Noobies
  • PipPip
  • 13 posts

Posted 16 February 2012 - 09:10 PM

well thats 3 hours of me life I'll never get back! :D
And well worth it! read your thread from beginning to end...I'm also wondering how you're getting on?

But many congrats for amazing perseverance, and more than a bit of sufferance by the sound of it!

#353 mike.

mike.

    Crazy About Mini's

  • Members
  • PipPipPipPipPipPipPipPipPipPip
  • 6,176 posts

Posted 16 February 2012 - 10:05 PM

Hi guys, thanks for the interest :D

Its been a while since my last post in here and i've not really got anything spectacular to add either really.

I got a second car and had some temporary building surveying work in the months before Christmas so all work on the mini stopped. It was annoying really as all the nice days I was in work and then at weekends it was peeing it down. But anyway, I paid for a recovery guy to take the car to my nana's garage where it was out of the weather and I could work on it and since my temp work has now ended i've got more time to play with the mini.

Theres been some good and bad bits since my last update. Starting with the bad bits.

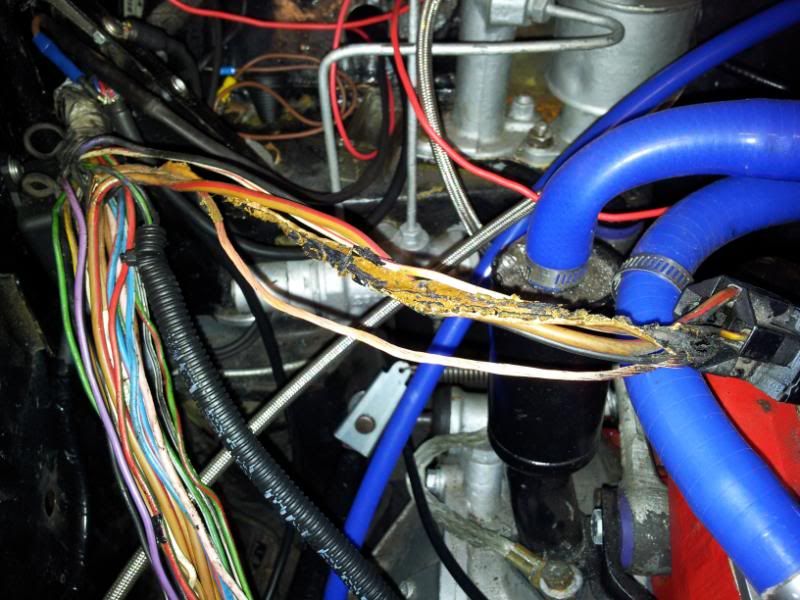
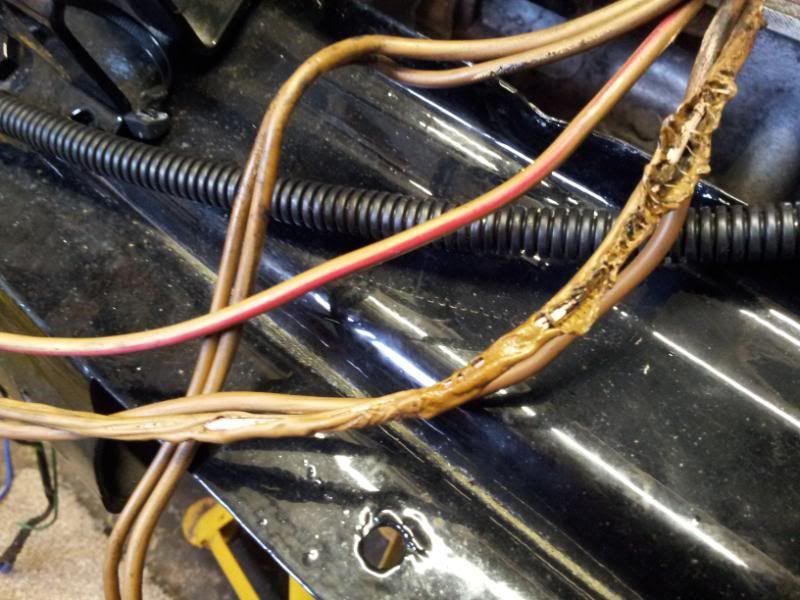
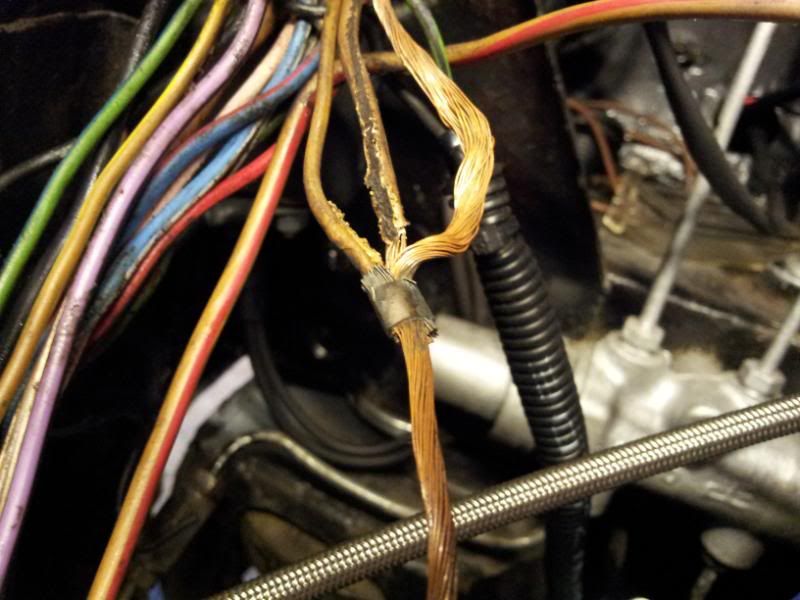
I tried turning the car over on the starter motor, first time i'd tried it in ages and was just turning it over for the sake of it really. I turned the motor over so a split second and hear popping, crackling and some big plumes of smoke coming out of the engine bay >_<

Quickly disconnected the battery and inspected the damage. It was the starter relay wiring:

Posted Image

Posted Image

Posted Image

Fried I think is the word for that. That wire got HOT! The insulation melted straight off most of it! Don't even know what happened there, apparently the relay must of shorted out some how?!

Anyway, that was a set back considering i'd just re-wrapped and tidied all my wiring loom! *sigh*

But yeah, new starter relay, new plug for it, some new wire and that was sorted.

Then the megajolt - oh my god. Spent sooo long sorting the wiring out for that, then trying to sort out that bottom pulley and fit the specialist components one. Then it wouldn't start, not one bit. Spent ages testing everything over and over before buying a new coilpack and finding that was the problem. But anyway its running again now on the MJ with my new wiring and the SC trigger setup so thats some good news, although its not sounding too healthy at the mo, I think the mapping may be out.

Just thinking back to my to do list at what i've done so far as I suppose i've done a few bits.

Bits I can cross off the to do list are:

Rewire and remount MJ
Remove current bottom pulley and source/fit suitable one
Clean/rub down under sills and floors and paint/seal
Mount/wire in fog light
Strap down fuel tank
Clean out interior, wipe out floors and touch up paint on floors/sills
Fitted the rear arches but ran out of trim for the front ones

So i've done a few bits and once i've got the engine running sweet, i've got some leaks to fix for the next job and random touchups round the engine bay. Then after that its sealing up the doors, wiring the alarm/central locking and then just the interior I think.
Sounds like nothing really but progress is pretty slow.

Maybe now i've updated this a bit i'll crack on some more!


I've got a load of pics of the stuff i've been doing but not got time to put them all on now. So i'll do a proper update when I get time

#354 mike.

mike.

    Crazy About Mini's

  • Members
  • PipPipPipPipPipPipPipPipPipPip
  • 6,176 posts

Posted 17 March 2012 - 01:14 AM

Thought i'd update this a bit with some of the photos i've been taking along the way. Since i've had the engine running, work on the car has been going pretty sweet, no real problems and the jobs I done i've not broken anything in the process or discovered another horror I need to fix; so yeah not too bad and feeling pretty motivated with it at the moment.

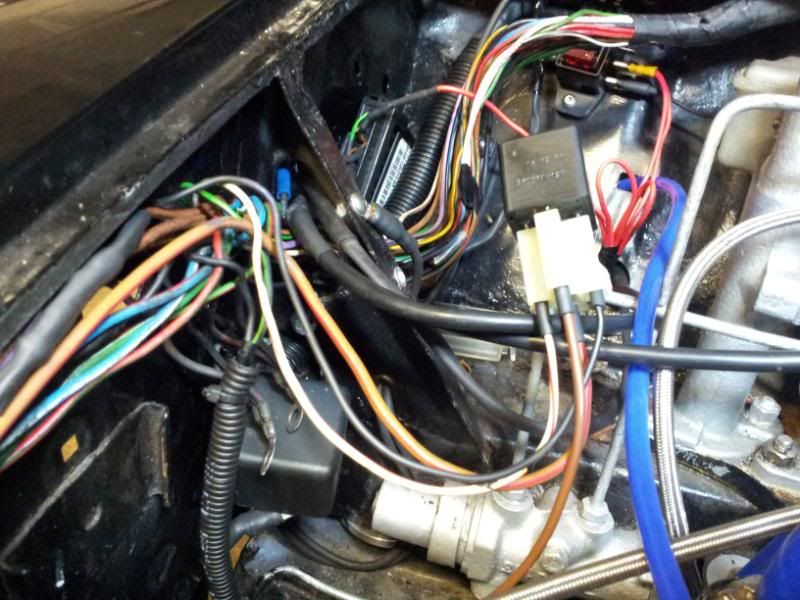
Going back a fair few weeks after all the wiring melted itself and the ignition relay as shown in the post above, new relay and plug was fitted:
Posted Image

That, along with its new wiring had the car turning over again on its start without smoke/fire this time... So checked all the other nearby wires and things for any damage from the heat but all was good.

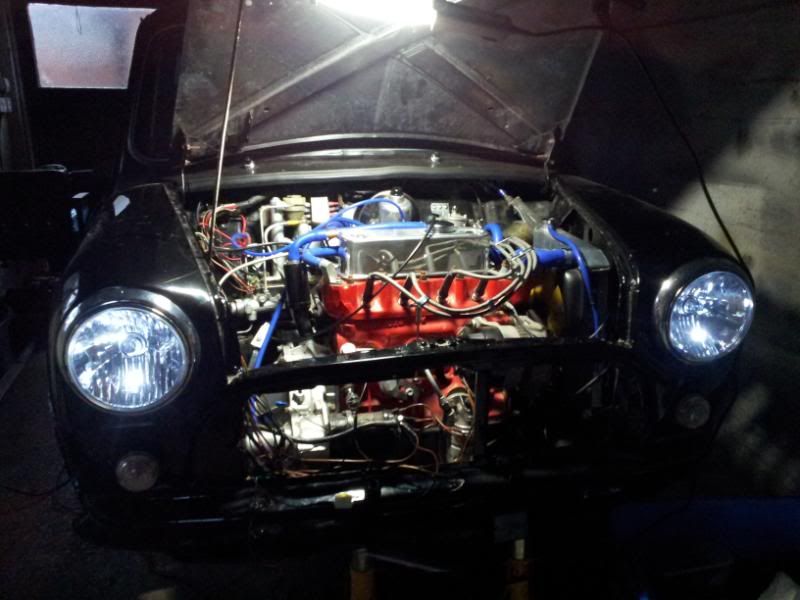
Random cool photo showing my LED sidelights, they're not as blue as they look in the photo, just bright white:
Posted Image

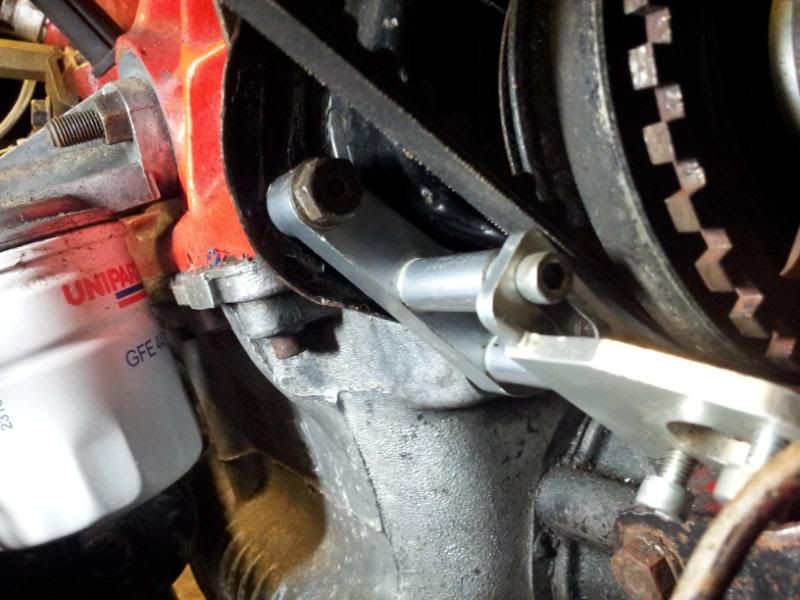
Next was sorting out the MJ. I couldn't get it started even on my new wiring loom so was a case of tracking down the problem. I spent ages with my multimetre testing my wiring over and over until I was sure my wiring was correct and making all the right connections. Then decided it must of been the dodgy trigger wheel/sensor mount i'd been supplied with. So I took all that off and refitted the specialist components set up I also had.

First attempt wasn't great, fouled the fan belt badly:
Posted Image

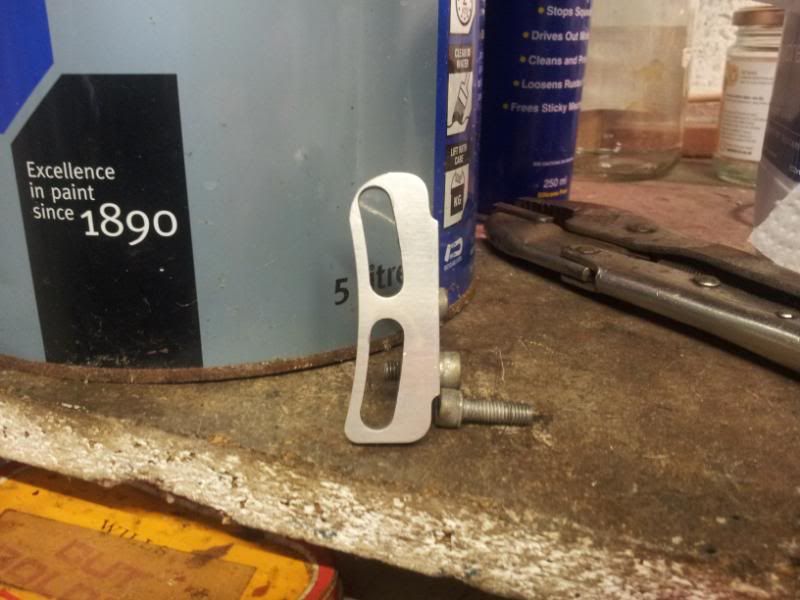
That came off and got adjusted with the dremel:
Posted Image

Posted Image

That gave enough clearance, just about anyway, about 2-3mm. Then when I came to put the rad and everything back in, the rad cowling fouled the trigger wheel lock ring >_< So that also had to be adjusted (hacked away at) with the grinder to remove a small piece from the rad cowl bottom mount. Then at last I got it all fitted with no fouling issues:
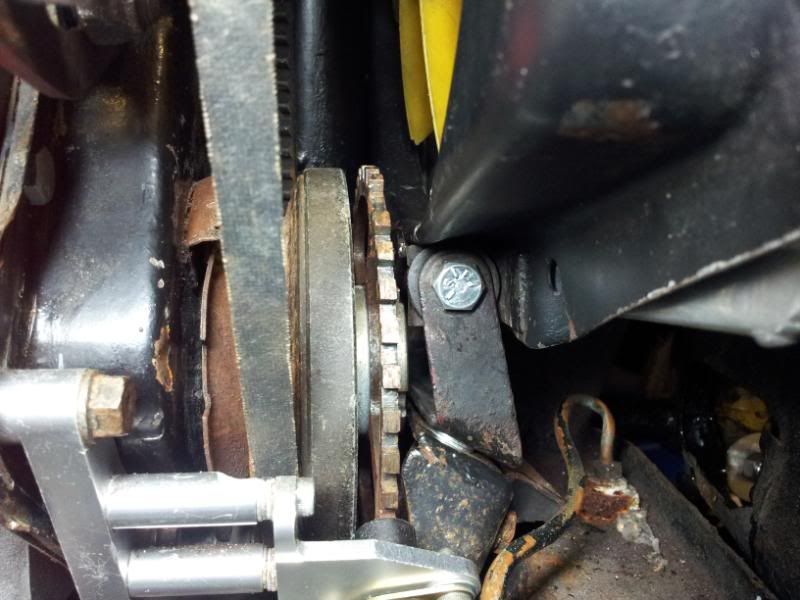
Posted Image

The clearance between that lockring and the rad cowl is small, I don't even know how close it is, can't really tell...

After that, I still couldn't get the engine running on the MJ O_O

More time was spent with the multimetre, writing tech threads on here for help and studying the wiring diagrams on the auto sport labs site. Since I couldn't even get the engine running in 'limp home' mode on just the ford EDIS parts, it was either the coilpack or the EDIS module that was at fault, and since a new coilpack was about £28 and a new EDIS module was more like £130, I picked up a new coilpack from a motorfactors - Plugged it in and it fired straight up! That was mixed emotions there, mainly relief at finally finding the problem, but a lot of frustration at the amount of time I wasted trying to get it working, only for it to be a faulty coil pack I bought off here O_O

Next little problem was, once the engine was running, it didn't want to turn off!! :lol: After more head scratching and problem searching, I found a thread on here that explained the same symptoms as mine. Turns out that once the engine was running, there is a little run around path that keeps the relay i'm powering my second fusebox off connected, even when the key was out. So basically, the alternator powers the relay through the little red ignition light on the dashboard! The fix was thankfully simple. A little diode wired into the ignition light wire:
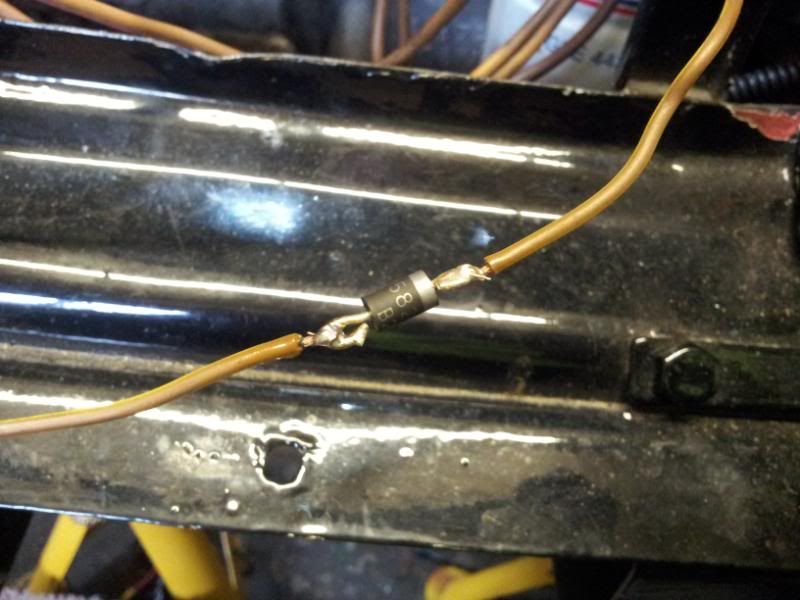
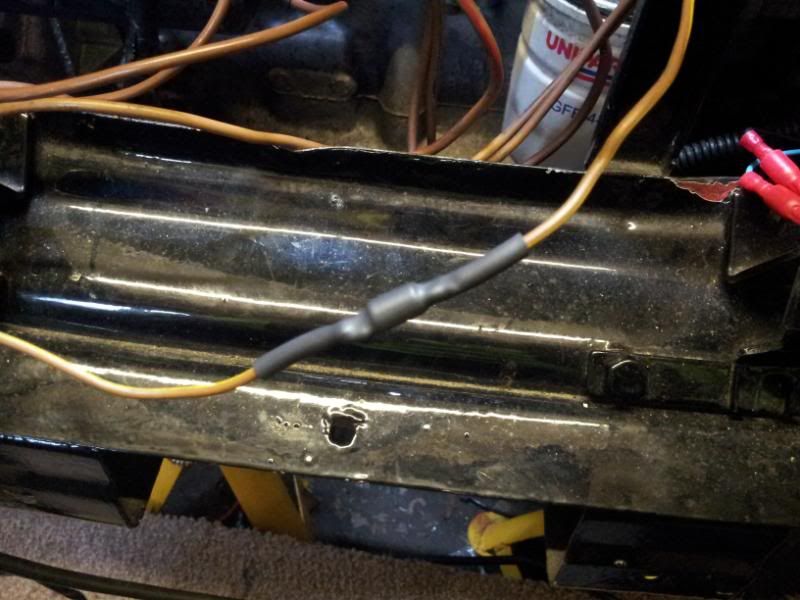
Posted Image

Posted Image

Sorted!

Very glad I found the info I did here on TMF. From what I gather this is not a known issues and so I doubt many people would of been able to work out what the hell was going on there.

After that I had my engine running and stopping on the MJ as it should. The hard rev limiter isn't working, I think it may have been damaged but at the moment I don't even care about that. My next job was to re-wrap all my wiring loom :ohno:

Posted Image

Started with just tape every couple of inches:
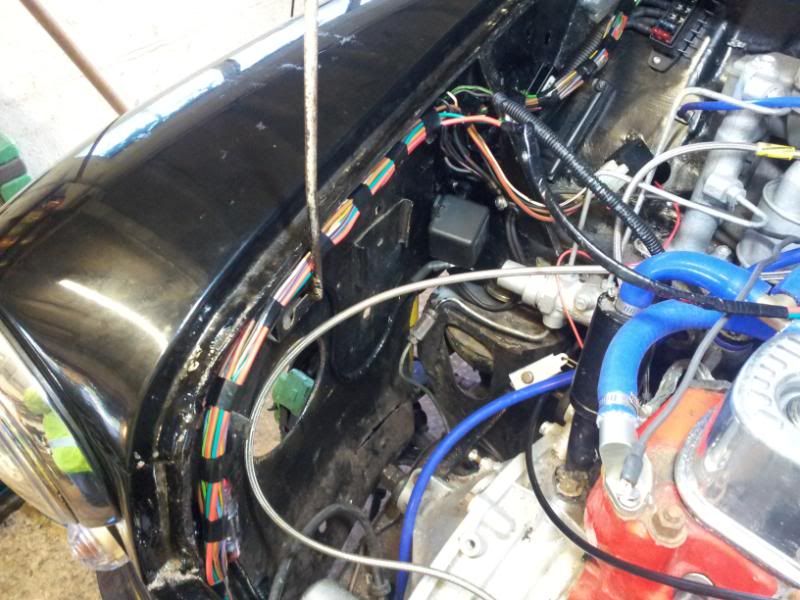
Posted Image

Then decided to wrap it in spiral wrap this time rather than conduit, because the conduit seems to have moisture in it when I took it off so may have been causing condensation issues!

The spiral wrap is a better choice anyway really, easy to put on, looks neat, easy to remove if I need to and generally does a good job of holding the wires and protecting them:
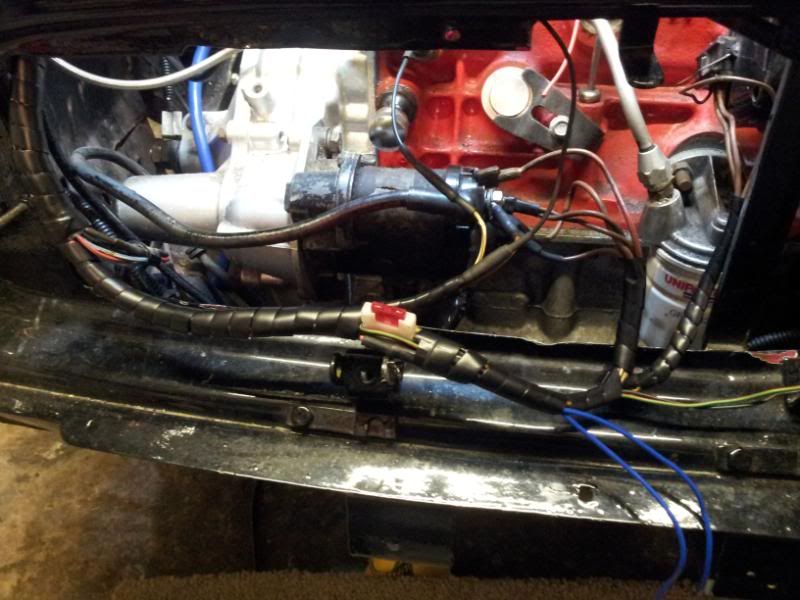
Posted Image

You can see the in-line fuse holder I put in to avoid future problems with the starter relay. This will be wrapped up too soon

I also had to incorporate the MJ wiring, the second fusebox wiring and my spotlight wiring into the loom in the neatest was I could. It was a PITA really as a lot of wires were going in/out of the car, popping out in all directions at different places in the loom, but eventually got it wrapped up and through a grommet. The wiring isn't exactly as stealth as i'd first imagined but it's good enough for now. Maybe next time the engine is out i'll mount if all in the car and hide the wiring better. You can also see I routed the vacuum tube for the MJ through a modified wiper motor captive nut through one of the holes in the bulkhead which worked nice:
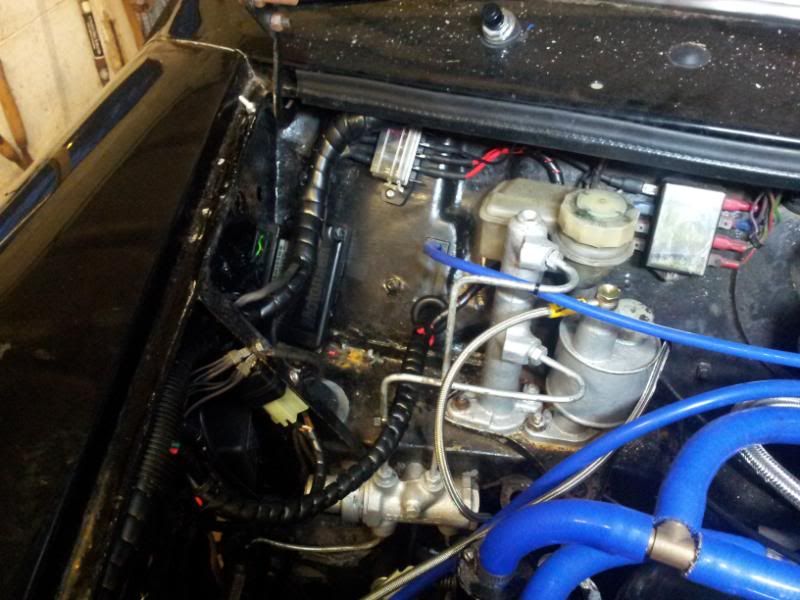
Posted Image

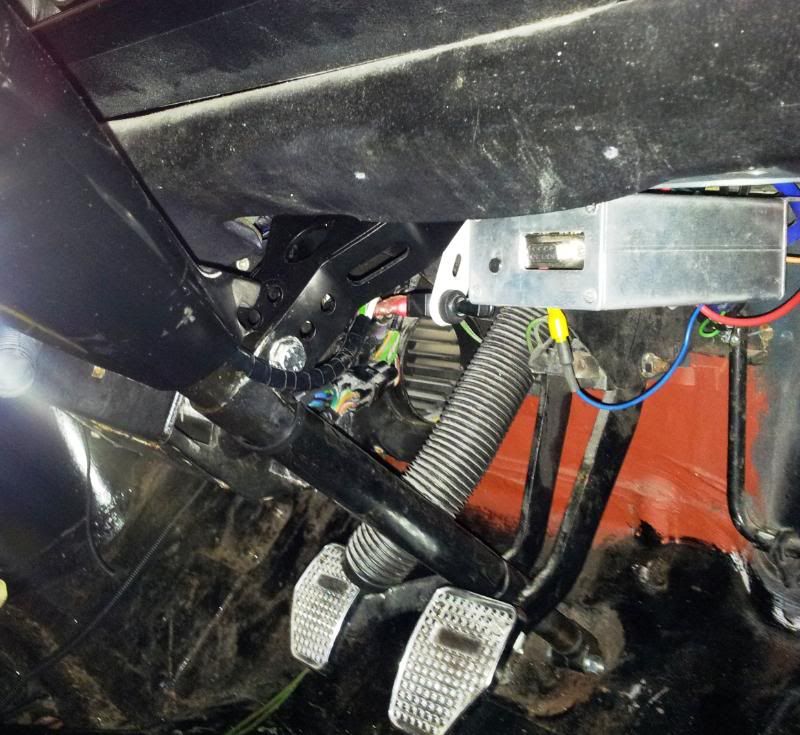
The MJ was mounted under the dash so it's right behind where all the wiring passes through to it, and still easy to connect to with the laptop:
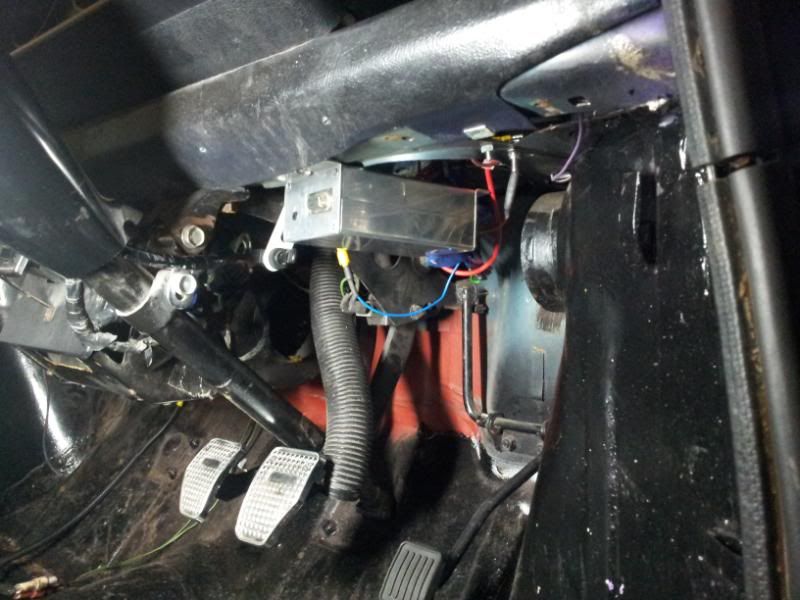
Posted Image

I'm yet to see if the heater pipe will still fit with that there! Didn't think about that until it was all mounted, but fingers crossed. The earth points for it all and the spotlight relay are mounted at the side of the clocks out of the way and keeping nice and dry and reliable hopefully :P

Posted Image

Next job in the quest for making the car reliable, was keeping the engine bay dry. It used to leak pretty badly and fill up the bulkhead crossmember after heavy rain. I think it was mainly because the drip tray round the engine bay was a mess and didn't really direct the way at all:
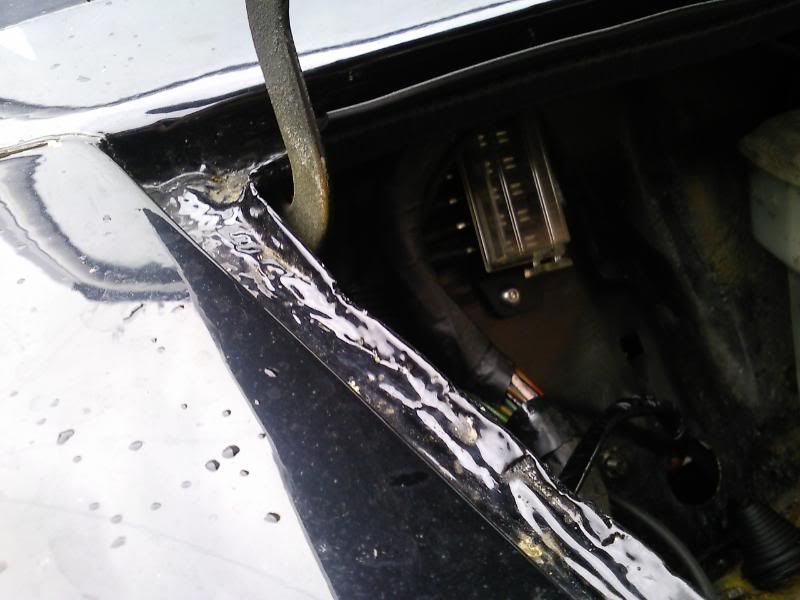
Posted Image

and i'd gone and mounted my EDIS module right underneath that! >_<

Needed to make sure water didn't drip straight into the back of it. So I removed all the paint and fibreglass that was making a lip and found there wasn't much left of the original gutter on both sides:
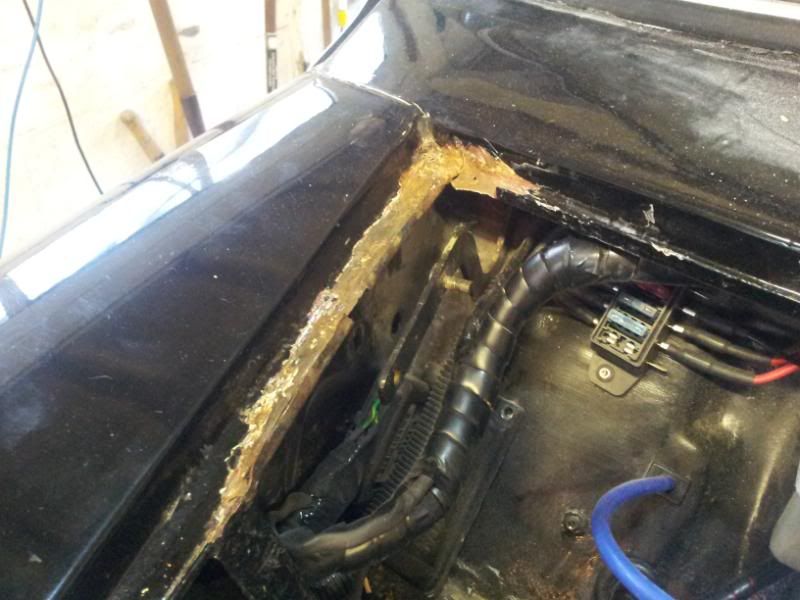
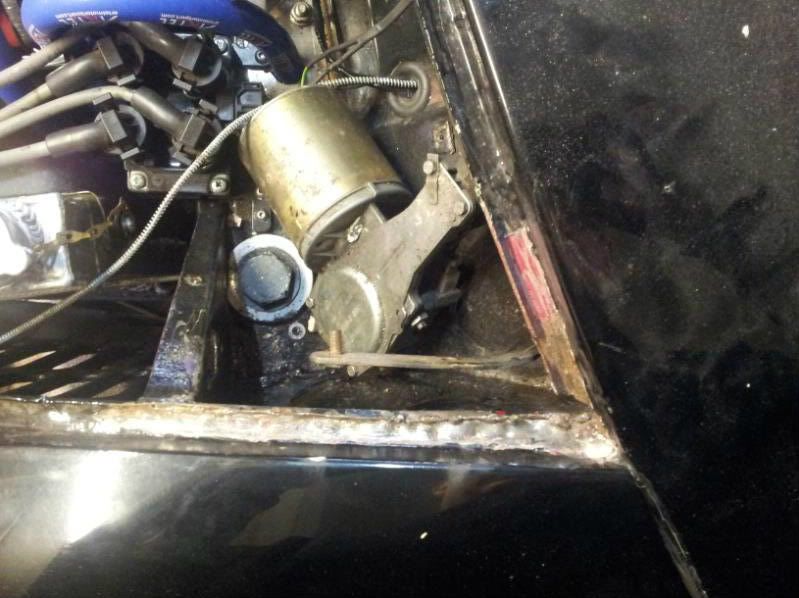
Posted Image

Posted Image

Set about making a new lip for that from some 1.2mm steel:
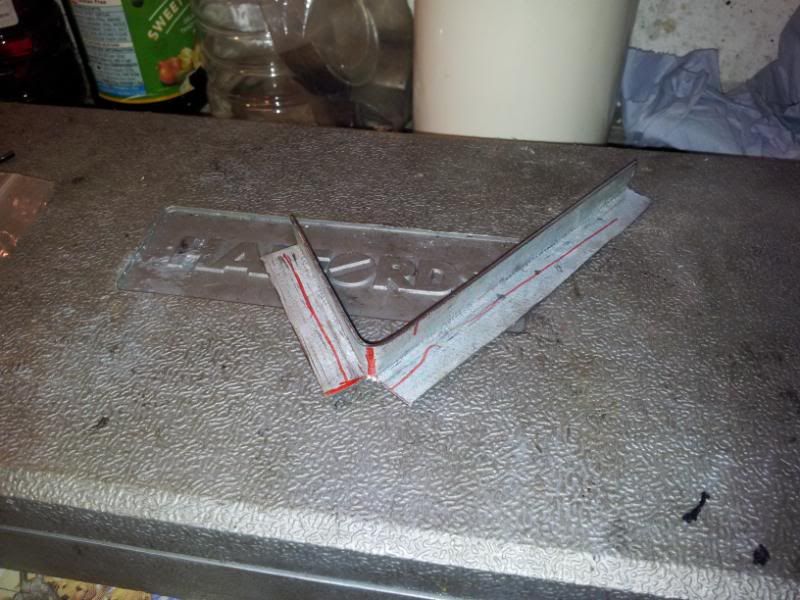
Posted Image

Posted Image

If i could weld I could of made a pretty professional job of this, but what I ended up doing would be considered as a bodge by some. But for me i'll be happy with it if it doesn't leak.

Drilled the car and the new lip to be riveted in, sprayed them up and painted any holes i'd made:
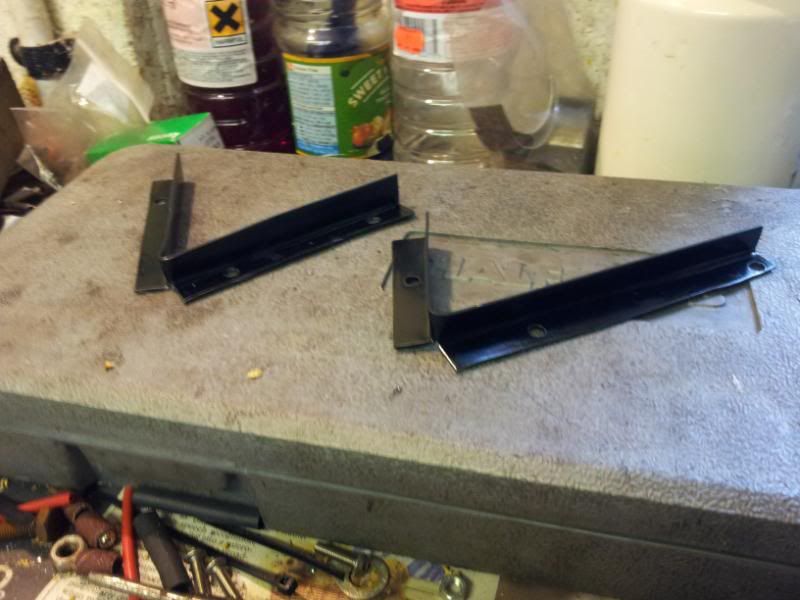
Posted Image

They were then riveted inplace with a bead of tiger seal between then and the car and also tiger seal on and underneath the rivet heads to seal them and prevent any corrosion between the 2 metals:
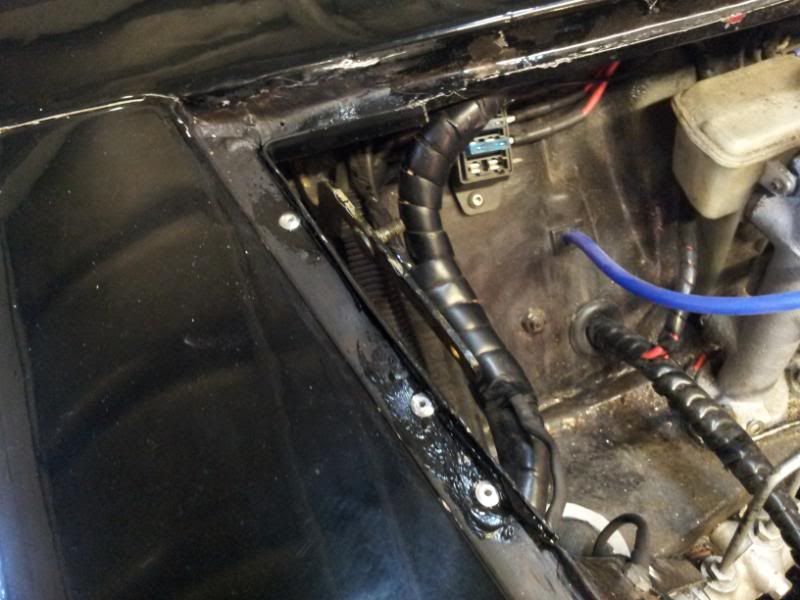
Posted Image

Then tiger sealed all the drip tray up followed by a coat of paint:
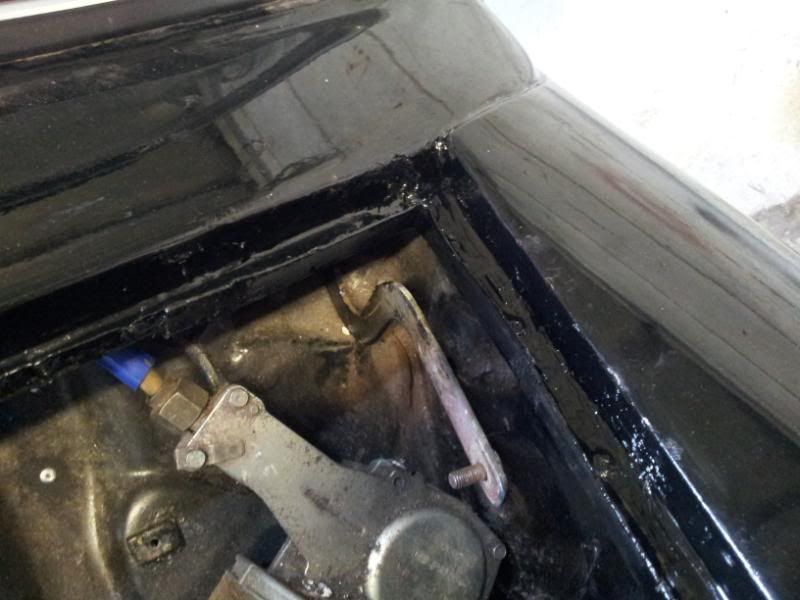
Posted Image

Its worked quite well I think, but time will tell and we'll see if it leaks.....

After that, I moved onto my doors - Fitting cental locking too them. The locking motors are controlled by the alarm, but may leave that till a later date, just wanted to get these in so I don't have to mess about taking the door cards off to wire the alarm in.

Thankfully this job was straightforward with these street fighter doors. No fancy hinges or anything are needed, just the motors themselves which cost me a fiver for the pair of them off ebay. I started by drilling the locking bar and putting the central locking control bar through it:
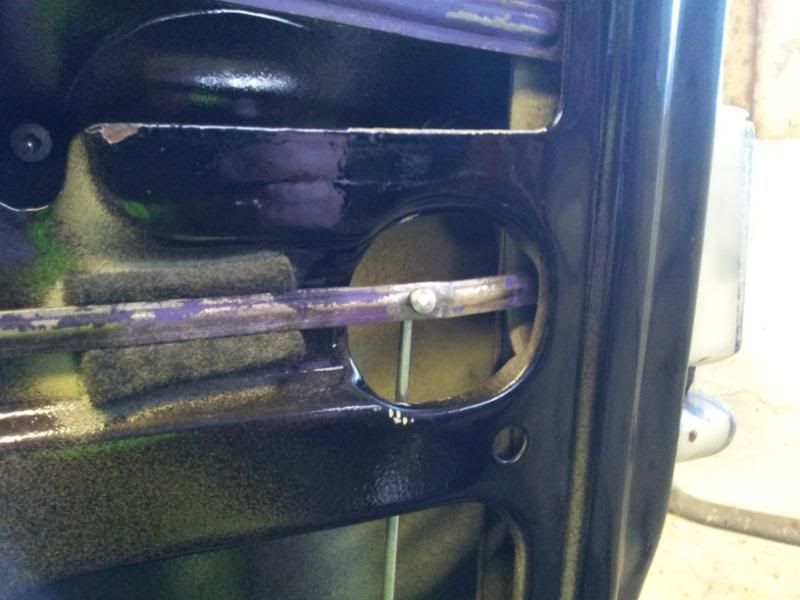
Posted Image

Then this is where the motors are mounted - But inside the door obviously, was just checking the direction of the locking bar here:
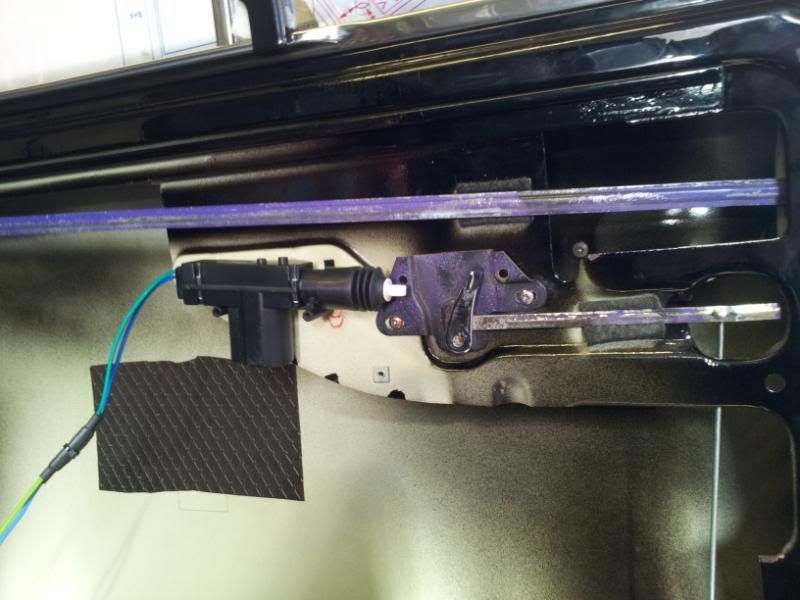
Posted Image

Then the locking bars were fitted to the motors and the motors mounted in the door. The wiring was extended and the door and door post drilled to route the wiring through. I riveted a P clip to the door where the door opening handle goes to support the wiring and help route it without it dangling around inside the door or dropping down into any water that'll be draining into the bottom of the door:
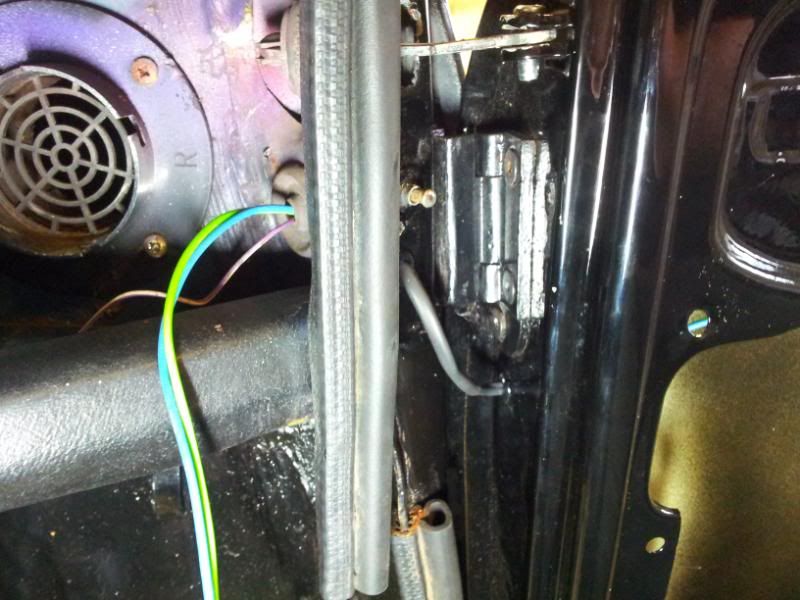
Posted Image

All in and tested. Locks and unlocked the door nicely - Pretty powerful little motors there for their size:
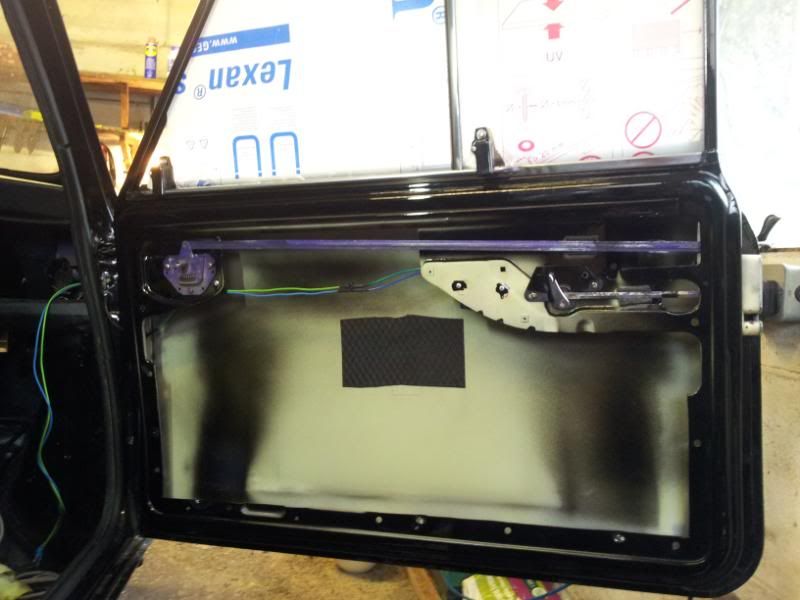
Posted Image

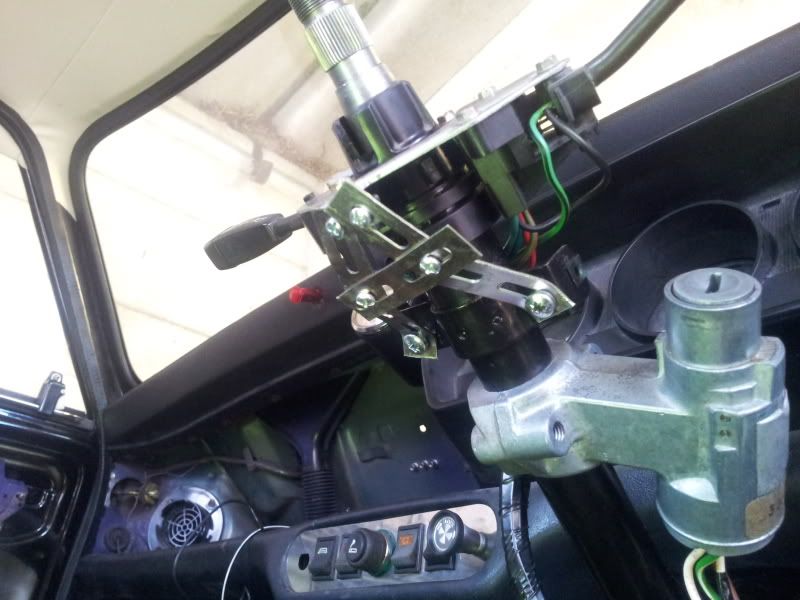
Today i've been sorted the steering column out. It had a fair bit of play in it and movement from the chrome drop bracket. I thought it was because the drop bracket had loosened over time, but I tightened it up and the play was still there. So today i've been taking the steering rack out to replace the bushes in that and get rid of the nasty chrome drop bracket.

When I fitted the drop bracket, I didn't loosen the U bolts so was half expecting to see the splines of the rack chewed up and useless, but there fine which is a relief!
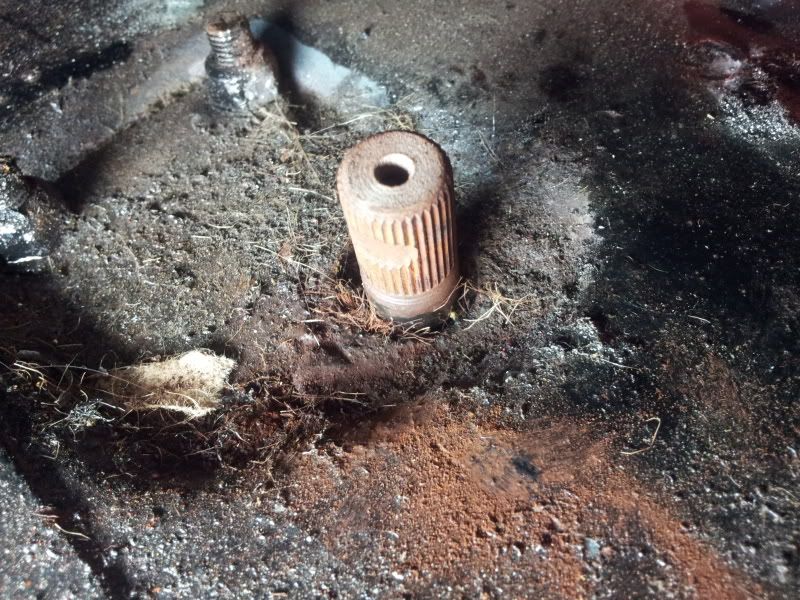
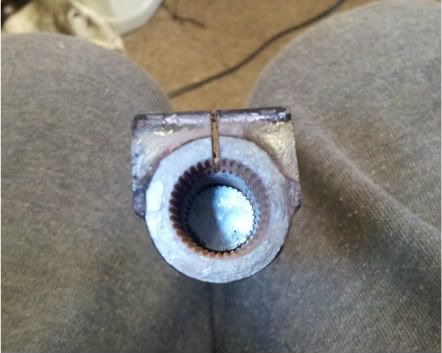
Posted Image

Posted Image

The pinch bolt has seen better days though, so will be getting a new once of those and i've got a beefy steering drop bracket on order from Jon betts on here - AKA JB Fab. Gona be glad to remove that chrome drop bracket, the whole thing was bent and twisted when I took it off!

Just got to deal with the nasty shear bolts to remove the standard column mount! I thought i'd got lucky as both the heads were still on the bolts, but as I tried to undo them, they sheared off :goaway:

So i'll be going at them with molegrips, stud extractors and the dremel next to get them out - Wish me luck!

I've done a few other odd jobs too, but nothing exciting really. Adjusting the handbrakes, fitted the front arches etc.

I can see the light at the end of the tunnel now :D

#355 carboy001

carboy001

    One Carb Or Two?

  • TMF+ Member
  • PipPipPipPipPipPipPip
  • 1,065 posts

Posted 05 April 2012 - 05:29 PM

Looking good Mike, read your update a while back but was on my way so didn't have chance to reply.

I'm quite impressed with the DIY bonnet gutters, not ideal obviously but I appreciate what you mean with the cost of getting it done. Can barely tell with the tiger seal anyways.

Your remote locking doors look ace, the streetfighter doors came in handy there haha. Although gotta say I'm not a fan for them obviously, I find the original locks with keys is part of the charm with the mini.

You got a running/finishing date for it yet?

Cheers
Chris

#356 mike.

mike.

    Crazy About Mini's

  • Members
  • PipPipPipPipPipPipPipPipPipPip
  • 6,176 posts

Posted 08 April 2012 - 12:43 PM

Thanks man, yeah I was pretty happy with how the bonnet gutters turned out. I think its about as good as it can get without doing a proper repair with welding - Which I can't do!

The central locking motors job couldn't have gone smoother really, those street fighter doors are great for it behind able to mount the motor directly to the inner skin and get a drill in the door too. When the cars next back on its wheels, I can move it over a bit in the garage and get the passenger door open wide enough to drill the holes and run the wiring on that side too. I know what you mean about the old car keys but really if i'm fitting a decent alarm it'd be daft not to use the central locking feature when its so easy and cheap to do with these. Also i'm not going to miss fiddling around with my worn out keys in the dark and the rain with my passenger stood there waiting to be let it :P

Latest bit of an update, I've got the steering column sorted now, the shear bolts were a killer - I drilled them and tried using stud extractors which didn't work, couldn't get a grip on them with mole grips, then cut a slot in the top of them with the grinder and tried using a screwdriver which I just couldn't get the force with. Ended up using the slot i'd cut and hammering the bolt round with a chisel to get them off!

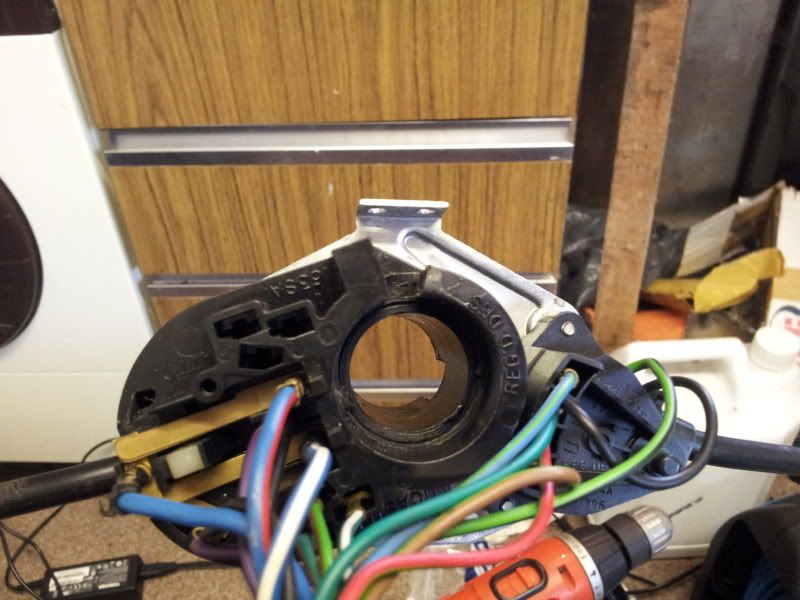
So reassembled the steering column with the new bushes, got the new JB fab drop bracket fitted - Used some normal bolts with some locktight this time rather than shear bolts. Put the column back in and started to reassemble it with the stalks, but as I was tightening the clamp on the stalks, screw was tight but the stalks were still loose on the column, so tried to tighten it further then heard a crack :/

Posted Image

The plastic clamp ring on the stalks had broke off! Don't even know what happened really, as the screw wasn't tight enough to hold the stalks in place when it broke. I guess i'm just too heavy handed for these brittle plastic parts!

I tried a couple of different glues to fix it but they wouldn't hold it while it clamped the stalks. So had to come up with another way of holding the stalks still...

Used some left over bits that came with central locking motors, a few bolts with nyloc nuts, drilled some holes in the part of the column that the cowling mounts to and made a little mechano style frame to hold the stalks in place :P

Posted Image

Looks pretty funny but does the job and fits inside the cowling too.

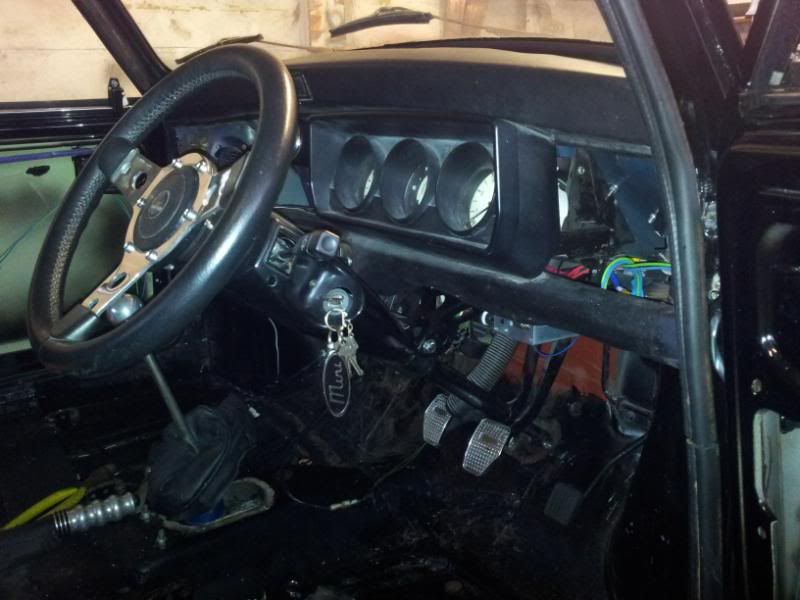
So anyway, got all the column back on, gave the steering wheel a polish and put that back on and i'm really happy with how it turned out. The steering is now held solid with no play, the new drop bracket looks much better too and the driving position seems spot on:
Posted Image

Posted Image

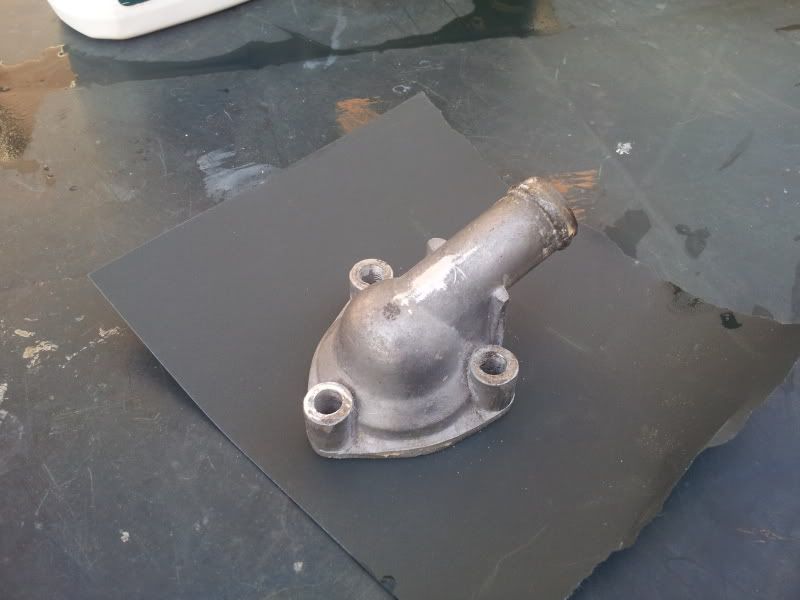
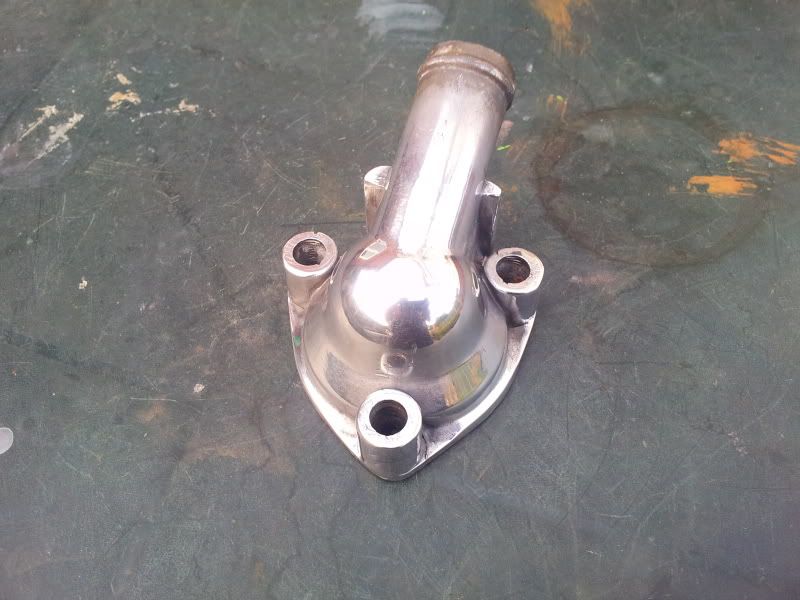
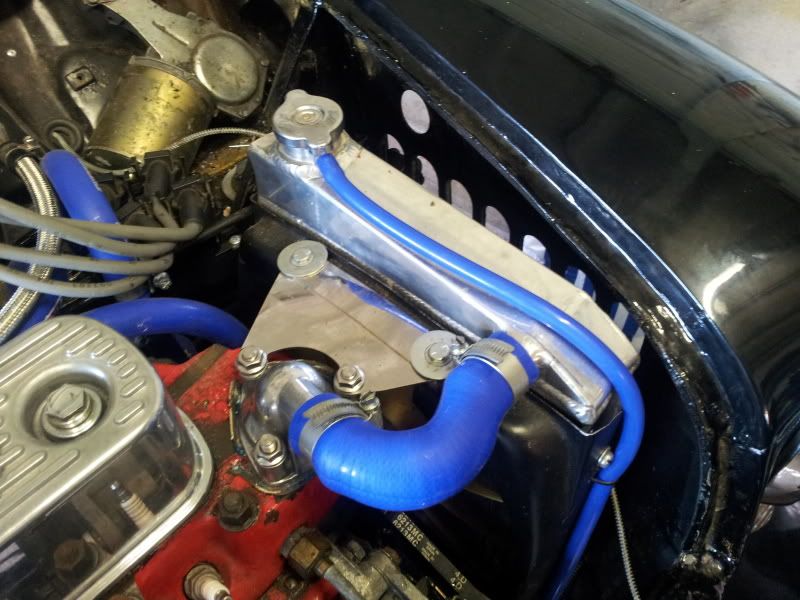
Because of my engine bay OCD, the thermostat housing and its rusting studs/nuts were bugging me, so took it off and gave it a polish. Before:

Posted Image

After:

Posted Image

Then refitted it with a stainless stud kit from minispares:

Posted Image

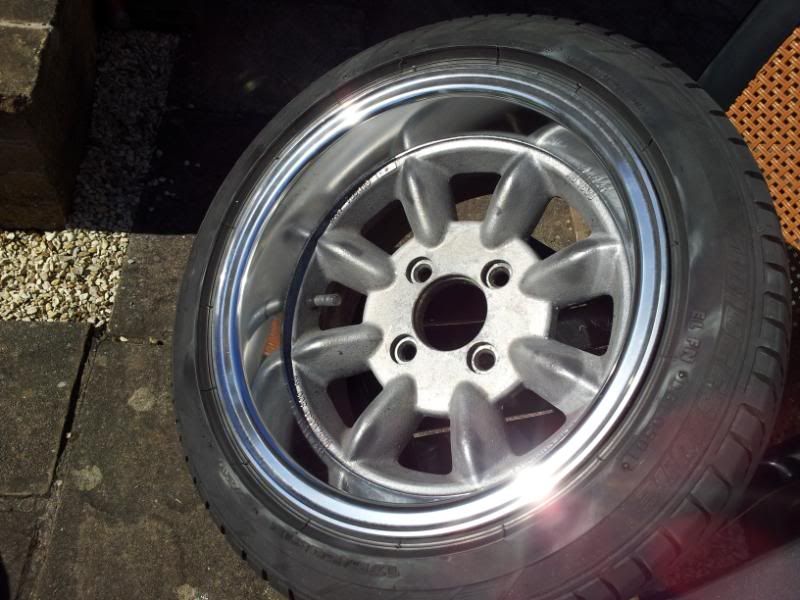
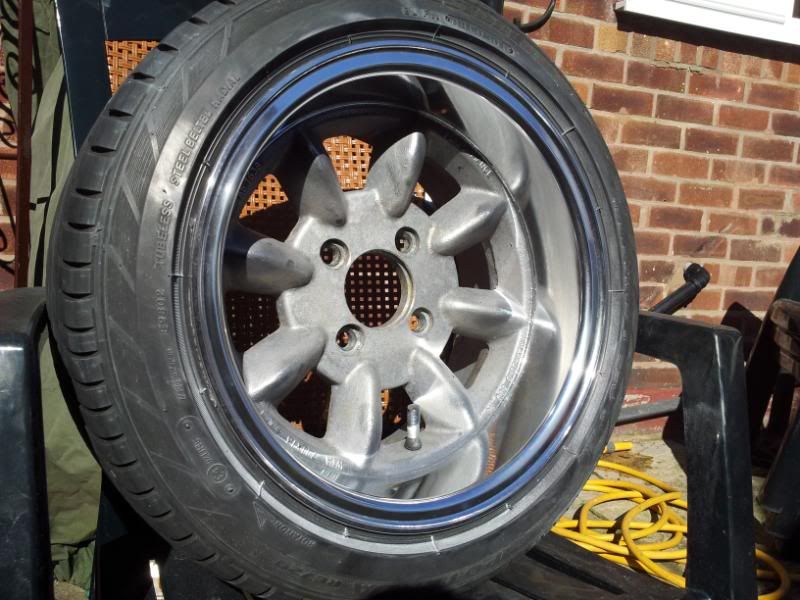
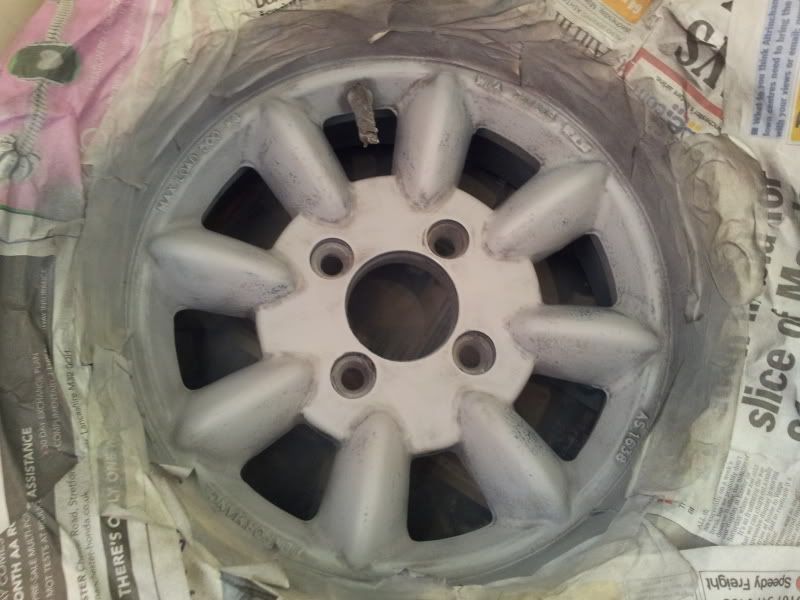
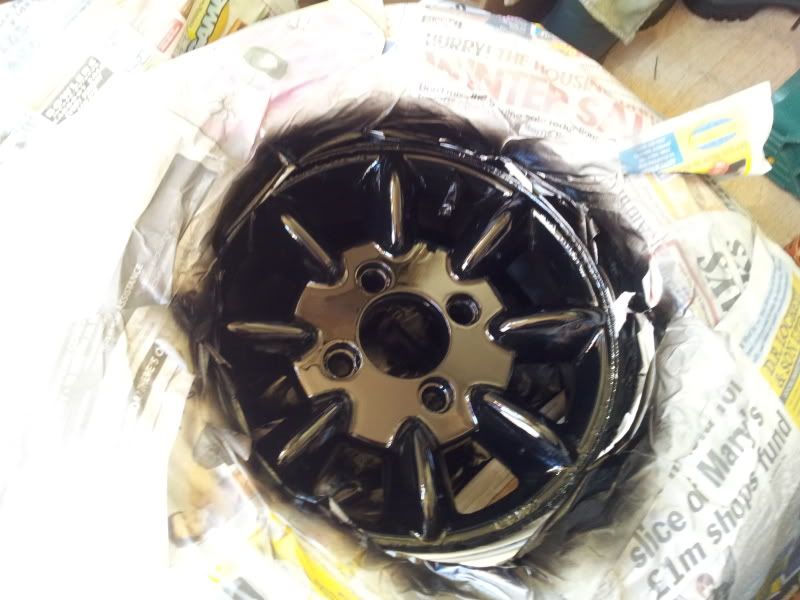
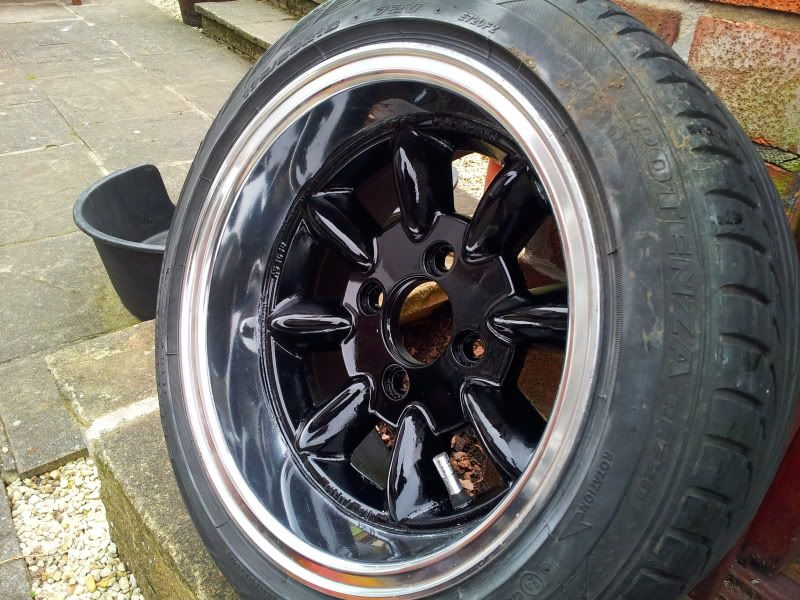
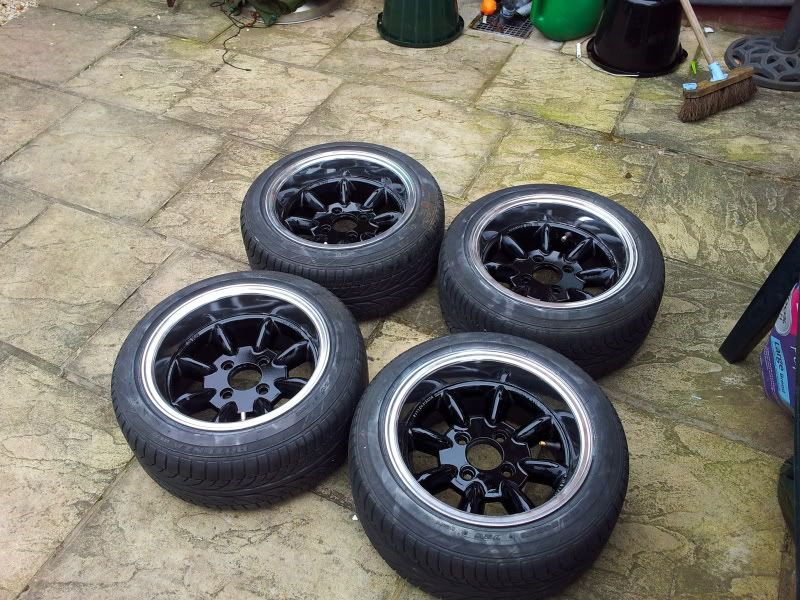
Had my next 2 wheels to polish and paint too, and wasn't too happy with the finish on the first 2 wheels I sprayed as the paint was starting to chip off from round the wheel nuts. So started over and gave all the wheel another quick polish and then got them all sprayed up together and the results are much better this time:

Repolished:

Posted Image

Posted Image

Prepped:

Posted Image

Painted:

Posted Image

Done :D

Posted Image

Posted Image

Also decided to write a guide with the photos I took along the way: http://www.theminifo...bishment-guide/

So i'm pretty happy with them.

I really just need to put some thought in to whats actually left to do now, because apart from the interior I think i'm not far off at all now. Theres a couple of bits of paint to finish underneath on the rear suspension and subframe before I put the car back on its wheels, I wana give the engine bay a good clean and some paint touchups and finish that off. Once the cars back on its wheel I can test the clutch and gearbox - Fingers crossed for that! The clutch is bled and adjusted but doesn't quite feel right, the first inch of pedal travel takes no force even though it is moving the clutch arm, then the second bit of travel on the pedal is really hard. So we'll have to see about that...

#357 M44K TS

M44K TS

    Up Into Fourth

  • Members
  • PipPipPipPipPipPipPipPipPip
  • 3,104 posts

Posted 09 April 2012 - 06:50 PM

After reading m44k ts project thread and in particular his MJ install, I decided he had a way better place to mount the coil than I did.


I accept Paypal for the royalties!

:D

Some good progress there mate.

#358 mike.

mike.

    Crazy About Mini's

  • Members
  • PipPipPipPipPipPipPipPipPipPip
  • 6,176 posts

Posted 09 April 2012 - 09:05 PM

haha I did wonder when you might stumble across this and realise me completely ripping off your idea :shy:

I was also tempted by your shiftlight idea but decided that was too far to rob that as well :kiss:

#359 M44K TS

M44K TS

    Up Into Fourth

  • Members
  • PipPipPipPipPipPipPipPipPip
  • 3,104 posts

Posted 10 April 2012 - 09:08 PM

Doesn't bother me dude, go nuts!

#360 mike.

mike.

    Crazy About Mini's

  • Members
  • PipPipPipPipPipPipPipPipPipPip
  • 6,176 posts

Posted 11 April 2012 - 06:13 PM

Haha thanks, shiftlight may be future project, but may just settle for a little LED in the dashrail


2 user(s) are reading this topic

0 members, 2 guests, 0 anonymous users