'86 City Refurb
#331

Posted 15 July 2011 - 01:23 AM
Might give the insulation tape a go, if it does the job thats all i'm after if you can't see it.
#332

Posted 15 July 2011 - 01:59 PM
So got the lights put together properly, with the plug off my old lights soldered in so they can just plug straight into the rear loom:
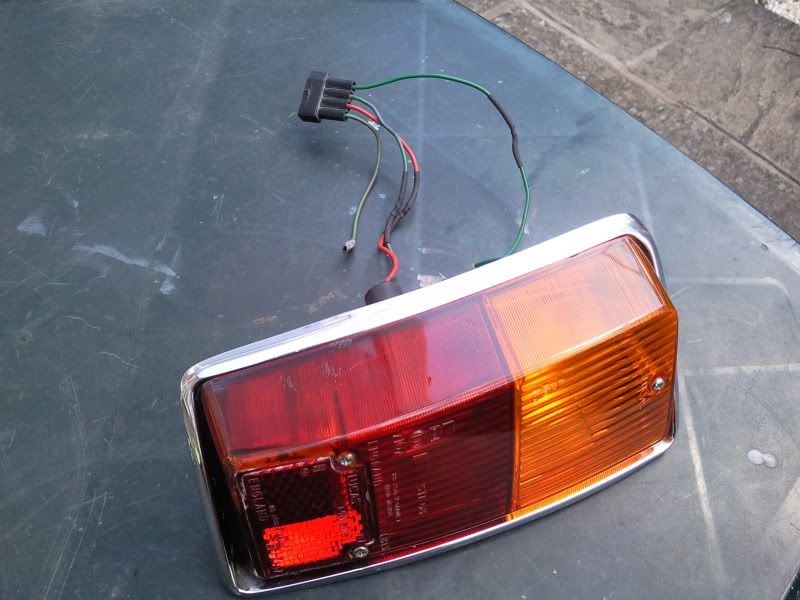
Was thinking about cutting all the little E marks and other markings off them and flatting them back and getting them all smooth and polished up but don't really want to waste time on stuff like that at the moment, maybe another time.
Heres a few pics of them on the car:
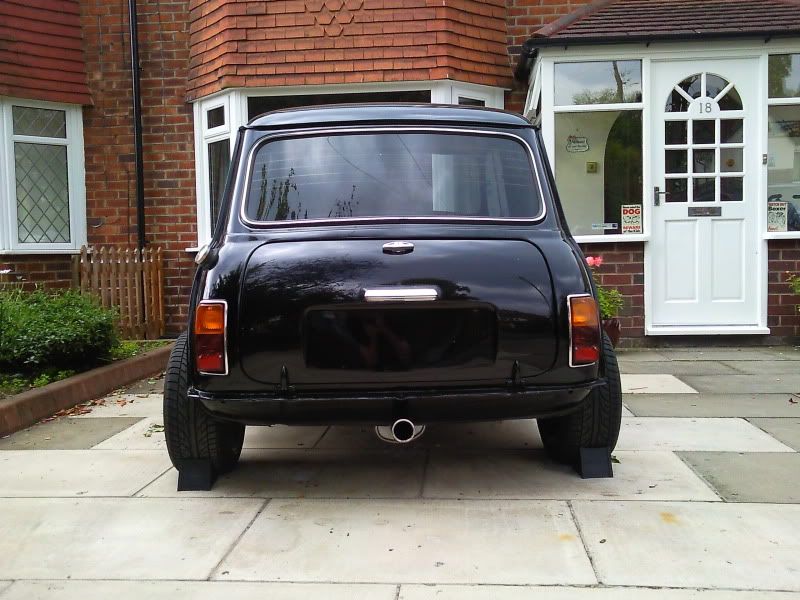
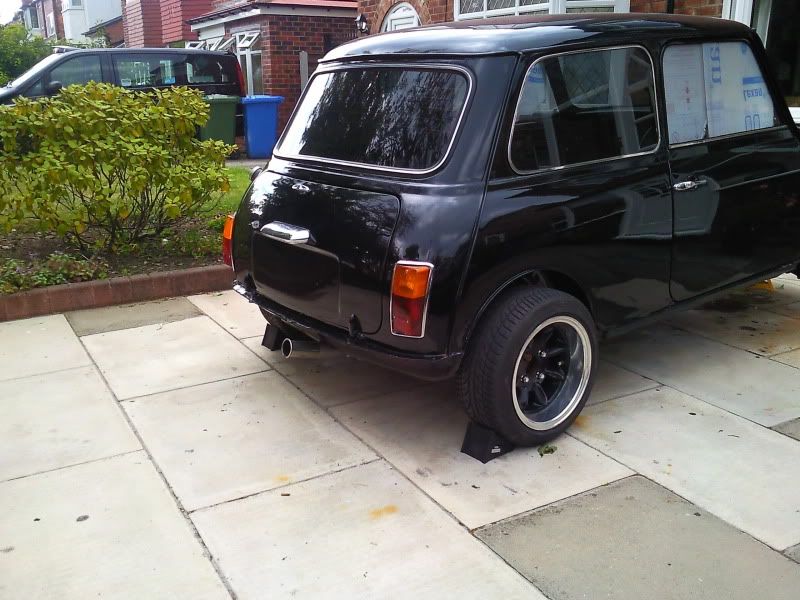
How the cars sat at the moment on the drive:
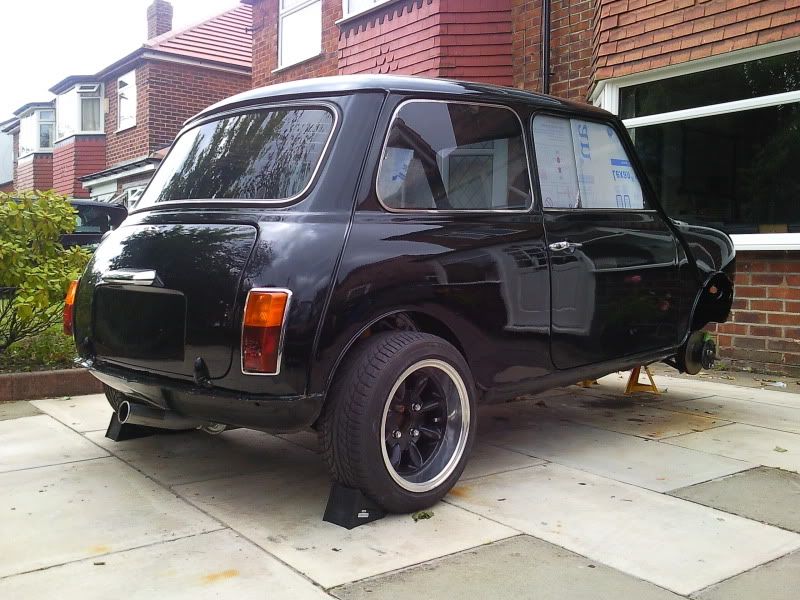
Thats literally all i've managed to do today before the rain came. I'm busy this weekend but hopefully if we have some more nice weather next week i'll make some good progress!
#333

Posted 24 July 2011 - 07:43 PM
Rubbed down and prepped the bulkhead and inner wings after the welding:
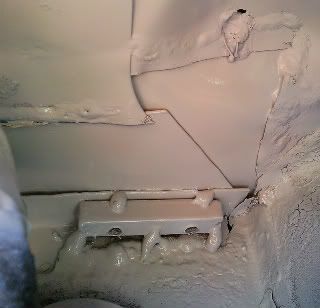
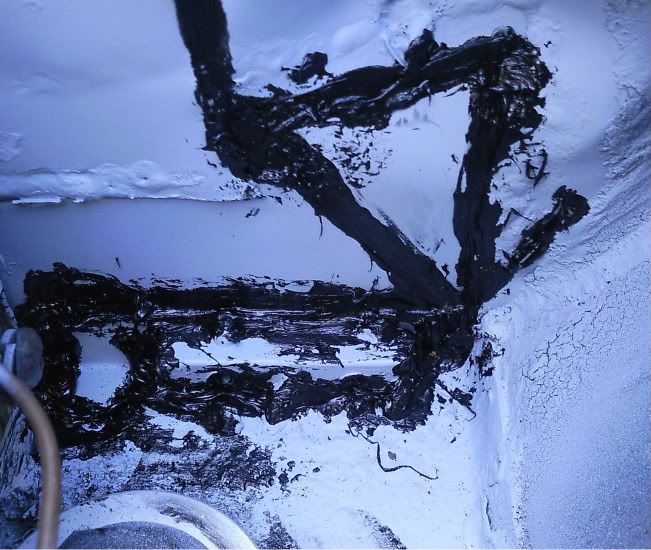
Then tiger sealed all the seams and gaps. First time i'd used tiger seal, wasn't sure whether to just put it on out of the tube or smear it over all the seams and push it into gaps. Ended up smearing it to get a better seal. Looks a bit of a mess but it'll do the job and its getting painted over anyway:
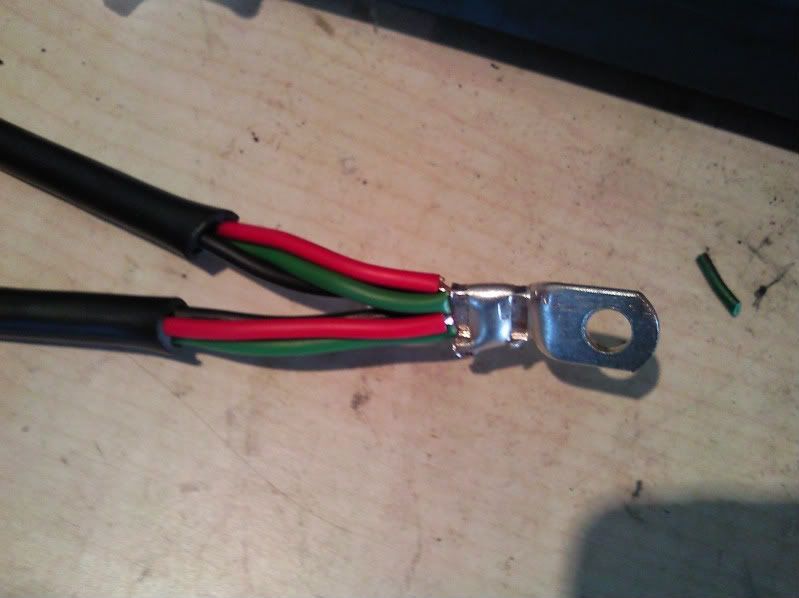
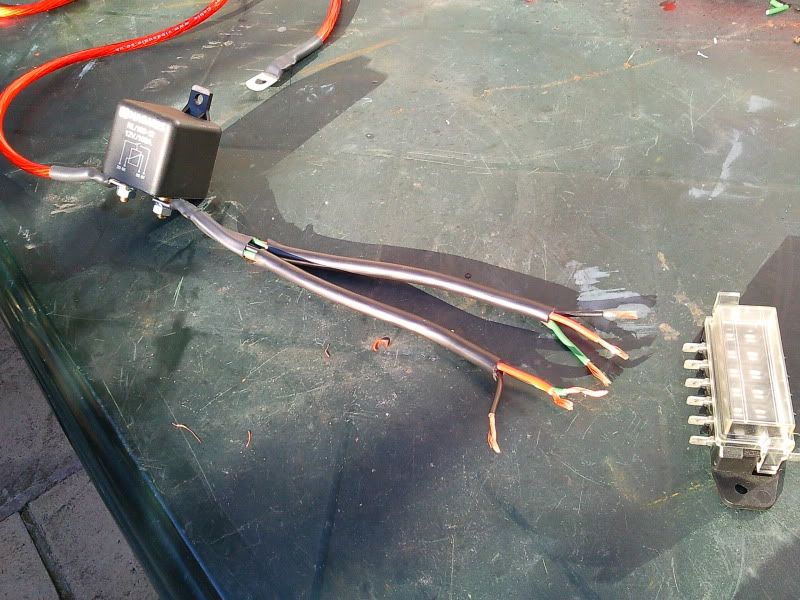
Also got a load of electrical bits through the post so made a start with those. I'm putting in a second fuse box to run all the extra bits off, so got myself a 6 way blade fusebox, some wiring and a big 100A relay to wire it through which will be switched from the ignition. 100A may be abit overkill but the relay wasn't too expensive and it'll be neater than running it through 2 smaller relays.
I used 2 lengths of 3 core wiring to go from the relay to the fusebox, You can get 6-7 core wiring but the wiring can only take 5 amp. This wiring is rated to 20 amp so it'll be up to the job for the things i'll be running through it. So heres how i'm wiring it, 2 lengths of 3 core wire into one 6mm ring terminal from the fuse box to the relay and I've used a length of spare amplifier wiring to go from the starter solenoid to the relay. Just need to get some spade terminals and then I can put it in and get it mounted. Couple of pics:
Also had a bit of a distraction this week. Got a second car to use for work and generally getting around reliably. Its a 3 door corsa SXI, 51 reg. 1.2 16v:
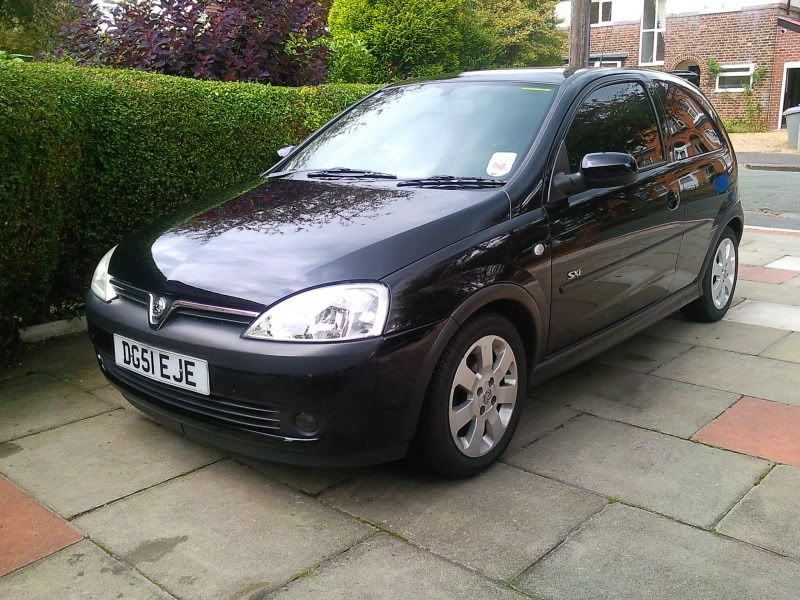
So spent most of the good weather this week on that, gave it a proper wash/polish/wax, cleaned out the interior with upholstery cleaner and things. Also gave it a service, changed the oil and the filters and put some redex in the fuel, so it all running nice and fresh now. Only thing I don't like about it is the engine is really tappy, especially when its cold. I put some wynns valvetrain treatment in the oil which is supposed to quieten things down, I think its worked to an extent when its warm but its still really loud when its first started.
I'm just hoping we get some decent weather next week so I can crack on with the mini, because pretty soon i'll be starting some work placements and i'll have less time.
#334

Posted 25 July 2011 - 12:49 AM

what on earth is that if you dont mind me asking?:S
also with the tappet noise... how many miles has the corsa done? might just be the valve clearances...
Chris
#335

Posted 25 July 2011 - 11:09 AM
Its a tricky area to repair as its made up of so many bits and welding it all from the engine bay and under the wing when all the suspension and engine is in place makes it worse.
The corsa's done 64000 miles, its had the timing chain done about 6000 miles ago. Are the valve clearance something I can do myself? I assume they're not as simple to do as they are on the mini? Also these corsa's have hydraulic lifters as far as i know.
#336

Posted 26 July 2011 - 11:35 PM
I ended up wiring the fusebox twice since the first attempt i'd overlooked a few factors. This was the first loom I made up for it:
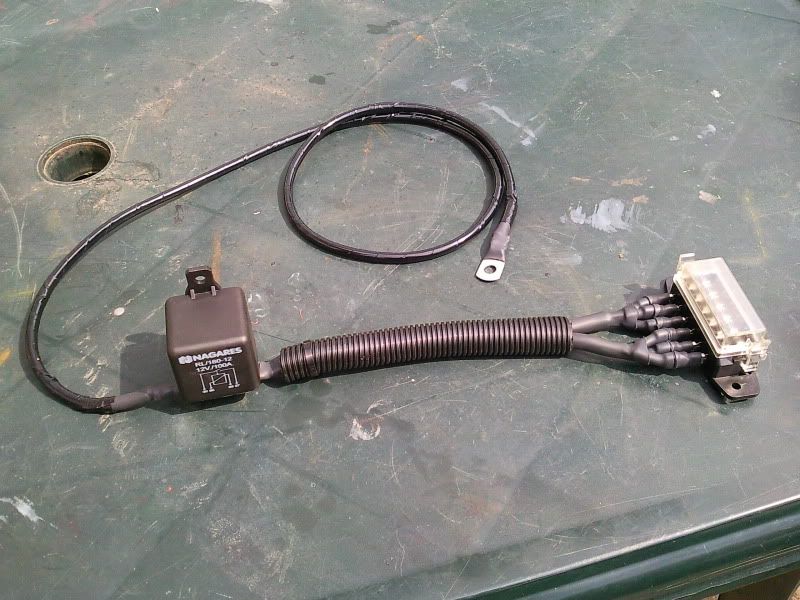
Was neat enough, but when I tried to install it where I wanted, the wiring wouldn't have been right. I realised I needed the wiring to be able to bend sharply just before entering the fuse box. This was so it could clear the inner wing and also not get in the way of the bonnet hinge when it closed. I also needed to extend the wiring as I changed my mind about where I was going to mount the relay. I could get the wiring to bend sharply, but when it did it was all under tension and starting to bend the spade terminals on the fusebox.
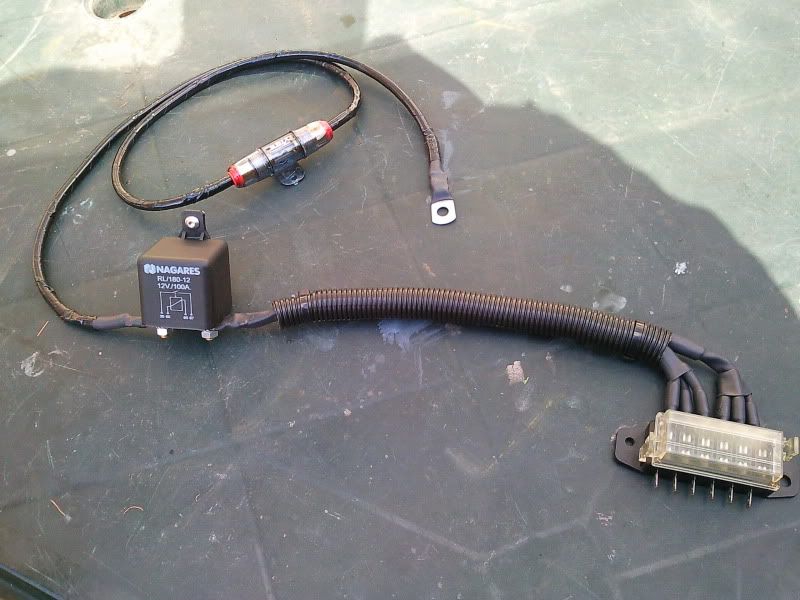
So I made a second lot of wiring, slightly longer from the relay to fusebox, and cut all the wiring to different lengths so it could all line up next the the spade connections on the fusebox, whilst still having enough slack to bend sharply without putting all the connections under strain. I also added an inline fuse in the wire from the starter to the relay.
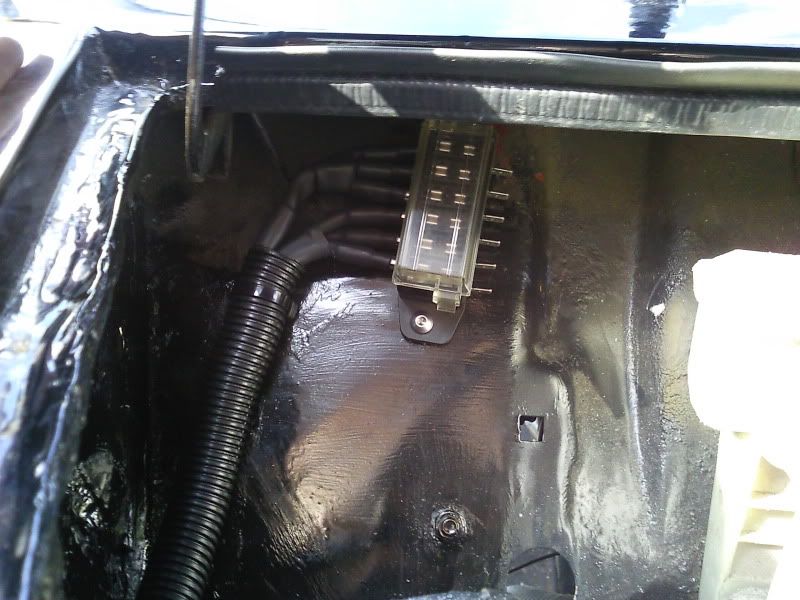
The fusebox is mounted pretty high up on the bulkhead out of the way, the top of it is mounted on one of the mounting studs that holds the clocks in to the bulkhead, and the bottom just a nut and bolt. I wanted to put the bottom mount slightly to the right to get the fuse box to follow the shape of the bulkhead and install it with a rivnut, but once I tried drilling I realised the bracket that holds the clocks was in the way, so its a little bit squint but not too bad. Wiring looks neat and clears the the bonnet hinge and comes down the inner wing to meet the relay nicely:
The relays mounted through an existing hole in the inner wing, just infront of the triangular bulkhead bracket. The power wire for it comes from the started solenoid, follows the loom up the wing and down the inner wing nicely behind the washer bottle and out of the way of everything. The inline fuse holder is mounted on the inner wing with the wiring loom so all looks nice and neat and doesn't get in the way:
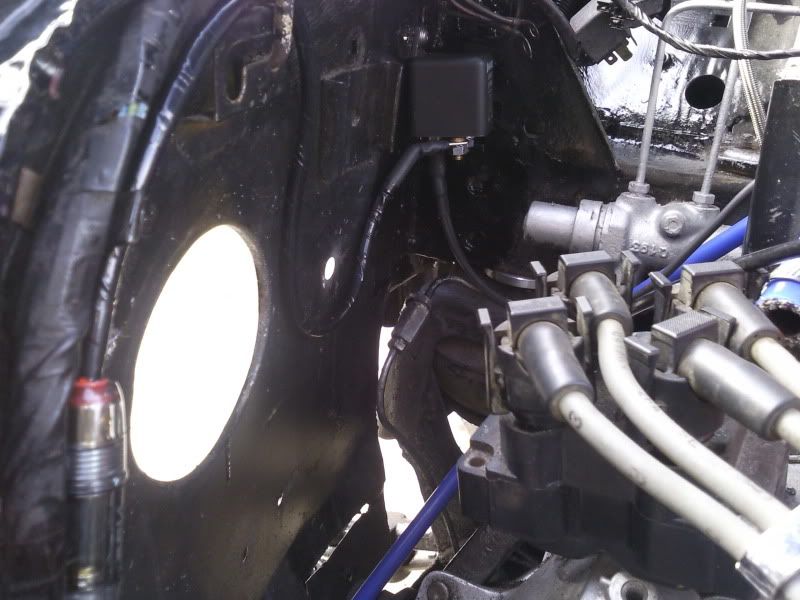
So now once the washer bottles in place the wiring and the relay is hidden and the only exposed wiring is nicely wrapped and looks nice and neat. Just need to re wrap and put conduit round the standard loom now to tidy it up. Its been rewrapped in the past by someone in insulation tape, but i've got some proper non adhesive loom tape to wrap it up properly.
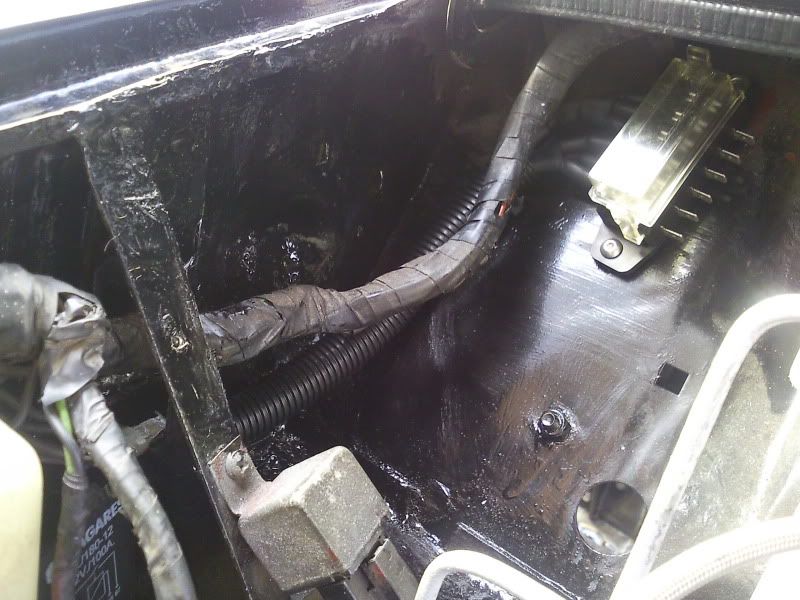
Pretty happy with how thats come out, I wasn't expecting the 100A relay to be so big, so was struggling to think of somewhere to put it. Just need to earth it and wire in the switch wire to the ignition live and then the second fuse box will be ignition switched.
Weather report looks pretty good this week so hoping get most of the wiring finished off. Next main job after that is painting underneath before I can start putting headlamp bowls back in, but i'm not looking forward to that, so putting it off for now
#337

Posted 27 July 2011 - 05:25 PM
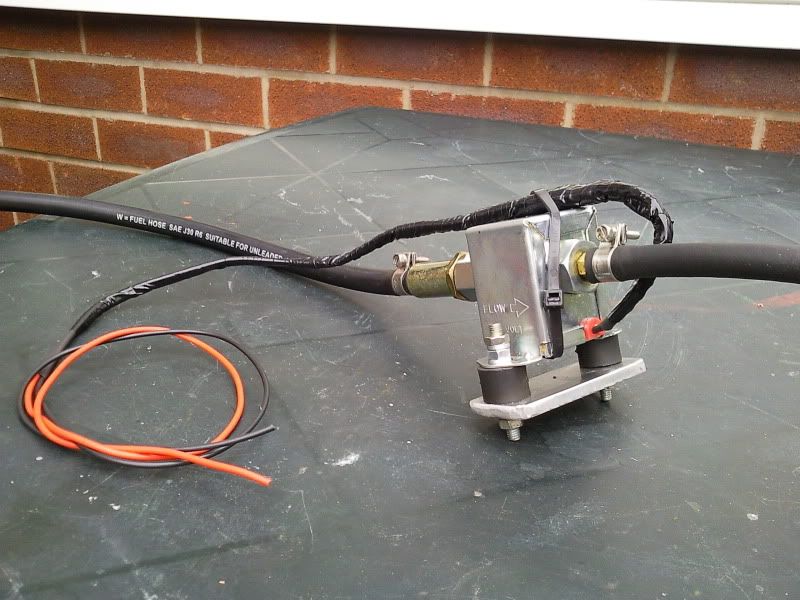
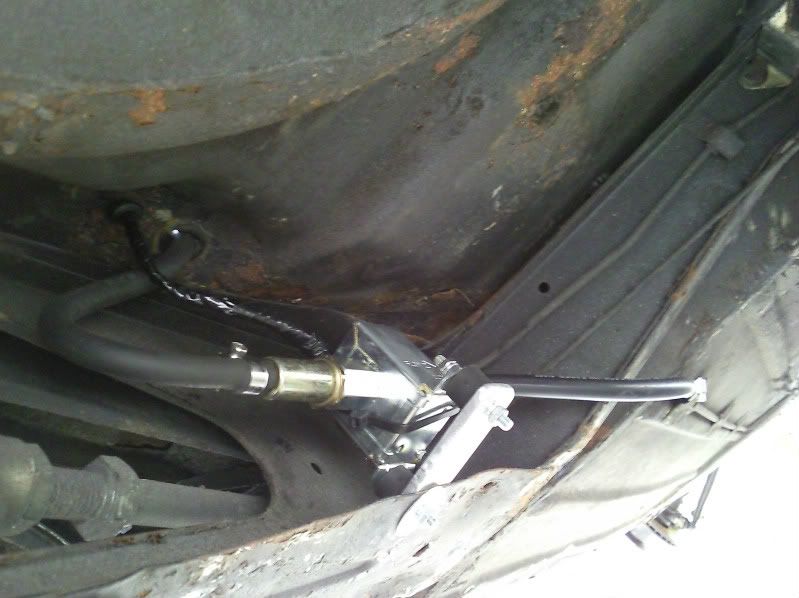
It was mounted on the rear of the back seats by the guy who did my car, but once i'd mounted it on its rubber mounts it stuck out about 4" into the boot so was just in the way. So like a lot of people have done i've moved it onto the subframe under the tank.
I made a bracket to support the pump over its full length, extended the wiring and wrapped it in multiple layers of heatshrink and loom tape since it'll be exposed under the car. The cable tie i've wrapped round is just to hold the wiring in the right sort of direction so it'll pass through into the boot without straining the wires where they come out of the pump:
Then I just mounted it on an existing hole in the subframe. I also cut the metal fuel pipe shorter, just where it bends up around the heel board, so the pipe runs nicely to it now. Just needs the wiring to be connected up to the new fusebox and some fuel in the tank to test its working right. Also note that the underside of the rear needs some TLC. Going to give it the same treatment as the front end, rub it all down, repainted and reseal it:
#338

Posted 27 July 2011 - 08:45 PM
#339

Posted 27 July 2011 - 11:28 PM
The cam belts only around 5000 miles old on it and its been serviced recently aswell, its nothing to worry about just a bit annoying. I'm used to it now really.
#340

Posted 28 July 2011 - 07:40 PM
Been going to and from Manchester airport since last year but never been to see it yet - It is a beast.
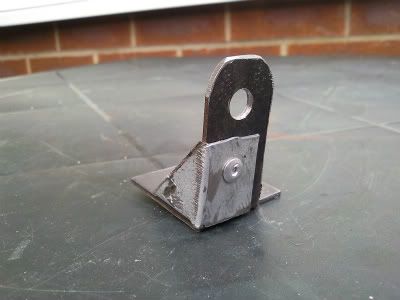
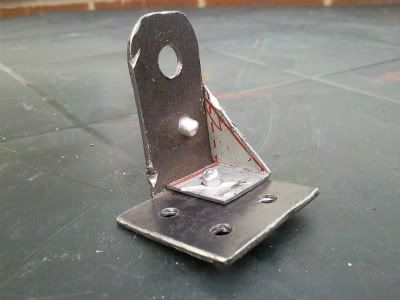
Only thing i've done today is make a bracket for the fuel tank strap. The old bracket was lost when the old boot floor was cut out, so now i've got no mount for the tank.
Made this out of some steel plate i've got and just riveted the gusset piece in place. Its more than strong enough i'd say and seems to line up well with the tank strap when I rest it in place. Put a few holes in the base plate so I can either bolt or rivet it to the boot floor, just need to get a decent sized nut tacked to it as a captive nut.
I could put a rivnut through it but the biggest rivnut my gun will do is M6, and I think with a full tank of fuel on a fast bumpy corner, the tank strap would just rip the threads out of it since they're only aluminium. I'll probably just take it to a garage somewhere and ask them to tack the nut on for me.
#341

Posted 28 July 2011 - 07:46 PM
I went to the Farnborough Air Show last year with college, saw the A380 test plane, with the test pilot doing fighter type stunts!! Was amazing to see something that big do stunts like that, the only plane that beat it for me was the Vulcan, stood behind it as it took off too!
#342

Posted 29 July 2011 - 06:18 PM
Yeah the A380 is just crazy, just dwarfs all the other planes around.
Little bit more progress today. Decided to use bolts instead of rivets on the fuel tank bracket to make it stronger, still not definite i'm going to use that as some people have shown their doubts as to how strong it'll be in the topic i've got in the bodywork section, but i'll just have to see.
Main bit of progress though is more POR15 usage, which I really wasn't looking forward to.
Its a horrible job rubbing down under the car and cleaning/painting it all, but i'm getting there now.
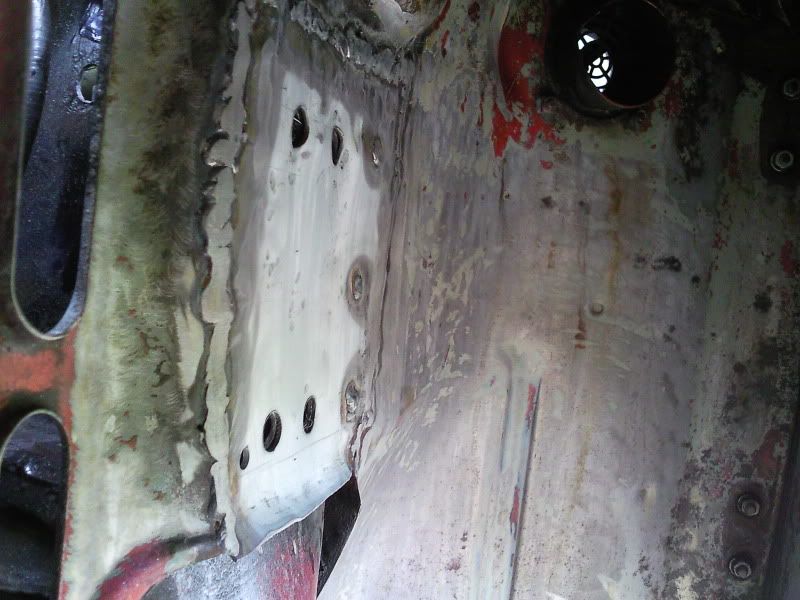
I bought a flap wheel from machinemart to clean the welds up a bit before painting the repairs, it did the job really well; I didn't grind them flush as i've heard it leaves the weld stronger if you leave it sitting proud. Anyway so cleaned up the welds and rubbed down under the wing again, i'd done it before but its been sat bare for months so wasn't ready for painting.
This is after rubbing down with wire brushes/flap wheels, washing down with water, drying, treating the surface with POR15 metal ready, and then again washing a drying the surface ready for painting with POR15:
Did the same to the repair pieces on the drivers side:
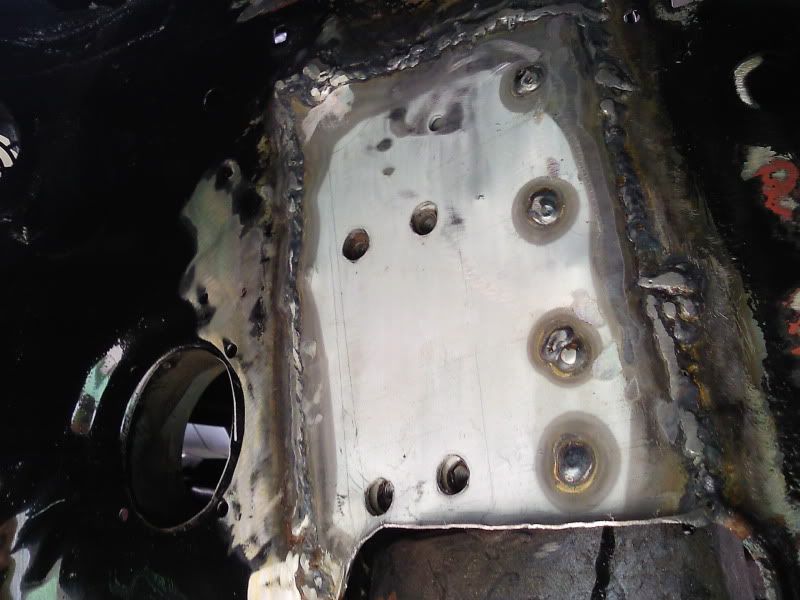
Then I got the POR15 out and gave it all a good covering. I learnt my lesson from last time I used this stuff and got it all over me - Doesn't come off until the skin its on dies and flakes off!! So this time I was wrapped up in a hoody, hat, gloves etc to keep it off my skin - This made it a horrible job as its been really humid today and sitting under the wing with my inspection light made it a stuffy, humid job but I got there in the end!
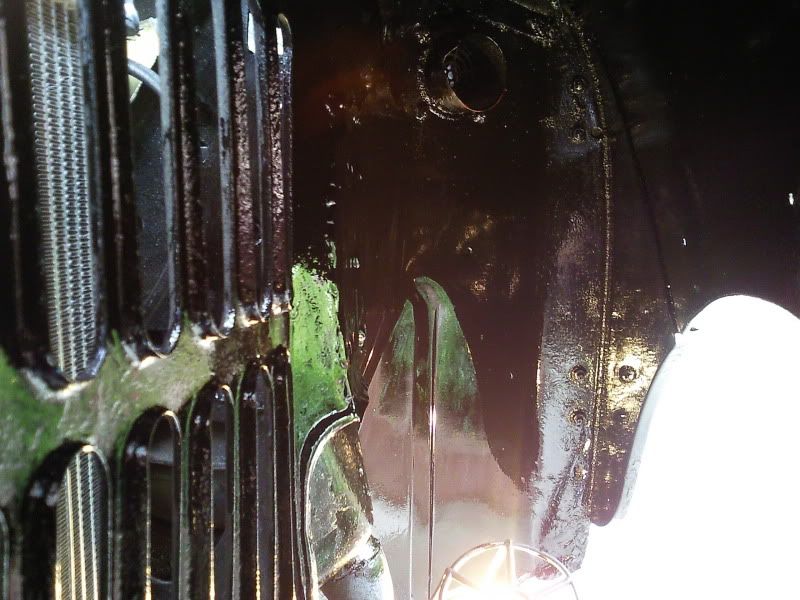
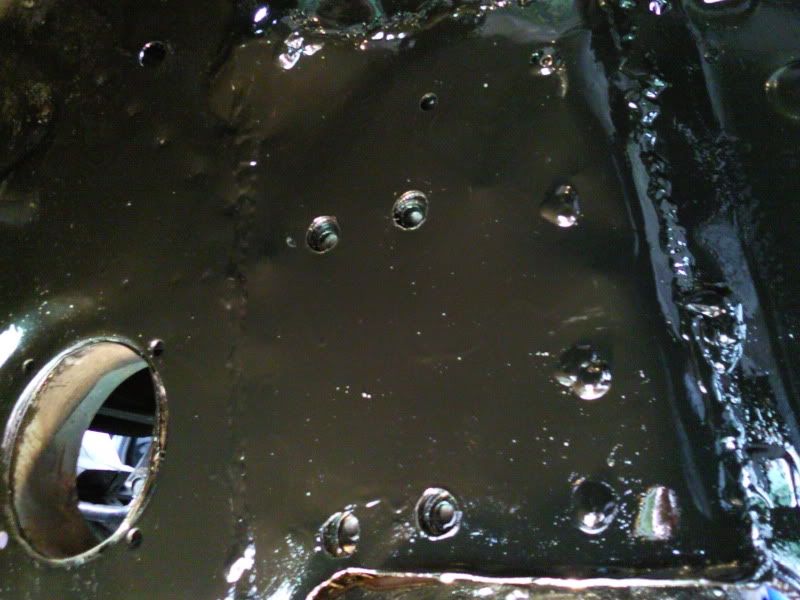
I love the finish POR15 gives and it covered really well considering its quite thin. I painted all of the above with a really good thick layer all from an aerosol lid filled with POR15 and still had some left over at the end!
Next job is to sort out all the wiring in the engine bay for the lights and everything, then I can think about installing the headlight bowls and stuff!
#343

Posted 02 August 2011 - 05:25 PM
Once I unwrapped the loom and the bits of the loom for the headlights I just found pure bodgery.
This is how the wiring was:
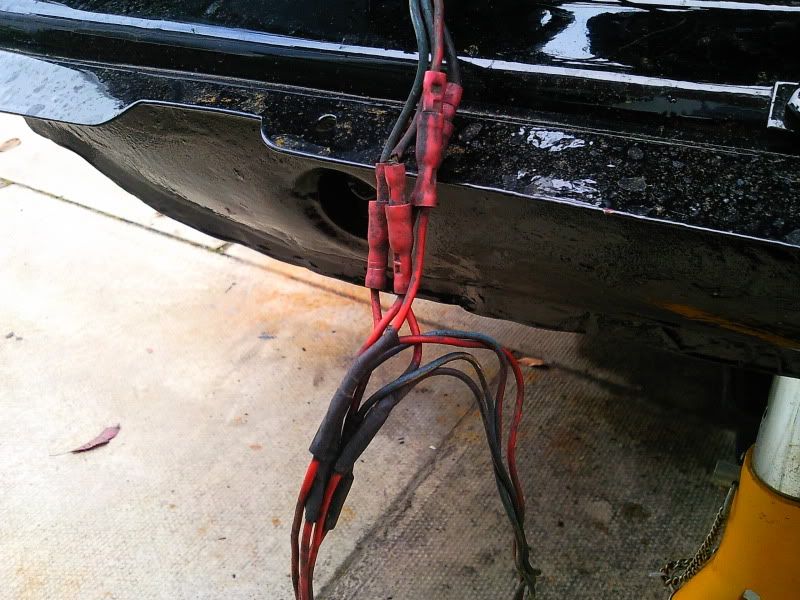
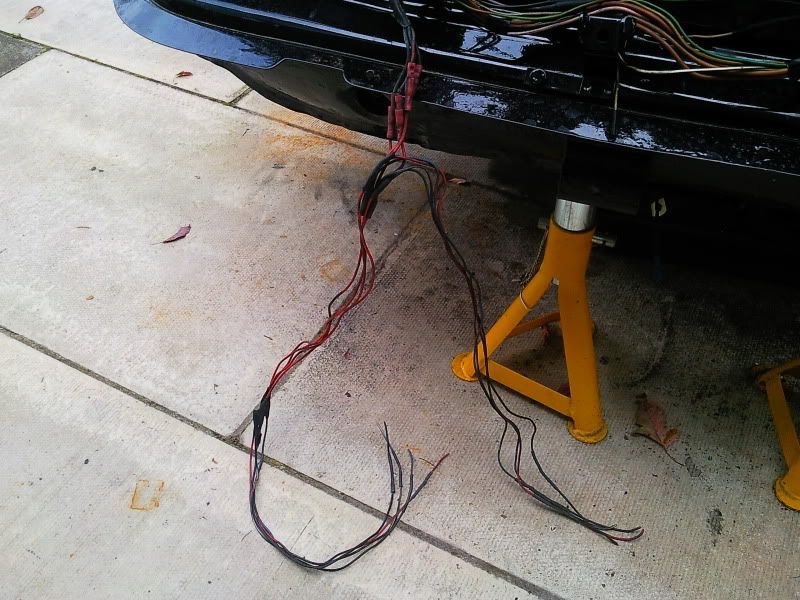
Extended with bits of random wire, all the 'connections' under the tape are just wire twisted together and taped over and the bullet connectors themselves are crimped onto about 50% of the strands of wire, with bits of the wire left exposed and corroded and generally just bad connections.
So I went and got some new headlight looms from Moss near me, cut them to the right lengths for both lights, cut the sidelight holder off them and crimped on the sidelight holder off my new wipacs, then wrapped them in conduit to protect them and a bit of heatshrink where they come out of the headlamp bowls to make it a waterproof loom:
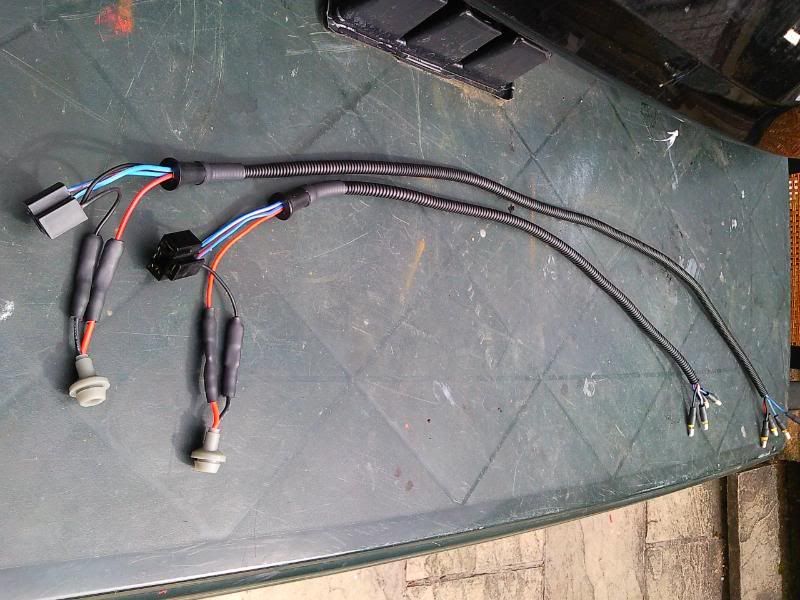
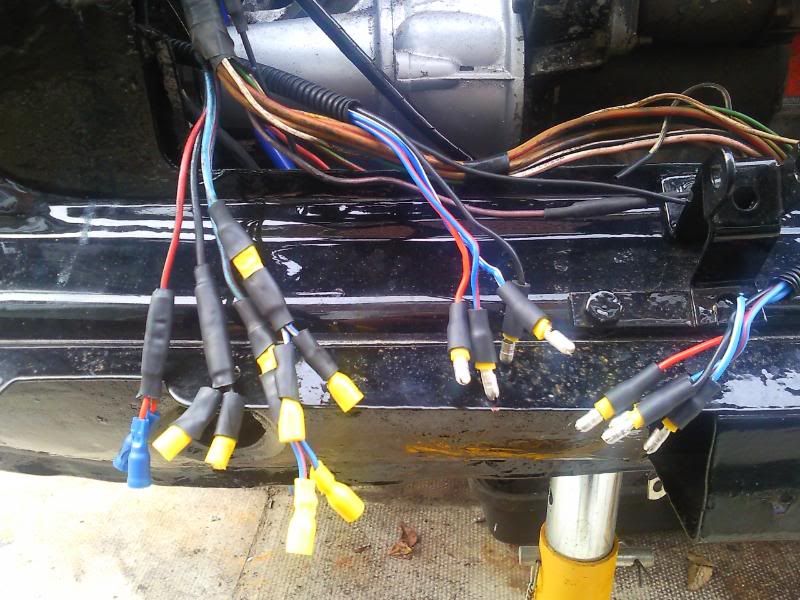
Then I cut out all the bullet connectors and bodged wiring for my headlights and started again with the 4 lighting wires from the cars loom. I used offcuts from the new headlamp looms so everythings the right colour code and used through crimps to take power from each feed wire i.e. main, dipped, sidelight and down to 2 wires with bullets on the end. This gave me the proper 8 bullets I needed to connect both headlamp looms up separately so they can be removed if needs be in future. I've tested it with a H4 bulb and its all working apart from the sidelight - But neither are the tail lights or dash lights so its probably a fuse. But once i've got it all in and tested, i'll tidy this wiring up and re-wrap it in loom tape and conduit:
Then I drilled out the headlamp mounting holes in the wings to take rivnuts, touched up the exposed metal and installed some M5 alu rivnuts:
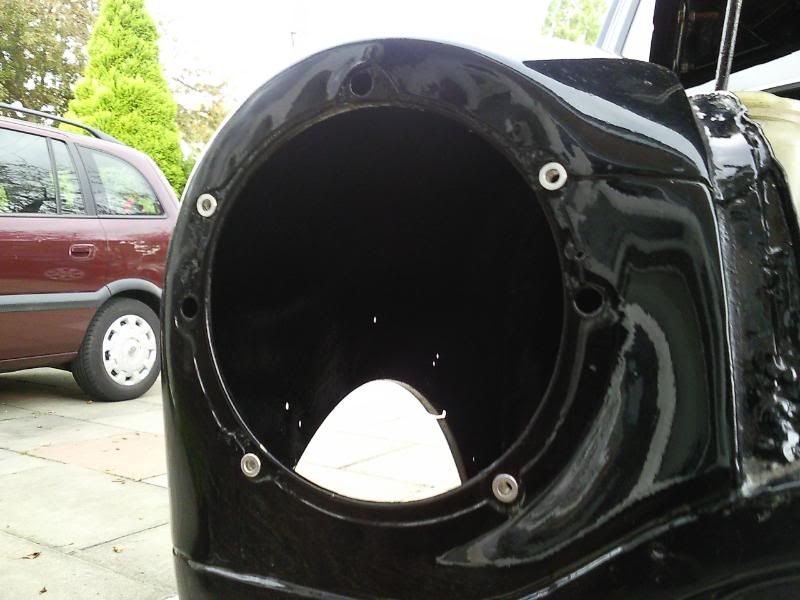
Then fitted the new bowls, seals and the wiring with some M5 stainless button head bolts - Need to order some more of these as i'm a couple short for the nearside:
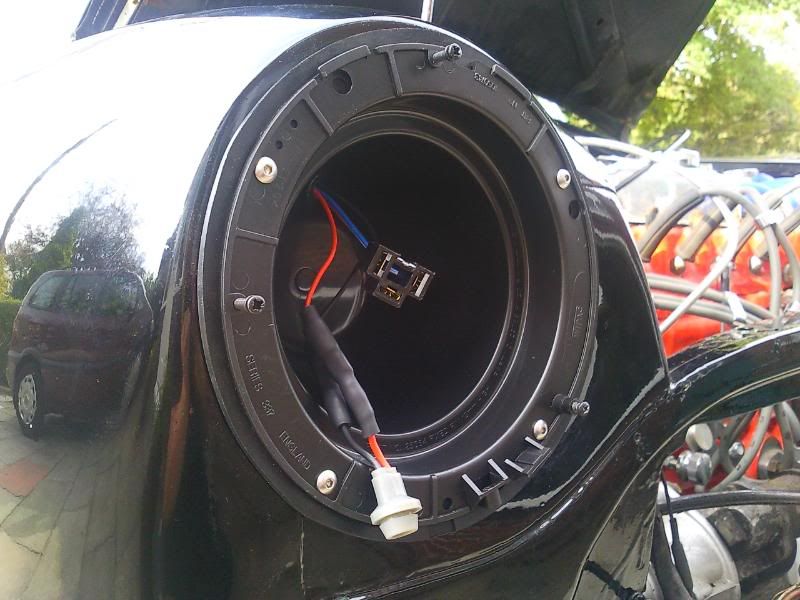
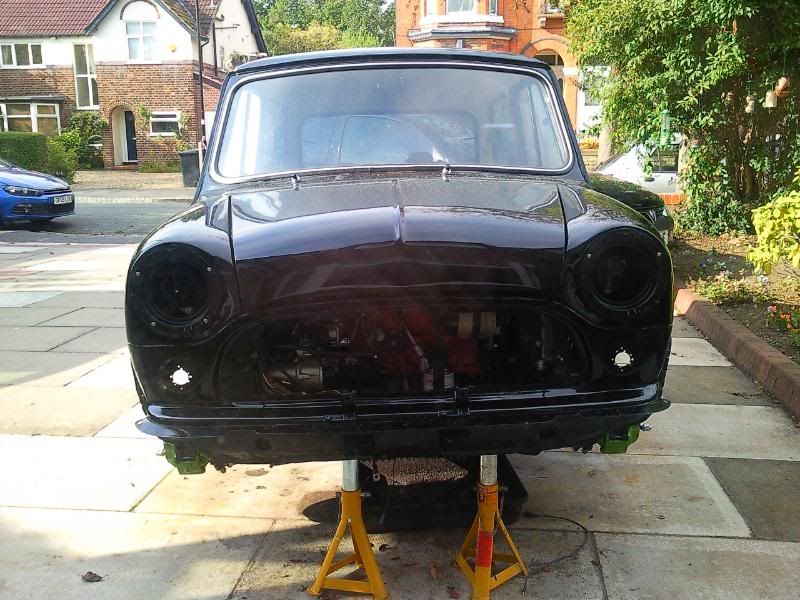
I've ordered some LED numberplate and sidelight bulbs for these aswell, hopefully modernise the car a bit more. My only concern is that the sidelights will be silly bright and too chavvy for my taste, but i'll wait and see when they arrive. If they are i've only lost out on a few quid anyway...
If weathers good tomorrow i'm going to wire in the fuel pump properly to the new fuse box, put the shock absorbers back on and do a bit of undersealing aswell...
#344

Posted 02 August 2011 - 05:36 PM
#345

Posted 14 August 2011 - 01:34 PM
Got the lights pretty much sorted though.
Got my LED sidelights through the post and popped them in to test if they look too chavvy or not, I think they look good, not too bright, and just nice crisp white light:
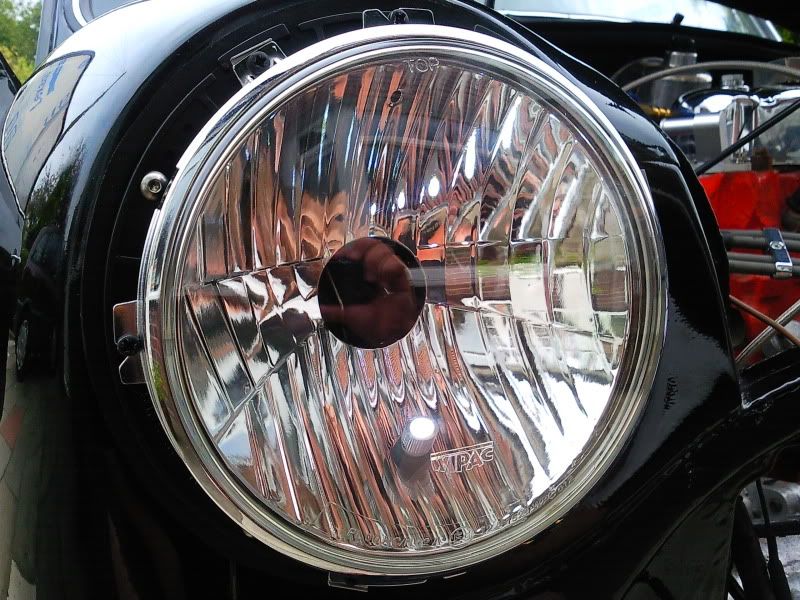
So they'll be staying.
Ran the headlight and indicator wiring through conduit and grommets where needed and connected it all up to the loom:
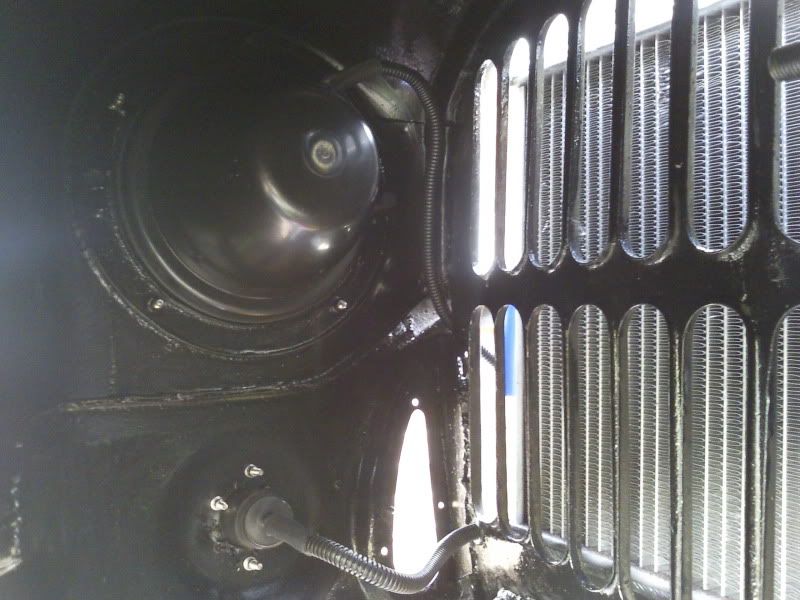
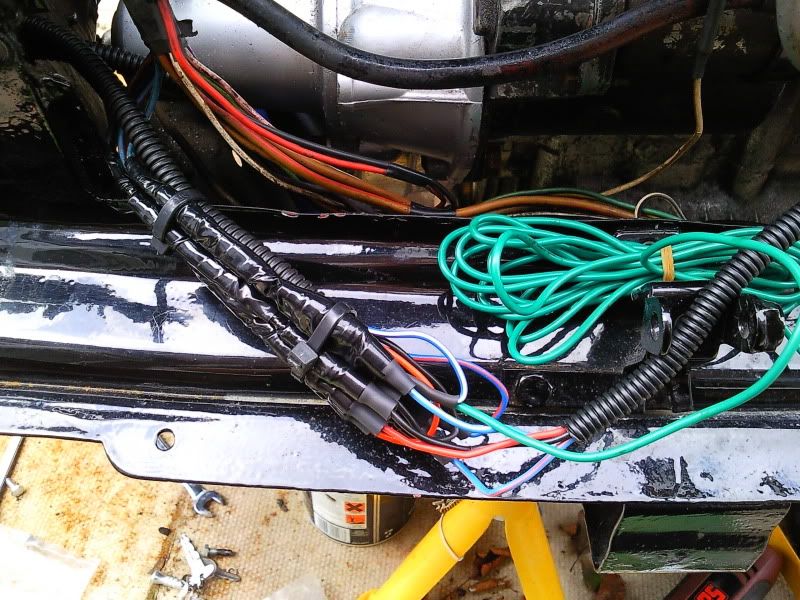
All the connections are wrapped in non adhesive PVC loom tape, so can be unwrapped easily with no mess if I get any problems or needed to take the lights out again. Its all going to be wrapped up fully now the lights are in, in loom tape and conduit. The green wire is the switch wire for my spotlight relay.
Then put the new headlights in, wipac freeforms. They're fitted with some osram night breaker plus bulbs which are supposed to be 90% brighter and 10% whiter than a standard H4 bulb, and so far the do look good.
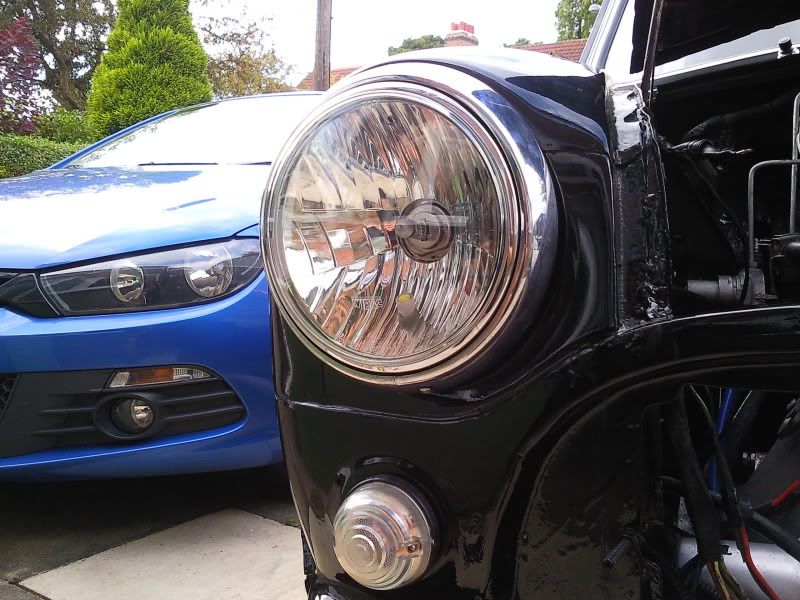
Sidelights and dipped beam on:
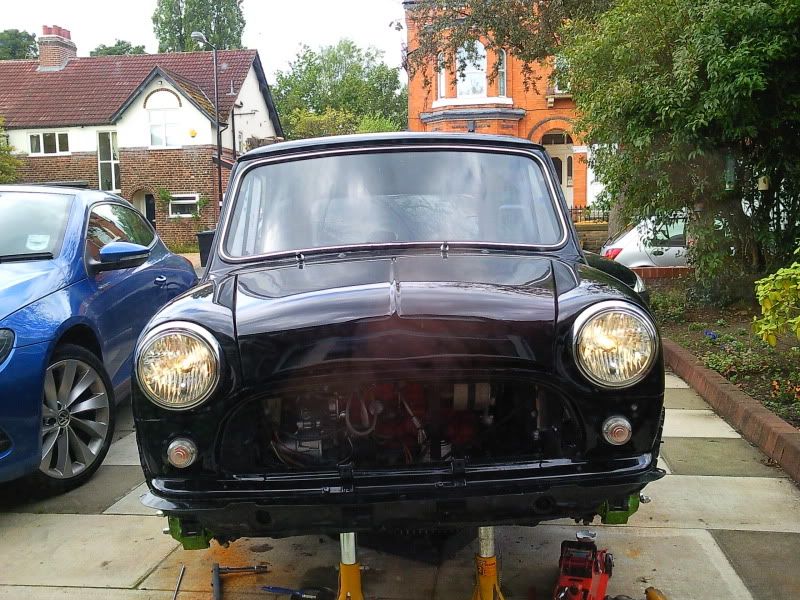
It looks like a mini again!!
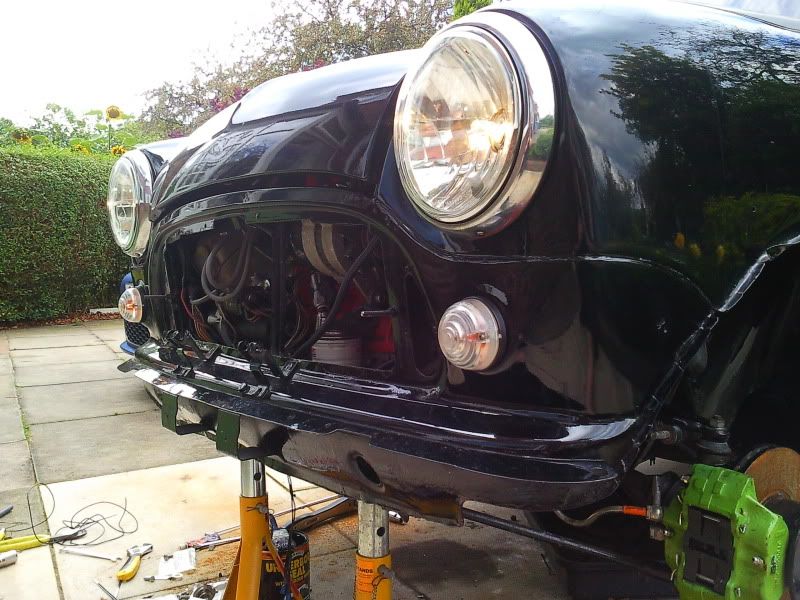
Also put some new shock mounts on. These are the performance ones that minispares sell, they're stronger than standard and the mounting pin in moved higher up and closer to the inner wing - Apparently helps with suspension performance with the damper in a more vertical position. I've fitted these with zinc plated bolts with plenty of copper grease on the threads, and put a good coat of underseal between them and the inner wing, so hopefully i'll have no problems taking them off again:
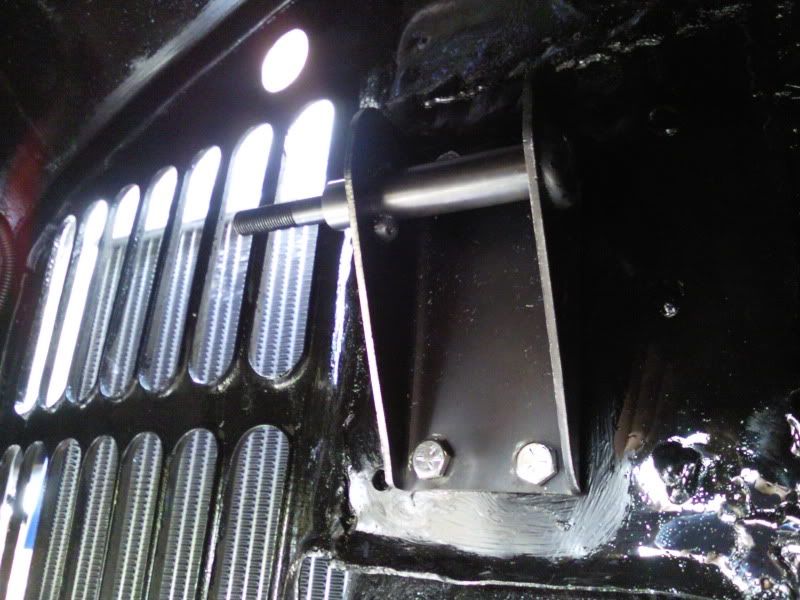
Just waiting for some new nyloc nuts and washer to come through the post before I put the shocks back on...
1 user(s) are reading this topic
0 members, 1 guests, 0 anonymous users


