Jump to content


Photo
- - - - -

'86 City Refurb


  • Please log in to reply
375 replies to this topic

#271 minimad01

minimad01

    Super Mini Mad

  • Members
  • PipPipPipPipPipPip
  • 563 posts

Posted 19 August 2010 - 04:11 PM

Thanks

They're from the-mini-door-company; same place as my doors. He makes them specifically to fit his streetfighter doors, when I spoke to him he was saying he's had so many problems with people trying to fit his streetfighter windows into homemade streetfighter doors that he doesn't sell them to people unless they can prove the doors are from him.

I've been doing alot of searching on the forum on the brakes and had seen somebody mention that before. So i'm going to give that a go next week.

argh iv just got normal doors an quite fancied a set of sliding windows think they look so smart :thumbsup:
an ye give it a try mate

#272 mike.

mike.

    Crazy About Mini's

  • Members
  • PipPipPipPipPipPipPipPipPipPip
  • 6,176 posts

Posted 23 August 2010 - 06:16 PM

Well not alot more progress has happened today because of the rain! Its been raining heavy all day long.

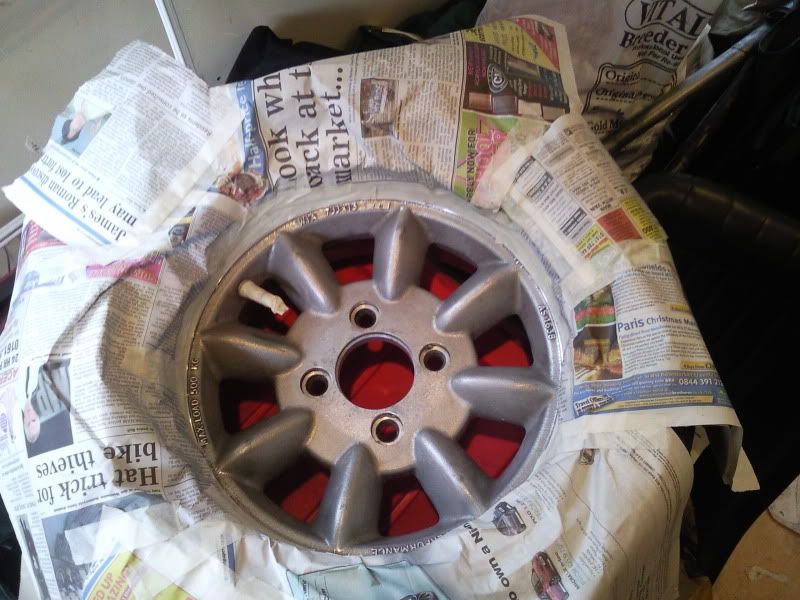
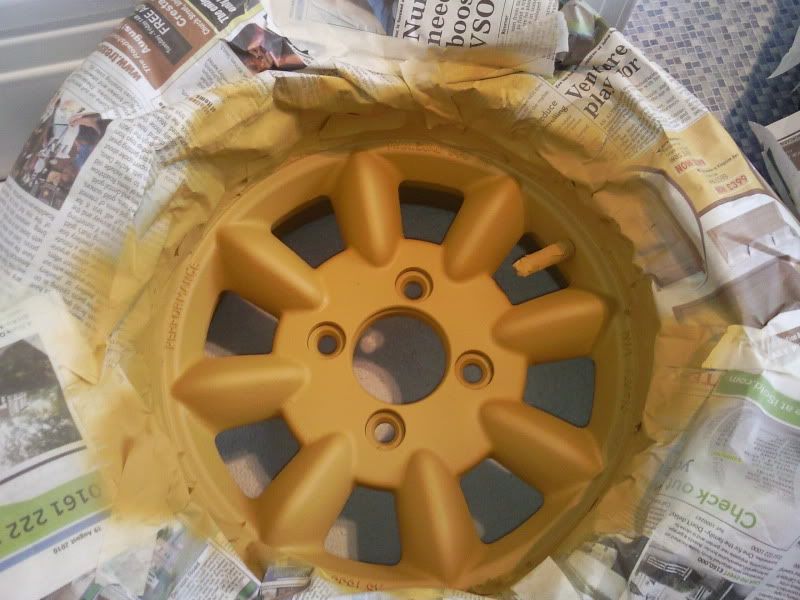
Decided to do the only thing I can in the garage which is to start spraying my wheels. I've got 2 off the car at the moment, so I can them a quick clean and used a wire brush grinder attachment to clean all the inside/back of the wheel as I realised If I just sprayed the spokes black you'd still see the shabby silver alloy of the back of the wheel. I'm planning on just using hammerite on the back of them.

I then spent ages masking the dish of the wheel with tape and newspaper. Hopefully no paint will get where I don't want it or if it does it'll be very fine overspray thats easily removed. Then I wiped them down a couple of times with white spirit:

Posted Image

The photos are actually very forgiving on the alloy of the wheel. The alloy is actually very rough and full of bumps and bobbles. I couldn't be bothered to smooth them all down or filler the whole wheel, so hopefully with enough coats of primer/paint they won't effect the finish too badly.

They then had 2 coats of etch primer and 2 thick coats of filler primer. I ended up bringing them inside to dry overnight under the towel heater because in the garage each thin coat was taking 20+ minutes to even look dry.

Posted Image

Also on friday I began rubbing down the underside of the front end ready to be repainted and undersealed ready for winter. I want to make a thorough job of it though because my new uni flat is down at the docks in liverpool and judging by the look of the bikes that were in the bike shelter there - The salty wet air is very harsh on metal :genius:|

So i've got wire brush attachments for my drill and bought a good heavy duty one for my grinder. I soaked the underside with white spirit first and they made light work of the old paint and underseal. I just need to remove the heater air intake and pipes to get right up round the wings and flitch. I'm going to take it all to bare metal, then wire brush any surface rust off; then i've got some POR15 on the way as from what i've read its way better than my original plan of hammerite, then it'll be undersealed alot and then waxoyled aswell just incase the underseal doesn't cover every little bit.

Hopefully weather will be reasonable tomorrow so I can finish the messy job of wire brushing the underside, then the driveshafts and hubs can go back on.

#273 mike.

mike.

    Crazy About Mini's

  • Members
  • PipPipPipPipPipPipPipPipPipPip
  • 6,176 posts

Posted 24 August 2010 - 06:10 PM

Still been raining all day in Manchester, so nothing could really be done. So I've sprayed 2 of my wheels now.

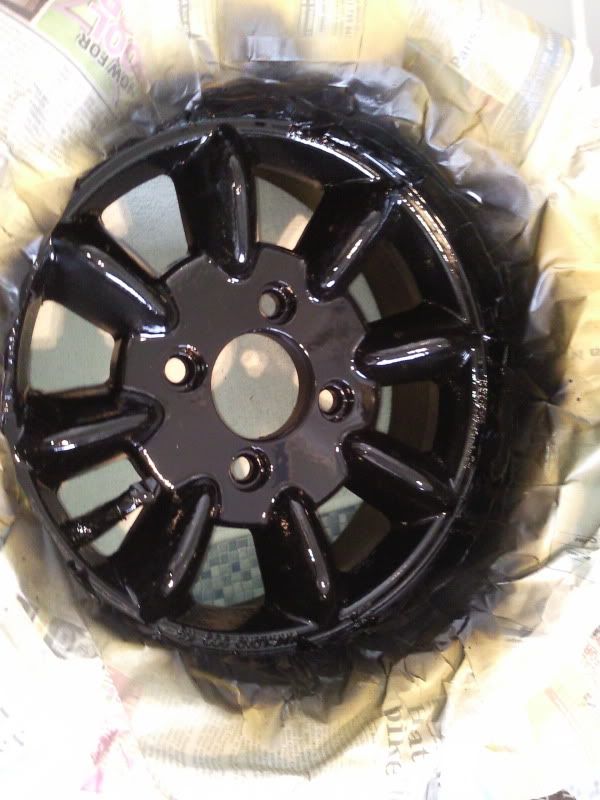
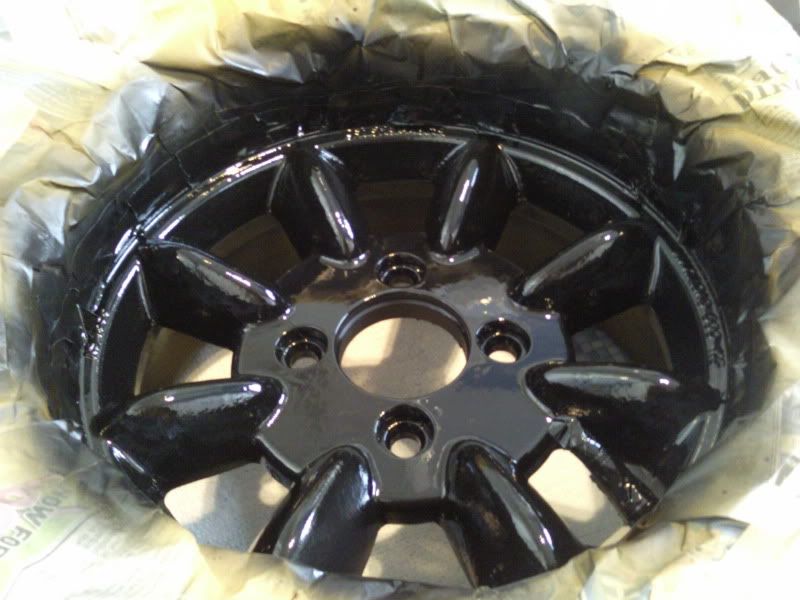
I let the primer dry overnight and this morning rubbed it down with 1200. I didn't go too far with the rubbing down because like I said the alloy underneath is full of bumps and bobbles, so the finish was never going to be perfect and its only my wheels in the end.

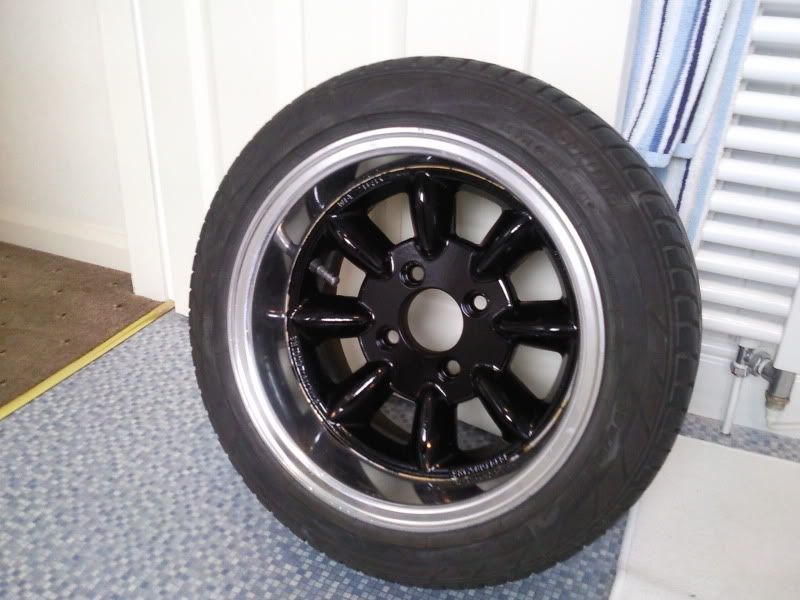
I sprayed 3 coats of gloss black then 2 coats of lacquer. I did get a couple of runs in the lacquer in the edges next to the spokes but after I let them dry for a while they smoothed themselves out and aren't noticeable now.

Heres a couple of pics:

Posted Image

Posted Image

#274 mike.

mike.

    Crazy About Mini's

  • Members
  • PipPipPipPipPipPipPipPipPipPip
  • 6,176 posts

Posted 25 August 2010 - 10:25 AM

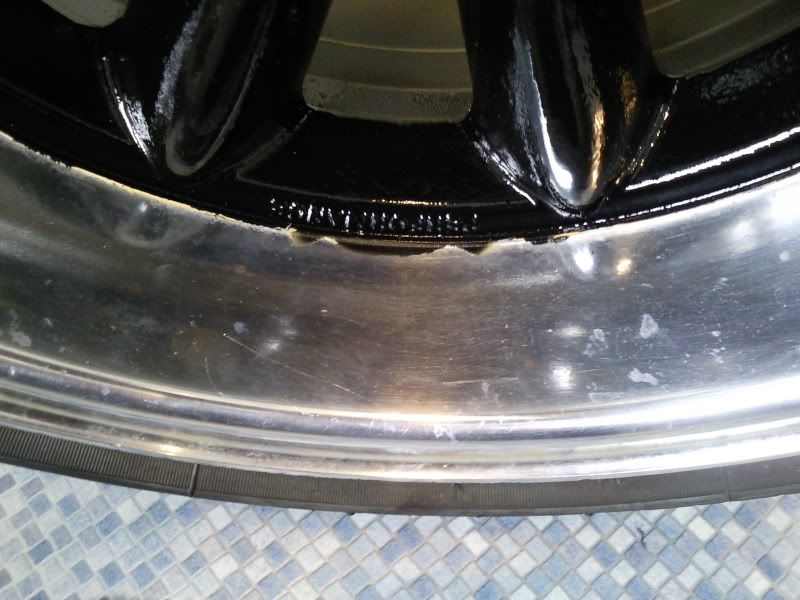
Just taken the masking off the 2 wheels i've sprayed. They look good :D

Theres a couple of bits where the paint got under the masking, but shouldn't be too hard to remove from the dish I hope as you can see:

Posted Image

Also on the very very edge of the dish, the filler primer seems to have got further than the paint. You can't really see it on the photos but there a very thin yellow line round the edge of the dish. Not sure how i'm going to fix that, may try and get a very tiny brush and hand paint over that bit. It'll be tricky though because the area is tiny; I don't think i'll be able to sand that area down either without scuffing the new paint hmmmm.

Either way i'm pretty pleased considering I bought these wheels all flaky and peeling for £150, spent £10 on a polishing kit and about £40 on paint and now they look like this:

Posted Image

Took alot of time though probably spent about 3 hours polishing each wheel and a couple of hours per wheel masking and painting. I'm probably going to give the dish a quick going over again to bring the clear shine back, because they have been sat for over a year since they were first polished. I'll maybe see what autosol does first. But for now the rain looks like its holding off for now at least. Its cloudy but hopefully i'll be able to get a few hours work done

#275 GreaseMonkey

GreaseMonkey

    Has Ratchet, Will Make Noises

  • Members
  • PipPipPipPipPipPipPipPipPip
  • 3,663 posts

Posted 25 August 2010 - 10:34 AM

Nice progress :D I understand how annoying it can be when you can only work outside on a car, does test your limits all the time but you'll get there :D

#276 Racer_Pete

Racer_Pete

    Up Into Fourth

  • TMF+ Member
  • PipPipPipPipPipPipPipPipPip
  • 2,492 posts

Posted 25 August 2010 - 06:21 PM

Them streetfighter doors look great, also thinking of getting them in a couple months, how much was the lexan window kit for it?

#277 mike.

mike.

    Crazy About Mini's

  • Members
  • PipPipPipPipPipPipPipPipPipPip
  • 6,176 posts

Posted 25 August 2010 - 07:20 PM

Cheers

Errrm off the top of my head the windows were about £130...

#278 Racer_Pete

Racer_Pete

    Up Into Fourth

  • TMF+ Member
  • PipPipPipPipPipPipPipPipPip
  • 2,492 posts

Posted 25 August 2010 - 07:51 PM

Cheers

Errrm off the top of my head the windows were about £130...


Thats really good value, i would have thought there'd been alot more, will deffo be getting them soon then. cheers :D

#279 mike.

mike.

    Crazy About Mini's

  • Members
  • PipPipPipPipPipPipPipPipPipPip
  • 6,176 posts

Posted 27 August 2010 - 06:40 PM

Well last couple of days have been quite productive because the rains held off. Thurday I was out so didn't do anything but wednesday and today i've had good days at it.

I've hand painted round the edge of the 2 wheels where there was the yellow of the primer showing through. Thats come out well i've just got to work out how to remove the excess from the dish now without damaging the new paint or scratching the dish....

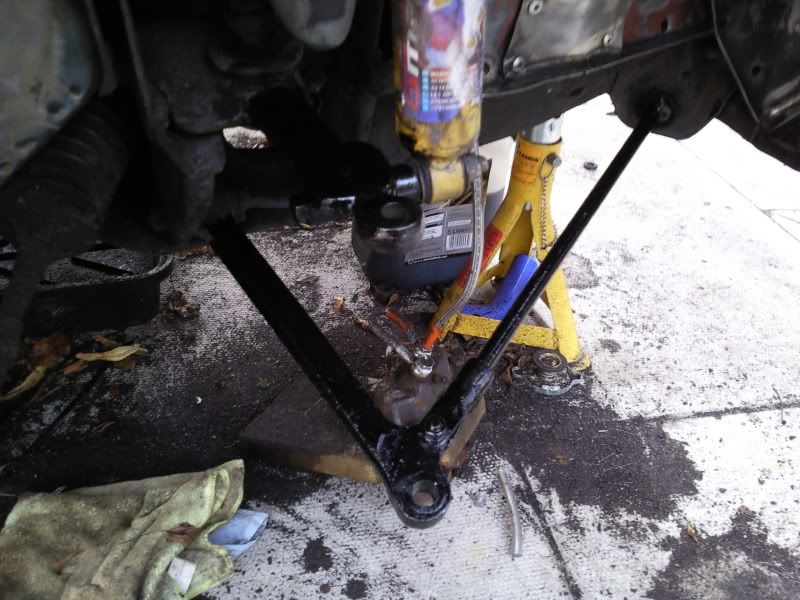
Today I wired brushed off the suspension arms and ties bars and gave them a coat of hammerite which turned out well:
Posted Image

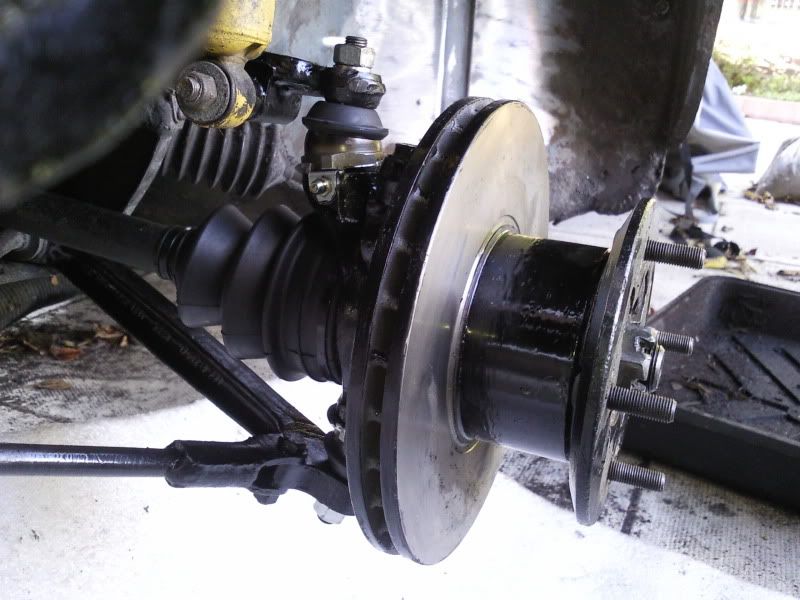
Then got the driveshafts in. I made a newbie mistake and strapped the inner pot joint boot on, then realised the pot joint doesn't fit through the subframe! :dozing: So they had to come back off and I just re secured them with cable ties because there was no way theres enough room to fiddle with the metal straps once the joints in place. Then the refurbed hubs could go on:
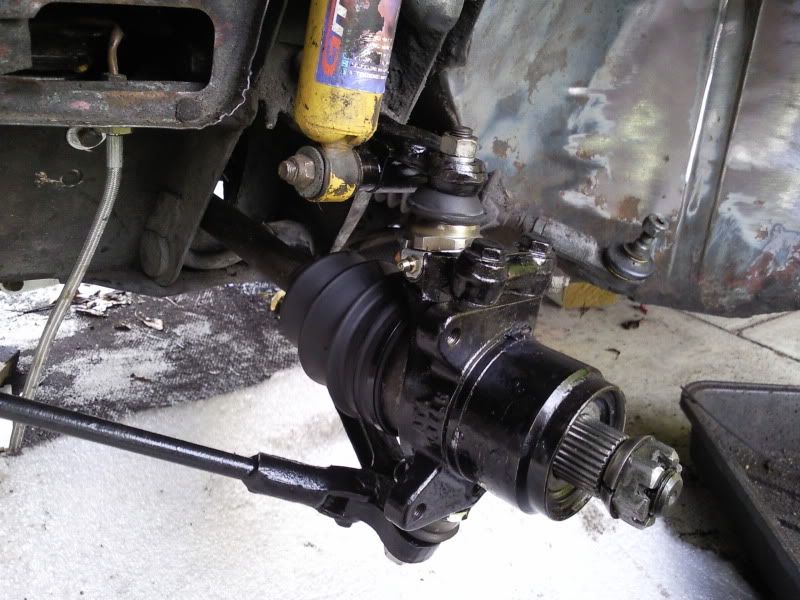
Posted Image

Followed by the new vented discs:

Posted Image

So i'm pretty happy with all that. The engine can now be refilled with oil, then the exhaust can go back on and it can be started up to harden the exhaust sealing paste.

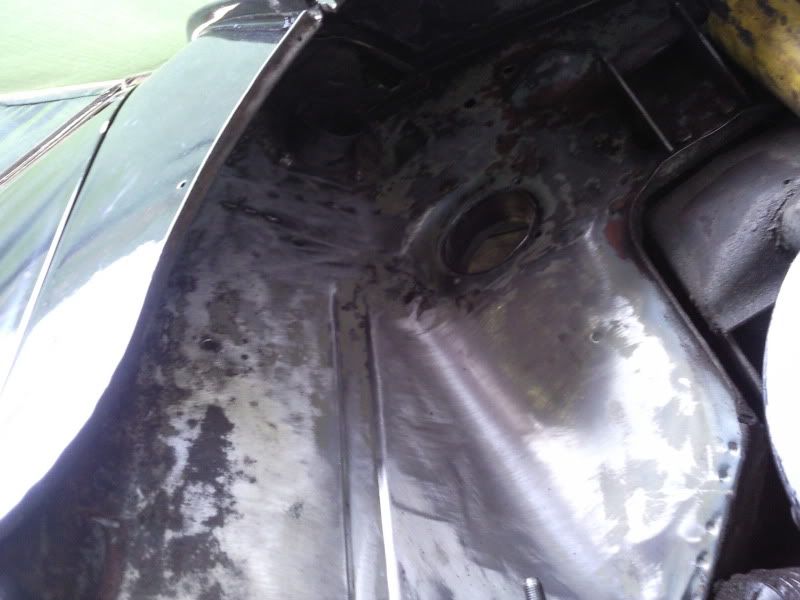
You'll notice the underside is looking pretty bare now aswell. I've wire brushed all the old underseal and most of the paint off. There a couple of holes i've found unfortunately. The scuttle closing panels aren't looking too good, but its down to a previous owner/garage fitting them quite poorly. They're pretty shielded from direct water spray by the heater/vent intakes but I think i'll just give them a proper clean up and paint all over them.

I've got por15 and metal ready on order for the underside, so thats the next main job. Por15 only sticks to bare metal though, so its going to be a big job getting all the old hardened paint off, because the wire brush attachments are falling apart now. Think i'll have to order some proper paint removing attachments.

Heres how its looking though:
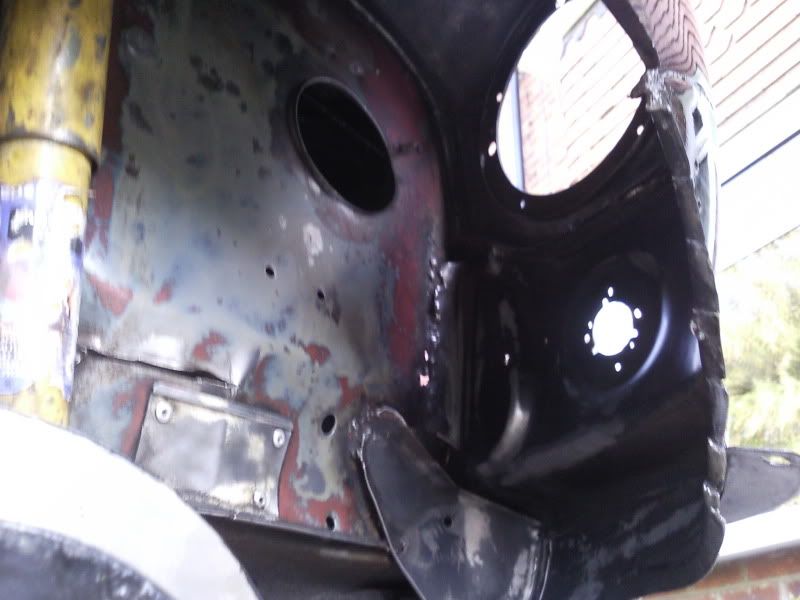
Posted Image

Posted Image

So there still a fair bit of paint to get off yet before its ready to be redone, but if the weather stays alrite, its only another days work to do that. Then again i've then got the rear arches, sills. floors and boot floor to do then :D

#280 minimaff

minimaff

    Super Mini Mad

  • Members
  • PipPipPipPipPipPip
  • 695 posts
  • Location: Barnsley
  • Local Club: Barnsley mini club

Posted 27 August 2010 - 07:06 PM

Nice project,

Love the new colour although it looked good in orange,

should look well when all finished

Door cards look well

#281 mike.

mike.

    Crazy About Mini's

  • Members
  • PipPipPipPipPipPipPipPipPipPip
  • 6,176 posts

Posted 30 August 2010 - 08:39 PM

Thanks. I did like the red and would of been happy to keep it that way but when it needed respraying I thought i'd go for my favourite colour for cars - Black!

Anyway some good news! The brakes!

I attached the eezi bleed and cracked off the hose unions to the master cylinder and let abit of fluid drain out. Didn't hear any air escape but as soon as I tightened them back up and tested the brakes, the pedal was solid! :)

So I put the callipers on the hubs loosely and got some thin bits of wood to put between the piston and disc to stop them coming out too far. I then just attached the eezibleed and the pressure of that pushed all but one piston on each calliper out, but I just pumped the pedal abit and they slid out pretty easy.

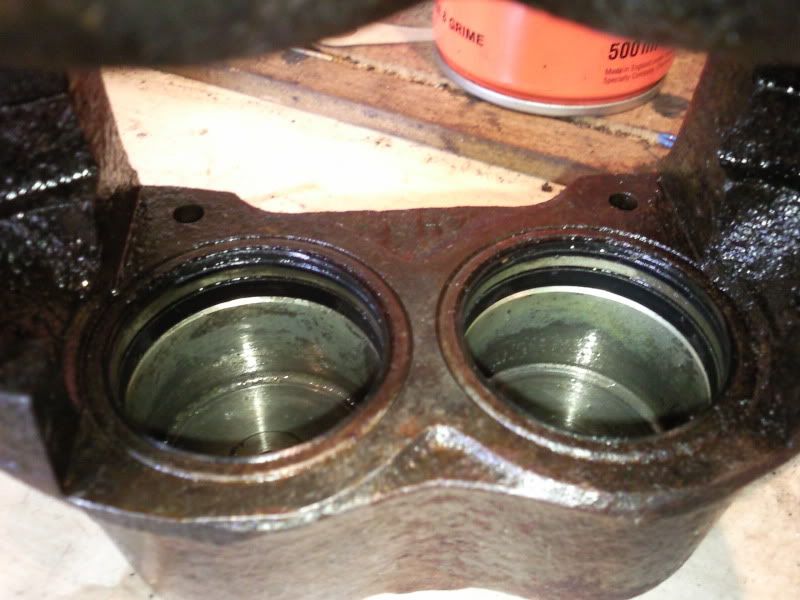
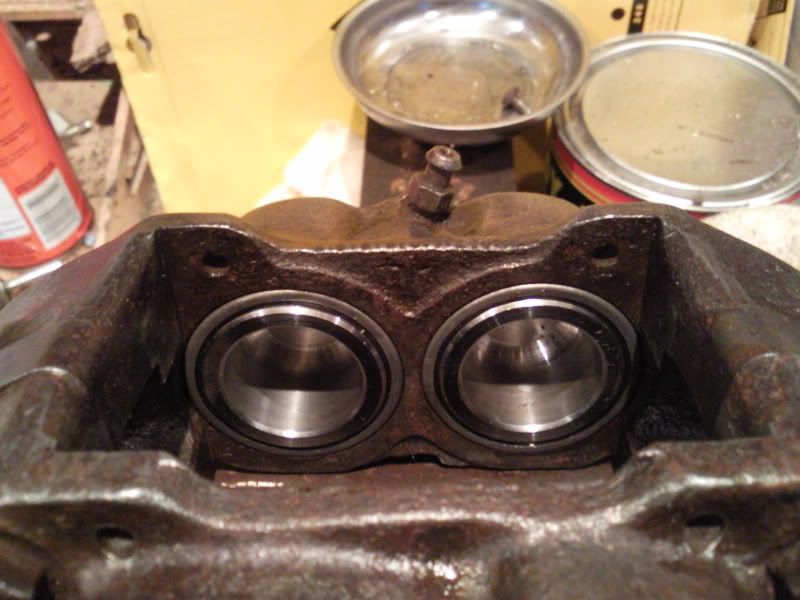
Most of the calliper bores looked in good nick with very slight marking to each one:

Posted Image

The inner bore had some very minor rust marking/staining but I gave the bores a little rub up with 1200 wet&dry and some brake fluid and they cleaned up perfect. So then the new seals were put in and the new stainless steel pistons pressed in which all went well. The final 'wiper' seal and the retaining ring were a pain though, took me and my dad a couple of hours to get them in properly. The rings were a really tight fit - Obviously they need to be but it made them hard to get them in level and flush. You'd push them down level but when you went to push them down flush, one side would always pop out. My dad tried pressing that end in with a flat screwdriver but ended up damaging the ring, so we ended up cleaning up one of the old ones and fitting that. But eventually they all went in and the pistons pushed back:
Posted Image

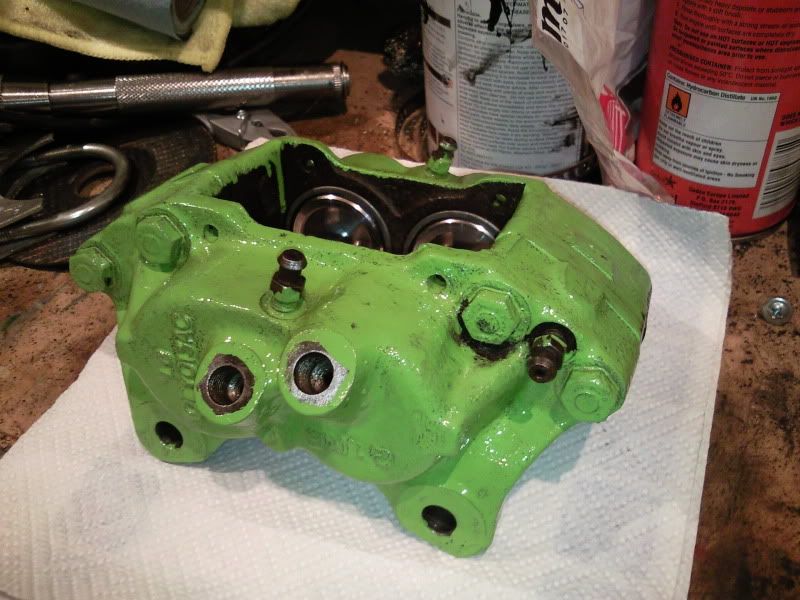
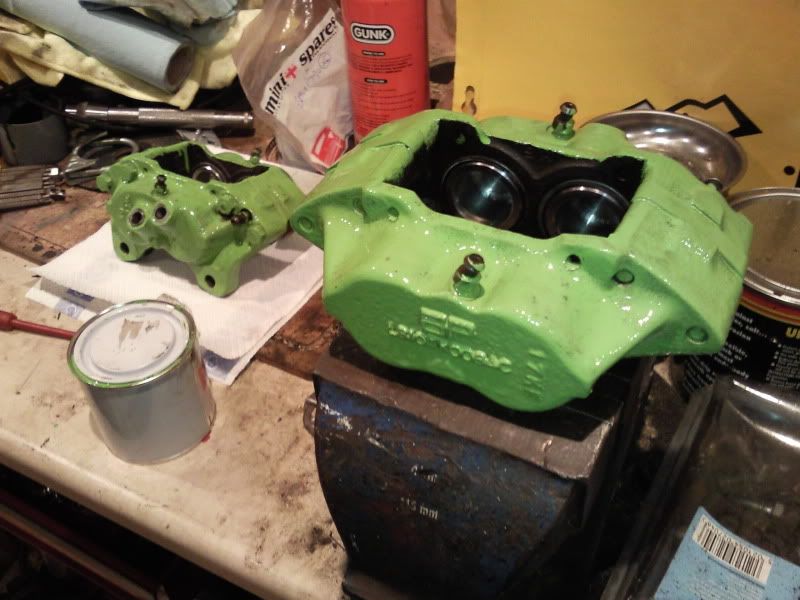
So thats pretty good. I gave the callipers a proper clean and wipe down and added the first lick of paint to them. The calliper paint is really thin but covers quite well, so the 250ml tin i've got is going to be more than enough. I've done one coat on the top/side faces of the callipers so far, so will add another tomorrow and paint the bottom/inside of them. The paint looks abit lighter than it really is in the photos because the lights are bright in the garage but its alot like the focus RS green - Which is just what I wanted.

Posted Image

Posted Image

So i'm glad i've got them done - They were worrying me and thought they'd be the bits keeping my car off the road longer. Hopefully they'll go back on easily and the eezi bleed will do its job and they'll be bled in no time....

#282 mike.

mike.

    Crazy About Mini's

  • Members
  • PipPipPipPipPipPipPipPipPipPip
  • 6,176 posts

Posted 31 August 2010 - 04:30 PM

Done abit more today. Don't really know where the time went because i've been out in the garage/on the car all day and not really got alot to show for it :gimme:

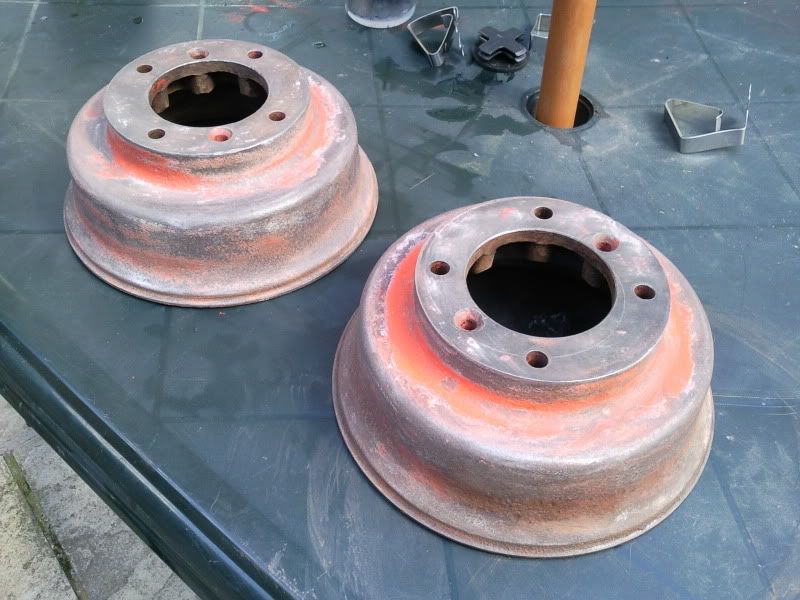
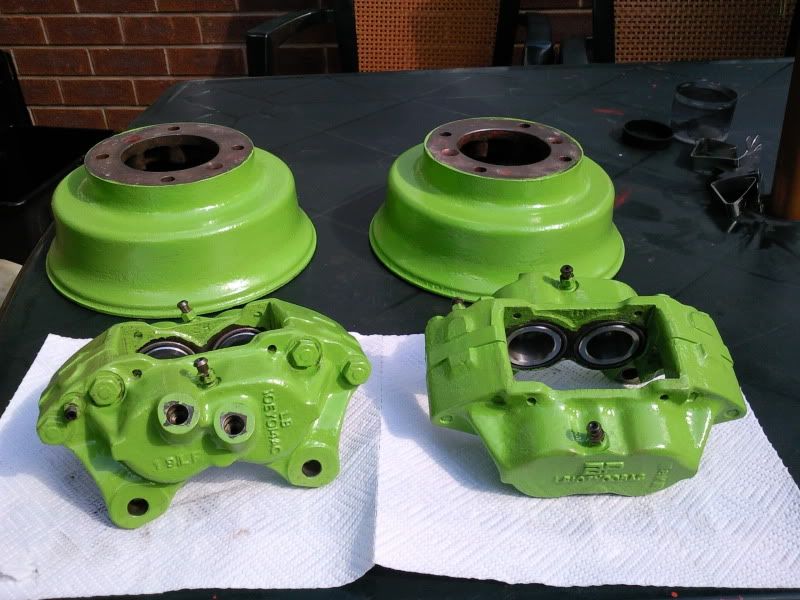
Started by putting the back of the car on axel stands and taking off the back wheels and the drums. The drums are in pretty good condition, I would rather get some minifins really but the genuine ones are money i've not got at the moment considering I'll be needing money for MOT, Tax and Insurance soon hopefully. Either way i've gave them a good wirebrush inside and out, and gave the braking surface a quick going over with the flap wheel to get it nice and clean. Ready for paint:

Posted Image

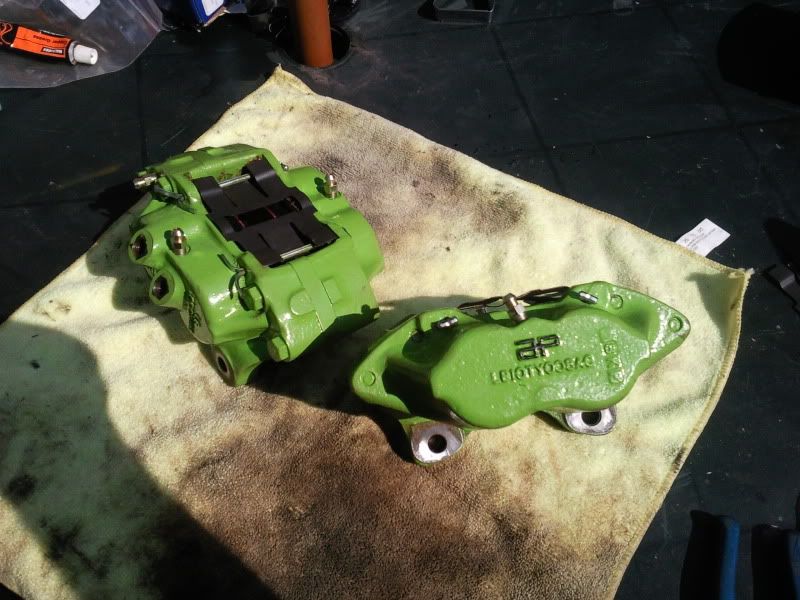
Then gave them 2 good coats of paint and also finished painting the callipers. Both have got 2 coats of paint on them and i'm really happy with the colour. Wish i'd put more thought into my engine bay now rather than just painting it red with blue hoses as i'd like to keep the black/lime green theme going, but I suppose the brakes and engine aren't too close to eachother, so it doesn't matter now. So these are ready now, I might just highlight the AP logo with black just for abit of extra detail tomorrow then hopefully i'll put them on tomorrow...
Posted Image

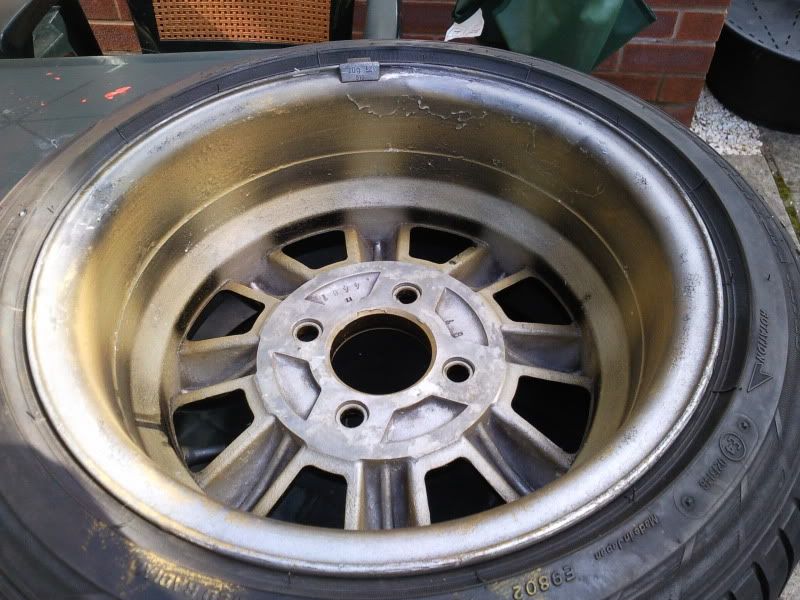
I had a proper look at the wheel and decided the rear of the wheel needed painting aswell, because looking through the spokes you could see all the crap and dusty filler primer finish on them where the paint came through the spokes. You can see what I mean:

Posted Image

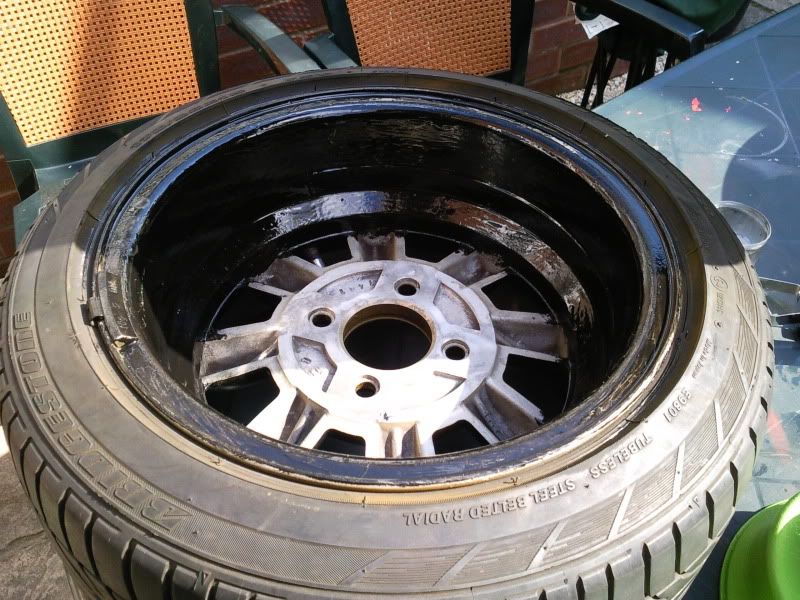
So I gave them a quick rub down and a very quick thick coat of hammerite and it made a good difference:

Posted Image

So thats good. I also filled the engine with oil, so now its ready for the exhaust to go back on properly and started up to heat the exhaust sealing compound to set it. So hopefully tomorrow i'll get the brakes on and maybe get them bled and get the exhaust back on. Then after that the main job is rubbing down the underside and getting it all painted up and protected. My por15 metal ready came in the post today aswell so the whole underside will be going to bare metal - Fingers crossed i'll find no rust/holes!

#283 AndrewJ530

AndrewJ530

    Camshaft & Stage Two Head

  • Members
  • PipPipPipPipPipPipPipPip
  • 1,628 posts
  • Location: Middlesbrough

Posted 31 August 2010 - 05:21 PM

You could always strip the engine bay of the ancillaries and paint the engine in situ? Probably wont get the same finish as when it's out of the car but it'll match the brakes.

#284 mike.

mike.

    Crazy About Mini's

  • Members
  • PipPipPipPipPipPipPipPipPipPip
  • 6,176 posts

Posted 31 August 2010 - 05:25 PM

Yeah I did that with my 998 it worked ok. I think i'd probably do it black with green hoses and other green bits. The whole block in that green would be abit tacky/overwhelming I think.

I'll be leaving it for now anyway, its nice how it is. Maybe a job for the christmas holiday or next year....

#285 mike.

mike.

    Crazy About Mini's

  • Members
  • PipPipPipPipPipPipPipPipPipPip
  • 6,176 posts

Posted 01 September 2010 - 07:31 PM

Todays been another day where i've been out working most of the day and not got a massive amount to show for it... don't know why, i'll have to start getting up earlier to make the most of these sunny days were getting at the moment.

I started by remounting the fuel pump on rubber mounts, because it was pretty noisy without them. Its in the boot at the moment screwed to rear bulkhead but I want to relocate it to the subframe really but that'll have to wait.

The callipers are ready to go on now. I painted the little AP logo did a few little touch ups on the paint and rubbed the paint off the mating surfaces to get them flat. Then I added the new bleed nipples, EBC kevlar brake pads and springs, they look brand new now so pretty happy with them since I bought them for £60 and spent a little over £100 on them inc all the parts and discs etc. Hopefully they'll work!

Posted Image

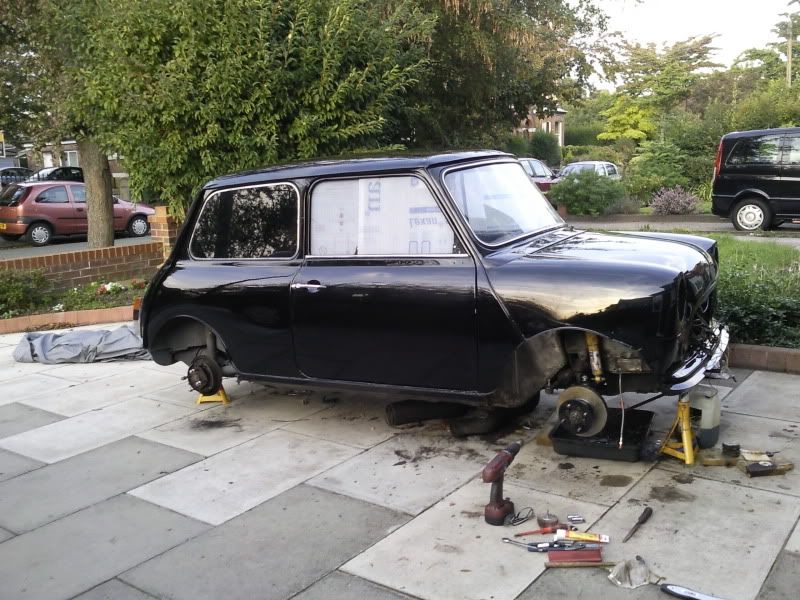
Then set about refitting the exhaust properly. Its on there now but going to have to sort something out to support it more I think because as you can see at the moment the centre mount isn't going to work because it doesn't line up with the hanger on the subframe. So at the moment its held on with 2 cotton reel hangers at the back and by the LCB at the front, but not really ideal so will have to see about that....

Posted Image

But apart from that its all on the right way, clamps are all done up with plenty of firegum sealant around them. Not sure how well its going to work, the firegum seems to dry really quick and just flakes off if you touch it. I cant really see it 'lasting years' like it says on the tube, but aslong as its not blowing i'll be happy enough.

Posted Image

Still wish i'd gone for a stainless system for the extra £70 though...

I also cut out a recess in the rear valance for the exhaust to exit through, because with no cut out the exhaust hit it before the cotton real mounts were done up tight. Its a pretty deep recess, much more than standard but the exhaust fills it nicely and is tucked up into the back of the car rather than poking out form underneath, so i'm pretty happy with it, once the bumpers are back on it'll be good. Its not perfectly central and I slipped a couple of times with the file afterwards but its good enough:

Posted Image

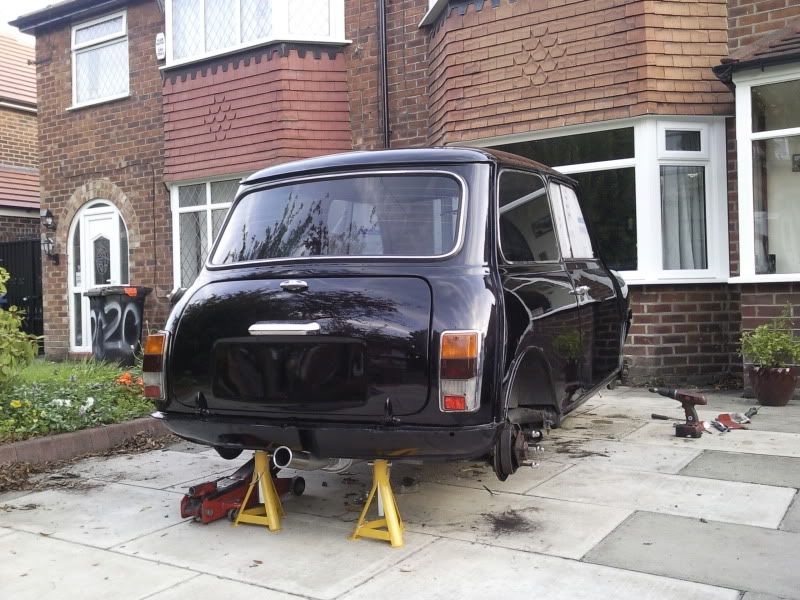
Car looks like its going backwards rather than forwards with all the wheels and brakes off :)

Posted Image

Posted Image


1 user(s) are reading this topic

0 members, 1 guests, 0 anonymous users