Jump to content


Photo
- - - - -

'86 City Refurb


  • Please log in to reply
375 replies to this topic

#256 mike.

mike.

    Crazy About Mini's

  • Members
  • PipPipPipPipPipPipPipPipPipPip
  • 6,176 posts

Posted 10 July 2010 - 12:07 AM

Well today i've been doing the headlining. Really wasn't as bad as I thought but still had a few problems.

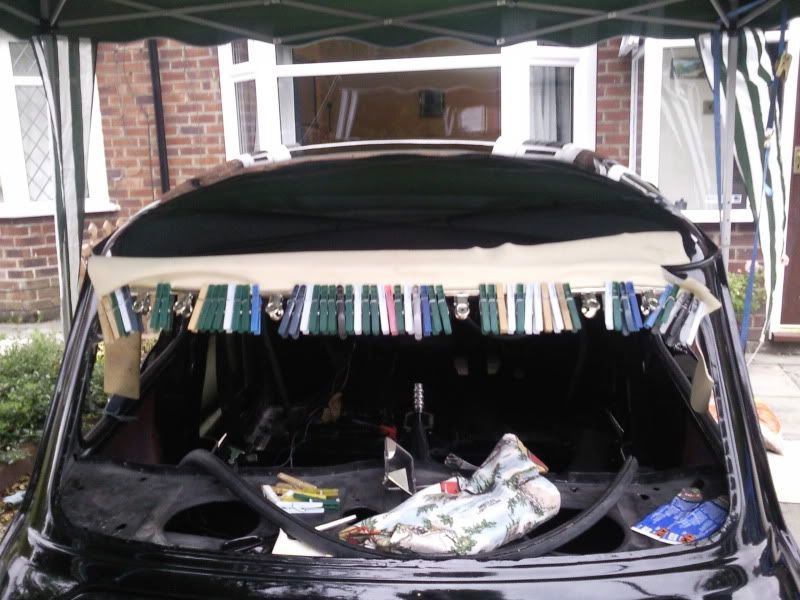
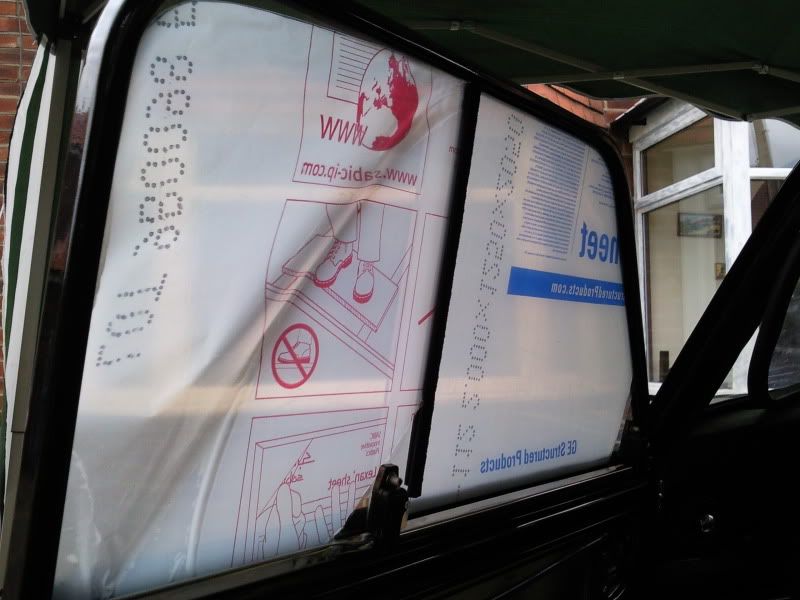
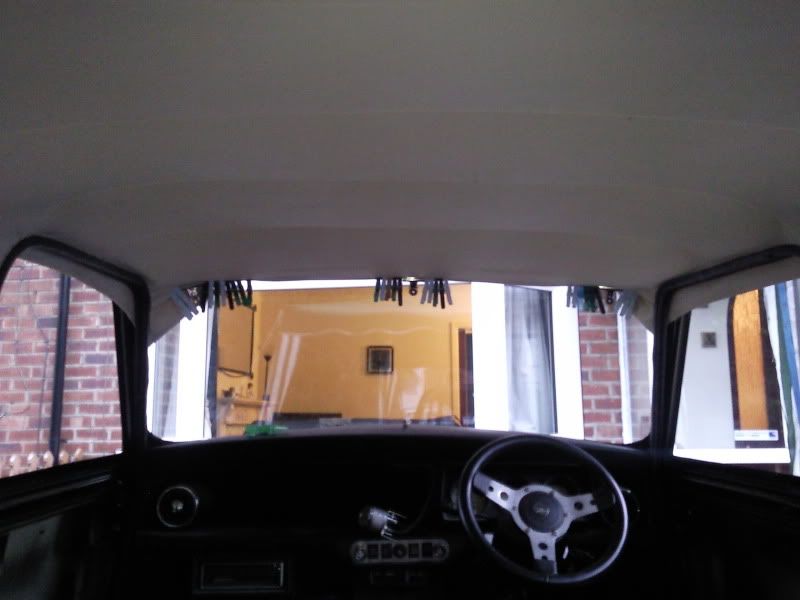
The bulldog clips I bought ended up being about as powerful as a few pegs, so still needed some pegs to hold the headlining tight with the bulldog clips. Ended up using about 30 pegs and the 6 bulldog clips I bought to get it all gripped properly.

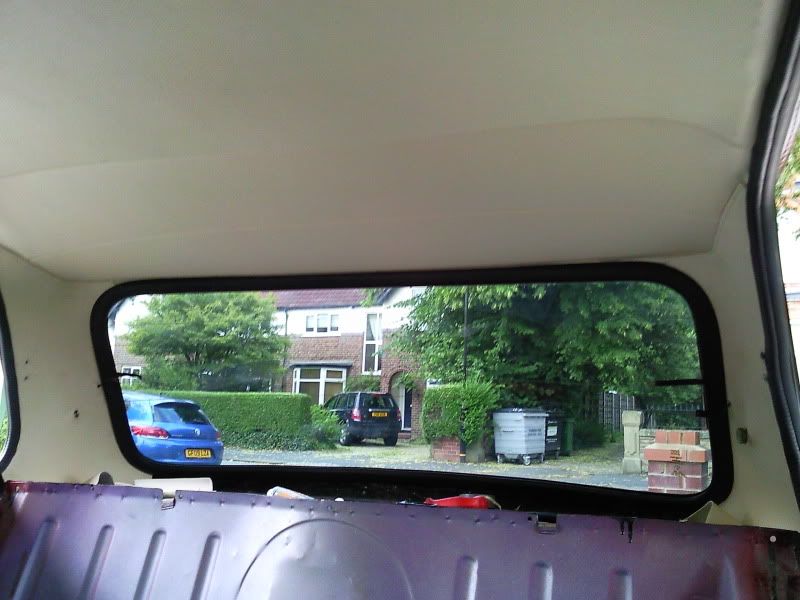
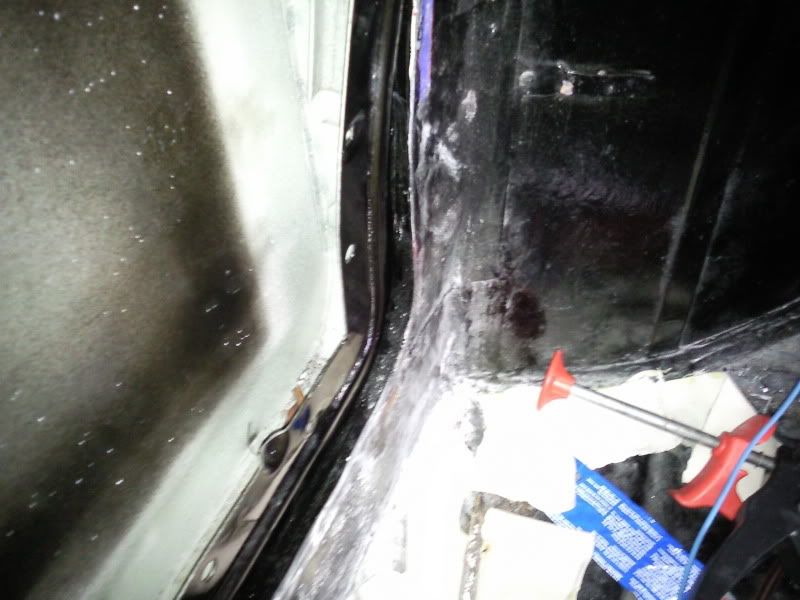
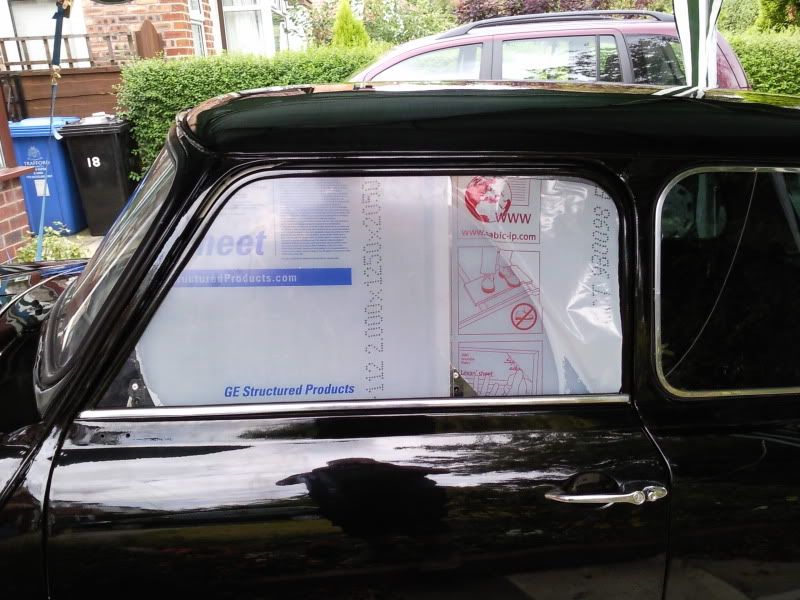
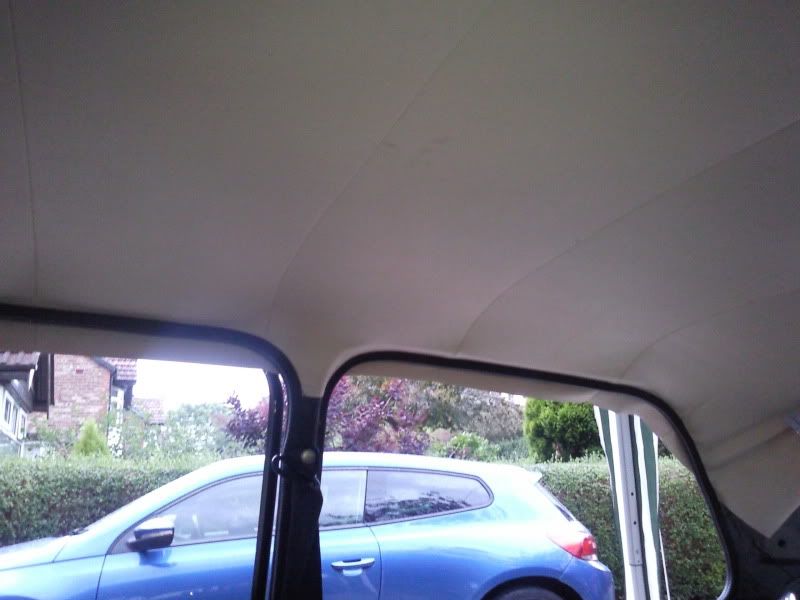
The front doors went perfectly and had no problems and the headliner looks great over them, although I wasn't really sure what to do with the headliner around the door post, so ended up just stretching it around them. But doing round the back windows was much harder to get nice and tight, it needed pulling with quite alot of force to get all the wrinkles out and at one point I was pulling the headliner and my mate was pushing the seal on and the headliner ripped!! Theres about a 10mm long rip in it now, but luckily we managed to get this mostly under the seal so it can't be seen and you have to look really closely to see a slight mark just before the seal. I'm planning on putting some glue along the edge and in the rip to try and help reinforce it abit. The same happened on the passenger side even though we were pulling it with much less force, but again we got pretty lucky and the rips have ended up under the seals so they are hidden and supported. Although I reckon my seals are now on the car for life because if I pull the off the headliner will probably rip and tear off with them.

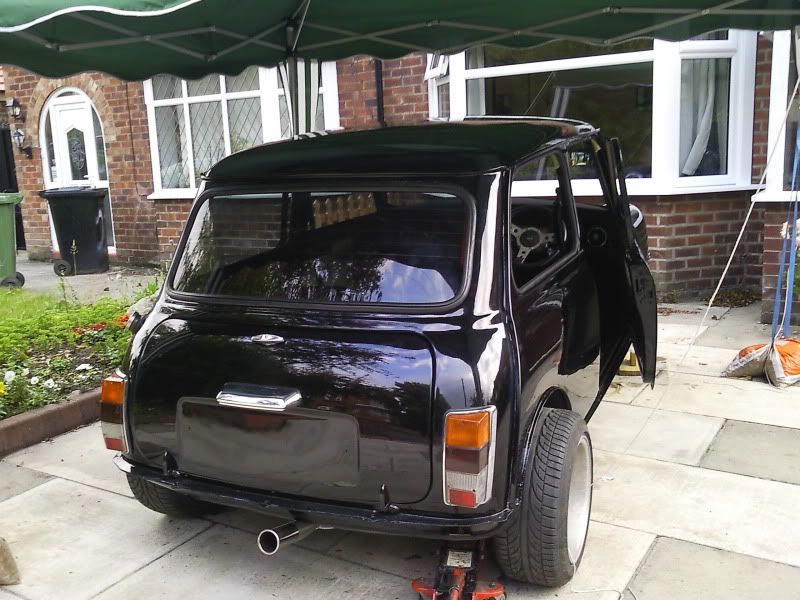
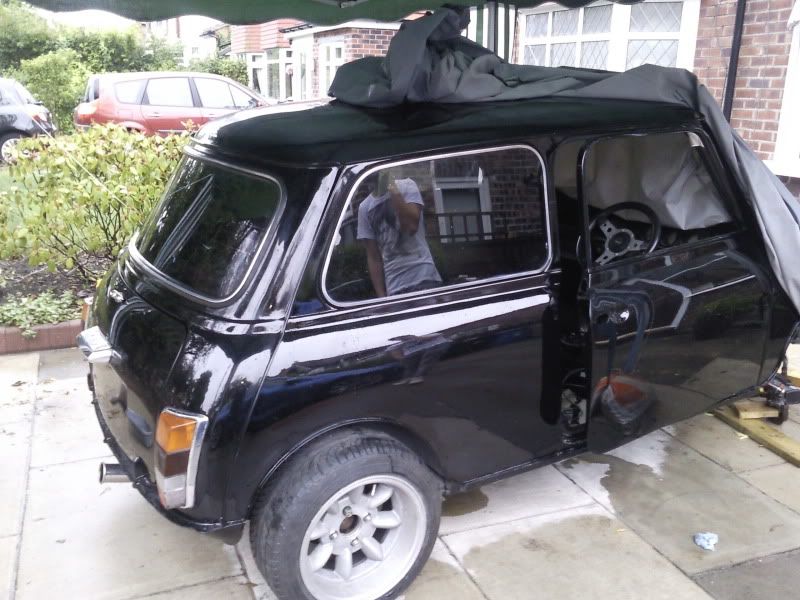
Either way i'm happy with it so far and its looking pretty swish:

Posted Image

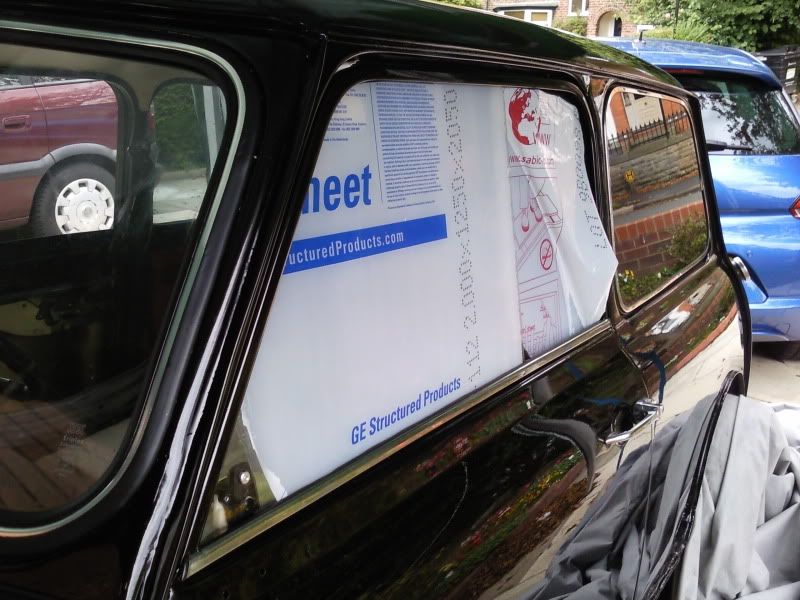
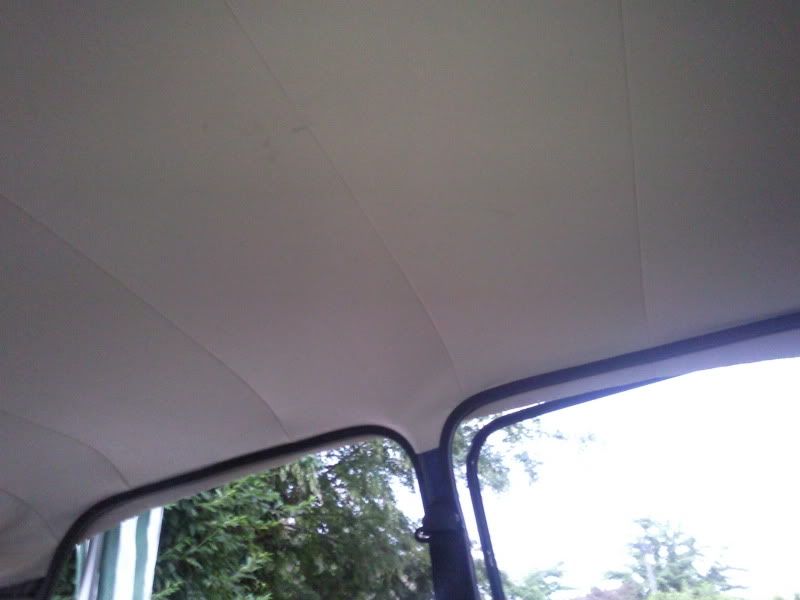
And the sides... Not really sure how the back shapes round the rear roof piller and all pulls tight but i'll see when the glues set and I get all the pegs/clips off back

Posted Image

Posted Image


Engine wise, i'm pretty sure the oil pressures sorted now and i'm getting a reading of about 70 psi at idle and goes down to about 40-50 when its warmer. However I had the engine running today for about 10 minutes with the revs raised up to try and bed the cam in - To what i'm not quite sure because my rev counters not wired in yet. My thermostat is an 86 degree one, so probably too high for this time of year and its been pretty warm today, but either way one minute I look at the gauge and the temp is rising nicely, next minute theres wisps of steam floating around and the gauge is maxed out off the scale! So the first proper run the engines had on the MJ and it overheated pretty badly... I let it cool for a few hours while I did the roof lining and tryed it again later, the temp started to rise again slowly and the thermostat hadn't even opened yet when I realised the manifold region was feeling really really hot - I look at the manifold at it was glowing red hot ;)

So whats going on with that i'm not quite sure, but its getting so hot, so quick that it can only really be mixture or timing. I took a spark plug out and they looked nicely sooted, so its pointing more towards timing. Steve set up the MJ map thats on at the mo, i'll have to try the MJ base map and see what happens, i'm just hoping no damage was done getting the engine so hot :-

#257 Mini-Mad-Craig

Mini-Mad-Craig

    Crazy About Metro's

  • Members
  • PipPipPipPipPipPipPipPipPipPip
  • 9,298 posts
  • Location: Travelling in a fried out Kombi

Posted 10 July 2010 - 12:19 AM

Looks like a good job to me mate!

#258 mike.

mike.

    Crazy About Mini's

  • Members
  • PipPipPipPipPipPipPipPipPipPip
  • 6,176 posts

Posted 11 July 2010 - 09:59 PM

Thanks. Hopefully I'll get it finished tomorrow, with no more rips...

I want the glass in and doors built up with the polycarb windows fitted by about wednesday. Then need to get the other hub off to refurb that, Then i'll tackle the inner CV seals and speedo cable...

#259 mike.

mike.

    Crazy About Mini's

  • Members
  • PipPipPipPipPipPipPipPipPipPip
  • 6,176 posts

Posted 22 July 2010 - 06:29 PM

Meh. Been held up this week by the weather. So annoying because after a couple of hours at it, it'll start throwing it down heavy, I'll pack everything up and put the cover on the car and go in to dry off - Then by the time i've done that its near enough dry again!

Anyway the headlining is pretty much done now. The front and back have been pulled into place and with the aid of most of the pegs in the house, was glued in place:

Posted Image

The front and back wasn't too bad, just took alot of thinking and cutting and working out where needed to be pulled/stretched to remove the creases. But got it all done eventually. Then I marked up and drilled the side panels for the heated screen wires, rear seatbelt and rear window screws and got those wedged into place. They were a real pain because they need to be bent quite alot to fit under the seals, but they're in now and look good.

Posted Image

You'll also notice i've put the back screen in. Its only in with the seal at the moment, i'm waiting for my new locking strips to turn up from minispares. But i'm pretty happy with the tint, you can tell its tinted but its not so dark that it makes my car look like a van and as you can see from above you can still easily see out of it.

Posted Image

Locking strip for that should be fun :)

Been trying to get the new 4 pots bled to try and push the pistons out to refurb them, but Its just not happening. I've even bought an eezi bleed now and had a go with that today, its worked better than pumping and did remove some more air from the callipers, but the pedal still goes straight to the floor.

I've checked the rear brakes over and adjusted them, buts its made no difference. So i'm going to have to try and bleed the whole system, but I can't workout what size spanner I need for the rear bleed nipples. I'm guessing its 1/4" because it looks to be abit smaller than the 8mm spanner i'm using for the front, so i'll have to see...

#260 mike.

mike.

    Crazy About Mini's

  • Members
  • PipPipPipPipPipPipPipPipPipPip
  • 6,176 posts

Posted 28 July 2010 - 10:38 PM

Brakes are give me problems now. Spent most of monday bleeding them but its made no difference. I've now bled the whole system front and back 4 times with the eezi bleed and i've still not got a pedal. Theres a little more pressure in the pedal but nothing really and not enough to push the pistons out. Decided i'm going to leave them for now because i'm wasting too much good weather working time on them.

I've put the side windows in now and got halfway through putting the locking strip in the rear window - I hate this job and the flimsy tool keeps bending under the force.

Front window is ready to go in, got new seals and locking strips for that. Rubbed down abit of surface rust on the lip and treated that so thats ready after abit of paint. Also got all the rust treatment, paint and underseal I need to redo under all the wings and arches before the hubs go back on.

Spent some of today changing the driveshaft seals in the diff and finished off the new boots boots on the driveshafts themselves, so thats all ready to go back on.

Also changed all the engine steady bushes today to poly versions and added an extra gearbox steady also fitted with poly bushes. Hopefully should add up to a nice solid gearchange along with the KAD quickshift and new bigger/stronger gearlinkage mounts i've bought.

Posted Image

Posted Image

Posted Image

Hopefully will have front and rear windows in and sealed up with the locking strips in and have all the underside rubbed down and resealed by the end of the week if weather stays ok.

#261 mike.

mike.

    Crazy About Mini's

  • Members
  • PipPipPipPipPipPipPipPipPipPip
  • 6,176 posts

Posted 30 July 2010 - 07:34 PM

Not done too much today really. No excuse really, weather was abit wet and i'm lacking abit of motivation at the moment because the brakes are always in the back of my mind...

But got the side windows in and sealed up the rear screen with sealant and the fillet strip. I hate that job and i've only ever done it on the rear, its going to be a killer on the front with the amount of force you need to put on the tool to slide it along the seal and having to lean across the car. Think i'll get some proper rubber lubricant rather than just splashing the seal with soapy water as I go along.

Either way it looks pretty good:

Posted Image

Going to be working over the weekend but next week I want to get a real push on it and get alot done. Main job that needs doing is to take the exhaust off and seal it properly to stop it leaking and to rub down and paint and seal the underside of the car. Need to order some clips and stuff before I can fit the locking mech back in the door and get them adjusted.

#262 mike.

mike.

    Crazy About Mini's

  • Members
  • PipPipPipPipPipPipPipPipPipPip
  • 6,176 posts

Posted 11 August 2010 - 03:11 PM

Little bit more progress. I've removed the exhaust to get the rod change in, but thats in and all connected now. The gearlever feel solid now with the new steady, poly bushes, bigger, firmer cotton reel mounts and the KAD lever, going to feel really good whilst driving hopefully.

The exhaust was actually on the wrong way, so i'm going to swap that round like this:

Posted Image

So that'll give good clearance of the rod change. I need to wait till i've got all the driveshafts in and oil in the engine again before I put the exhaust on, so that I can fire it up and get some heat through it to harden the exhaust sealant i'll be putting round all the joints. But not going to take me too much time to get that done.

I've took all the lock mechanism, levers and handles off my old doors and serviced those. Gave them a good wirebrush, degreased them fully and cleaned all the crud and dust out of all the moving parts, then I reoiled them all. I've got the passenger side on and working well, also fixed the lock while I was at it, it never used to unlock the door from the outside, but found one of the parts inside had been bent, so I just bent it back and it works fine now.

So then I adjusted the door to get it closing nicely against the body, went really well compared to some people who have unlucky troubles with door adjustment/fitting and it fits way better than my old doors did!

Posted Image

Only problem I had was that the front of the door was extremely tight on the seal, the seal was completely crushed at the front before the back of the door had even touched the latch. This meant you had to force the door closed with the handle/your knee to close it against the seal. Obviously not ideal and from the inside, i'm pretty sure any future passengers would rip the interior handle clean off before the door even shut. Here you can see the problem, the lip for the seal has a perfect gap along the bottom edge of the door but as you can see, the gap gets narrower towards the front edge of the door, leaving no room for the seal:

Posted Image

I've sorted this pretty much now by protecting the lip with some old sill edge trim and bending the lip for the seal over slightly with mole grips to make room for the seal. It still needs abit of tweeking to get perfect but its alot better now and the door can shut properly with abit of a slam. Unfortunately the paint did crack around the lip where it was being bent, but i'll just give the lip a quick rough up with sandpaper and paint it with some hammerite, because the seals going to cover it anyway. The locks are all ready to go on the drivers door aswell so hopefully by the end of the week i'll have both doors built up and opening/closing properly.

Then I thought about my mirrors. They've been getting knocked around in a cardboard box full of my wipers/arms, lights and various other bodyparts off my car in 3 different garage for the last 18 months or so they weren't looking their best. They were all scuffed and dull:

Posted Image

So I gave them a rub down with 600 to remove the scuffs and get them smooth:

Posted Image

I was going to sand the little SPA logo off them but decided not to - But now i've painted them I wish I did because its had so many layers over it now you can't even read it anymore. Anyway after that they had 4 coats of plastic filler primer:

Posted Image

Once that was hard I rubbed them down with 1200 and gave them 4-5 coats of gloss black:

Posted Image

The finish is ok but I want it to be as good as the paint on my car really. But you can see better on this photo there is some slight orange peel going on:

Posted Image

So think what i'm going to do is let that harden, then wet sand them with 1200 to get them perfect again. Then i'll lacquer them and use rubbing compound on the lacquer afterwards to shine them up nicely.

The front screen is also in on my car now. I've used a new seal as my old one was full of primer, but i'm regretting it now because the screen seemed to be a much tighter fit that the rear one and the gap for the fillet strip is completely closed up all the way round the seal, so its going to be a hard job fitting that now and going to take alot of force to open the gap enough for the strip...

#263 mike.

mike.

    Crazy About Mini's

  • Members
  • PipPipPipPipPipPipPipPipPipPip
  • 6,176 posts

Posted 17 August 2010 - 07:01 PM

I wasn't happy with the finish on the mirrors, it would have polished up ok, but still i wanted them to match my car if possible using rattle cans.

So I ended up rubbing them down and respraying them twice before I was happy with the final finish before applying 2 coats of lacquer. So today after rubbing them down with rubbing compound and polishing them back to a shine here the final result.

Theres still abit of orange peel but its only minor, so wasn't worth flatting down and risk rubbing through the lacquer:

Posted Image

Posted Image

#264 Midas Mk1

Midas Mk1

    Crazy About Mini's

  • TMF+ Member
  • PipPipPipPipPipPipPipPipPipPip
  • 5,777 posts
  • Location: Manchester
  • Local Club: S.U.N.M.C

Posted 17 August 2010 - 07:25 PM

Great Progress! Nice Mini :)

#265 mike.

mike.

    Crazy About Mini's

  • Members
  • PipPipPipPipPipPipPipPipPipPip
  • 6,176 posts

Posted 17 August 2010 - 10:07 PM

Thanks

I'm hoping to get alot done over the next couple of weeks, so its done by the time I need to start thinking about my last year of uni in sept...

#266 mike.

mike.

    Crazy About Mini's

  • Members
  • PipPipPipPipPipPipPipPipPipPip
  • 6,176 posts

Posted 19 August 2010 - 12:18 PM

Just thought i'd post up what i've been doing this morning whilst im in having some lunch.

Front screen is now sealed in properly; went really well, I used silicone lubricant which is safe on rubber and filled the gap where the fillet strip was going to go and the insert tool just slid along with ease and I got the whole thing sealed in in about 2 minutes.

Main update though is i've just fitted the first of my mk1 polycarb sliding windows!

The door skin where it folds round the top of the door frame needed abit of bending and filing with my dremel to make enough room for the window track on the top of door but apart from that it went in pretty easily. Its held in with 2 self tapping screws through the top of the door, doesn't really need any more than that because theres no load on them, they're just to hold it in place.

The weather strip on the outside is off my old doors. The rubber/felt seal that goes against the winding glass on a mk3> door is cut off with a stanley knife, the little clips inside it that grip the top of normal doors are flicked out to make way for the thicker top of the streetfighter door and then the strip is just knocked on. I also love autosol! It made the strip look like it was brand new!

Anyway heres the pics:

Posted Image

Posted Image

Inside pics are a little dark but oh well:

Posted Image

These windows should be a good compromise for poly carbs because they'll still be quite practical for drive throughs and pressing buttons on parking gates etc:

Posted Image

Posted Image

Pretty happy with them so far. I've put some silicone lubricant in the rails for the windows so they slide quite freely aswell.

Only thing i'm not sure about is the gap between the 2 panels, its probably about 10mm wide and will let in quite a draft. I've got some mk1 draft excluders but they're not going to fill the gap completely. I'll have to see how it goes.

I've also drilled the holes for both the mirrors on each door, so they're ready to go back on. I'll be leaving those until the interior is back in because they have to be adjusted before being bolted to the door. But apart from that once i've got the other window in the doors are complete! They are both adjusted up nicely and are opening/closing properly. Only little thing i'll have to do is to see how I can fit the central locking motors and run the wiring...

Edited by mike., 19 August 2010 - 12:20 PM.


#267 mike.

mike.

    Crazy About Mini's

  • Members
  • PipPipPipPipPipPipPipPipPipPip
  • 6,176 posts

Posted 19 August 2010 - 03:56 PM

Just finished fitting the drivers side. It doesn't slide as smoothly as the passenger side, I think its because the poly carb is quite a tight fit top to bottom in the frame, so its flexing abit and is sitting slightly curved in the frame. So when you go to close it fully, you have to push on the centre of it to get it to line up with the rail/seal in the door frame. The passenger side does the same but not as bad, so I might whip them back out and sand a couple of mm off the top of the window if I can be bothered.

Had a think about the draft excluders, the mk1 excluders i've got are still a few mm off from closing the gap between the panels. I had the idea of using the interior chrome weather strip from my old doors instead. I've cut them to the right size and prised them open to fit over the polycarb. It closes the gap better and looks much nicer being chrome. The only thing i'm concerned about is because they are quite ridged, they might scrape along the polycarb whilst sliding the windows and mark them, so still not definite on those but they do look good:

Posted Image

Posted Image

#268 minimad01

minimad01

    Super Mini Mad

  • Members
  • PipPipPipPipPipPip
  • 563 posts

Posted 19 August 2010 - 04:04 PM

liking the windows where you get them from ? an if your stil having problem with your brakes try cracking the pipe of just that comes out of the master cylinder (if you havnt got servo) because i had this problem with mine when i changed all the brakes an lines they somtimes get an air lock right at the top

#269 mike.

mike.

    Crazy About Mini's

  • Members
  • PipPipPipPipPipPipPipPipPipPip
  • 6,176 posts

Posted 19 August 2010 - 04:09 PM

Thanks

They're from the-mini-door-company; same place as my doors. He makes them specifically to fit his streetfighter doors, when I spoke to him he was saying he's had so many problems with people trying to fit his streetfighter windows into homemade streetfighter doors that he doesn't sell them to people unless they can prove the doors are from him.

I've been doing alot of searching on the forum on the brakes and had seen somebody mention that before. So i'm going to give that a go next week.

#270 minimad01

minimad01

    Super Mini Mad

  • Members
  • PipPipPipPipPipPip
  • 563 posts

Posted 19 August 2010 - 04:11 PM

Thanks

They're from the-mini-door-company; same place as my doors. He makes them specifically to fit his streetfighter doors, when I spoke to him he was saying he's had so many problems with people trying to fit his streetfighter windows into homemade streetfighter doors that he doesn't sell them to people unless they can prove the doors are from him.

I've been doing alot of searching on the forum on the brakes and had seen somebody mention that before. So i'm going to give that a go next week.

argh iv just got normal doors an quite fancied a set of sliding windows think they look so smart :thumbsup:
an ye give it a try mate


1 user(s) are reading this topic

0 members, 1 guests, 0 anonymous users