Jump to content


Photo
- - - - -

'86 City Refurb


  • Please log in to reply
375 replies to this topic

#241 mike.

mike.

    Crazy About Mini's

  • Members
  • PipPipPipPipPipPipPipPipPipPip
  • 6,176 posts

Posted 04 May 2010 - 11:38 PM

Just read your project thread. Very helpful. You seemed like a seasoned professional when it came to putting the engine back together, hope it runs first time for you! Have you reconstructed/refurbed an engine before? Don't think its fair to call your procrastinating mate a friend, other people don't seem to appreciate what it means to get a Mini perfect.

Best of luck from here on in, looking forward to seeing you refit that Mk1 grill and put those finishing touches on. :)


Thanks for the comments - The engines never ran yet so i'm still holding my breath!

But yeah that was the first time i'd ever seen the inside of an engine before. It was a learning experience for me, I just used the building a 1380 A series engines DVD - Found that really helpful and it was full of little tips that the haynes doesn't give you.

MiniAlex - The dials I added were obviously just off a later mini - They bolted straight in and the rev counter wiring is already included in the wiring loom of the car - But just not used.

If you take your 2 clocks out and have a fish around you should find a loose black/white wire somewhere. Thats your connection from the coil to the rev counter and should be the one you need to run it.


Only update I have is that steve at SD minis has informed me that the car is now black again! Just got the bonnet and bootlid to spray, then he can crack on with the engine and things. So yeah i'm hoping to have that back fairly soon so i can start the rebuild. As of today i'm finished for summer at uni now too so i've got all my time spare. Hoping to get the car back on the road ASAP - Its been far too long since i've driven it.

Although saying that i will have a fair bit of work to do and will need a few good hours spent on getting it MOT prepped too. I know the brakes need bleeding at least and the balljoints could probably do with replacing. I don't want to rush it, but I will be working hard on it aslong as the weathers not too bad.

#242 skippy123

skippy123

    On The Road

  • Noobies
  • PipPip
  • 40 posts

Posted 01 June 2010 - 09:06 AM

Hi there nice job on your mini,
just wondering what type of paint you used to coat your floor after welding, also what did you use to coat under the car?

thanks

#243 mike.

mike.

    Crazy About Mini's

  • Members
  • PipPipPipPipPipPipPipPipPipPip
  • 6,176 posts

Posted 01 June 2010 - 09:51 AM

Inside I took all the soundproofing stuff off, sanded the floor down and then wire brushed and used some kurust on the little bits if surface rust.

Then i painted it with some red oxide primer, followed by a coat of black hammerite.

The underside i've not done much too, just topped up with spray on waxoyl

#244 Mursell14

Mursell14

    Just On Tickover

  • Noobies
  • Pip
  • 8 posts

Posted 15 June 2010 - 10:33 PM

i have just spent 2hrs reading your post and all i can say is OUT OF THIS WORLD for all the work and effort you have but into the rebuild i hope once your finished you stand in front of your mini with a nice cold beer and give yourdelf a big pat on the back.

also thanks for the info on the unleaded convert.

Matt

#245 mike.

mike.

    Crazy About Mini's

  • Members
  • PipPipPipPipPipPipPipPipPipPip
  • 6,176 posts

Posted 17 June 2010 - 05:37 PM

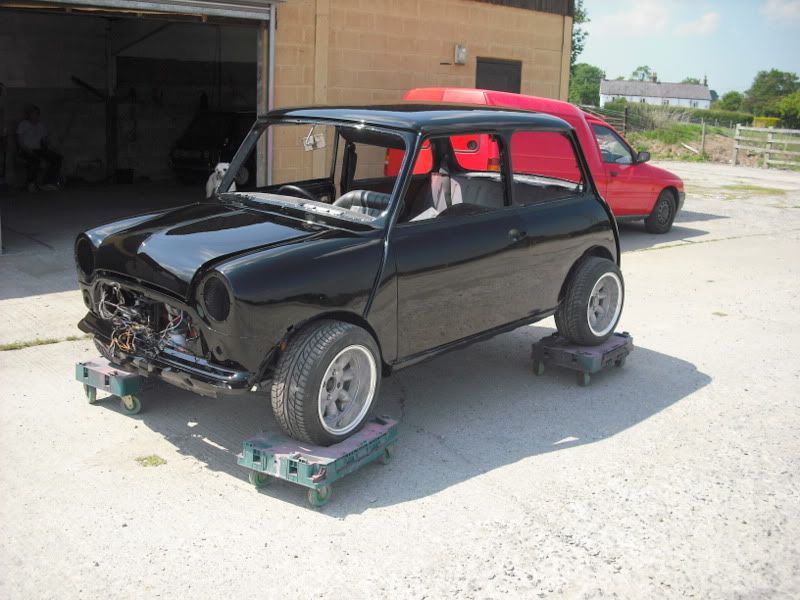
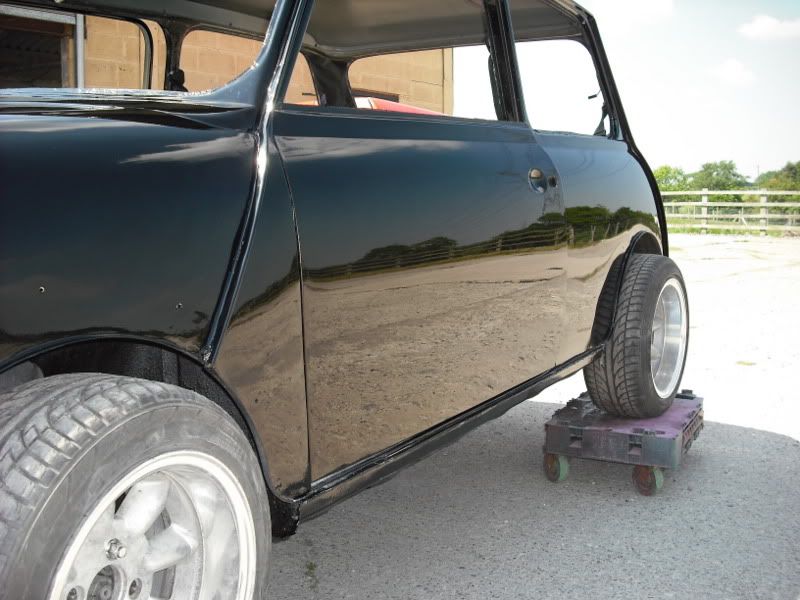
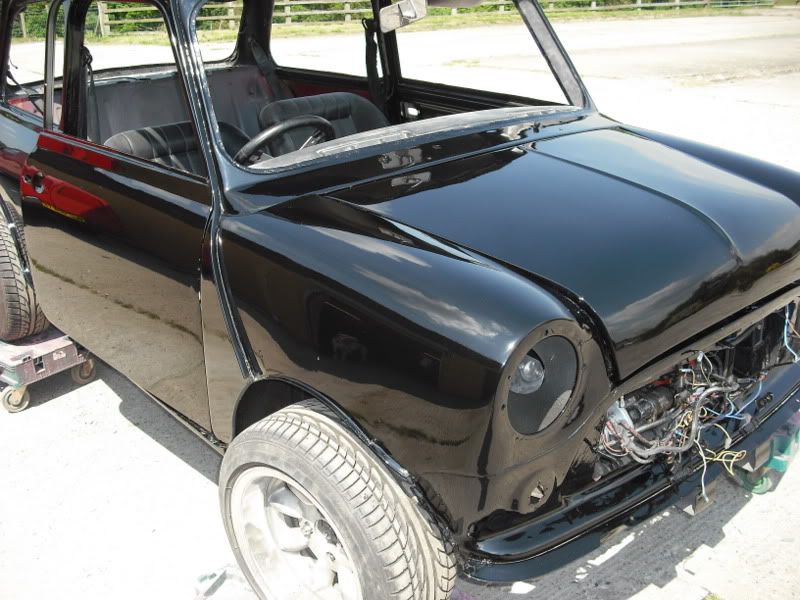
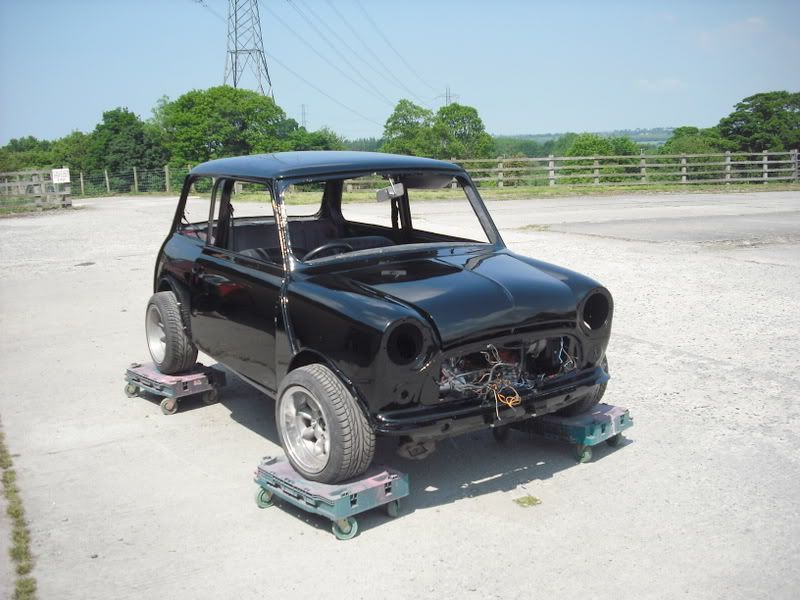
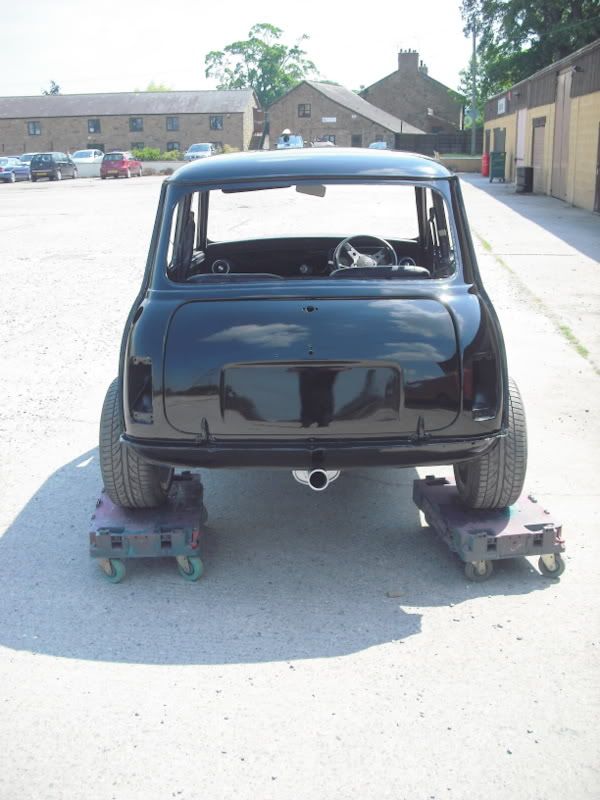
Well heres an update for anybody whos interested. The car is very nearly done and ready to be brought back to me, just some problems with the MJ setup to sort frist. Looks like the VR sensor is faulty and also the badly designed specialist components bracket for it, rubs on the fanbelt. So got to sort that out and get the engine running then it can come back to me sometime next week.

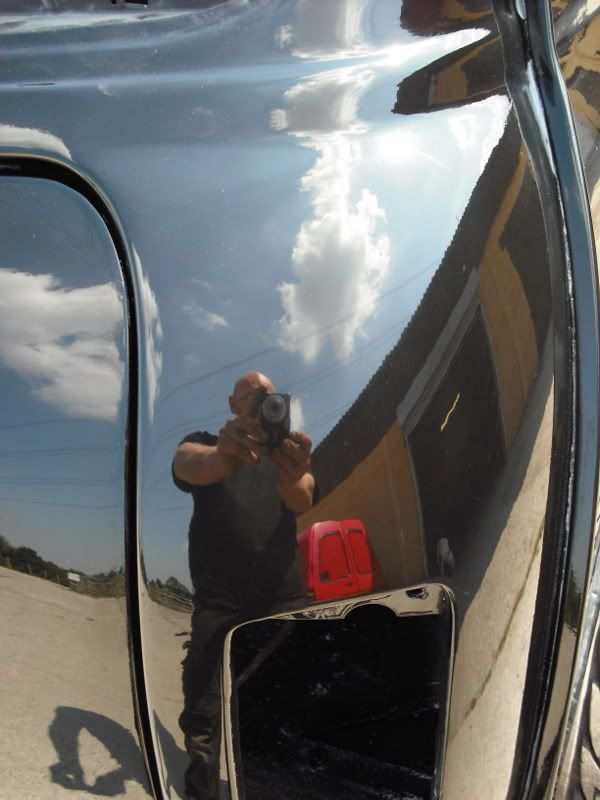
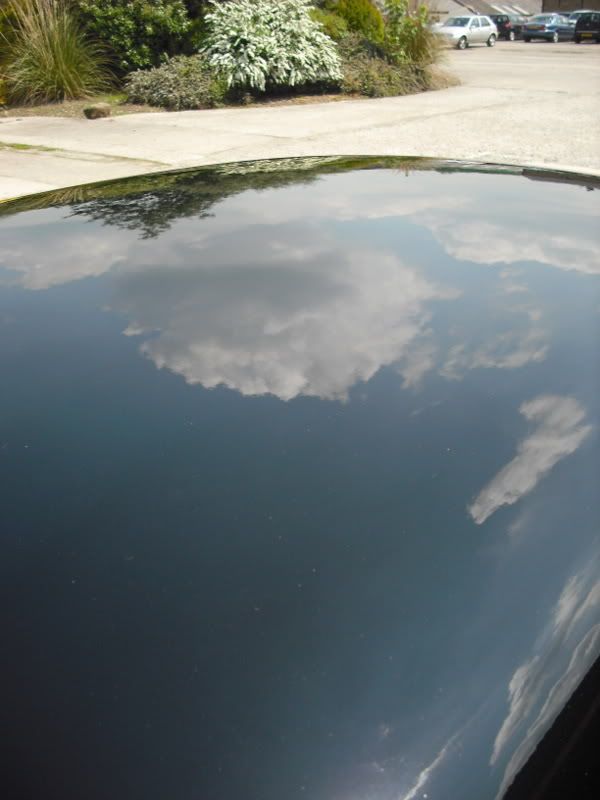
Steve at SD minis has sent me a few photos for now and i've got to say, i'm so excited - It looks amazing! :thumbsup:

Here the pictures:

Posted Image

Posted Image

Posted Image

Posted Image

Posted Image

Look at the finish of the paint! I thought the last respray was good, but this is the next level:

Posted Image

Posted Image

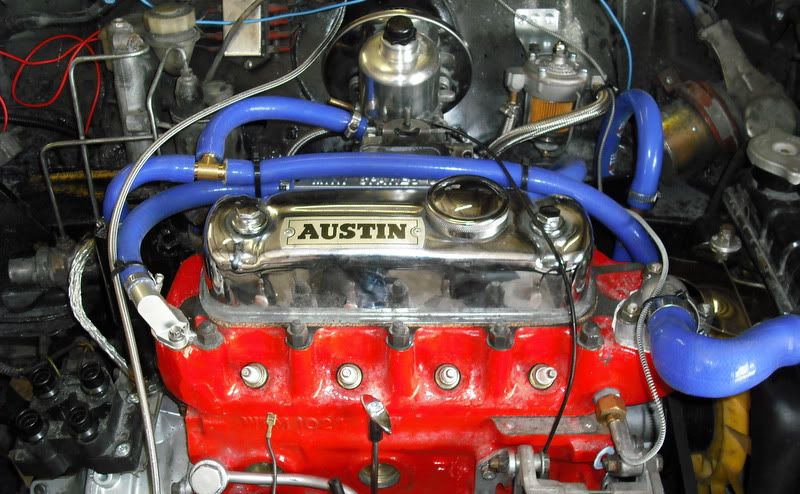
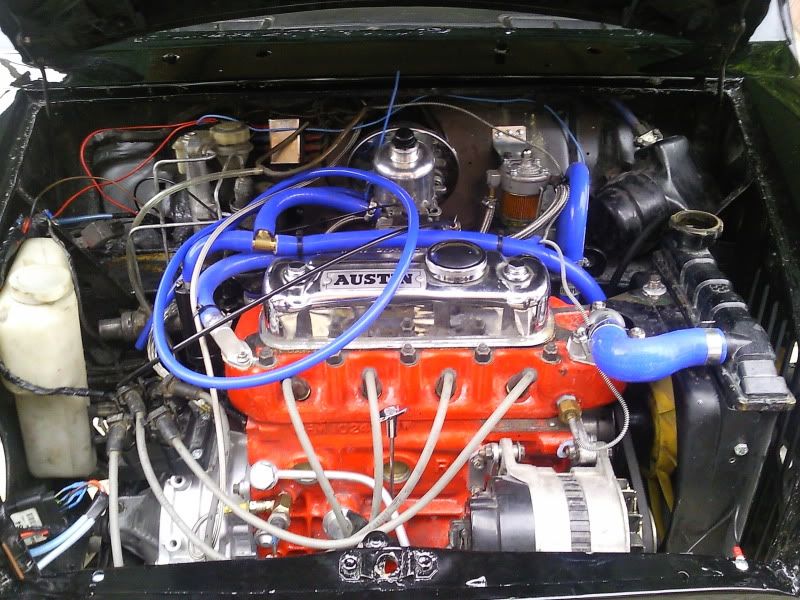
Finally the new engine, all plumbed in with the new hoses, fuel lines and MJ:

Posted Image

I can't wait!

#246 mini_mad69

mini_mad69

    Let future you worry about it

  • Traders
  • PipPipPipPipPipPipPipPipPipPip
  • 5,417 posts
  • Local Club: urrrr no

Posted 17 June 2010 - 05:40 PM

Looks supurb mate. I bet your itching to get it back.

#247 mike.

mike.

    Crazy About Mini's

  • Members
  • PipPipPipPipPipPipPipPipPipPip
  • 6,176 posts

Posted 17 June 2010 - 06:04 PM

Thanks

I really cant wait - It was February last year when I last drove it and i've not even seen it since March!

#248 Mini-Mad-Craig

Mini-Mad-Craig

    Crazy About Metro's

  • Members
  • PipPipPipPipPipPipPipPipPipPip
  • 9,298 posts
  • Location: Travelling in a fried out Kombi

Posted 17 June 2010 - 06:13 PM

Looks AMAZING mate

#249 GreaseMonkey

GreaseMonkey

    Has Ratchet, Will Make Noises

  • Members
  • PipPipPipPipPipPipPipPipPip
  • 3,663 posts

Posted 17 June 2010 - 06:55 PM

WOW! :thumbsup:

#250 mike.

mike.

    Crazy About Mini's

  • Members
  • PipPipPipPipPipPipPipPipPipPip
  • 6,176 posts

Posted 25 June 2010 - 06:21 PM

Cheers guys. Got a call from steve yesterday, he's had the engine running :) He said the tappets are abit loud so they need adjusting and said that the LCB clamps are too big and don't clamp the Y piece properly, so the exhaust is blowing abit at the Y piece. All little teething problems really that I expected.

So hopefully steves mate will be dropping the car off to me early next week...

I also went up to minisport and picked up new balljoints and wheel bearings, so going to recon the hubs when they're back - Just so I'm sure i'll get through the MOT asap. Also picked up a carpet set, and a few other little bits.

I've also found some new second hand front and rear windows - As my 'mate' lost the last set :/ - So i've cleaned those up, repaired the heated strips on the rear one and i've got the back 3 windows booked in for tinting tomorrow morning :thumbsup:

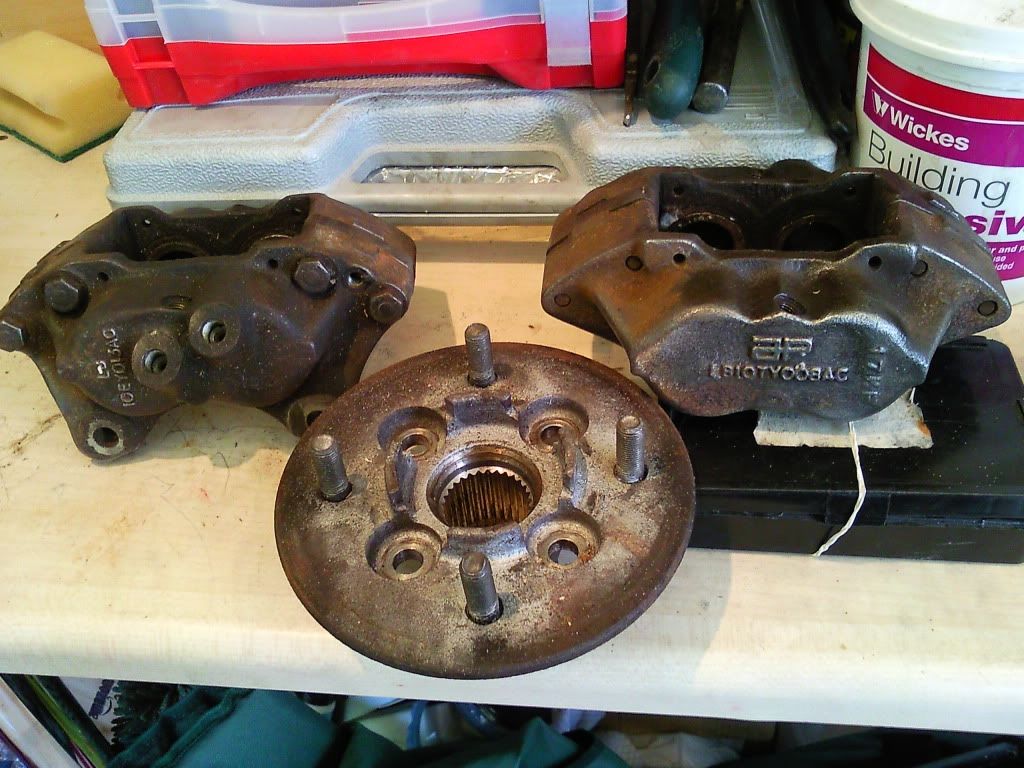
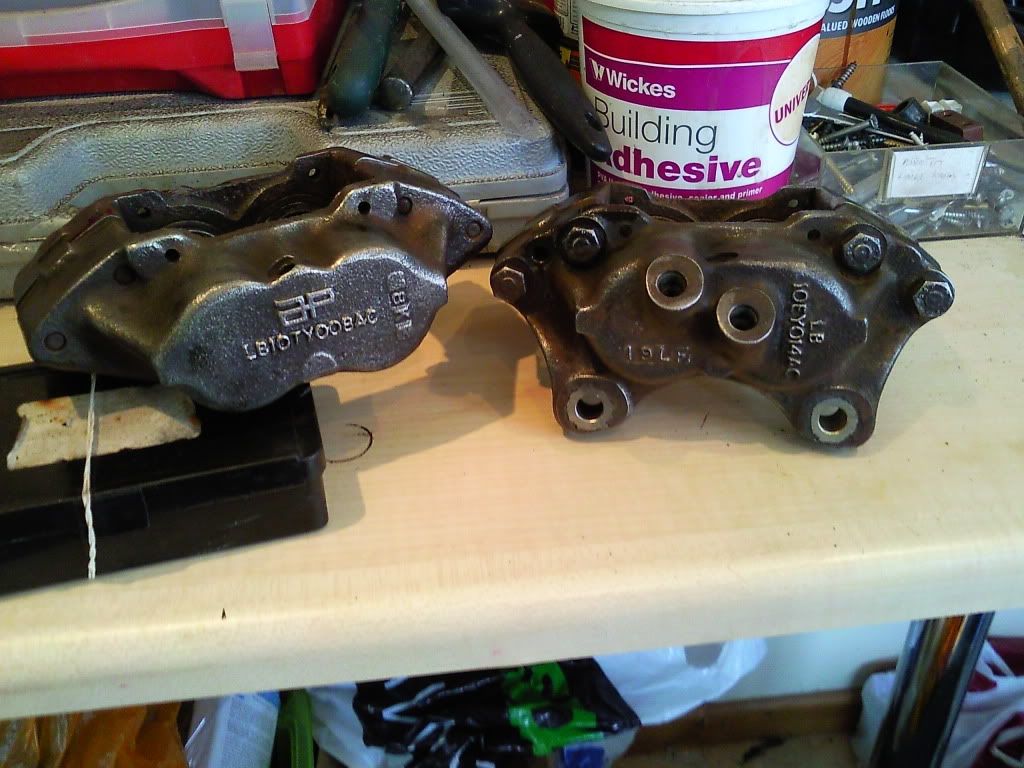
One last purchase was abit of an impulse buy - got some metro 4 pot vented calipers and drive flanges off ebay for £50 - So will probably rebuild those and buy some new vented discs and pads - Worked out it'll probably cost me about £200 - But still aload cheaper than buying a near enough £400 alloy 4 pot setup.

Edited by mike., 25 June 2010 - 06:22 PM.


#251 mike.

mike.

    Crazy About Mini's

  • Members
  • PipPipPipPipPipPipPipPipPipPip
  • 6,176 posts

Posted 30 June 2010 - 04:35 PM

Well the car is supposed to be coming back on saturday now, hopefully.

Meanwhile i've got my new vented metro 4 pots through the post and did abit of work with those today:

Posted Image

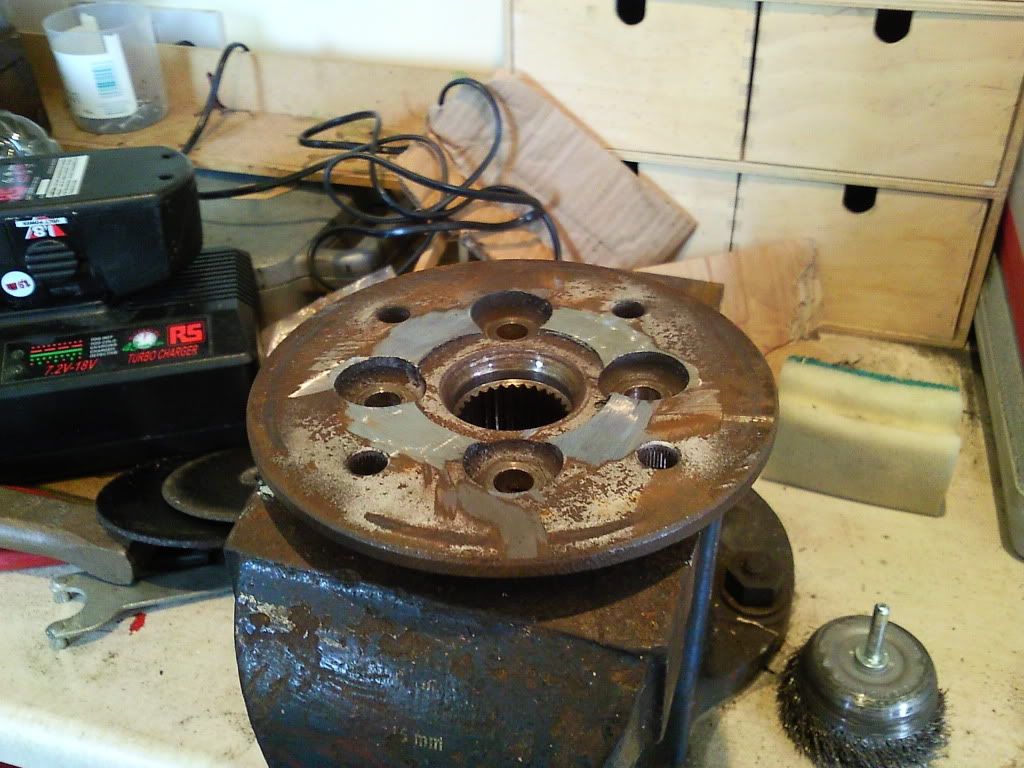
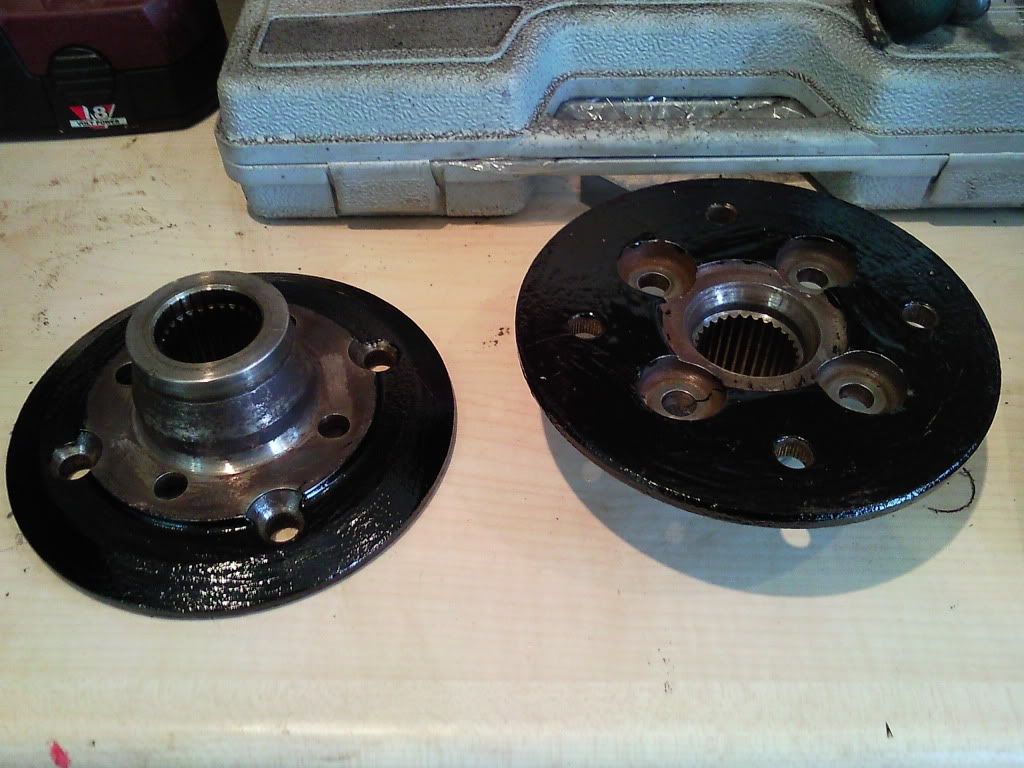
Started by grinding the lugs off the drive flanges:

Posted Image

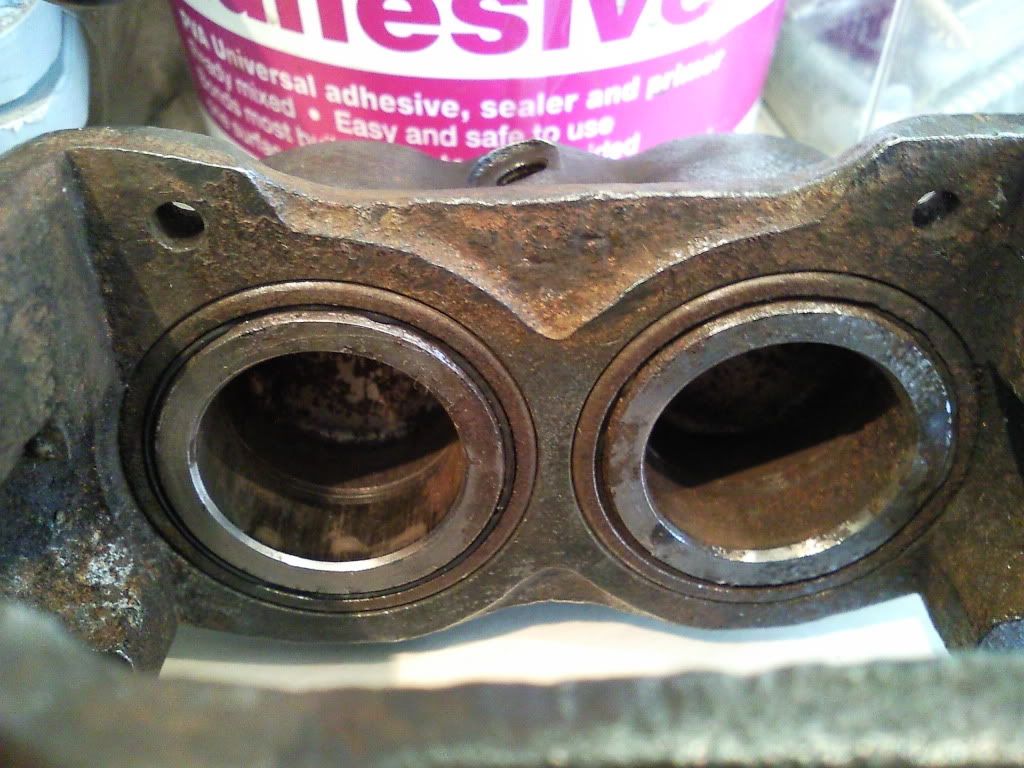
Then got the brake cleaner and wire brushes out and cleaned the callipers off:

Posted Image

The pistons look pretty good to me really, its just the seals that look abit dodgy:

Posted Image

Either way i've ordered some vented discs, kevlar pads, seal kits and new stainless steel pistons aswell as the conversion hoses, ERA calliper bolts and some new driveflange bolts. So i've got all the bits on the way.

After that I gave the driveflanges a wire brush and a clean and gave them a lick of paint:

Posted Image

Once thats dry i'll stick the wheel studs back in and they'll be ready to go...

Only other things to say are that i've bought an alarm and pager system, central locking etc so that'll be fun to wire in; and also my back windows are down at the tinters and being picked up on friday :D

#252 prototypet24

prototypet24

    Learner Driver

  • Noobies
  • PipPip
  • 12 posts

Posted 01 July 2010 - 09:12 AM

Blinding mate. You've got an absoulte fire cracker therer, can't wait to see it rebuilt and tarted up with those home comforts. :D

#253 mike.

mike.

    Crazy About Mini's

  • Members
  • PipPipPipPipPipPipPipPipPipPip
  • 6,176 posts

Posted 08 July 2010 - 08:20 PM

Well heres an update. Got the car back on saturday. Pretty pleased with it and happy with the work thats been done, althought it was very pricey :withstupid:

When I first started the car, the megajolt wasn't connected and so it was just running on the ford EDIS stuff. It ran pretty rough and started backfiring through the carb and cutting out because the timing was so far out. But i've got a plug for the MJ and have wired that in now and its running much better. Idles fairly smooth and seems to rev up quite freely:

Posted Image

Only problem I've been having is with high oil pressure on the engine - Off the scale on my gauge and over 100psi at idle, I thought there was a major problem but i've cut a couple of coils off the pressure relief spring and the pressures dropped to about 90psi at idle. I've ordered an adjustable valve, so will be fitting that whenever it comes and I can get the engine warmed up and get the cam bedded in.

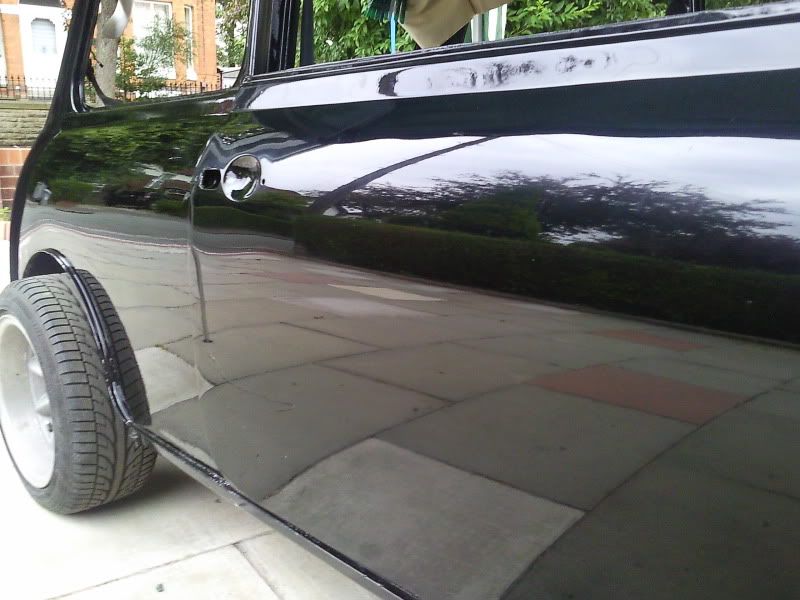
Heres how the paint looks:

Posted Image

Pretty nice in general. Theres a few bits of orange peel on the A panels and on one of the quarter panels, but nothing to major and once i've got the car washed and polished up i'm sure it won't be very noticeable. However the first time I opened the drivers door, it caught on the A panel, chipped about 20mm of paint off and put a bit of a crease in the door skin :) So i've had the door of today and shimmed it out abit, so i'll just need abit of paint to touch up the chips...

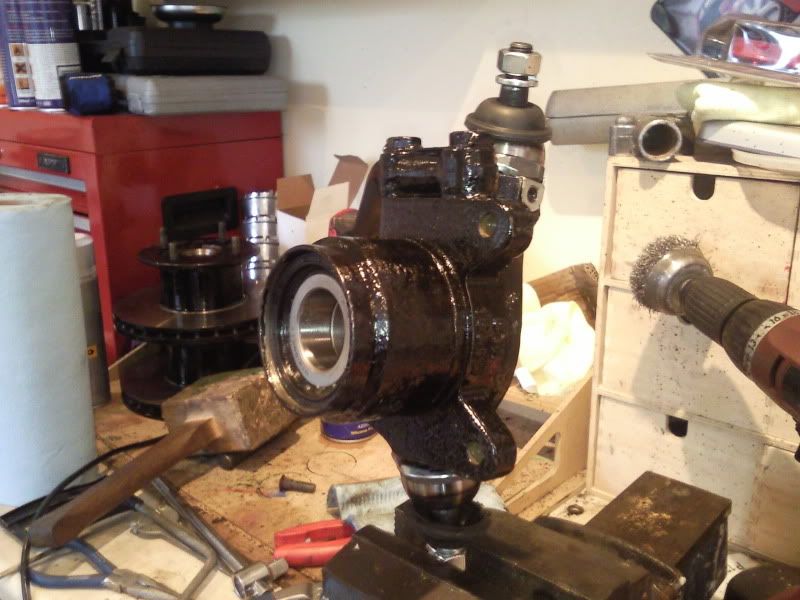
I took the driver hub off and i've refurbed that with new balljoints, wheel bearings and a lick of paint:

Posted Image

I'll be doing the same to the other side aswell. I've got to get the driveshafts out to do the inner pot joint seals because they're all split open, and while i'm there I need to attach the speedo cable aswell.

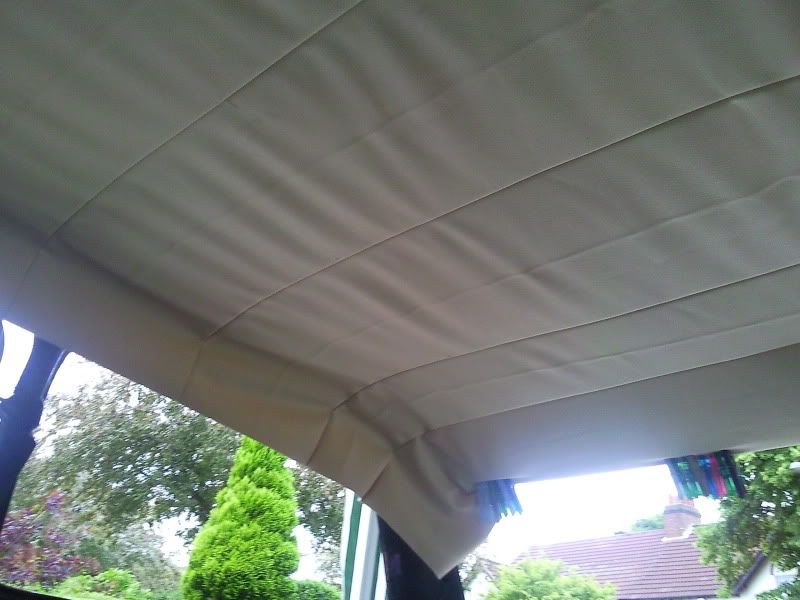
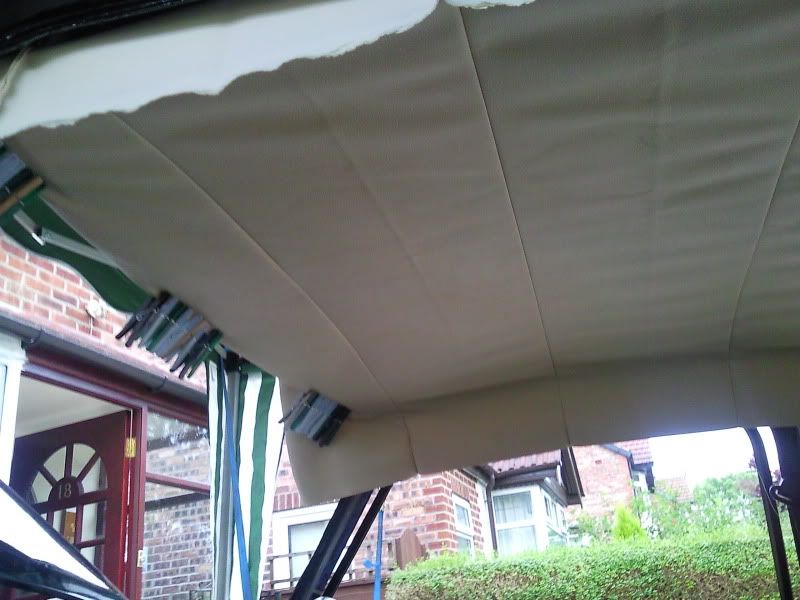
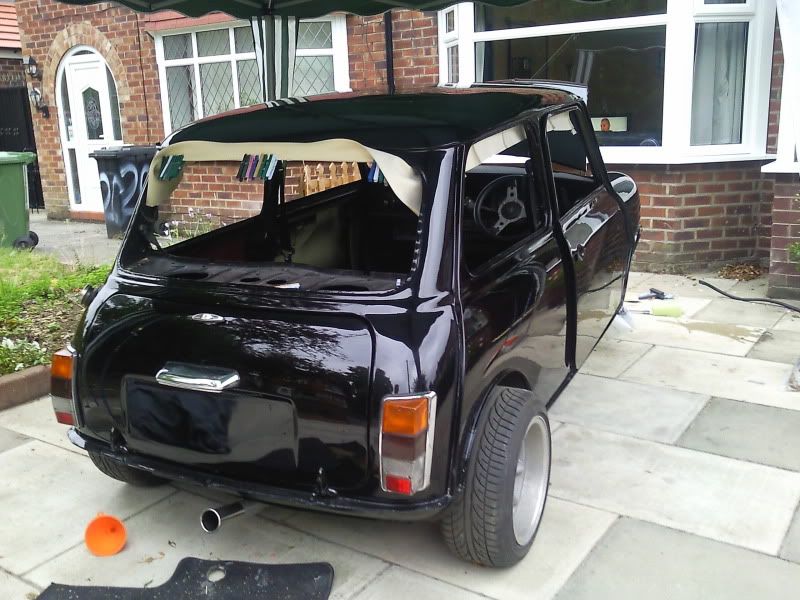
The headlining is the main job I want to get done asap. I was putting the rods into the roof today and the front red rod was bent and out of shape. I tryed bending it back and tryed it in the roof again and the little plastic locating knob snapped off :( So I found abit of copper pipe in the shed, bent that to roughly that right angle and glued some bolts into the end of it to locate in the holes in the roof. So I'm not sure how well thats going to work but its staying in place at the moment so i'll see how that goes. I've put the headlining in the car and go the front and back pulled semi-tight, but all i've got to hold it atm si clothes pegs, so need to get some proper clamps before I can carry on pulling at it really:

Posted Image

Posted Image

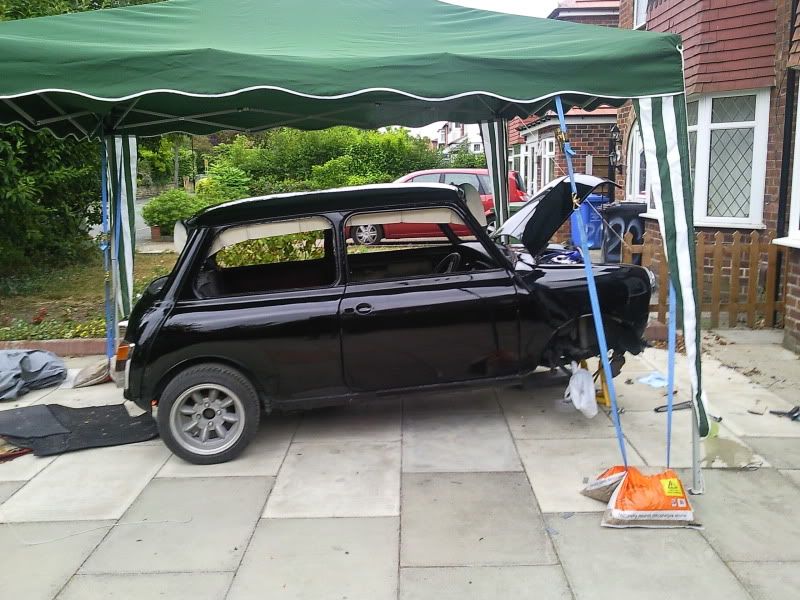
I've got the gazebo out on the drive at the mo as a little make shift garage which is working pretty good so I can work in all weathers as long as its not too windy:

Posted Image

Posted Image

So hopefully early next week the headlining will be in and then the windows can go in. Also need to build up the doors with locks and handles aswell as fit the poly carb windows and i've got the 4 pots to refurb and fit. So still plenty of work to do, i'm hoping a couple of weeks will have it looking near enough ready for the road again, so wish me luck...

#254 GraemeC

GraemeC

    Crazy About Mini's

  • TMF+ Member
  • PipPipPipPipPipPipPipPipPipPip
  • 7,415 posts
  • Location: Carnforth

Posted 09 July 2010 - 07:37 AM

Use either bulldog clips or old door/window seals to hold the headlining :withstupid:

#255 mike.

mike.

    Crazy About Mini's

  • Members
  • PipPipPipPipPipPipPipPipPipPip
  • 6,176 posts

Posted 09 July 2010 - 08:53 AM

Yeah i'll have to go and get something today, because the clothes pegs are feeble :withstupid:

Bull dog clips are a good idea, they're strong for their size so i'll see if I can get some of them


1 user(s) are reading this topic

0 members, 1 guests, 0 anonymous users