Jump to content


Photo
- - - - -

73 fast road mini


  • Please log in to reply
305 replies to this topic

#121 BigRed8

BigRed8

    Passed Test

  • Noobies
  • PipPip
  • 28 posts
  • Local Club: N/A

Posted 01 February 2009 - 09:24 AM

Just looking at that photo makes me worried about the bigger cars all around such a nice mini, you have to drive proper careful now buddy, defensive as hell, esp with big cars like that, one 'i didnt see you, you're too small' and thats your rear end taken out :) I'm sure the cars quick enough to evade that though :D


So imagine how his father is going to worry... Vehicles the size of that Toyota truck are the norm around here (sorry to say). That's why the full roll cage, racing seats, 5 point harnesses, relocated fuel tank and dual 118db Hella horns were all agreed to early on in the project.

I'm not at all worried about Chris remembering to drive defensively, not because of any personal sense of the danger (he's 18 after all). I know he will be extremely careful because 1) he's a good driver (OK a little heavy on the gas....) but more importantly by the time this project is done he will have poured so many hours and so much sweat into creating it that he simply will not allow anyone to get close enough to damage his baby!

He's almost done with the flip front and he's done a hell of a good job with it. I'm sure pictures will follow before long.

--------------------------------------------------
Chris: I was just about to post this when you posted your message. Did you make it to Berkely OK or are you wi-fi on the road?

#122 LankyJames

LankyJames

    Speeding Along Now

  • Members
  • PipPipPipPipPip
  • 428 posts
  • Local Club: Heavy Handed Cluts Club

Posted 01 February 2009 - 09:31 AM

But it is your job to worry dad! :D

With all the precations taken he'll be fine, esp with that roll cage, just be sure to wrap it in foam, as round steel tubes are a really good shape for collapsing unprotected skulls.

Maybe it would be a good idea to fit a third brake light at the very top of the rear windscreen?

#123 rcbamm

rcbamm

    Mini Mad

  • Noobies
  • PipPipPipPip
  • 101 posts

Posted 08 February 2009 - 06:15 PM

Dude awesome work.

I just have one question, (if you don't mind me asking) where do you get the money to do it this way? lol

I'm 17, currently building a 1978 Clubman Estate over here in South Florida, My first car aswell >_< I'm fully restoring the shell (as you did) and then I'm going to custom make my own subframe for a ZC D16A6 boosted. The only thing that sucks about my project is money. I always have to work, earn money, buy parts, work on my car, then wait to earn more money lol. project build time is slow :P

I like your build though, gets me excited about mine, I can't wait!

Check out my build thread here > http://www.d-series....ad.php?t=101024 I think I might post up a build thread here aswell. I have a couple on Mini forum but they are poop now because of all my major mind changes I'v done to my build :thumbsup:

Edited by rcbamm, 08 February 2009 - 06:19 PM.


#124 Chris C

Chris C

    Mini Mad

  • Members
  • PipPipPipPip
  • 212 posts

Posted 03 March 2009 - 03:53 AM

Thanks rcbamm.

The car was originally supposed to be a quick "restoration" with the only goal being to get it on the road, with the old 998 and auto box. Obviously, plans changed and the "quick summer resto" project became the beast that I have owned for what is approaching 2 years now. My dad has also been very supportive in terms of working on parts of the car when my motivation begins to wear thin (take the dash and the shift linkage for example) and fronting me money for parts. Since the choice was made to go VTEC, i'm in some debt...

Anyways, the Minitec kit has not been without issues, and I finally decided to address a fairly serious one.

With approx. 1/2 a degree of toe out and 0 degrees of camber, the front wheels will collide with the shocks before full lock.

Posted Image

Kind of hard to see, but the wheel won't even roll and it's still around a 1/4 turn from lock.

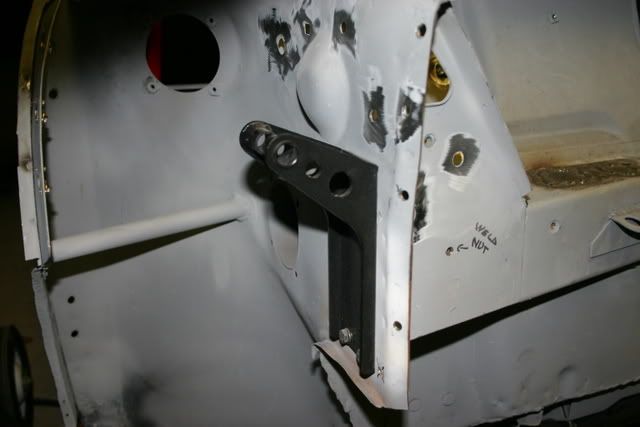
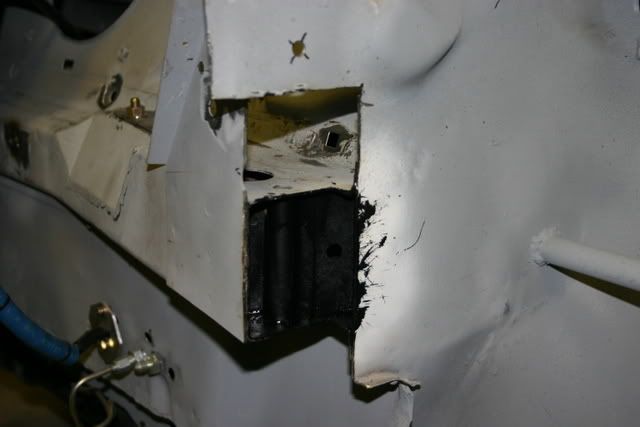
I decided it would be best to notch the top shock mounts in about 3/4 of an inch. Thought I would put up some pictures of that progress for anyone else in a similar situation. The black inside the box section is rust sealer/preventer that I brushed in there.

Mount as it originally sat:

Posted Image

Cut:

Posted Image

Poster board template of the notch:

Posted Image

More updates as they come.

#125 Chris C

Chris C

    Mini Mad

  • Members
  • PipPipPipPip
  • 212 posts

Posted 05 March 2009 - 03:12 AM

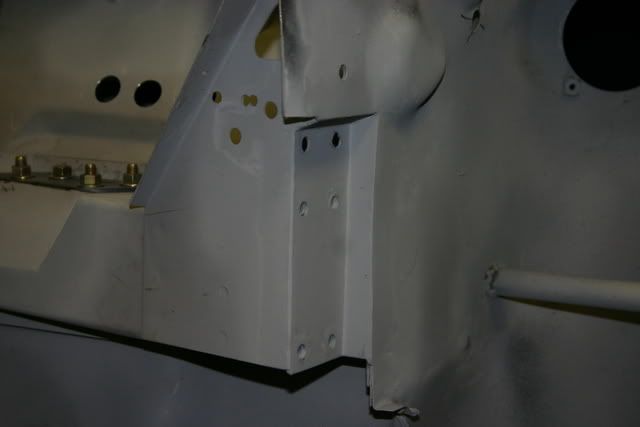
Welded in.

Posted Image

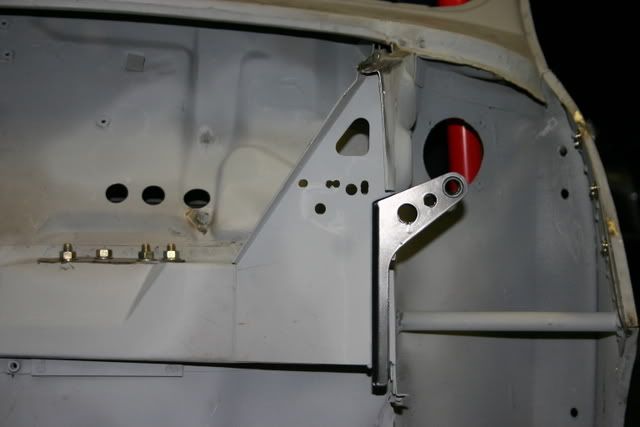
How it looks with the mount on:

Posted Image

Compaired to the other side, which still has the standard mounting:

Posted Image

Since I had the opportunity to change all of that, I added another set of bolt holes and upped the bolt size from 1/4 inch to 5/16 inch. The bottom 4 nuts are welded onto the back of the plate because it would have been a hassle to get a wrench around the middle 2 and the bottom 2 are in the box section. Next step is to address the other side.

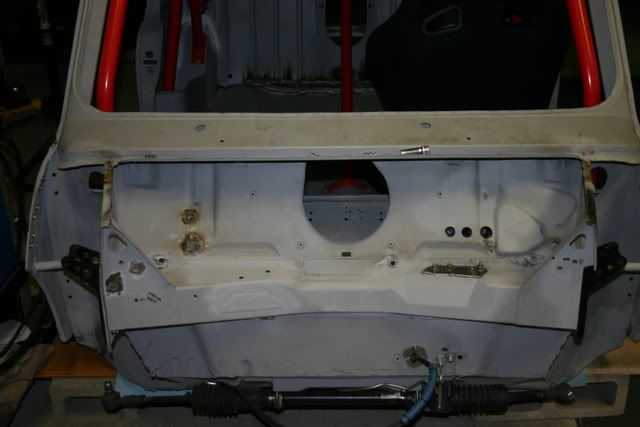
Also, I've been cleaning up the firewall a bit and getting rid of all the holes I don't need, as you might be able to see in that last picture.

#126 irishdude

irishdude

    Mini Mad

  • Noobies
  • PipPipPipPip
  • 124 posts

Posted 16 March 2009 - 10:49 PM

Great looking project. You have done some nice work. Interior set-up is incredibly clean and hte manifold is a nice little piece of engineering. Keep the prgress coming. As Hannibal said" I love it when a plan comes together" :ermm:

#127 zeeve

zeeve

    Stage One Kit Fitted

  • Noobies
  • PipPipPip
  • 72 posts

Posted 18 March 2009 - 10:07 AM

Hi.
Great project :)

I'm gona start mine soon :)

Are you using the original D15b gearbox? Is the first gear useable? How is the 5th? I'm going to use the D16a (127 hp) with my MTD minitec and haven't yet desided about the best tranny to use :P

#128 smurf09

smurf09

    Just On Tickover

  • Noobies
  • Pip
  • 8 posts

Posted 22 March 2009 - 09:12 PM

considering you live so far away and you can't just pop out for spares your mini is absolutely gourgeous and will look even better once painted good luck with finishing it and im sure it will make a few heads turn over there as you dont see mini's every day. :thumbsup:

#129 Chris C

Chris C

    Mini Mad

  • Members
  • PipPipPipPip
  • 212 posts

Posted 23 March 2009 - 03:30 AM

I really appreciate the kind words from all of you, I really try to do things properly.

As for the tranny, I have no idea how it drives. I know the JDM D15B transmissions have a final drive of 4.250 which means I'll have to be gentile on the throttle in first, but then again I have no driving experience with this motor or any D-series motors at that.

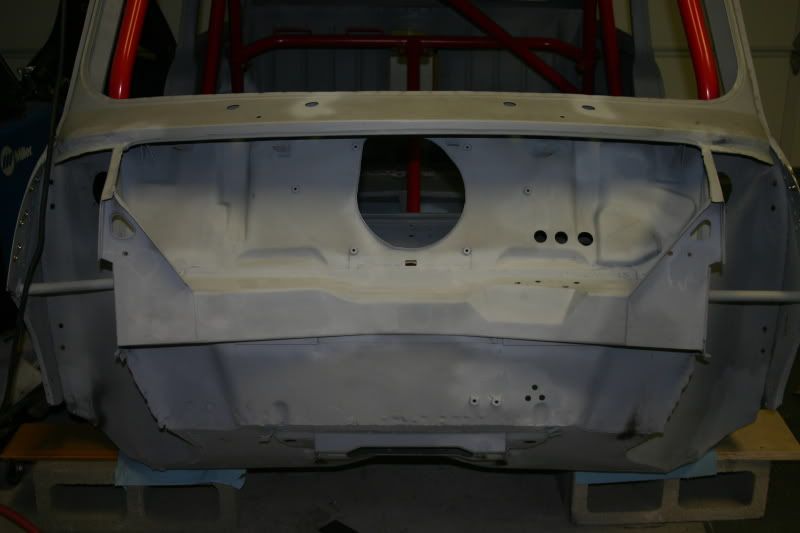
Only one picture for now, I've just been doing the final welding work on the body. I finished the other shock mount and filled useless holes in the firewall:

Posted Image

#130 lindy119

lindy119

    Super Mini Mad

  • Noobies
  • PipPipPipPipPipPip
  • 514 posts
  • Local Club: looking for one!!

Posted 26 March 2009 - 09:14 PM

fantastic project! keep up the good work! i wish i could be as mechanically minded as you!!

#131 Chris C

Chris C

    Mini Mad

  • Members
  • PipPipPipPip
  • 212 posts

Posted 29 March 2009 - 02:52 AM

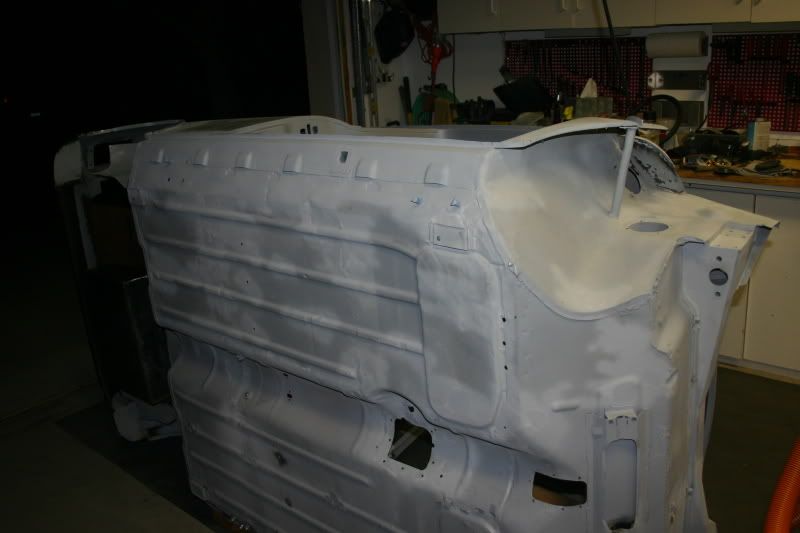
Right side floor and toe board are pretty much done:

Posted Image

I've been doing some other cutting as well:

Posted Image

I need to finesse the new lip a bit more, but overall I am surprised with how easy tubbing the rear arches is, I had been putting it off and debating doing it all together. I'm glad I chose to do it, you can always use another inch and a half of clearance on this car.

#132 Chris C

Chris C

    Mini Mad

  • Members
  • PipPipPipPip
  • 212 posts

Posted 09 May 2009 - 07:51 AM

It's been far too long since my last update as I have been working away on the car, figured today was a good day to let the 3 people who'll read this know what's been going on.

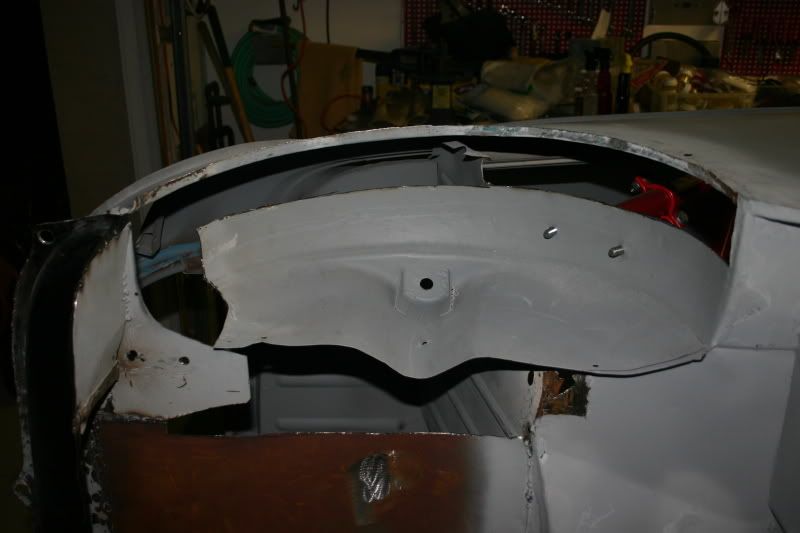
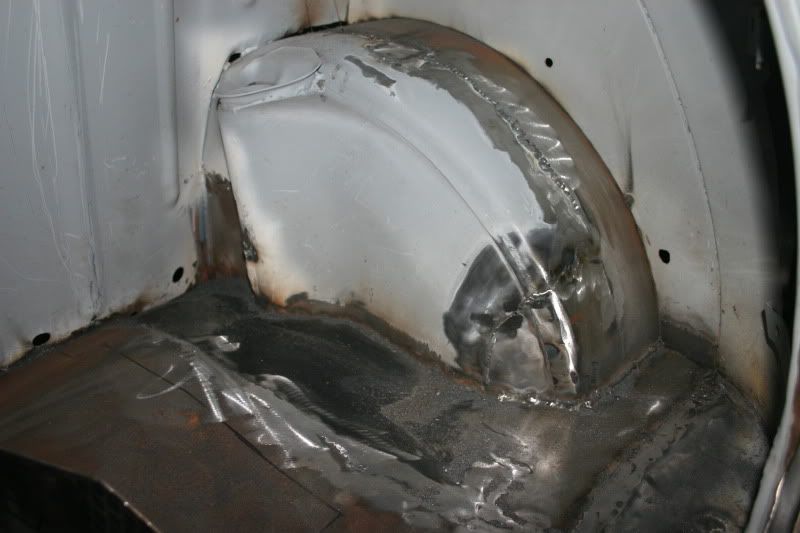
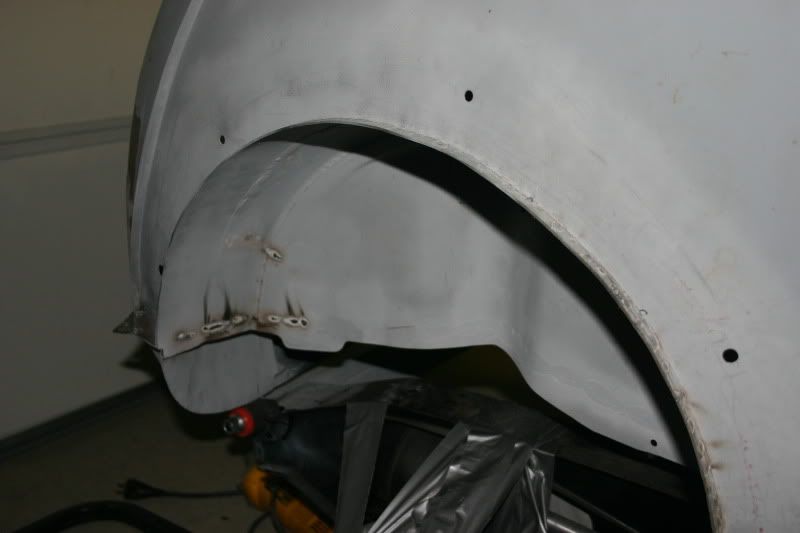
Anyways, that nasty closure panel I made a long while back has been cut out and replaced as well and some other areas around the trunk have been dealt with. I spoke too soon about tubbing the arches, turned out to be much more fiddly work then I anticipated. Right side is more or less done now though:

Posted Image

Yes, I know there is that brace piece and another panel in that rear seat back/arch area, I just haven't welded them up yet. As for the outside, I bent a new lip and then plug welded the new panel to the quarter panel, so it looks almost standard. Thought it was cleaner then running a bead and then grinding it or any of that nonsense I've seen other people do.

Posted Image

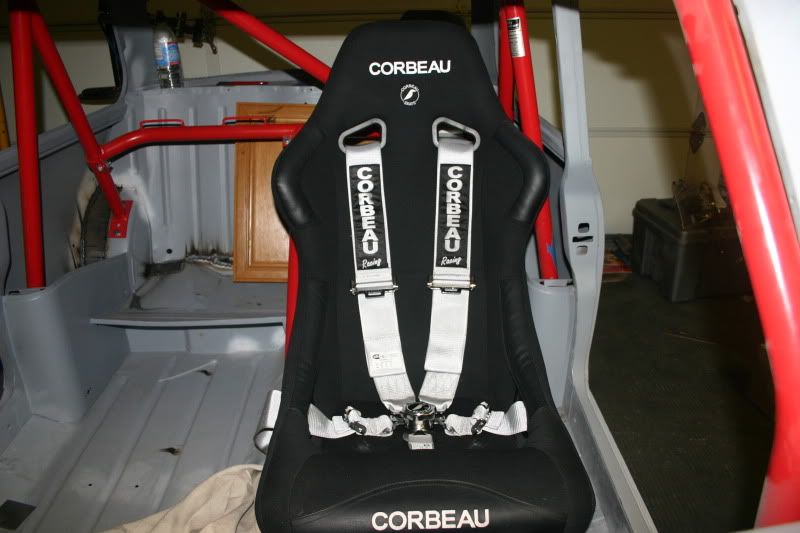
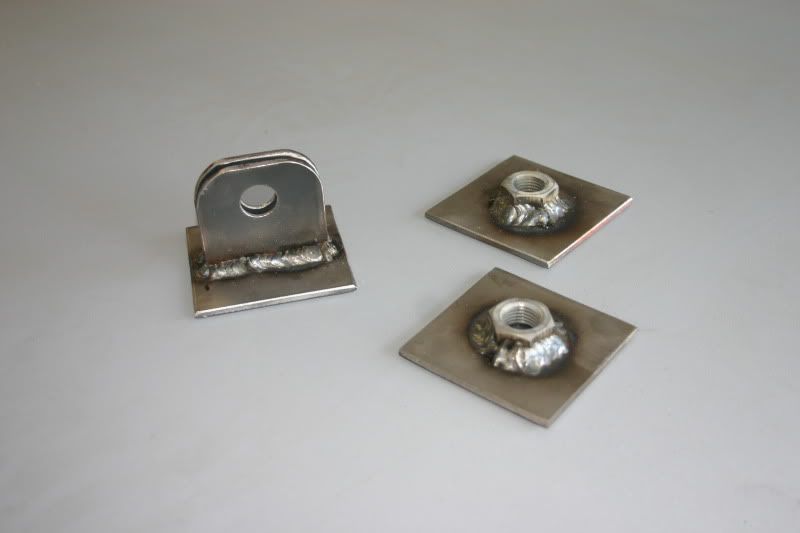
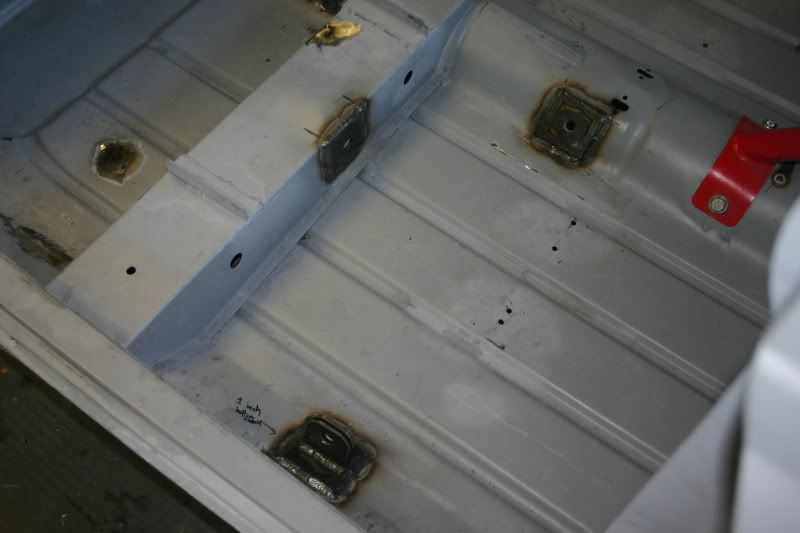
Received one of the seat belts as they were expensive and you only need one for mockup. Been working on welding up mounts for them, which will be in accordance with current FIA safety regulations. The flash made the belts look white, but they are actually silver. And sexy.

Posted Image

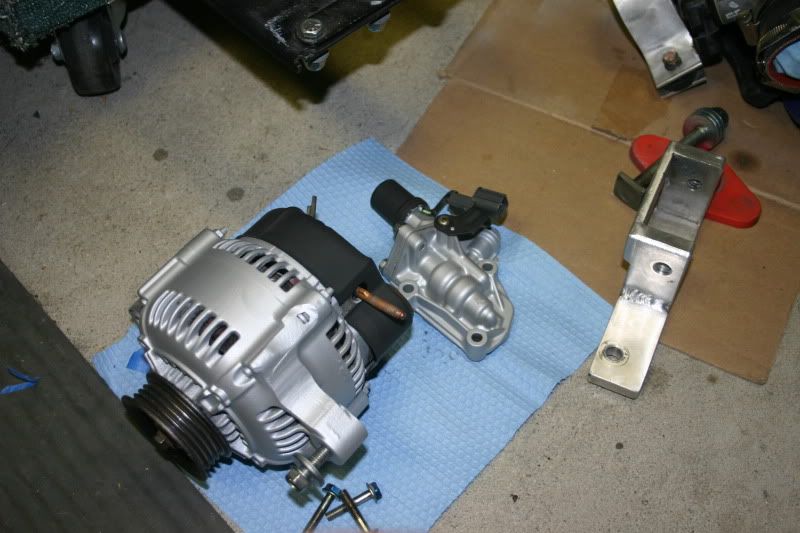
Been giving the motor a cleaning up as well, It's not anywhere near done but I have a little teaser to show you guys, the VTEC solenoid and the alternator:

Posted Image

You can also see in that picture the custom lower bracket for the alternator, so the alternator actually fits where it should which seems to be a problem with the Minitec frames. It needs more welding but I've been putting it off since I don't have a TIG machine at my disposal currently.

I'll get back in the habit of posting more updates.

Edited by Chris C, 09 May 2009 - 07:53 AM.


#133 Chris C

Chris C

    Mini Mad

  • Members
  • PipPipPipPip
  • 212 posts

Posted 10 May 2009 - 04:14 AM

Made these today:

Posted Image

Then welded them in:

Posted Image

Then proceeded to realize that while strapped in, it is extremely difficult to put the car in 1st, 3rd, or 5th gear. So the shift linkage will have to be completely redone and moved back and basically I'm not looking forward to it.

#134 Ro8bieg

Ro8bieg

    Camshaft & Stage Two Head

  • Members
  • PipPipPipPipPipPipPipPip
  • 1,581 posts
  • Location: Lytham St.annes
  • Local Club: Fylde Mini Club

Posted 10 May 2009 - 07:19 AM

great project!

Can you not just extend the gearstick?

Robbie

#135 Chris C

Chris C

    Mini Mad

  • Members
  • PipPipPipPip
  • 212 posts

Posted 10 May 2009 - 07:41 AM

Thought about it, but the shifter was never in a good position to start with. If I move the entire assembly inside the car I free up room in the tunnel for the exhaust, put the shifter exactly where I want it, and it'll also allow me to cut the shifter down for a shorter throw. I also like the way it looks, racecar!

I went back out and spent some time figuring out how I want to do this, the more I thought about it the cooler it sounds. It's going to look good.

Screw the easy way.


1 user(s) are reading this topic

0 members, 1 guests, 0 anonymous users