Jump to content


Photo
- - - - -

My Speedwell blue reshell


  • Please log in to reply
89 replies to this topic

#1 dfraser

dfraser

    Mini Mad

  • Noobies
  • PipPipPipPip
  • 121 posts
  • Local Club: Minis in Inverness

Posted 19 July 2007 - 12:54 PM

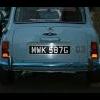
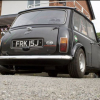
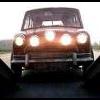
Attached File  David_pics_Oct_06_010.jpg   1.64MB   127 downloadsAttached File  David_pics_Oct_06_011.jpg   241.64K   97 downloadspg]Attached File  David__s_Pics_Mar_07_005.jpg   158.94K   105 downloadsAttached File  mini_002.jpg   1.41MB   113 downloads
Here's my Mini. It's been painted for a while, and these photo's are a little out of date as there are a fair few bits which have been fitted since being taken. However, I shall add more in due course...
My mini is loosely based on a Mk 2 Cooper, but to be honest, won't bear too much resemblance as this is a new shell, and I'm adding my own interpretation on how a Mini should be. The donor was not exactly 100% original itself and besides the non standard engine which turned out to be an ‘S’ / 1300GT engine - probably from a Mk 3, there was some previous accident damage which manifested itself in the condition of some of the parts. The car had at some point taken a bash on the OSF and pushed the steering column, bending it slightly and damaging the pedal box in the process. I discovered this when trying to get the brake pedal to spring back into position - once I remembered seeing the damage on the old shell, I realised this was the reason that the pedal was so stiff - sorted now though.
I have recently finished polishing the paintwork back to a lovely shine – I’m delighted with the result. Once I get a chance to post some better pics, you should see the result for yourself.
So what is the spec? Well, I can call it a Cooper due too its donor, but it will have an S engine which is currently being built at Morspeed. I gave them a summary of what I wanted and have left it to the discretion of Simon at Morspeed, and from what I’ve heard, I shouldn’t be disappointed. I’ve got twin 1 ¼ Su’s fully restored by Burlen, Aldon Yellow ignition distributor, alternator and lots of new bits for under the bonnet, but not as interesting to mention individually.
Autosparks made me a new wiring loom with not a few modifications from the original. Pig of a job to get it through the NS A post, but I got there in the end. This was probably largely due to the fact that the speaker wires were taped into the loom. I’m just glad that I didn’t request Monster speaker wires!
Brakes will be 7.5” S discs and servo set up, the servo being completed in the last few days by my own fair hands. Brake pipes are copper nickel, with braided flexi hoses. Fuel pipes and hoses are likewise copper nickel, with braided hoses.
Suspension is KYB gas adjust with Hilo’s, wheels, 6” x 10” Minator on Falkens.
Body wise the shell is Mk 4 Heritage painted by myself in cellulose Speedwell Blue, lashings of underbody seam sealer, painted blue, then dosed with liberal amounts of waxoyl. Cavities have also been injected with that sticky waxy stuff – gets everywhere, and despite what MiniWorld writers say, I have mastered the use of the Waxoyl pump sprayer, though granted it is a bit of an art! I will abstain from divulging too much incase someone gets hurt, but suffice to say the kettle needed a good wipe afterward.
I’ve got 4 period spotlights, body coloured Wood & Picket arches, and have a choice between Downton alloy mirrors or standard plastic – I think I’ll try both and see what I’m happiest with.
Interior wise, the Mini shall bear no resemblance to the original donor, bar the steering column and switches.
Interior will have a restored Rookee Dash with 3 centre clocks, additional Rev counter and volt meter, starter button, Wooden Mota Lita steering wheel, alloy door furniture and handbrake grip, red carpets, and mulberry red leather seats and door cards – the style from the late Rover Coopers. The rear parcel shelf and underseat boards have been treated to some tartan fleece and I’ll decide how pleased I am with it once it is in place, though I have to say it looks really good at this time
For extra sound proofing, I have used 20 Bodyline bitumen sound deadening pads, and have got Newton Commercial felt for under the carpet as well as the carpets set from the same company with sound deadening bonded. I’ve also managed to get bulkhead sound deadening from a scrapped Mini. I’m also putting extra sound deadening behind the wooden dash. The bonnet and under bonnet bulkhead will be fitted with Newton Commercial sound deadening.
Hoping to be able to hear the music, I will have a VDO CD player as is in my Rover 25 which is a decent enough system. I also have speakers for the parcel shelf and under the rear seat.
As for completion date, summer completion looks unlikely due to a few hitches and spending a fair bit of time away from home with my new job. I’ll have to try to catch up by doing a few ‘late nighters’
I think the project is at that stage where you seem to be always doing something, but getting nowhere, with loads of jobs half completed or waiting for something else to be done first. Once I have my engine, progress should be more apparent as I’ll be able to get the headlining in, then the glass and the doors.
Most of the rest of it is just a case of fitting the restored or new parts in place – which sounds easy, but when Concours is the aim, a little extra care is required.
Watch this space for more posts; this is when the real progress shows!

#2 slyoldfox2001

slyoldfox2001

    Up Into Fourth

  • Members
  • PipPipPipPipPipPipPipPipPip
  • 2,936 posts

Posted 19 July 2007 - 01:10 PM

great project.
you are ont gonn believe this but i too am rebuilding a baby blue mini shell into something of my own interpretation.

heres some pics of my rebuild website -

http://stevesrspmini.fotopic.net/


i know what you mean about getting the wiring loom down the A-post, it took me over 3 hours but i got there in the end.
i too am going for full leather interior but i have opted for the black and cream late cooper stuff.
black one piece carpet
my engine is a newly built 1380 unit
brakes are 8.4" discs
wheels are 10" chrome reverse rims (special imported ones from japan to clear 8.4" brakes) with yoko tyres
sportspack dash
pop out dvd screen with cd player
stainless steel stage 1 kit with twin centre exit exhaust
wide grp 2 black arches
new subframes, new wiring loom, new headlining, new cones, stainless steel hi-los

#3 The Matt

The Matt

    You don't escape that easily.....

  • Admin
  • PipPipPipPipPipPipPipPipPipPipPip
  • 17,231 posts
  • Name: Matt
  • Location: Overton, North Wales
  • Local Club: Welsh Border Minis

Posted 19 July 2007 - 02:58 PM

It's a lovely colour too. I never used to like it, but now I think it's one of the nicest colours to paint a mini!

#4 mk1leg

mk1leg

    Crazy About Mini's

  • Members
  • PipPipPipPipPipPipPipPipPipPip
  • 9,343 posts
  • Location: Jersey
  • Local Club: Mini Club Jersey, MCR

Posted 19 July 2007 - 04:51 PM

It's a lovely colour too. I never used to like it, but now I think it's one of the nicest colours to paint a mini!

Very Very nice mini, I hope my shell looks that good when it comes back from the spray shop soon, see my mini in intro section under 1990 cooper (all my own work) its going to be retro works .

#5 dfraser

dfraser

    Mini Mad

  • Noobies
  • PipPipPipPip
  • 121 posts
  • Local Club: Minis in Inverness

Posted 20 July 2007 - 12:39 PM

It's a lovely colour too. I never used to like it, but now I think it's one of the nicest colours to paint a mini!

Very Very nice mini, I hope my shell looks that good when it comes back from the spray shop soon, see my mini in intro section under 1990 cooper (all my own work) its going to be retro works .


Kind words guys, I must admit every time i get into the garage, I just look at it and think wow! Just wait till the doors, arches, bonnet etc go on - mmmmmmm!!

Attached Files


Edited by dfraser, 04 February 2008 - 01:33 PM.


#6 dfraser

dfraser

    Mini Mad

  • Noobies
  • PipPipPipPip
  • 121 posts
  • Local Club: Minis in Inverness

Posted 04 February 2008 - 01:36 PM

My mini rebuild Project completion due for Spring 2008.

I thought it was about time I did a photo dump to update this journal. The rebuild is getting towards nearly complete, but still with plenty to do. I estimate that there’s about 45 hours worth of work left to do, but most of that is the highly visible stuff like fitting the doors, windscreens and interior which is all just ready to bolt in place. Most recently, I have been doing most of the work in the engine bay. Over the Christmas period I fitted the Carbs, servo, coil, distributor, cables, wires and hoses here there and everywhere. I took the wiper motor off to re-spray it as it looks rubbish under the plastic cover. There is still quite a lot of detail work to do under the bonnet, like clip the cooling hose from the heater tap – I’ll need a couple of those brass P-clips for that – can’t get a hold of them – does anyone know where I can find some? Some paint touch ups on the engine, routing and clipping of cables should tidy things up greatly. Last few weeks, progress has been slower due to the usual winter colds etc, so garage nights have taken a back seat.
Next up is to fit the NS drive shaft, should be fun as I’ve got about a foot and a half to work with on that side of the Mini – we’ll see how I get on with that! After that I’m going to bleed the brakes using my easi bleed kit, then I’ll go for fitting the exhaust which ultimately means engine start up – can’t wait for that!! No doubt I’ll be losing sleep over that job – have I done this, have I connected that, what if…? The engine should be fine though, it’s been bench tested, and I’ve got a first start up/running in checklist from Keith Calver’s website, so I’ll be okay with that.

#7 mini_kel

mini_kel

    Up Into Fourth

  • Members
  • PipPipPipPipPipPipPipPipPip
  • 2,851 posts
  • Local Club: EMC/No pub mini club

Posted 04 February 2008 - 01:52 PM

;D

#8 dfraser

dfraser

    Mini Mad

  • Noobies
  • PipPipPipPip
  • 121 posts
  • Local Club: Minis in Inverness

Posted 04 February 2008 - 02:04 PM

Attached File  CNV00030.JPG   944.18K   53 downloadsAttached File  CNV00029.JPG   802.39K   30 downloadsAttached File  CNV00028.JPG   796.47K   46 downloadsNV00028.JPG]Attached File  CNV00027.JPG   956.05K   42 downloadsAttached File  CNV00026.JPG   1022.94K   70 downloadsThough
you'd like to see the headlining too... Fitting headlining is an art form. I am reasonably happy with the result.

Edited by dfraser, 04 February 2008 - 02:09 PM.


#9 minimadjonesy

minimadjonesy

    Crazy About Mini's

  • Members
  • PipPipPipPipPipPipPipPipPipPip
  • 6,417 posts
  • Local Club: SMAC

Posted 04 February 2008 - 02:10 PM

very nice indeed! look forward to seeing the finished article soon by the looks of it!

#10 clubby

clubby

    Super Mini Mad

  • Members
  • PipPipPipPipPipPip
  • 650 posts
  • Local Club: BrEt

Posted 05 February 2008 - 12:12 PM

hye mate.. i'm pretty sure ur mini will become GREAT ;) good luck mate

#11 Bungle

Bungle

    Original Spamster

  • Members
  • PipPipPipPipPipPipPipPipPipPipPip
  • 28,971 posts
  • Location: Cornwall
  • Local Club: cornish mini club

Posted 05 February 2008 - 05:19 PM

wow great work

whats next to do ?

#12 dfraser

dfraser

    Mini Mad

  • Noobies
  • PipPipPipPip
  • 121 posts
  • Local Club: Minis in Inverness

Posted 06 February 2008 - 01:50 PM

Thanks guys, I'm at a pretty exciting stage. I never got the N/S drive shaft done the other day, so instead I fitted the exhaust. I’ve got a list of jobs that I’m working with, helps keep me right. It might sound a bit sad, but it actually keeps me on track and it’s really encouraging to see jobs getting ticked off the list – I recommend it…
I try to over estimate the time to take into account any snags that might occur. I’ll try to get some decent piccies of exhaust and undercarriage at the weekend…

Mini Jobs to complete


Mechanical
Fit drive shafts & check front suspension
Adjust rear brakes
Bleed brakes
Connect choke & accelerator cables
Bleed Clutch
Gap spark plugs
Clip heater hose in place
Torque Cylinder Head nuts
Set valve clearances
Start engine & set up
Touch up paint on engine etc
Exterior
Fit grille & grille buttons
Fit spotlights
Fit Bumpers & over riders
Fit doors
Fit windscreens & inserts
Polish remainder of paintwork
Touch up paintwork
Interior
Fit starter button panel
Fit rev counter & voltmeter
Sort heater motor wiring
Fit shelf speakers
Fit wooden dashboard
Fit seatbelts
Fit rear bins
Fit soundproofing
Fit carpets
Fit speakerboard
Fit seats
Fit sill tread plates
Fit steering wheel
:shy:

#13 clubby

clubby

    Super Mini Mad

  • Members
  • PipPipPipPipPipPip
  • 650 posts
  • Local Club: BrEt

Posted 07 February 2008 - 12:32 PM

any progress mate... ? hope to see next ~!

#14 tomkidd

tomkidd

    Super Mini Mad

  • Members
  • PipPipPipPipPipPip
  • 559 posts

Posted 07 February 2008 - 02:00 PM

Excellent stuff. Paint job looks good for a DIY job. What compressor/gear did you use?

#15 dfraser

dfraser

    Mini Mad

  • Noobies
  • PipPipPipPip
  • 121 posts
  • Local Club: Minis in Inverness

Posted 07 February 2008 - 03:17 PM

Excellent stuff. Paint job looks good for a DIY job. What compressor/gear did you use?

Yes, I was pretty pleased with it, though I did flat it back and polish it up with 1200, then 1500, then 2000, then t-cut. Lots of work, but worth the effort.
I used a Sealey 2hp 50 litre compressor, 1/4" air hose, and a SIP Diamond spray gun. Paint was from www.paints4u.com.


2 user(s) are reading this topic

0 members, 2 guests, 0 anonymous users