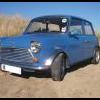
Getting Rid of rust bubbles
#1

Posted 25 May 2007 - 03:25 PM
Can somone help?
Im just about to start sorting out my rust bubbles on the mini, has any one got a step by step guide to show how to this.
what is the best sandpaper to use and what is the best filler ETC.
Cheers
Darren
#2

Posted 25 May 2007 - 03:52 PM
well it all depends what is under the bubbles if you are going to spray whoke car or just do the rust patches in the short term ,you will need to go back to bare metal.using a 80 grit paper to start, till you get to bare metal asander will be easier if they are easily accesible.,then a 320/360 grit around the patch to key the paint and get out some of scratch marks .Hello Guys and Girls
Can somone help?
Im just about to start sorting out my rust bubbles on the mini, has any one got a step by step guide to show how to this.
what is the best sandpaper to use and what is the best filler ETC.
Cheers
Darren
some people will treat with a rust inhibittor not sure if they work to well, if pitted a skin of filler or stopper and smooth down
a high build primer 2/3 coats flat till yr happy you have a smoth finish unblemished . flattenwith 360 wet
couple of coats of paint ,flatten and dry to see if smooth and scratch 3,if yr happy couple more coats then 3 coats of clear, let dry hard flatten 1500 wet/dry compund ,polish and wax
this is a simple giude assuming you are going to use spray cans i think there are threads for a more complete job,
mask and primer (filler type
#3

Posted 25 May 2007 - 04:02 PM
Generally when I hear people use that term they are talking about something that looks like a blister lifting the paint up off the car and perhaps a little visible rust showing. The bad thing is, these typically represent rust that started from the inside and has progressed through the panel. In short, when you remove the top coat, you open up progressively larger holes as you remove the rusty metal.
If your rust bubbles are as I described, be mentally prepared for the fact that the correct fix is new metal with treatment applied to the back side of the panel after the repairs are complete.
#4

Posted 25 May 2007 - 04:32 PM
As a general guide you can probably see about 25% of the rust, the rest is hidden, don't shirk on getting rid of it, just a tiny bit left will continue to eat away!!
Going back to my daughters car, she had a few little stone chips, no more than 2mm across, when I had finished getting all the rust out they were about 15mm across, she was not impressed
#5

Posted 25 May 2007 - 09:53 PM
why do people insist on saying spraying clear laquer on, clear laquer is for clear over base. how do you know what paint he has on?
#6

Posted 26 May 2007 - 08:57 AM
Im starting today, so wish me luck.
Im sure i will be posting problems when i come across them.
Cheers Again
Darren
#7

Posted 26 May 2007 - 12:48 PM
Right i sanded down the rust spots on the mini, it turned out to be surface rust! they have all been sanded down to the metal and i will be filling them in tomorrow.
In the mean time, ive gone round the gutter in the roof and sanded down all the flakey paint and just given it a right good sand over, as it will be resprayed in white again, however i have a small hole in the gutter about an half inch long, ive sanded around it hoping that wasnt spreading, as luck would have it, its only that spot.
The Question i want to ask is- What would be the best thing to do with the hole? i dont want to take the roof linging out, as i have heard it is a tricky job to put back?
any ideas would be great?
Cheers
Darren
#8

Posted 27 May 2007 - 05:30 PM
#9

Posted 27 May 2007 - 06:32 PM
Ugh... rust bubbles... a job I should be getting on with... flaming exams.
Need a hand
#10

Posted 27 May 2007 - 07:39 PM
#11

Posted 27 May 2007 - 09:14 PM
Take the front & rear screens out, side rear glass too. The headlining will be folded over and glued. Heat the folded over lip of the headlining with a hairdryer and gently (VERY GENTLY) peel the headlining away with a plastic implement. The aim is to warm the plastic headlining so it goes subtle. Without heat it will crack and split and you will not have anything to fold over on refitting. Took me about 4 hours to get mine out. Refitting is fairly easy, use some spray glue and bull dog clips.
Remember to wipe greasy paw prints off the "borrowed" hairdryer, those females are a touchy breed!
Good luck!
Edited by webweavers, 27 May 2007 - 09:20 PM.
#12

Posted 27 May 2007 - 09:21 PM
Cheers
Darren
1 user(s) are reading this topic
0 members, 1 guests, 0 anonymous users


