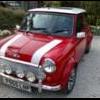
'91 Mayfair Restoration/upgarde
#616
Posted 22 May 2011 - 10:24 PM
Mounted through the underside of the slam panel to allow for clearance of the bonnet
Going to cover the wiring in convoluted tubing to tide it up a bit, I have some in the garage somewhere. This is just a temporary fix until I get the car MOT'd, I had to dash away as my recovery services were needed to help a mates stricken Skoda that had broken down so had to rush wiring the fusebox!
Hopefully, next time I jet wash the car or drive in the rain, the relays shouldn't fill up with water and destroy them
#617
Posted 22 May 2011 - 10:33 PM
#618
Posted 22 May 2011 - 10:42 PM
#619
Posted 25 May 2011 - 10:33 PM
The dash had only 1 of these top brackets on and the 2 under the air vents that bolt through the lower dash rail, now, the top of the dash in the middle never sat flush...
But had some pre-drilled holes for extra ones, so took the ones off my old dash and fixed them on to make the dash a bit more secure..
(Ignore the creative bulb holder supports/pikey cable ties...)
So, now, the dash sits nice and flush and is a tight fit unlike before
First time I've seen it back together with the new centre console finished and the heater fascia too, I think it's ok for now, might still get the heater panel changed to black, but it's quite a good match for the clocks. New radio in and working, got the EQ settings tweaked and it all sounds good so I'm happy with that too.
New LED bulbs in the 3 gauges seem quite a good match for the originals in the speedo too
Apart from fitting the electric windows and having the original door cards retrimmed in black leather and cream piping to cover the window winder hole, I *think* the interior is pretty much complete. Maybe a new headlining if I'm feeling brave, possibly get the leather seats restored.
All that's left to do now before the MOT is to get the suspension level and raise the front a tad as it catches a tiny bit on full lock. My aim is to book the MOT for Saturday morning!
#620
Posted 27 May 2011 - 04:26 PM
Result. pass with no advisories.
I'm well happy about that, let the fun begin.
#621
Posted 27 May 2011 - 07:19 PM
dean
#622
Posted 27 May 2011 - 08:26 PM
Just a quickie - you've got cappings on the doors haven't you? - how did you go about fixing them, i.e. did you pilot drill the holes first and what length screws did you end up using?
Tom.
#623
Posted 27 May 2011 - 11:10 PM
Tom, Yeah, taped them in place, drilled some pilot holes first, can't remember what size screw I used, but they were self tappers, possibly about an inch long? I'll whip one out and get a pic.
#624
Posted 27 May 2011 - 11:11 PM
#625
Posted 28 May 2011 - 10:07 AM
#626
Posted 30 May 2011 - 02:32 PM
Where did you get your front speaker pods from?
When you wired your intermittent wipers up did you have to add an extra wire to the plug which connects to the wiper motor?
#627
Posted 30 May 2011 - 03:22 PM
Haha, thanks. Hows Reggie coming along?
Not bad, thanks - I've quite dramatically attacked him with a grinder
He needed a new inner wing, so I'm slowly stripping the old one off, ready to replace it with a new one!
Have you been out on those country roads, yet?
#628
Posted 31 May 2011 - 03:11 PM
Pete, The front speaker pods are just some 165mm universal ones from Ebay like this...
http://www.passionau...-door-pods.html
Also, the intermittent wiper relays were a nightmare mainly due to the relay I bought from car builder solutions, the output went to earth when the relay clicked off and put a full short and kept on blowing fuses so had to wire in a 2nd relay.
I can't remember exactly what I did, but I'm sure I just tapped into the 2nd speed
Edited by M44K TS, 31 May 2011 - 04:37 PM.
#629
Posted 31 May 2011 - 06:01 PM
#630
Posted 31 May 2011 - 07:47 PM
Cheers for that mate,i`ve actually copied your wiring diagram.I`m sure it will all come together.
Or buy the add on part from minispares. £30 odd, but it works.
2 user(s) are reading this topic
0 members, 2 guests, 0 anonymous users