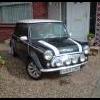
'91 Mayfair Restoration/upgarde
#481

Posted 29 August 2010 - 02:45 AM
#482

Posted 29 August 2010 - 12:57 PM
#483

Posted 29 August 2010 - 02:28 PM
Wish I'd seen your post earlier dude, I've just literally painted the alternator
For now though, today's progress..
Finished off the coilpack brackets, got them cut to the profile of the coilpack itself so they shouldn't really be seen when fitted. Ground them down on the bench grinder, took ages due to the aluminium getting really hot really fast so had to keep running them under the cold tap in the garage so I could hold them, still ended up burning my finger on one of them though!
Underside

From above

Painted the brackets black too

Then finished off prepping ad painting the other bits satin black for the 'bay
Fan cowling, (may change it for a powder coated one in the future as I'm thinking of changing to an electric fan so it'll have to come out again.)

Radiator side bracket, (should be attached to the radiator, I'll chemical metal it in place)

Radiator itself, fins are pretty mashed but I'll order a new one when I change the fan


Alternator

Uncovered the original sticker too!

So I'll be off over to the Mini this afternoon and get the rest of the ancillaries fitted and start wiring in the megajolt, Edis and coilpack.
#484

Posted 29 August 2010 - 11:40 PM
Tidy work as usual Mark.
Cheers dude
This afternoon/tonight I managed to get the engine mount back on fully, the top bolt on the gearbox part wouldn't go in, had to totally unbolt the mount and with a combo of jacking up the engine then the car, it slotted in.

Fan back in place, I much prefer it black than the in your face yellow, alot more subtle

Alternator back on and tensioned up, glad the revised Specialist Components crank sensor bracket doesn't foul the drive belt. Coolant hoses fitted back up with some shiny new jubilee's


Coilpack mounted and HT leads fitted

Added a small self tapping screw into the side of the rocker cover too


If you're wondering why, then wonder no more!!! It's an HT lead clamp that came with the leads, it has a slot where you can mount it to a screw, so to keep it all neat, I thought, ideal place to put it. I already had another one which is clipped in just before the coilpack


And how the HT leads sit in the engine bay. I'm really surprised at how neat they look considering they're about 3 times the length of the originals, I think it kind of makes the engine look more modern and alot less cluttered.


OCD mode again, you might have noticed the tatty yellow throttle cable, well, I decided to wrap it to make it look a little tidier.

All that's left to do is get some antifreeze (probably have some in the garage) and fill the radiator up, make sure I have no leaks. Can anyone recommend the right stuff to use?
After sorting the mechanical side of things, I made a start on the looms for the EDIS module, Coilpack, Crank sensor and Megajolt unit.


Also ditched the 4 way fusebox for the 6 way one so I can safely run the 2 ignition lives I need along side the existing 4 permanent lives without overloading the original fusebox.

I would have started soldering everything up but then noticed that it was 11:30pm so decided to call it a night, I have work tomorrow
#485

Posted 30 August 2010 - 10:44 PM
Got cracking with making the loom up, had most of the wires set out last night, tonight was joining them all up and routing them through the bulkhead behind the dash.
Main bulk of the loom connected

Fusebox loom wrapped in cloth tape ready to go, the rest were all wrapped afterwards but I forgot to take pics.

First of the Megajolt wires going in, only got the bare essentials in at the moment, will add things like the shift light and rev counter afterwards once I get the dash out, hopefully tomorrow nights job.

So with everything connected, I put a couple of fuses in the fusebox, (after I wondered for a minute why it wasn't sparking lol ) and tried again, nothing. So had a feeling I had the crank position sensor wires reversed, (there was nothing to say which was which) I quickly swapped them round and resoldered them, then this happened....
So being quite pleased with myself for getting it working with limited mechanical know-how, I decided to fit the new door handles.
Before

After

All in all, I'm really happy with how it's turned out, I'm looking forward to getting it on the road and testing it all.
Edited by M44K TS, 30 August 2010 - 10:44 PM.
#486

Posted 31 August 2010 - 12:27 PM
#487

Posted 31 August 2010 - 02:06 PM
#488

Posted 31 August 2010 - 09:41 PM
So, ran the car for a while to get it up to temperature and loaded a basic single point injection map optimised for a 286 cam, (mine has a 266 so not too far off). With the engine running, I could hear that the map sensor tubing wasn't a tight fit so air was escaping and not giving the correct signals to the megajolt unit. I'll have to buy some pipe as I'm currently using windscreen washer tubing

Megajolt lying loose in the footwell for now

Everything ran smooth, played about with the rev limiter, setting it at 3000rpm produces flames from the exhaust
Had the car running for half an hour or so, temp. gauge stayed perfectly in the middle, went round to the front of the car to notice the car had had a pee on the floor

The culprit..

Top hose clamp hadn't been tightened down properly and was weeping slightly.
Put the bonnet back on and took it for a quick drive, vid is currently uploading to youtube, it's a bit crap because I couldn't find the head off the tripod so had to holt it above the steering wheel
#489

Posted 31 August 2010 - 11:04 PM
#490

Posted 07 September 2010 - 12:28 AM
Just wait for the rain and puddles and the first time you go through and... nothing happens!
#491

Posted 07 September 2010 - 10:18 PM
Rev counter out the dash

Cut a hole in the bottom at on the back, (kind of looks like a face?)

Rev counter insides out


Test fit of the shift light


Happy that it fits fine, time to break out the worlds most lethal glue, sets in half a second and if you stick your fingers together, it's bye bye skin getting them apart!

Glued in place

Quick test of the shift light off a battery


Plug in loom made up for it

Rev counter signal wired to the MJ unit, it's pretty much accurate, thought I'd have to adjust the pot on the rev counter to sync it up, but seems ok

Played about with the map a bit and configured it a little. Fixed the leaky vacuum hose so the MJ unit is getting the correct KPa readings, around 50KPa at idle instead of the 95KPa with the leaky tube

So, with the dash back in and everything wired up, time to test everything.
Shift light and rev limit...
And the shift light when driving
The camera makes it look like it's not that bright, but you can easily see in in person and is still discreet.
Took the car out after that for a good half hour drive to make sure everything was ok, dripping radiator was a combo of the thermostat housing and both top hose jubilee clips needed nipping up as they were weeping. All in all, very happy with how it runs, power delivery is a lot smoother, no more annoying flat spots, rock steady temp. gauge and no more leaks.
Oh and Evans, I literally just got the car back into the garage and no sooner than shutting the door, torrential rain, was going to take it out for a run to test it but couldn't be bothered
#492

Posted 07 September 2010 - 10:44 PM
#493

Posted 07 September 2010 - 10:46 PM
Makes me want to move my coilpack, although i've got an ultimate engine steady where you've mounted yours...
Is that a Maplin series to USB adapter you've got there by the way? I STILL can't get mine to connect... And as such, the only advantage i've seen of the megajolt so far is that i can go through puddles
#494

Posted 07 September 2010 - 11:07 PM
MiniLandy - It's a cheap ebay one, came with a cd of drivers that I had to install before the computer even recognised it was plugged in. Now the drivers are installed, it connects to the MJ as soon as I open the configuration software, first time, every time.
#495

Posted 08 September 2010 - 08:38 AM
1 user(s) are reading this topic
0 members, 1 guests, 0 anonymous users


