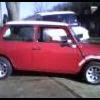
'91 Mayfair Restoration/upgarde
#331
Posted 27 September 2009 - 09:33 PM
Found i have a couple of minor issues to sort over the winter, when backing off the throttle, there's a vibration from the rear shelf area at around 2000rpm, i think it's the covers for the crossovers on the underside of the shelf in the boot, one of the clips for the covers is broken so might just need some cloth tape on it to stop it rattling, 2nd is the drivers window seems to have come off it's runner again, not a huge problem though. I need to adjust the tappets a bit still and sort the idle when the cars warm as it sits a little high. I also need to see why the temp gauge isn't working too, it was with the old engine, just not with the new one.
Apart from that, i'm happy enough with it.
Took a pic with my phone, (forgot to take the proper camera) of the engine bay after the sound deadening was fitted on the bulkhead. Not the neatest of jobs but it certainly quietens the engine noise down a bit, the air filter housing helps alot too.
#332
Posted 12 January 2010 - 06:58 PM
It seems like we need to see the boot with the mini cooper winged badge fitted, did you do it ?
I finally got the time to fit the steering column and stalks. I was wondering if you made wiring diagrams
when you connected the MPI stalks to the main loom. I'm trying to do the same here, so it will be a great help for me.
#333
Posted 12 January 2010 - 09:16 PM
I'll have a dig through all the bits in the garage and see if i can find my notes.
Might aswell take the opportunity to update the resto a bit more. I've decided to go for electric windows as the passenger regulator doesn't want to sit in properly and the drivers glass keeps slipping off the runner, I still need to run the 12v wire for the central locking, (just a 2 min job of extending the wire to the fusebox!) and i need to rehang the passenger door again as it catches the door step on the hing side.
So that should keep me busy when the better weather comes.
#334
Posted 14 January 2010 - 06:37 PM
The job was easier than I was expecting, in my column almost all the cables have matched,
the different ones were as you said, the headlight rerouting and the wiper group
but the ignition barrel and indicator had the same colors ( I bought connectors from and MFG )
What I'm not able to do is find the way to use the wiper intermittent position as the '91 Cooper stalks does not have it.
Did you solve the horn problem ? I mean, are you honking from the steering wheel ?
I've seen that you have eliminated the rotary coupler from the system, this is essential for using the horn.
Mine came damaged but I was able to repair it. If you need some info I'll be glad to help.
#335
Posted 14 January 2010 - 09:41 PM
Basically, (bear with me on this as it might not make much sense!) you take the 12v feed for the relay from an ignition live, (1st or 2nd position of the ignition barrel, doesn't really matter which) then the 'triggger' for the relay to activate it (This wire is what connects to the int. setting of the stalks and sends 12v to the relay to start the intermittent wipe of the wipers). Then one wire for the relay to earth and the last is the wire that goes to the 1st or 2nd speed of the wiper motor, depends if you want it to do a fast or slow wipe on intermittent.
The problem with the relay is, when it sends the 'pulse' to start the wipers, it sends the 12v+ for about 2 seconds to get the motor going which would only last about half a wipe of the screen, so, this is where your wiper park switch should work as the park switch carries on the sweep of the wipers so they do a full cycle and return to the bottom of the windscreen, but, then the wire that goes to the wiper motor turns from a 12v, to a negative, which puts a full short on the wipers causing a fuse to blow. So to get around this, i had to add a standard 4 pin relay between the intermittent wiper relay and the motor and use the output of the int. relay as the trigger wire for the standard relay... (see the picture)
For the horn, because i'm not using an active airbag, i ran a new switched 12v wire to one terminal of the 360 degree airbag contact, then the yellow 2 core wire that usually plugs onto the airbag, i chopped the plug off and used the cable to connect to the buttons on the steering wheel, (my wheel didn't have any wiring for the buttons so i just connected the wires up myself, basically, the 12v switched wire to feed one side on each button, then the other connects to the original purple and black horn wire which goes straight to the horn.
I hope the picture is of help, it's really hard to explain it in simple terms if you've never came across the problem before as it's a simple problem with a simple solution, but it's very long winded to explain lol...
#336
Posted 14 January 2010 - 10:16 PM
#337
Posted 15 January 2010 - 08:34 AM
#338
Posted 15 January 2010 - 09:03 PM
first off got a spare job going? your earning waaaaay to much money
and secondly congrats on getting it finished that is one very stunning mini im guessing you are now a very proud and slightly smug man
...i'll also be popping back in the future to borrow some of your handy wiring diagrams thankyou
#339
Posted 15 January 2010 - 09:43 PM
#340
Posted 25 March 2010 - 09:38 PM
Anyway, tonights purchases are shiny engine bits and a new rocker cover, I'm not happy with the one that's on.
pictures of those in due course.
Also gonna see if I can whip the doors back off and get the electric windows sorted, might make life easier if they're off the car.
#341
Posted 29 March 2010 - 09:10 PM
Before.
Head nut covers & HT lead clamps
I will replace the HT leads too as they're the old ones and don't look too neat
Clutch resivoir cap cover, (ignore the state of the resivoir, I will be replacing it in due course and the soundproofing strands will he hoovered up too)
Boot lock mechanism cover, Not easy to get a picture of, but covers the ugly looking caddium plated one.
Before
After
Door striker plates, only the drivers side ftted as I'd pulled the car close to the wall on the passenger side and it was raining quite a bit so wasn't going to reverse the car out then back in, that can wait for when it's dry.
Before
After
I also fitted subframe tower bolt covers, but they're tucked out the way and I couldn't get a decent picture of them.
Lastly, new polished rocker cover with new T-bars. Not keen on the blue T bars, would have prefered polished ones, but never mind.
Still not happy with the engine bay though, It still needs alot of work, I'm on the lookout for some snazzy silicone rad hoses, preferabley in black to match, I hate the dull looking rubberones, and I want to tidy up the alternator, starter motor and gearbox a bit.
I also bought a black leather upper dash rail as I'd been after one for a couple of years now, but always seemed to miss them on ebay. It works out quite good for fitting it, as I have to remove the dash anyway as there's a loose conenction on the 3 extra dials, the lights flicker when I go over a bump.
#342
Posted 29 March 2010 - 10:12 PM
Just bought a polished dipstick, black silicone hoses and a polished top rad bracket. Yay! More expense!
#343
Posted 29 March 2010 - 10:13 PM
#344
Posted 29 March 2010 - 10:22 PM
#345
Posted 30 March 2010 - 11:31 AM
I want to clean up my alternator anyway, so would make life easier if I buy a new one and polish that, then I could sell my current one, new one is only £60 or so anyway. Hmmmm?
1 user(s) are reading this topic
0 members, 1 guests, 0 anonymous users