Jump to content


Photo
- - - - -

'91 Mayfair Restoration/upgarde


  • Please log in to reply
664 replies to this topic

#151 M44K TS

M44K TS

    Up Into Fourth

  • Members
  • PipPipPipPipPipPipPipPipPip
  • 3,104 posts

Posted 12 May 2008 - 11:20 PM

Well, almost ready for paint, the doors, bonnet, boot and arches are getting taken away on Friday to get prepped and primed, followed by the rest of the car hopefully the week after.

So tonight...

Made a start removing the doors (heavier than i was expecting!
Posted Image

Driver side off
Posted Image

Don't think my van would suit 12" wheels ;D
Posted Image

Next to be removed was the rear screen, just a case of slicing through the rubber as it's being replaced anyway
Posted Image
Posted Image

Then i could finally get the old speakers and the parcel shelf carpet out as i'm not using those anymore
Posted Image
Posted Image

And with the help of my trusty heat gun, removed the remaining stickers from the rear 1/4's
Posted Image

So there we have it, ready to be taken to the bodyshop for it's full shoot.
Posted Image

Also, i removed the grlle mounting lip on the new bonnet ready for the mk1 grille, but as i was drilling out the spot welds, the bonnet catch mounting bracket fell off, so that'll need re-spot welding back on before paint!

Also bout some much needed sound deadening stuff for under the carpets and under the bonnet to try and make it a bit quieter when driving.

Edited by M44K TS, 13 May 2008 - 09:42 AM.


#152 M44K TS

M44K TS

    Up Into Fourth

  • Members
  • PipPipPipPipPipPipPipPipPip
  • 3,104 posts

Posted 06 July 2008 - 02:16 PM

Woah, didn't realise it had been so long since i was on here!

Well, where to begin.

I'm still waiting for the car to be painted, couple of things are holding it up.

First of all, when i went to remove the door latch & hendles etc, i noticed the doors were a little rusty under the seam sealer, so a prod with a screwdriver later and i noticed that the door frame has sort of seperated from the door skin.

So i took the doors to the guy that did the bodywork on the car for him to have a look at the doors. After saying the doors would need a bottom repair on the dor frame, he then mentioned he had a pair of doors from a 1996 cooper with side impact bars, only the passenger side needs a new skin, so i've decided to go with the later doors, mainly for the added protection that the impact bars would offer.

Nothing major, but i've also drilled the holes in the front panel ready for the spotlight brackets so that i'm not drilling through fresh paint.

Also, i might be buying a late cooper wood dash with the magnolia clocks and matching door cappings, so the style of the interior of the car might change again :D

Apart from that, i've been far too busy at work and doing a couple of bits and peices with the Accord to really have time to mess about with the Mini of late, but i hope to get back into it this week finishing off the headlight wiring and a couple of other bits.

Pics shall follow

#153 M44K TS

M44K TS

    Up Into Fourth

  • Members
  • PipPipPipPipPipPipPipPipPip
  • 3,104 posts

Posted 09 July 2008 - 09:58 PM

Small Update. Appologies about picture quality, i only had my phone with me.

Been to pick up a couple of goodies for the interior tonight.

First off, a set of black upper and lower dash rails, i painted my existing upper one black using vinyl paint and was gonna just use that, but the guy threw in the upper one for free so might as well use it.

Posted Image

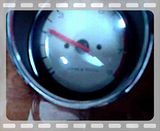
Next up was a 6 clock late Cooper dash including all 6 clocks, i have pretty much figured the wiring for the 3 gauges, clock and volts are easy, just need to find out how to go about wiring up the oil temp.

Posted Image
Posted Image
Posted Image
Posted Image


The sportpack speedo is a 110mph one, which means i can't use it on mine as it has the 90mph clocks in, plus, i want to keep the original mileage with the car so i have some record of it for the future. Also, the sportpack rev counter decided it didn't want to work properly in mine so i have the mpi clocks for sale.


Also, i bought a set of walnut door capping to finish off the interior.

Posted Image


And a quick video of the rev counter that didn't want to work.

Posted Image

#154 M44K TS

M44K TS

    Up Into Fourth

  • Members
  • PipPipPipPipPipPipPipPipPip
  • 3,104 posts

Posted 17 July 2008 - 10:46 PM

Had the choke and the heater cable's out tonight to swap my switch panels over from a 4 switch one to a 5 switch one, so had a go at seeing if the terminal on the choke cable works for using it as a worning light to remind you the choke is out/

So, connected a spare side repeater with the + to a 2Ah 12v battery, the end of the choke cable to the - side of the battery, and the - of the repeater to the spade terminal...

Choke in
Posted Image

Choke out
Posted Image

Also, did a trial fit of the new dash rails and the dash itself.

I have to say though, the lower dash rail is the fiddliest thing i have done in a while, and i need to drill 2 small holes for the mounting brackets that secure the dash itself, to the underside of the dash rails.

Please ignore the poorlighting, i had the cr half ot the garage and it was dark.

Posted Image
Posted Image

Also, the new switch panel in place, not half as bad toremove and refit as i rememer it.
Posted Image

Also, the loom for the 3 aux. gauges, i haven't got the other wiring plug that plugs into the gauge loom that's ormally found o the body loom fr the car (if that makes sense) So i had to replace the plugs with a spare one instad of wiring them direct to the car loom, so if i need to remove the dash, i can just unplug everything.

Took a little headscratching at first as it's been so long since i did any wiring in the car, but all seems good so far. I forgot to take pics of the finished gauge loom, but i'll be back over tomorrow afternoon to wire in the car side of the plug, run the speaker wires for the front speakers and to generally tidy the rest of the wiring up ready for the interior going back in.

So expect more pics tomorrow >_<

#155 M44K TS

M44K TS

    Up Into Fourth

  • Members
  • PipPipPipPipPipPipPipPipPip
  • 3,104 posts

Posted 18 July 2008 - 10:01 PM

Right well, got busy this afternoon, eventually finished off the headlight loom so i now have fully functioning lights front and back.

Turns out my dim dp relay was shot, which is why i had side lights, main beam but no dipped lights.

So once everything was working on the temporary connections for the stalks, i wired in the new plugs to give a solid connection (was previously wired using spade connectors)

So armed with arguably the best tool when it comes to auto electris, (ratchet drimper for non insulated terminals) i set about finishing the loom.
Posted Image


Wiring from the stalks on new plug.
Posted Image

using the crimper, it makes a hell of a good connection as can be seen here.
Posted Image


Original wiring for the headlight switch on the dash, extended, then the other half of the plug connected on the end. Job done! Note, the wiring has also been taped up in cloth tape to keep it tidy.
Posted Image

So now, i have a dipped beam to go with the other lights. (bulb sitting in one of the headlight bowls on top of the engine incase anyone was wondering:D )
Posted Image


So after that little lot, turned my attention to the new gauges.

You can just see the new connections i made for the loom for the gauges here
Posted Image

So going by my previous diagrams, set about wiring up the other end of the plug which will plug into the dash. This consisted of 1 switched live from the fuseboc, 1 permenant live from the fusebox for the clock, an earth which is on a ring terminal on the bulkhead and the dial illumination which i tapped into the wire that feeds the original speedo.

UnfortunatleyI forgot to take pics of it though, apart from this one which is pre-taping the wires up.
Posted Image


So here's the volt gauge working.
Posted Image

A nice healthy 13v, not bad considering the battery hasn't had any charge in 3 monh apart from maybe 5 mins a week with the engine running :dontgetit:

I also secured my immobiliser main box thing behind the dash and neatly cable tied the stalk wiring to the steering colum, no doubt i'll need to take it off to get the pipe between the inner wing and the heater back on though which if i remember rightly, is a pain in the backside :thumbsup:

Anyone got any tips on what's the best way of puttinng the pipe in place?

#156 M44K TS

M44K TS

    Up Into Fourth

  • Members
  • PipPipPipPipPipPipPipPipPip
  • 3,104 posts

Posted 25 July 2008 - 02:57 PM

Been finishing up the rest of the little interior bit's i had left to do, fitst up..

Retrim the front speaker pods.

They were grey to match the previous interior, but were tired and a bit past it, so retrimmed them in the same black vinyl i used for the rest of the interior bits.

Not the speakers i will be using by the way
Posted Image

Also trimmed the side panels as they were a bit passed it. (screw caps not yet on)
Posted Image

Also decided that as i have black A piller covers, i should do the C pillars black to match
Rear of the trim panels painted so that none of the grey will show through
Posted Image

And the side you'll see once they're in
Posted Image

So i have A & C pilar trim panels in black, next on the list is to make some B pillar panels to match,

I want it so that none of the metal of the car body is on show (or very little anyway) to make the car appear more modern. I'm not a fan of painted metal on show on the interior of cars, i'll also be covering the rear storage bin's in the same stuff

Also, when i bought the black carpet set a few year ago, it came with a black carpet section for the parcel shelf that i didn't get round to ever fitting (couldn't be bothered to remove the shelf speakers ;) )

So, whilst everythhing is out the car i thought i should cover the shelf.

Posted Image

The exposed bit of wood is covered by the back seat upright when it's fitted too.

The holes for the bass ports to let a bit more sound through from the speakers (can't seem to find the ports although they will be in the garage somewhere)
Posted Image

Cleaned up the washer bottle as it had about 17 years worth of road & general engine grime engrained into it.
Posted Image

Posted Image

Really easy to do too, stood it in a bucket of water & bleach for 3 hours to clean the sediment out of the inside, then a bit of cillit bang brushed on and left for 10 mins, and finally a wipe down with some paint brush cleaner.


The odd mirrors Mini Spares were selling off cheap arrived a while back too. Not bothered about them being different colours as they will be painted black when the car goes for paint.
Posted Image
Posted Image

So thats it for now, untill i can get over to the car and get the rear 1/4 bins and b pillars trimmed, which of course i will take a few pics.

Oh also, i have a spare set of MGF/MPI Mini indicator stalks for sale, £20 posted if anyone's interested? You'll need to nab the wiring from a rover or honda from a breakers though.

Posted Image

#157 M44K TS

M44K TS

    Up Into Fourth

  • Members
  • PipPipPipPipPipPipPipPipPip
  • 3,104 posts

Posted 27 July 2008 - 10:47 PM

Managed to get the b pillars and the rear 1/4 pockets covered in vinyl, excuse the current state of the car, and the rust marks on the seat base, it started raining when i had the car out a couple of weeks ago, and a box has been sitting on the back seat, i'll have to clean it up before it gets painted inside.

Also, there's a couple of bits i'm not overly happy with, like the tiny bit under the seat base that needs a small bit glued in (no templates you see)

On the whole though, quite pleased how it's turned out.

B pillar (looks messy but there's bits of old door rubbers holding the vinyl in place whilst the glue set)
Posted Image

Rear 1/4 pocket
Posted Image
Posted Image

Passenger side is the same, and i think when the carpets, door & 1/4 panels and cappings go in, it'll look seamless.

Like i said previously, i'm not a bit fan of exposed painted metal on cars and i think that's one thing that's always let the interior of a mini down.

Next up is wether or not to paint the headlining and visors black to match everything else or, leave it grey to break it all up a bit.

Any ideas?

#158 miniallsort

miniallsort

    Up Into Fourth

  • Members
  • PipPipPipPipPipPipPipPipPip
  • 4,723 posts

Posted 28 July 2008 - 12:00 AM

nice work dude

#159 M44K TS

M44K TS

    Up Into Fourth

  • Members
  • PipPipPipPipPipPipPipPipPip
  • 3,104 posts

Posted 28 July 2008 - 02:35 PM

thanks, i need to go back over and scrub the inside clean and maybe give the front footwell's and the bulkhead a quick lick of paint.

I also tried the extra fans in the windscreen ducting, but they didn't fit too well into the tubing and were a bit cumbersome.

So i have thought about making them fit behind the face vents on the dash and use the now redundant switch on the dash that was for the headlight leveling control, for the face vents so:

position....
0 would be both off
1 would be driver side fan on
2 would be passenger side fan on
3 both on

Just an idea at the minute, would need to see how well the fans work behind the dash vents first

#160 Down&Out

Down&Out

    The King Of Retro Cool

  • Traders
  • PipPipPipPipPipPipPipPipPip
  • 4,847 posts
  • Location: -

Posted 28 July 2008 - 04:17 PM

just read through this.. good work! :gimme: keep it coming :D

#161 M44K TS

M44K TS

    Up Into Fourth

  • Members
  • PipPipPipPipPipPipPipPipPip
  • 3,104 posts

Posted 28 July 2008 - 05:16 PM

don't worry, i'm right into the swing of it now :D

infact i'm going to buy some more vinyl paint to do the headlining tonight, dark grey or black.... hmmmm

#162 M44K TS

M44K TS

    Up Into Fourth

  • Members
  • PipPipPipPipPipPipPipPipPip
  • 3,104 posts

Posted 28 July 2008 - 09:58 PM

well, went and made a start with a couple of bits and pieces tonight, first of all, a trip to Hellfrauds for a can of black vinyl spray to change the colour of the headlining from grey/brown & dirt to black, was going to get 2, but thought 1 would be enough.


Well, i was wrong, got the edges and a light coating in the center of the headlining done, then ran out, so i need to go and get another 2 cans tomorrow at some point. Also, even though i was outside-ish doing it, the fumes still choked me, i tell you, it's potent stuff!

Anyway...

As it was yesterday.
Posted Image

As it ended up tonight (looks fire damaged don't you think :o )
Posted Image
Posted Image

So, as i couldn't do anything more with the headlining until tomorrow, i thought it would be best to get the holes drilled for the rear 1/4 cappings so that i'm not having to drill any holes after the car's painted. I also couldn't wait to see what the newly trimmed b pillars and 1/4 bins would look like against the new cappings, door cards and rear pocket liners :huh:

Drivers side one taped in place with the quater card in place
Posted Image

And screwed in place
Posted Image

A close up of the b pillar, it looks a little messy, but that's only because there's no door seals on yet to hold the vinyl in place on the door side of the pillar.
Posted Image

And a blury pic of the passenger side, i think i had auto-focus on the camera and it's focused on the wall :huh:
Posted Image

When i got home i did a couple of diagrams of how the relays will be fitted for the dipped beam, main beam, and the spots and fogs.

It looks complicated, mainly because i want to be able to flash the headlights, and all 6 lights to flash, but also be able to turn on the fogs seperatley (only when the sidelights or headlights are on) without the headlights or spots to come on

Posted Image

So all i need to do now is figure out what plugs and sockets i need to get everything wired up.

#163 M44K TS

M44K TS

    Up Into Fourth

  • Members
  • PipPipPipPipPipPipPipPipPip
  • 3,104 posts

Posted 29 July 2008 - 06:15 PM

Got a parcel today, my new remote locking kit, only ordered it yesterday at 4pm, arrived 10am today!

Swanky new VAG style flip keys.

Posted Image
Posted Image

All i need to do is have the blank inserts cut to the original ignition key.

Also bought another tin of black vinyl paint so should be able to get the rest of the hadlinig sprayed tonight.

#164 Joloke08

Joloke08

    Not banned but still weird

  • Members
  • PipPipPipPipPipPipPip
  • 828 posts

Posted 30 July 2008 - 08:26 PM

Got a parcel today, my new remote locking kit, only ordered it yesterday at 4pm, arrived 10am today!

Swanky new VAG style flip keys.

Posted Image
Posted Image

All i need to do is have the blank inserts cut to the original ignition key.

Also bought another tin of black vinyl paint so should be able to get the rest of the hadlinig sprayed tonight.


Hiya
where did you get the remote locking kit from?
those keys are exactly the same as the ones ive got with my golf;)
I think it would be soo kewl to have the same style on the mini too:)

Did you just get them keys to use with another central locking kit or did the central locking kit come complete with those keys?
Info please pleaseeee
>_< Jodie :D

#165 M44K TS

M44K TS

    Up Into Fourth

  • Members
  • PipPipPipPipPipPipPipPipPip
  • 3,104 posts

Posted 30 July 2008 - 10:02 PM

lol, i bought them off ebay, it's a universal remote locking kit...


http://cgi.ebay.co.u...e...A:IT&ih=002


I had to buy the Mitsubishi key inserts as they're pretty much identical to mine, also got the mini logo's for them.

I had the same style on my Audi A6, but all i ever did was *flip *close *flip *close etc etc lol

I'm sure to do the same with these keys ;D

Also, a few other bits came today...

The mk1 grille surround and mustache ends

Posted Image

Looks retro-cool with the wavy grille too

Black leather handbrake gaiter with beige stitching toi match the rest of the interior
Posted Image

And the gearstick gaiter to match.
Posted Image

Also bought some relay's for...

Lights on warning, i've had the battery go flat once or twice leaving the lights on before!

Interior light delay so that the interior light stays on for 10 seconds after the doors closed, makes the car a it more modern

and finally, an intermitent wiper relay so i can use the int. setting on the new stalks.

Posted Image

Only problem is, they came with a basic diagram so i'm going to re-draw them to make some more sense of them.

Also, didn't manage to get the rest of the headlining painted, think i'll go tomorrow night to finish it.


1 user(s) are reading this topic

0 members, 1 guests, 0 anonymous users