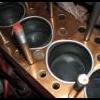
Anyone have any tips for cleaning up rusty bolts a bit? I'm hoping to put my the head and bits back on my engine tomorrow, but don't really want to shove in the same old orangey bolts as it ruins the clean look of the engine. I'll replace them at some point, but for now any quick 'handy housewife' tips?
tar!


cleaning bolts?
Started by
OllyD
, Mar 24 2007 10:22 PM
15 replies to this topic
#2

mini93
-

- Members
-

- 8,615 posts
He's just too casual!
- Location: Warwick
- Local Club: Medievil minis of Warwickshire
Posted 24 March 2007 - 10:28 PM
if you can get a wire buffing wheel (iv got one at work for example) should do well, or put in a basket in parts blaster
otherwise de-greasent, effort and wire brush
otherwise de-greasent, effort and wire brush
#3
minivanman
-

- TMF+ Member
-
- 3,454 posts
Up Into Fourth
- Local Club: Backstreet Minis
Posted 24 March 2007 - 11:46 PM
like mini93 said, get a bench grinder with a wire wheel on it. Buffs stuff up very nicely
#4
Big_Adam
-

- Members
-
- 7,435 posts
Crazy About Mini's
Posted 24 March 2007 - 11:47 PM
soak them in vinegar. Works on penny's.
#5
Silicon Skum
-

- Members
-
- 741 posts
One Carb Or Two?
Posted 25 March 2007 - 02:24 AM
If you want to do it the lazy way and let it sit for a few hours or overnight, then all you need is a plastic tub, a stainless steel or iron electrode, water and washing soda cyrstals (or any caustic solution, some bleaches for example) and a battery charger. About a tablespoon of soda crystals to a gallon of water. If you have trouble finding the washing soda, try baking soda (sodium bicarbonate, you can get it at anywhere). The solution is weak, and is not harmful, though you might want to wear gloves. NOTE: It is the current that cleans, not the solution, making a more concentrated solution won't make it go quicker.
The electrode should be large (within reason), if possible, larger than the object being cleaned. The iron electrode works best if it "surrounds" the object to be cleaned. An iron electrode will be eaten away with time. Stainless steel has the advantage (also some alloys, but not all) in that it is not eaten away. I use an old kitchen sink in the garage (also used as a parts washer...), but I **REALLY** don't recomend trying this with a GOOD kitchen sink (can leave some stains....).
if you don't have an old sink to use, just place a large flat iron / steel etc, metal sheet in the base of the tub (or folded to fit the plastic tub if possible). Have also used an old (cleaned out to bare metal) paint can (steel).
Dip the objects to be cleaned in the solution / sink / tub / whatever, and make SURE the objects do NOT TOUCH the other electrode (metal sheet, sink etc) or you will SHORT OUT the charger!
Connect the battery charger, (or an old charged up car battery, if no charger) THE POLARITY IS IMPORTANT!! The iron or stainless electrode is connected to the positive (red / +) terminal. The object being cleaned, to the negative(black / - ). Make sure you have good contact, which can be difficult with heavily rusted objects. Get the connections backwards and your object will be relentlessly dissolved away! Make connections on a part of your electrode that is out of the solution, or your clamps / crocodile clips / whatever, will erode rapidly (then turn over when clean and connect otherway round to clean the rest). For bolts you can just use bare cooper wire and wrap a few turns around each bolt (so it looks like string of xmas lights), and use the wire to support the bolts in the solution.
If you want to do multiple objects (or bolts in this case) just connect them all together in series (with a smalll gap between them) and connect to the negative terminal.
When you switch on the battery charger the meter might show a slight current flowing, or if no meter or using a car battery just wait a few mins to see if very fine stream of bubbles (fizzing) forms around ALL of the bolts (if not check connections).
Then just leave it for a few hours if light to medium rust, or overnight for HEAVY rust. any flaky rust can just be scrubbed off. if a little rust remains after flaky rust as been removed, give it another blast in the solution for a couple more hours, and you will see bare clean metal.
You can use the solution over and over until it's full of crud. Handy if you doing a LOT of parts!
Best part of this method is that it DOES NOT REMOVE metal from the object being cleaned, it just coverts the rust ( which can be important for things like bolts, nuts, screws etc). It also get to ALL the areas that wire brushing might not reach.
SS
The electrode should be large (within reason), if possible, larger than the object being cleaned. The iron electrode works best if it "surrounds" the object to be cleaned. An iron electrode will be eaten away with time. Stainless steel has the advantage (also some alloys, but not all) in that it is not eaten away. I use an old kitchen sink in the garage (also used as a parts washer...), but I **REALLY** don't recomend trying this with a GOOD kitchen sink (can leave some stains....).
if you don't have an old sink to use, just place a large flat iron / steel etc, metal sheet in the base of the tub (or folded to fit the plastic tub if possible). Have also used an old (cleaned out to bare metal) paint can (steel).
Dip the objects to be cleaned in the solution / sink / tub / whatever, and make SURE the objects do NOT TOUCH the other electrode (metal sheet, sink etc) or you will SHORT OUT the charger!
Connect the battery charger, (or an old charged up car battery, if no charger) THE POLARITY IS IMPORTANT!! The iron or stainless electrode is connected to the positive (red / +) terminal. The object being cleaned, to the negative(black / - ). Make sure you have good contact, which can be difficult with heavily rusted objects. Get the connections backwards and your object will be relentlessly dissolved away! Make connections on a part of your electrode that is out of the solution, or your clamps / crocodile clips / whatever, will erode rapidly (then turn over when clean and connect otherway round to clean the rest). For bolts you can just use bare cooper wire and wrap a few turns around each bolt (so it looks like string of xmas lights), and use the wire to support the bolts in the solution.
If you want to do multiple objects (or bolts in this case) just connect them all together in series (with a smalll gap between them) and connect to the negative terminal.
When you switch on the battery charger the meter might show a slight current flowing, or if no meter or using a car battery just wait a few mins to see if very fine stream of bubbles (fizzing) forms around ALL of the bolts (if not check connections).
Then just leave it for a few hours if light to medium rust, or overnight for HEAVY rust. any flaky rust can just be scrubbed off. if a little rust remains after flaky rust as been removed, give it another blast in the solution for a couple more hours, and you will see bare clean metal.
You can use the solution over and over until it's full of crud.
Handy if you doing a LOT of parts! Best part of this method is that it DOES NOT REMOVE metal from the object being cleaned, it just coverts the rust ( which can be important for things like bolts, nuts, screws etc). It also get to ALL the areas that wire brushing might not reach.
SS
#6
smudger
-

- Members
-
- 1,854 posts
Camshaft & Stage Two Head
- Local Club: Lots
Posted 25 March 2007 - 07:29 AM
SS
Now that sounds a plan.
Got any for an ultra sonic hot parts washer by any chance?
Now that sounds a plan.
Got any for an ultra sonic hot parts washer by any chance?
#7
Jobu
-

- Members
-
- 508 posts
Super Mini Mad
- Local Club: 16vminiclub
Posted 25 March 2007 - 09:30 AM
As people have said wire wheel works, but i tend to clean threads on the bolts by running a die down them. Just because the wire wheels can be too harsh for the threads.
#8
mini93
-
- Members
-
- 8,615 posts
He's just too casual!
- Location: Warwick
- Local Club: Medievil minis of Warwickshire
Posted 25 March 2007 - 09:38 AM
iv got ultrasonic washer at work aswell, can imagin (if i bare to stay there) ill be using alot there machiens going to beed blast me 10inch wellers next week
#9
Silicon Skum
-
- Members
-
- 741 posts
One Carb Or Two?
Posted 25 March 2007 - 06:53 PM
SS
Now that sounds a plan.
Got any for an ultra sonic hot parts washer by any chance?
Actually, I could prolly run something up without too much effort. Would need to find a suitable sorce of ultrasonic transducers strong enough to cause cavitation.
Could prolly make a fairly cheap hand held "probe" that could be used in a modified parts washer though.........Hmmm, now there's an idea!
still quite pricey though, high power ultrasonic transducers and generators are not cheap. 
Might want to be carefull on ally parts though, I have heard some people say "don't use it on aluminium", supposedly they're bad for aluminium parts because of hydrogen embrittlement. Plenty of ally parts are put through them with out much harm, but I've never been able to find any "proof" one way or the other. Personaly I think it's prolly OK, I doubt the fast forming surface oxide layer will be disturbed, and it's the oxide that protects aluminium in the first place. Your milage may vary, don't blame me, etc.
SS
#10
koss
-

- Members
-
- 1,399 posts
One Carb Or Two?
- Local Club: The Greenbank working mens social club
Posted 25 March 2007 - 07:16 PM
If you used the same process on alloy parts, then put them in a pan of boiling water with a food colouring for 30 mins.SS
Now that sounds a plan.
Got any for an ultra sonic hot parts washer by any chance?
Actually, I could prolly run something up without too much effort. Would need to find a suitable sorce of ultrasonic transducers strong enough to cause cavitation.
Could prolly make a fairly cheap hand held "probe" that could be used in a modified parts washer though.........Hmmm, now there's an idea!
Might want to be carefull on ally parts though, I have heard some people say "don't use it on aluminium", supposedly they're bad for aluminium parts because of hydrogen embrittlement. Plenty of ally parts are put through them with out much harm, but I've never been able to find any "proof" one way or the other. Personaly I think it's prolly OK, I doubt the fast forming surface oxide layer will be disturbed, and it's the oxide that protects aluminium in the first place. Your milage may vary, don't blame me, etc.
SS
Would they be anodised then? Its a long time since I done chemistry.
#11
Silicon Skum
-
- Members
-
- 741 posts
One Carb Or Two?
Posted 26 March 2007 - 01:04 AM
If you used the same process on alloy parts, then put them in a pan of boiling water with a food colouring for 30 mins.
Would they be anodised then? Its a long time since I done chemistry.
It's a similar sort of process, different chemicals involved, but same method - only in REVERSE.
Anodizing aluminium means that you are converting the VERY thin, weak aluminium oxide (which forms a natural barrier on bare ally metal - it's a VERY reactive metal) into a MUCH thicker coating that is very hard. To do this you just accelerate the natural formation of the oxide by connecting the aluminium part up to the POSITVE (anode - hence ANODizing...) which causes the oxygen to be striped from the electrolyte and react with the ally to form ally oxide.
The oxide layer is very porus on "type 2" anodized ally (sulphuric acid electrolyte at room temp ~ 20 deg C) and this allows the dyes to leach into the surface. Hotter acid temps (about 50 dec C or more) cause a thick, grey matt finish to the ally part, but can also cause pitting of the surface.
Food colouring will work, but it's not very good (tends to be very faded, not much resistance to UV light, so fades even more) Red food colouring gives a sort of see-through pink tint, blue gives a blueish "hard steel" sort of colour. You will prolly have better results using something like fabric dyes that are "UV fast", some inks, proper anodizing dyes or inorganic mineral dyes. Most of the organic dyes WILL change colour over time as they are affected by UV light (sunlight, halogen lights, etc), but fabric dyes will be longer lasting than most food dyes (much deeper colours too).
If you want to do it, it needs the same sort of set up, plastic tub (must be plastic due to acid), battery charger and fair amount of sulphuric acid (or sulfuric as it's also called), and some lead or alloy metal sheet (lead is better). The ally part is hooked the positive (+) of the charger and the negative to some Lead sheets either side of the tub. You can get lead sheet from any builders merchant (or church roof...)

The best way to connect the current to the part to be anodized, is use aluminium wire and bend it to make a hook, then hook the part on and dip into the solution and connect the wire to the battery charger. Should be able to get thin ally wire from welding supliers, builders mechants etc.
The electrolyte is 15 - 20% Sulphuric acid mixed with water. ALWAYS add acid to water, NEVER ADD WATER TO ACID!! Otherwise it could cause a reaction and boil over. Quite a bit of heat is produced when adding the acid, so be carefull. AND WEAR EYE PROTECTION!
You can get acid from a CHARGED car battery (a flat battery is mostly water), as the battery acid is already mixed with some water, just add a 50 :50 mix of acid to water and this should give about a 20% solution. You can also get acid from chemistry lab supplies, many places on the web, or even the local motor factors (for car batteries).
How long it take to complete, depends on the temperature of the electrolyte, current / voltage settings, and the size of the part. Once tha part is removed from the bath, rinse the acid off with COLD water. You can then go on to add a dye to the part.
There are a ton of websites related to DIY anodising, just google it, should pull up loads of resources.
SS
#12
koss
-
- Members
-
- 1,399 posts
One Carb Or Two?
- Local Club: The Greenbank working mens social club
Posted 26 March 2007 - 04:23 AM
Cheers SS forgot about the sulphuric. I think we used caustic soda to clean the alloy up first. Then as you have said into the acid. I think the acid seems to open the pores up to let the dye in. I have two big plastic tubs at work. The sort you mix plaster in. I would also like to do some nickel plating and other types, but I think there are environmental issues.
Cheers
Cheers
#13
Xiao_Bin
-
- Members
-
- 621 posts
Super Mini Mad
Posted 26 March 2007 - 05:27 AM
be careful with what chemical you use, as I remember a case study of a factory using a cleaning bath for steel parts, that thought it would be ok to clean aluminum parts too and all the parts dissolved into the cleaning bath 
#14
biggav
-

- Members
-
- 5,830 posts
Crazy About Mini's
- Local Club: South Central
Posted 26 March 2007 - 06:04 AM
Or, if you are really lazy (like me) just buy new nuts and bolts... there was a bloke on ebay doing sets a while back.
#15
TimS
-

- Members
-
- 2,712 posts
Mini Doctor
- Local Club: TMF
Posted 26 March 2007 - 07:12 AM
I like to hold them in a vice and use a wire brsuh on the end of a dril, l find a bench mounted wire brush tends to take your fingers off, then I run a die down it to make sure the threads clean 


1 user(s) are reading this topic
0 members, 1 guests, 0 anonymous users


