
Your car is so amazingly tidy, it makes me feel sick!
Good project man, very good project!


Yet another Z cars haybusa mini
Started by
oli79
, Feb 18 2007 12:22 AM
100 replies to this topic
#32

markrally
-

- TMF+ Member
-

- 1,378 posts
Z Cars
- Local Club: Miniaddicts.co.uk
Posted 20 March 2007 - 04:26 PM
Well done, It brings back som memeories of what i was doing 12 months ago, Just one little detail, Where you have mounted the rear brake lines and T-peice, They will be subject to a lot of heat so i fitted mine underneath and wrapped them in some heat protection sleeving arond the manifold area.
Good stuff, I can see a lot of my car in yours!!!
Cheers
Good stuff, I can see a lot of my car in yours!!!
Cheers
#33
oli79
-
- TMF+ Member
-
- 144 posts
Mini Mad
- Local Club: none
Posted 20 March 2007 - 10:21 PM
Well done, It brings back som memeories of what i was doing 12 months ago, Just one little detail, Where you have mounted the rear brake lines and T-peice, They will be subject to a lot of heat so i fitted mine underneath and wrapped them in some heat protection sleeving arond the manifold area.
Good stuff, I can see a lot of my car in yours!!!
Cheers
Thanks Mark,have got some p clips to administer to the rear brake lines but have also got some heat mat from car builder solutions so will do as you say,also thought i would line the inside of the removable panel in front of the exhausts to protect the bulkhead from heat.Thanks for the help-you might see a lot of your car in mine-you know what they say imitation is the best form of flattery!!!!

#34
oli79
-
- TMF+ Member
-
- 144 posts
Mini Mad
- Local Club: none
Posted 20 March 2007 - 10:26 PM
one quick sugestion, I would put another fuel filter before fuel pump, just to save it from any grime from tank. Had that happen once & cost a costly pump. Car it looking very good
Hi there thanks for that,have got a pre filter on order from z cars as they recommended one as well,but always grateful for good advice and the benifit of other peoples experience
#35
adyzr1
-

- Members
-
- 257 posts
Mini Mad
Posted 21 March 2007 - 03:45 AM
yeah top marks on the advice of the pre -filter 
mine was full of muck, which would have ended up in the pump, had i not fitted one
mine was full of muck, which would have ended up in the pump, had i not fitted one
#36
Robnut
-

- Noobies
-
- 66 posts
Stage One Kit Fitted
Posted 27 March 2007 - 07:59 PM
Nice project dude. Lookin excellent....
The alloy plate under the fuse box where did you get it from looks excellent...
Keep us posted...
The alloy plate under the fuse box where did you get it from looks excellent...
Keep us posted...
Edited by Robnut, 27 March 2007 - 08:00 PM.
#37
oli79
-
- TMF+ Member
-
- 144 posts
Mini Mad
- Local Club: none
Posted 27 March 2007 - 08:39 PM
Nice project dude. Lookin excellent....
The alloy plate under the fuse box where did you get it from looks excellent...
Keep us posted...
Hi there thanks for that, just been looking at your clubman-its flying along now, gonna look great that one when its done.The plate in mine was made to give a bottom to my modified dash arrangment, its just made from a sheet of 4mm or so aluminium and an hour with a pillar drill and an 1 1/2 hole cutter-and a file!!
#38
Robnut
-
- Noobies
-
- 66 posts
Stage One Kit Fitted
Posted 28 March 2007 - 06:56 AM
Yes the Clubby is coming along. Just at the stage where its going to cost me lots of dosh.... 
Will be worth it hopefully.
Have you got much more done yet??
Will be worth it hopefully.
Have you got much more done yet??
#39
oli79
-
- TMF+ Member
-
- 144 posts
Mini Mad
- Local Club: none
Posted 28 March 2007 - 04:29 PM
Yes the Clubby is coming along. Just at the stage where its going to cost me lots of dosh....
Will be worth it hopefully.
Have you got much more done yet??
Im just nearing the end of the lots of dosh stage! i hope

But dont worry it will be well worth it
Have got some bits done, but just so busy what with work and trying to meet my deadline and not let the finish quality down-dont worry more updates as soon as i have chance to sit and post
#40
oli79
-
- TMF+ Member
-
- 144 posts
Mini Mad
- Local Club: none
Posted 03 April 2007 - 10:18 PM
Right then, been at it nearly non stop - managed to get a full day in on saturday and have been on it every evening till about 10 o clock, and as such there are not a lot of pictures,however saturday got the doors back on and the glass back in,also got the front end on and started fitting some trim
 Picture_267240.jpg 1.23MB
187 downloads
Picture_267240.jpg 1.23MB
187 downloads
and as you can see also have now got some wheelarches
Picture_267242.jpg 1.22MB
169 downloads
didnt just put two on to fool you either!!
Picture_267246.jpg 1.22MB
77 downloads
Also stuck the bootlid on
Picture_267243.jpg 1.22MB
136 downloads
And put the fuel tank in to finish under the bonnet,its now all wired and plumbed up so let her tick over for half an hours or so and the fan came in and out as it should,no exhaust on it though bet the neighbours love me!!
Picture_267245.jpg 1.21MB
132 downloads
So this week have put the bonnet on,pins hinges ect so it all works, bad panel gap on the l/h side but couldnt get it any better for want of trying
Picture_267247.jpg 1.19MB
92 downloads
Also stuck the headlights in, although non of the front lights are wired yet
Picture_267249.jpg 1.21MB
73 downloads
These are my seats they are the ones out of the red ex demo car off the dvd-now the works racer so no doubt a few of you will have sat in these,after a root round at z cars chris has given me some black cushions for seat bottoms which i like the look of,also the blue ones had some misterious stains on them-did a few of you get nervous on your test drives!! After jet washing the seats and sticking the cushions in the washer(thats where the other set are )they have come up really well
Picture_267244.jpg 1.21MB
79 downloads
so stuck one of them in,you will also see the start of my harness bar which is a nice strong piece of chrome plated steel tube which i am holding in place with a couple of simple alloy clamps-sound familiar to anyone?
Picture_267254.jpg 1.21MB
181 downloads
like so-not a very good picture though
Picture_267253.jpg 1.19MB
104 downloads
and last but not least a temporary dashboard,minimalist i think you will agree,i may even need to point out there is an oil pressure light on there!!!
Picture_267256.jpg 1.2MB
113 downloads
So if everything goes according to plan i think i should make it, hope to see some of you at york on sunday
Picture_267240.jpg 1.23MB
187 downloadsand as you can see also have now got some wheelarches
Picture_267242.jpg 1.22MB
169 downloadsdidnt just put two on to fool you either!!
Picture_267246.jpg 1.22MB
77 downloadsAlso stuck the bootlid on
Picture_267243.jpg 1.22MB
136 downloadsAnd put the fuel tank in to finish under the bonnet,its now all wired and plumbed up so let her tick over for half an hours or so and the fan came in and out as it should,no exhaust on it though bet the neighbours love me!!
Picture_267245.jpg 1.21MB
132 downloadsSo this week have put the bonnet on,pins hinges ect so it all works, bad panel gap on the l/h side but couldnt get it any better for want of trying
Picture_267247.jpg 1.19MB
92 downloadsAlso stuck the headlights in, although non of the front lights are wired yet
Picture_267249.jpg 1.21MB
73 downloadsThese are my seats they are the ones out of the red ex demo car off the dvd-now the works racer so no doubt a few of you will have sat in these,after a root round at z cars chris has given me some black cushions for seat bottoms which i like the look of,also the blue ones had some misterious stains on them-did a few of you get nervous on your test drives!! After jet washing the seats and sticking the cushions in the washer(thats where the other set are
)they have come up really well
Picture_267244.jpg 1.21MB
79 downloadsso stuck one of them in,you will also see the start of my harness bar which is a nice strong piece of chrome plated steel tube which i am holding in place with a couple of simple alloy clamps-sound familiar to anyone?
Picture_267254.jpg 1.21MB
181 downloadslike so-not a very good picture though
Picture_267253.jpg 1.19MB
104 downloadsand last but not least a temporary dashboard,minimalist i think you will agree,i may even need to point out there is an oil pressure light on there!!!
Picture_267256.jpg 1.2MB
113 downloadsSo if everything goes according to plan i think i should make it, hope to see some of you at york on sunday
#41
dean_chad
-
- Members
-
- 733 posts
One Carb Or Two?
Posted 03 April 2007 - 10:52 PM
oli i noticed your using group 5 arches. Did you find they are very close to scrubing the wheel? did you modify them at all? what height have you got the bottom sill from the floor?
Colour is really nice with bits of black trim bud
Colour is really nice with bits of black trim bud
#42
oli79
-
- TMF+ Member
-
- 144 posts
Mini Mad
- Local Club: none
Posted 03 April 2007 - 10:59 PM
oli i noticed your using group 5 arches. Did you find they are very close to scrubing the wheel? did you modify them at all? what height have you got the bottom sill from the floor?
Colour is really nice with bits of black trim bud
Hiya dean, these are sportpack arches non genuine i think i said in one of my posts somewhere that i was going to use euro group 5 arches but there were just no where near wide enough to cover the wheels,dont know about straight group 5's though they may be different-i have my ride height set at the z cars basic setting at the mo-47 inch front and 46 inch rear from floor to roof gutter. Some black trim is trying to escape need to break out the super glue!
#43
Robnut
-
- Noobies
-
- 66 posts
Stage One Kit Fitted
Posted 04 April 2007 - 06:43 AM
Oli
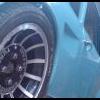
Lookin good. You have been busy. Love the rims. What size are those 7x13?
What clocks are going to be running. I am a little curious as the wife has TOLD me that what ever we do to the clubby it has to have a standard looking dash (no new zcars dash for me).
Is looking really good though mate.
Lookin good. You have been busy. Love the rims. What size are those 7x13?
What clocks are going to be running. I am a little curious as the wife has TOLD me that what ever we do to the clubby it has to have a standard looking dash (no new zcars dash for me).
Is looking really good though mate.
#44
oli79
-
- TMF+ Member
-
- 144 posts
Mini Mad
- Local Club: none
Posted 05 April 2007 - 12:54 PM
Oli
Lookin good. You have been busy. Love the rims. What size are those 7x13?
What clocks are going to be running. I am a little curious as the wife has TOLD me that what ever we do to the clubby it has to have a standard looking dash (no new zcars dash for me).
Is looking really good though mate.
Hiya rob thanks for that, hope the clubby is coming along,i really like the rims as well they are 7x13 revolites from MWS and for the mo i have yoko A539's on em, although you can get these in spilt rims from huddersfield mini spares up to 11" wide!! although the price gets a bit minty, you need at least 7" wide rims to get the power down.
As for the dash ive had a few minis and been into them for years but i have never really liked any of the fiberglass dashes and wanted to keep my car looking a bit traditional where i could.
Its a bit of a custom arrangment which i made up as i went along,chopped most of the old dash out and welded a straight 20mm steel tube across the car and then made some bottom slats from flat steel strip to mount the ally panel to and brace it to the car.The triangle structure around the steering column is made out of angle and braced to the bulkhead.The plywood template which is in now as my temporary dash is a braced fit at the top and there are 4 metal tags along the bottom to bolt the finished dash to.
If you want i can have a dig and see if i can post some more pictures to make it clearer just let me know.The finished dash is going to be covered in brushed S/S laminate and im using etb separate clocks - black faces with white pointers.
Took car to z cars this morning to get it ready fro sun, so its all up to them now
,only worring thing is sunday will be the first time ive ever drove it , need to find somewhere to bed the brakes in before hand 
#45
flamejob
-

- Members
-
- 297 posts
Mini Mad
- Local Club: TMF!
Posted 05 April 2007 - 01:30 PM
Dammit... why did I have to come across this thread whilst really busy at work!
Beautiful build
Beautiful build


1 user(s) are reading this topic
0 members, 1 guests, 0 anonymous users


