arche work and wheels
#1

Posted 18 December 2006 - 09:02 PM
#2

Posted 18 December 2006 - 09:48 PM
#3

Posted 18 December 2006 - 10:06 PM
but we need to know what wheels and arches you have
#4

Posted 18 December 2006 - 10:17 PM
I have the sportspack arches and 13 x 7 Superlite Alloy Wheels w.Tyres Mini Fitment SilB
#5

Posted 18 December 2006 - 10:27 PM
if you are going to go for 13 inch wheels it might be a good time to up grade the drum brakes to disks
a second hand 8.4 inch set up can be found quite cheeply
#6

Posted 19 December 2006 - 12:01 PM
#7

Posted 19 December 2006 - 01:28 PM
You also need to beef the suspension up to take into account the extra unsprung weight i.e heavy duty tiebars, uprated dampers etc. The tracking then needs to be sorted out to ensure that any tramlining is kept to a minimum.
#8

Posted 19 December 2006 - 03:36 PM
#9

Posted 19 December 2006 - 07:24 PM
#10

Posted 18 September 2008 - 09:19 PM
#11

Posted 19 September 2008 - 02:32 PM
Yes you will need to cut the arches. Its not so much the diametre of the wheels its the width that causes problems when steering.
I'll draw a diagram and get some pics up to show whats needed
#12

Posted 19 September 2008 - 03:12 PM
Heres my diagram - Bit basic but all i've got is MS paint on this laptop
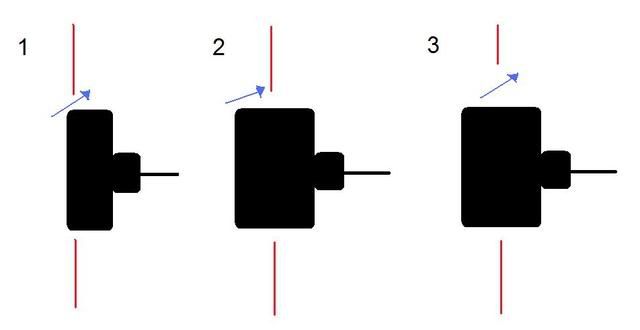
Right imagine thats the passenger side wheel. Number one is a standard 12x5 wheel. As you can imagine when you turn, the wheel will clear the wing and go into the inner wing area no problem. Number 2 simulates a wide 13x7" wheel; as you can see without cutting the wings away the tyre will hit the wing before it has chance to reach anywhere near full lock. So some of wing needs to be removed to allow the tyre to clear clear it to get decent steering movement. So in diagram 3 you can see that some of the wing material has been removed to allow the wider wheel to clear it and continue into the inner wing area.
By fitting wide wheels and spacers you will make this problem even worse and the wing will require more material to be removed.
Heres a few pictures of my mini when i fitted my wider wheels. I bought my car fitted with 12x6 wheels which required abit of wing material to be removed, so the previous owner had done that (quite poorly though) but i was fitting 13x7 wheels which required more material to be removed.
This picture is after about 3/4 of a turn on the steering wheel and as you can see the wheel hits the wing. I masked off roughly what material needed to be removed. You can also see where the previous owner had pretty much just hacked away at the wing and front panel to get clearance:
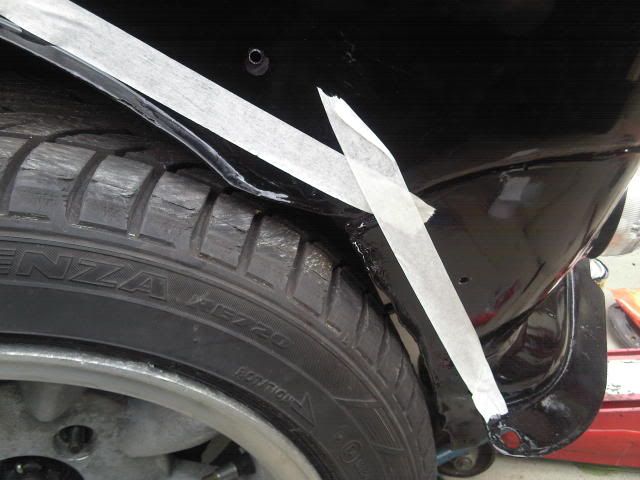
So next i marked off where i was going to make the cuts. You need to make a cut either side of the frontpanel-wing weld:
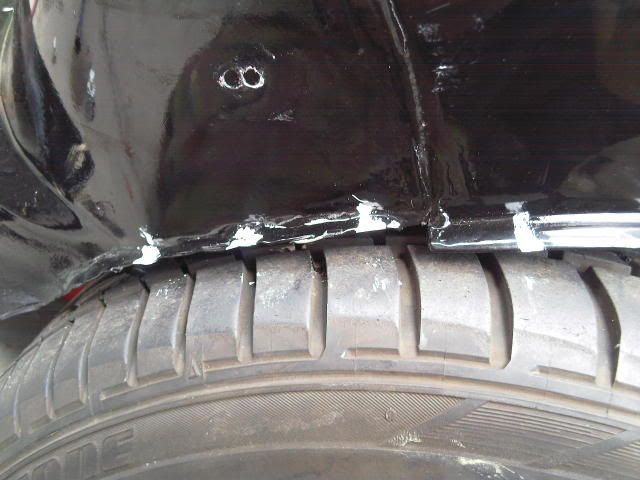
Then you need to use a hairdryer or heat lamp to warm the area you'll be making the cuts. This helps soften the paint to help it flex and resist cracking so much during bending. Then i used tin snips to cut into the lip and about half an inch into the wing. I then used pliers and molegrips to bend the material up and out of the way:
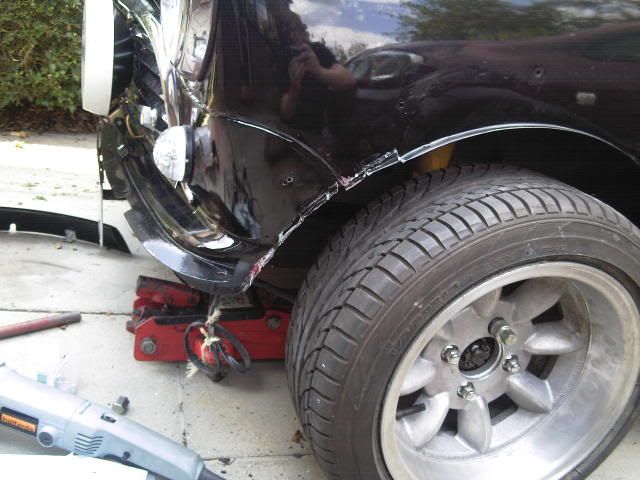
I kept on doing this until i was happy with the amount of clearance i had. This next picture was about 1/4 of a turn away from full lock but since i was planning on fitting some KAD steering rack limiters i left it at that. However if your not fitting steering rack limiters you will need to keep cutting into the wing until you get full clearance because it is an MOT fail if the wheel can come into contact with the bodywork at any point.
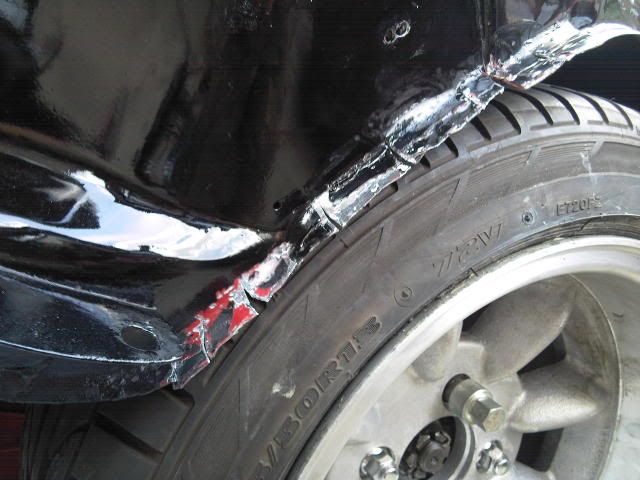
Then you need to get your grinder and grind back all the excess material to reform a new lip about 7mm wide - You must make a new lip as this is what gives the wing and front end all its strength! Then just go around with mole grips and pliers making sure you've got a nice 90 degree lip formed thats has a decent smooth curve to it. In this picture i'd chipped any bits of paint off that had cracked during the bending process and then simply painted abit of hammerite and underseal over any bare metal areas to stop them rusting - Since my cars black and this area will be covered by my arches it wasn't going to be noticeable. Its vital that you repaint the new lip thoroughly as this area will be sprayed with water when driving in rain!
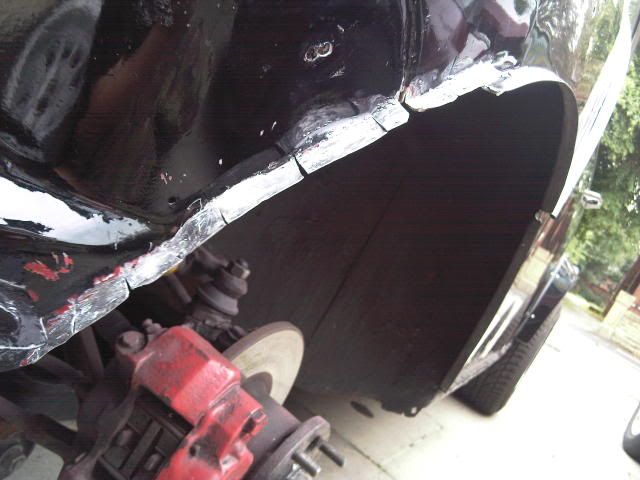
I've not got any pictures of the final result after painting but it came out pretty well. Heres the finished product - Any messy cuts are all hidden away under the arch:
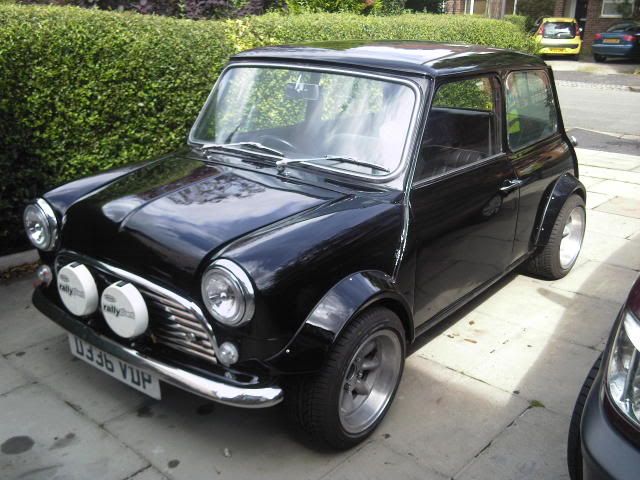
The way i did this is not the most professional way to do things. Apparently with the correct tools you don't need to make any cuts to bend and reform a new lip but without these tools i think the way i did things is your best bet to get a decent finish.
#13

Posted 19 September 2008 - 05:55 PM
#14

Posted 22 September 2008 - 10:09 PM
#15

Posted 23 September 2008 - 07:28 AM
1 user(s) are reading this topic
0 members, 1 guests, 0 anonymous users


