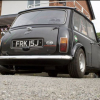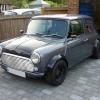
Monty the Rwd R1 engined tarmac eating Minus
#631

Posted 14 December 2011 - 04:39 PM
#632

Posted 15 December 2011 - 08:45 PM
http://vamosbatteries.com/
but it's not really powerfull enough and has poor performance in cold temperatures, so apparently a optima yellow top battery is gonna be the best bet. The YTS 4.2 is 870 amps but still 765 amps up to -18C and ways a whopping 19.5kilos. It is designed to be discharged and recharged too. There is a yts 5.5 with better power CCA (EN -18°C): 975 amps MCA (BCI 0°C): 1125 amps, but it weighs a tremendous 26.5 kilos!
http://www.optimabat...owtop-s-55.html
I'm waiting for responses on wether the power cap is realistically very usefull or not, it looks like 2.0 farad is a drop in the ocean for a starter motor.
#633

Posted 15 December 2011 - 08:57 PM
Surely they can help with the set up? Or have you gone freestyle and made one yerself?
#634

Posted 15 December 2011 - 08:59 PM
Help my blains, they's confused!
#635

Posted 16 December 2011 - 12:23 AM
Yes the cap is supposed to store enough power for it to soak up the initial start, I'm not convinced that it helped much.
It seems an average starter is about 1.4hp so 1kw ish. 1kW at 12v is about 83amps. 5 minutes is 1/12th kw/h. Therfore, in theroy, I would need an 83Ah battery to run for an hours worth of use (excluding the big current draw from initial start-up). To get 5 minutes use out of it is 1/12th of 83 which is 6.9Ah, which is feck all, but the battery needs to have the big numbers for the initial startup.
So the optima yellow top 4.2 is 55Ah and is designed for starting and heavy use - so I'm gonna go for that when funds allow, it being nearly chrimbo and all.
The man from vamos batteries, that make the lithium battery, has been very helpful. His current battery is 12Ah and he is developing an 18Ah one. The 12ah weighs 2.3 kgs and is pretty small, so a bank of 3 18Ah's lithiums would be great if money was no object. They drop in power to all most nothing when cold tho (around 0 degrees). But it's pretty warm in my mini with the engine going!
#636

Posted 17 December 2011 - 06:31 PM
Decisions!!!!!
#637

Posted 23 December 2011 - 07:14 PM
First, you have to make the push rod hole bigger, and as you can see I have chopped some of the standard bracket away to (the braket was later ditched but oh well)

The push rod was a much easier issue than I was anticipating, because you can use the standard mini push rod, albeit with a10mm approx spacer, which in this case I just rounded off a nyloc nut on the bench grinder and inserted it into the tube on the master cylinder:

The mini pushrod then sits within the tube and slides all the way up the, and with the spacer inside it is a perfect match up to get the clevis pin through on the pedal box.

Apart from the fact that the metro cylinder can't bolt down fully yet because the metro reservoir doesn't clear the mini one. Which is why the bracket got ditched, in order to lower the mini m/c and I will make a spacer to raise the metro m/c a couple of mm. But I did manage to plumb the brakes in with bits I had lying around and it does clear the bonnet!

The thread on one of the studs striped tho, which is annoying, but I mightneed longer ones anyway once the spacer is in place.
Edited by Alburglar, 23 December 2011 - 07:19 PM.
#638

Posted 23 December 2011 - 07:40 PM
#639

Posted 28 December 2011 - 07:32 PM
#640

Posted 30 December 2011 - 08:27 PM
I had another master cylinder tucked away, so I dug it out today to see if it came with a pushrod. The difference is quite obvious, the one I had fettled with must have been from a late rover metro and is much larger than the other one which is a lot better fit and must be from an austin metro:

The austin one is a much closer fit and just needed the bolt holes widened:

It would fit in the standard mini master cylinder/engine steady bracket, if you shave a little bit off the casting on one lug, but I wanted to remake the bracket with an extra place to fix my earth straps:

It fits with the mini brake m/c turned backwards and used as the clutch m/c. The standard mini push rod still fits but it will need another spacer inside the tube, as before, I will sort that once my new gaskets arrive.

#641

Posted 31 December 2011 - 11:19 AM
Regards Blue
#642

Posted 31 December 2011 - 03:37 PM
#643

Posted 01 January 2012 - 10:02 AM
Mines kind of finished. Still needs fully setting up when I find somewhere good enough.
Regarding you reverse problem. I'm sure a good car battery will be enough to drive it backwards. Are you sure there's not a dirty connection somewhere or maybe a knackered motor. A starter motor will drive a car along when in first gear so the only difference is your not using a gearbox
I don't think the power caps make a difference as they are designed for a lot less current.
#644

Posted 01 January 2012 - 08:07 PM
My cousin has a small Motorsport firm in Folkestone. He builds engines for Connaught most of the week and does his own work building race cars a couple of days a week. He is going to set mine up once it's mot'd. If you want I'll pm you his number.
If not, I can highly recommend gerald dale in Hastings. - google him he is a genius on the rollers too. If not bill Richards (ashford) has a laser setup, but he may not be keen on doing a bike engine minis seeing as he is a mini engine guru.
Let me know how you get on.
Edited by Alburglar, 01 January 2012 - 08:10 PM.
#645

Posted 01 January 2012 - 08:19 PM
1 user(s) are reading this topic
0 members, 1 guests, 0 anonymous users


