Jump to content


Photo
- - - - -

1977 Mini Leyland 850


  • Please log in to reply
16 replies to this topic

#16 siaugary

siaugary

    Learner Driver

  • Noobies
  • PipPip
  • 13 posts
  • Location: Lede

Posted 13 January 2025 - 06:44 AM

After a long summer, I started back on the mini.


Did some rust repairs on the sills, and my engine came back from the machine shop. Had to bore the cilinder walls because of too much play, oversize pistons it is

For the rest everything is sended out for powdercoating.


#17 Blumeanie

Blumeanie

    Stage One Kit Fitted

  • Noobies
  • PipPipPip
  • 91 posts
  • Location: Baja California

Posted Yesterday, 05:09 PM

Congratulations on getting the mini going again!

I'll be sure to follow your progress!

I have not seen a mini torn apart before - I do not have minis anywhere close to me at all!

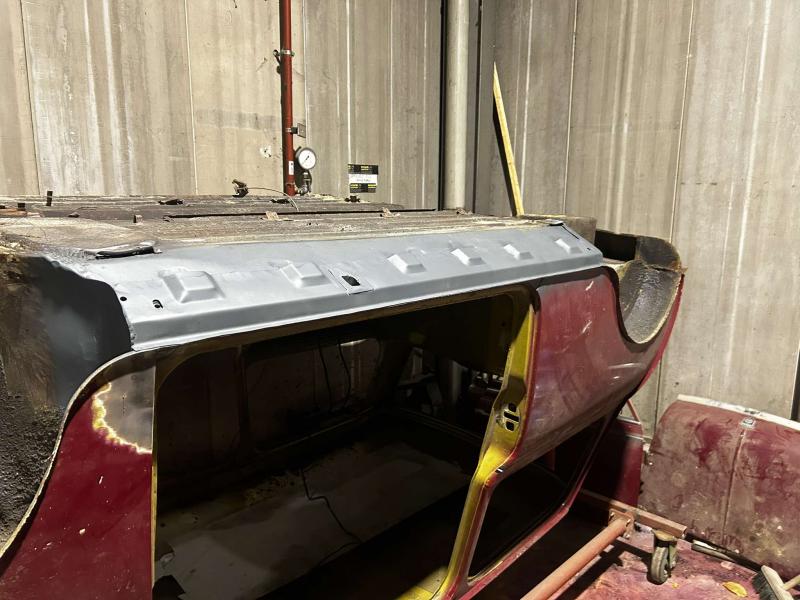
-  Can you please show me what the structure is like behind the outer sill (the part painted in silver with the vents? - (in the picture below).

I am curious about what the space behind the sill vents look like?
Is there somewhat of an empty 'tunnel' there between the sill and the floor - Is this correct?

Is the first and second pictures in your post above looking at this area without the piece with the vents?

I've been thinking of spraying some lanolin based wax product into that space through the vents to coat that area and ensure moisture is kept away. I definitely find myself in dry weather - but just to make sure that enclosed space has a barrier against any moisture...

I imagine there is nothing in there that I can damage...

- Any thoughts from others on this? I'm sure many of you are very familiar with this part of a mini, I've never had access to this part in a mini!
And I have not found  much insight into this void in any diagram I've seen.


post-136946-0-74747300-1736750566.jpg


Edited by Blumeanie, Yesterday, 05:17 PM.


1 user(s) are reading this topic

0 members, 1 guests, 0 anonymous users