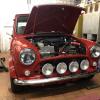
So this is a weird one, but I keep having issues with the green pipe on the fuel trap snapping off. I've had probably 3 of them break in the last 2 years. It seems if I touch it at all, it snaps. The most recent one snapped the first day I drove with it in. I even tried to make a point this time around to be mindful of how I routed the vacuum pipe to the ECU to try and not put pressure on the fuel trap. Is this just me? Is there a better quality part than the MiniSpares one? I feel like I need to buy multiples every time I order one.

Fuel Traps Keep Breaking
#1

Posted 23 April 2023 - 05:41 PM
#2

Posted 23 April 2023 - 10:41 PM
I’ve had this exact problem. Turns out the upper engine steady bush had worn. The one next to the brake master cylinder.
under acceleration the engine rocks back and breaks the fuel trap against the bulkhead.
if you put your hands on the engine and try and rock it back and forth you’ll see.
I replaced the engine steady bush. Now the engine is solid and no more broken fuel trap.
hope that helps.
#3

Posted 24 April 2023 - 01:27 AM
I’ve had this exact problem. Turns out the upper engine steady bush had worn. The one next to the brake master cylinder.
under acceleration the engine rocks back and breaks the fuel trap against the bulkhead.
if you put your hands on the engine and try and rock it back and forth you’ll see.
I replaced the engine steady bush. Now the engine is solid and no more broken fuel trap.
hope that helps.
Oh...that's definitely something worth checking. I also just feel like the green pipe on the trap is super fragile. Even just pulling the vacuum pipe off the fuel trap has snapped that before. I guess it could have already been weakened from engine flex though.
#4

Posted 02 May 2023 - 11:12 PM
Ok, bumping this back up. Put one one, it made it half a mile before snapping, barely any throttle. Got a new one, routed vacuum pipe differently to see if maybe that's pulling on it, made it almost 2 days, one throttle pull, then it cracked. I've pushed on the engine while it's in neutral, don't notice much movement front to back. Engine steady bushes were replaced 16,000km ago.
*edit*
I do have the fuel trap clipped into the little bracket that holds it, but I'm debating not using that anymore. Wondering if it is just supported by the vacuum pipes if it would fare better.
Edited by RealSlow, 03 May 2023 - 12:02 AM.
#5

Posted 04 May 2023 - 10:11 AM
Manufacturing standards have dropped on many “Rover” parts of late so it wouldn’t surprise me that these are more brittle than they used to be.
#6

Posted 21 August 2024 - 01:15 AM
So, I tried to glue the green pipe back together…and it melted! I blew a little car in it and it popped the top off, only the green pipe had melted to the top. Really wild. Clearly the green pipe is made of a pretty terrible material. These traps are basically a tic tac box with one pipe at the very bottom and the other extending nearly to the top. Pretty basic. I drilled out the green pipe and glued in a piece of oil pressure pipe. Heading out on a 500mile trip in less then 24 hours so a temp fix was needed.
Edited by brivinci, 21 August 2024 - 04:11 AM.
#7

Posted 22 August 2024 - 12:52 PM
Interesting reading, I was debating replacing mine as its been on the car for the past 22 years. Based on this thread am best keeping it in place.
off topic but the quality of spares is either terrible or completely different, I replaced my wiper arms after the splines were pretty much gone.. the new ones are much chunkier meaning they catch when you lift the bonnet. ugh!
#8

Posted 28 August 2024 - 10:53 PM
Now that I have seen the inside of these, I would suggest giving is a cleaning. Spray something (that won't melt plastic) into the green pipe, cover both and give it a good shake. Then blow low pressure air through the green pipe to flush out. It's just an empty cavity in there but could get some fuel built up. Just make sure it's LOW air pressure and that both outlets are open on the pipes so no pressure builds up inside.
#9

Posted Today, 04:43 AM
So, I took the old one and the new one and first glued the tops all the way around. Left them under heat to cure and then added sealant around the seam. I am leaving tomorrow for a 500 miles round trip and have them drying inside and installing in the morning. Fingers crossed.
1 user(s) are reading this topic
0 members, 1 guests, 0 anonymous users


