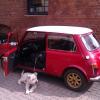
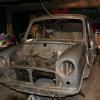
That’s good to know. Thanks for that.
I'm in North Lincs. I used a car transporter from the Island recommended by Ben who was great to deal with and will be getting him to return the car when it's finished.
Wow! You travelled all that way. I’ve been following a few of Ben’s restoration threads and thought how good would it be to get mine done by him, but then thought No Derbyshire is too far. Might have to get him to quote me.
I know. Well worth having the car transported 260 miles.Great work Ben you are a magician Mike has made an excellent choice in using you

Rover Mini Mayfair Restoration @ Mill Road Garage Iow
#46

Posted 05 August 2021 - 04:47 PM
#47

Posted 26 August 2021 - 02:18 PM
Finally, I have found time to update this thread.
To finish the front end, I just needed to spotweld the tabs and ears to the inner wings both sides.

Now it's the turn of the n/s sill.

First I located and marked up the spot welds

And then removed the sill

Before the new one can go on, there are some repairs to do on the floor.
I started with this hole at the back

I removed the slinging bracket and cleaned the area.

And then cut away a section of the heelboard for access

Next, I cut away the corroded section of floor


With that done, I made up a new section of floor to go back


And then finished up by welding back the removed section of heelboard

Then onto the next hole


And then the final part to repair was the front inner sill/floor pan which had corrosion and jacking damage


After straightening out the jacking damage, I removed the slinging bracket and cut out the corroded piece of inner sill and lower flitch

Replaced the piece of inner sill

And then started cleaning up ready for the outer sill.
After starting to clean up the seam of the step, I discovered more corrosion than anticipated so will now be replacing this step too.

All cleaned up now

And the new sill prepped

Cheers
Ben
#48

Posted 26 August 2021 - 02:27 PM
Now to fit the sill.

And finish up by replacing the section of lower flitch


Cheers
Ben
#49

Posted 26 August 2021 - 03:34 PM
I never cease to be amazed by the way your welds seem to vanish leaving no sign that there was anything other than new metal there all along!
#50

Posted 26 August 2021 - 07:11 PM
Edited by MikeRotherham, 26 August 2021 - 07:19 PM.
#51

Posted 26 August 2021 - 07:30 PM
I was hoping that side would be in a better condition than you found it Ben but never mind sorted now. What surprised me in the places that Rover applied the rubberised anti chip coating, it was very difficult to remove but when removed I discovered rust had had no difficulty getting behind it and creating havoc.
All of the rust I found that side has been caused by moisture traps. Usually it results in needing an inner sill or even a half floor because it spreads so easily once it starts.
We got to yours in plenty of time luckily so only needed those bits doing.
It was a shame about the step that side but the rubber finishing strip had obviously trapped dirt and moisture in which crept into the seam and once that happens, it's just not worth trying to repair when a replacement is so cheap and straightforward to do.
I cam confirm now that the floors are completely rust free now and long may they stay that way.
Cheers
Ben
#52

Posted 26 August 2021 - 08:20 PM
Amazing work!
#53

Posted 26 August 2021 - 10:16 PM
More great work so far there Ben really do enjoy seeing these post's
hopefully you can attack mine at some point
#54

Posted 27 August 2021 - 11:09 AM
Those pictures look very familiar to me. The rust holes that is, not the quality of workmanship in repairing that is.
What 'cheap' doorstep will you use? I found that the profile of the non genuine (MS16) is quite different to the original while the only available BMH panel (HMP441012/13) isn't exactly cheap.
Cheers,
Christian
#55

Posted 27 August 2021 - 11:51 AM
Watching with great interest as I have bought the MS16 with the same questionable profile fitment. I'm about to order the hmp44012/13 in order to get decent fitment here. Any other alternatives are more although at one side the A-pillar is not solid near the Door check arm hole.MaximMini, on 27 Aug 2021 - 1:09 PM, said:
What 'cheap' doorstep will you use? I found that the profile of the non genuine (MS16) is quite different to the original while the only available BMH panel (HMP441012/13) isn't exactly cheap.
Cheers,
Christian
Edited by Johnmar, 27 August 2021 - 01:15 PM.
#56

Posted 27 August 2021 - 02:35 PM
Hi Ben,
Those pictures look very familiar to me. The rust holes that is, not the quality of workmanship in repairing that is.
What 'cheap' doorstep will you use? I found that the profile of the non genuine (MS16) is quite different to the original while the only available BMH panel (HMP441012/13) isn't exactly cheap.
Cheers,
Christian
I shall be using the heritage panel.
Yes it's £100 with the vat but I don't consider that to be expensive when once fitted, it will look perfect and fit correctly. Especially when you compare the cost of it against repairing what was there.
The non genuine panel is OK in my opinion, not perfect but certainly usable if on a budget.
The problem here is that it does not have the drainage channels in it which means it will not match the other side.
I also found that if using m machine steps, the right hand ones are better than the left. The folds are more crisp.
Like with most of the non gen stuff, it's hit and miss. One time you get a panel that does not fit well and the next, one that fits and looks perfect.
Cheers
Ben
#57

Posted 27 August 2021 - 02:50 PM
Aren't Magnum steps designed or pressed to be able to fit over the top of the original steps ???
#58

Posted 27 August 2021 - 03:47 PM
Aren't Magnum steps designed or pressed to be able to fit over the top of the original steps ???
Probably!
I have seen them fitted over the top. I have a mini jn at the moment which is the next restoration after this one and It looks as though that's been done. Lol
#59

Posted 27 August 2021 - 04:47 PM
Thank you very much for sharing your thoughts here. The costs for replacement panels certainly weight differently when you have to pay someone to do the work.
Cheers,
Christian
#60

Posted 28 August 2021 - 09:50 PM
Ben, you are definitely a magician, making the rust spots disappear and the new metal blend in seamlessly! Fantastic work!
3 user(s) are reading this topic
0 members, 1 guests, 0 anonymous users
-
Bing (2)


