#451

Posted 27 May 2022 - 06:43 PM
#452

Posted 29 May 2022 - 05:04 PM
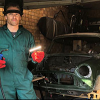
I did a bit of testing with the spot welder, and these are the results:
I started with these settings: 0.8mm+0.8mm and mid level for the time

That didn't get good penetration and the weld split off without peeling


Then I maintained the thickness, but increased the time to the maximum

But again, it didn't work as it should

I decided then to increase the thickness to 1mm+1mm and the time to middle settings. I noticed more spark when doing the welding

And this time after pulling quite a bit, it worked perfectly. A nice peeling one!

After that, I decided to try one more time with the same settings, but with the pieces previously painted with zinc primer

Nice spot weld

And perfect peeling

I believe this is a good result, but please let me know if you think otherwise.
Thanks.
Victor.
#453

Posted 29 May 2022 - 05:39 PM
That's exactly right Victor.
#454

Posted 29 May 2022 - 06:58 PM
#455

Posted 29 May 2022 - 07:11 PM
Thats simply awesome.
#456

Posted 29 May 2022 - 07:39 PM
Cheers guys, appreciate the feedback!
Indeed Colin, it is so fast and clean to do this type of welding. I want to try it on the car ASAP!
Let's see what the long weekend next week allows me to do...
Victor.
#457

Posted 02 June 2022 - 01:42 PM
So back to the project today, and decided to continue working on the wheel arch, where I left it the last time. I have to say that this is the most painful taks I have done since I started my project. Removing the old wheel arch is very difficult due to the way this part is welded to the side of the wheel arch (where the shock absorver is mounted). On top of that, access is pretty tight and difficult. Anyway, some photos below:
First thing is to remove the rest of the old wheel arch along the internal side

I drilled the spot welds to start with, and then I started peeling off the metal


The rest of the old wheel arch needs to be removed with the belt sander

After repeating that along the edge, the whole thing is done. I cut a hole by mistake at the top, but I will fix that later once the new part is in place

There's a bit of metal around the shock absorver mount, so I did that next

To have better access, I open a hole in the quarter panel, which is going to be replaced anyway

Then, I removed the spot weld in the stiffener and folded it to make space for the new part

Next thing was to try fit the new wheel arch. The big problem here is how to get it in position with the quarter panel in the car. The wheel arch lip needs to go over the area I cleaned up on the previous photos. The shock absorver mount is in the way, plus both ends with the boot floor and stiffener. A real pain in the...
So I tried to fit it, just to understand the setting out, without putting the internal lip in position. I aligned both edges of the new part, with the existing

On this side, the new panel is aligned, but there's a big gap with the floor panel. Not sure if I'm doing something wrong...


This side is also aligned, at it seems to be in the right position

But not sure if this gap with the quarter panel is correct

In the middle seems to run parallel to the quarter panel arch

Not sure if this hole in the new panel needs to be aligned with something else?

This is how it looks from inside. Yes, I know the lip of the new panel, needs to go over the old wheel arch panel. That is the main problem at the moment...

The area around the shock absorver mount

Overall view and detail of the aligment


So, I have a few questions here:
1 - Is the above the correct aligment of the new part?
2 - What about the gap with the floor panel at the rear?
3 - How can I place the new panel in its right position (lip over the old part), without removing the quarter panel?
Thanks in advance. Not sure if someone has done this before, but a link to a post on this forum, or YouTube video will be greatly appreciated.
Victor
#458

Posted 02 June 2022 - 04:07 PM
Hmmm.
Can't remember if I advised you before that it's much better to replace the entire tub..?
As for alignment. It needs rotating anticlockwise.
The hole in the lip isn't for anything.
As for lipping it over, just cut your quarter panel off if it's being replaced then fit the new one after doing the arch tub
Cheers
Ben
#459

Posted 02 June 2022 - 06:55 PM
Hi Ben,
Yes, you probably did but I think it was too late. It was by the time I got my new boot floor in, that then was welded to the floor. Also, the whole tub assembly is quite expensive, and my tubs were in fairly good condition... Anyway, it is done now ;)
May I ask if it is there any reference in relation to how much I need to rotate the wheel arch? At the moment it is aligned on both sides, so I guess it needs to be a bit short on the right hand side, which will be sorted then with the closing panel in the companion bin?
Okay, noted I was afraid of cutting the quarter panel off and loosing the reference for the arch lip. Now everything makes more sense.
Thanks for the advice. I will give it a go tomorrow.
Victor.
#460

Posted 02 June 2022 - 07:02 PM
Try the closing panel in that sits forward of the arch tub, over the top of the rear subframe mounting panel and flush with the edge of the boot floor.
Fit that and that will give you a good reference for where the arch tub should be.
Also, try on the valance closing panel even if you bolt it in with the trunnion mounting holes, that will give you another reference point.
At the end if the day, it's just a curved sheet of metal so if it closes up the gap, it's job done.
It's not detrimental to anything
Cheers
Ben
#461

Posted 02 June 2022 - 08:01 PM
Lovely, thanks Ben. I would do that.
#462

Posted 03 June 2022 - 04:45 PM
Quick update: I removed the quarter panel to see if I can fit the wheel arch. The access is much better, but I can't find the reference I need, so I will order the closing panel and the valance as Ben suggested.
In the meantime, I decided to clean the area for the new quarter panel. Some photos:
I started like this

And then quarter panel off. I cut it initially way under the window.

Then I saw lots of rust at the window edge, so I decided to clean that area up

I drilled the spots welds, those that were visible in between the rusty areas

And then removed the piece, waiting for a good clean up. There are a couple of sections missing, but I will do those once I get the new quarter panel


I left the quarter uncut intentionally on both sides of the window, as I'm unsure how far the repair panel gets to. Once I receive it I will finishing cleaning the area.
And that was all for today.
Enjoy the weekend!
Victor.
#463

Posted 10 June 2022 - 11:14 AM
Fresh metal received today. It looks like I will be able to start using my new spot welder very soon! :)
Quarter panels, I ordered both to save on delivery costs...


Rear valance and closing panels

I'm stil waiting for the wheel arch closing panels, which I'm hoping to receive tomorrow.
Victor
#464

Posted 10 June 2022 - 04:05 PM
Quick question: I need to remove the remaining of the quarter panel on my Mini. I have cleaned up the area where the quarter panel folds into the B-post, but I cannot see any spot welds.

How is that part fixed to the B-post and how can I get it removed?
Thanks in advance.
Victor
#465

Posted 10 June 2022 - 05:40 PM
Also tagged with one or more of these keywords: roundnose
Projects →
Mini Saloons →
Mini Cooper Project - Finally StartsStarted by piphatch , 08 Jan 2025 |
|
|
||
Projects →
Mini Saloons →
1965 Austin Mini Restoration - Canadian Mk1Started by DoubleEh , 14 Nov 2022 |
|
|
||
Projects →
Mini Saloons →
Project Joe - 1991 Mini Mayfair 998Started by Eggers , 02 Jun 2022 |
|

|
||
Projects →
Mini Saloons →
Mpi Dashboad ProblemStarted by mikeprez , 22 Dec 2021 |
|

|
||
Projects →
Mini Saloons →
1978 Oew - Willy The MiniStarted by smalltreegrower , 11 Nov 2021 |
|

|
1 user(s) are reading this topic
0 members, 1 guests, 0 anonymous users


