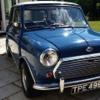
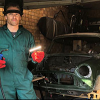
Good job the wheel's going - not the most stylish!

Mm 1987 Mini Advantage @ Mill Road Garage Iow
#376

Posted 20 April 2021 - 04:51 PM
#377

Posted 21 April 2021 - 07:35 AM
Looks spot on - it'll have some range with those tanks.
Needs a Mk1 boot handle!
#378

Posted 21 April 2021 - 07:53 AM
Needs a Mk1 boot handle!
I agree! To go to all the effort of MK1 lights, number plate and badge, seems a shame not too add a MK1 handle....
#379

Posted 21 April 2021 - 09:19 AM
Needs a Mk1 boot handle!
I agree! To go to all the effort of MK1 lights, number plate and badge, seems a shame not too add a MK1 handle....
Thats something that can be added if necessary.
It would look good
#380

Posted 23 April 2021 - 05:25 PM
Not much to show the last few days on this.
I spent a not inconsiderable amount of time repairing the main wiring loom.
It had a lot of things added in, broken wires replaced with random other wires joined on with scotchlocks and lots of corroded bullet connectors.
I've now gone through the whole loom, replaced and repaired where needed and fitted new soldered bullet connectors and spade terminals throughout.
I finished it off by rewrapping the front section that lives in the engine bay.
Once that was all installed, I cleaned and wired up the new centre binnacle set and fitted the lower dash rail cover and switches

I refitted the rebuilt wiper motor and tested it. All good

Next I sandblasted and painted the original steel headlamp bowls and then repaired the headlamp looms with new spldered bullet connectors and the joiners before fitting them to the car

I tested what electricals i could at this point. The hazards work but the indicators do not. I've diagnosed that as a faulty hazard switch and a new one is in its way.
The interior light works in the on position but not with the door switches. I'll investigate that later.
I love a sealed beam

Next up, into a 2 poster for some mechanicals.
I refitted the selector box and then the rc40

Rebuilt the driveshafts and installed those too

And then put on the brake calipers and pads


Rc40 looks sweet

I finished up by filling with oil and then spinning it over to build up the oil pressure. Its all good and there are no leaks so far.
Cheers
Ben
#381

Posted 23 April 2021 - 08:25 PM
#382

Posted 24 April 2021 - 05:14 PM
#383

Posted 26 April 2021 - 12:09 PM
Nice work Ben, as always! One question: isn't it cheaper to replace the entire wiring loom instead of repairing the existing one?
#384

Posted 26 April 2021 - 04:56 PM
Nice work Ben, as always! One question: isn't it cheaper to replace the entire wiring loom instead of repairing the existing one?
Thanks.
It would most certainly have been easier to replace the loom but by the time I had repaired the obvious bits, I was a bit too far invested into it to give up and order a replacement.
Apart from the bad repairs, it is otherwise perfect and now repaired, will be great.
Cheers
Ben
#385

Posted 26 April 2021 - 08:29 PM
Looks good Ben. If it were mine, I'd replace the clutch master cylinder for a tin can type and either a braided or original oil pressure pipe, especially as the owner has gone to the trouble of genuine seal beams.
Paul
#386

Posted 27 April 2021 - 12:08 PM
Looks good Ben. If it were mine, I'd replace the clutch master cylinder for a tin can type and either a braided or original oil pressure pipe, especially as the owner has gone to the trouble of genuine seal beams.
Paul
Yup, all valid points Paul.
As for the oil pressure pipe, that was only run like that temporarily to check the oil pressure.
I have no rerouted it in a way where it is not visible.
Cheers
Ben
#387

Posted 27 April 2021 - 05:40 PM
Nice looking car and great work mate. I'm following!
Victor
#388

Posted 27 April 2021 - 07:49 PM

I did run the engine briefly which im pleased to say fired straight up once the fuel had pumped up.
Cheers
Ben
#389

Posted 28 April 2021 - 03:04 PM
Credit where it's due, that's a lovely job.
#390

Posted 28 April 2021 - 08:49 PM
The heater is installed and plumbed in, the clevis pins for the brake and clutch are in and the cooling system is filled.
I put a couple more gallons of fuel into each tank and turned the key. it sprang into life and ticked over beautifully however it would not rev and if you gave it choke, it would cut out.
A few basic checks and it was no different so I pulled the carb and checked it over.
I removed the jet and blew into it, there was slight resistance and then fuel splurted out.
Obviously it was partially blocked.
A bit of something must have made it past the filter.
Once back together, it started right up and revved cleanly and crisply.
Once I can get it into the other workshop, I'll put it on the emissions tester and get the mixture dialed in properly.
Once run up to temperature, I checked and topped up the coolant and shut it off.
One thing I did notice prior to discovering the blocked jet was the ignition light was staying on and the alternator wasn't charging, however this seems to have woken up and resolved itself and is working perfectly.
Next I bled the clutch and brakes and run it back and forth in its bay. Everything feels great. Nice clutch pedal with a great bite.
I'm really impressed with this engine considering its long lay up.
Cheers
Ben
Edited by Ben_O, 28 April 2021 - 08:51 PM.
1 user(s) are reading this topic
0 members, 1 guests, 0 anonymous users


