Oh dear...

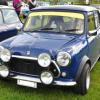
1983 Mini City
#586

Posted 01 December 2024 - 05:25 PM
#587

Posted 07 December 2024 - 04:20 PM


CV joint removed and shaft cleaned up. Grease had a green tinge to it, so definitely had water in it. CV joint didn't look to be damaged, but new one put on.

Inner clip that came with the kit suits the bigger size driveshaft, but had some other clips there.
Hub is built up with new ball joints and Timken bearings, ready to be put in once I get the inner joint cleaned and re-greased.

#588

Posted 13 December 2024 - 10:39 PM

Pot joint has been cleaned and ready to have a new boot and greased. Hopefully get that all put back together this weekend.
#589

Posted 16 December 2024 - 04:05 PM
Did you use self-tapping screws for the opening window latches? I found the screws can go into the rear wiring loom that follows the pillar behind on the nearside. I only discovered this when my new rear loom got ripped to shreds as I tried to fit it.
At least blunt the screws or remove them before removing/replacing the loom at any time.
#590

Posted 16 December 2024 - 07:27 PM
#591

Posted 25 December 2024 - 06:42 PM

Hopefully get back to it soon, get it ready for the road as early as possible 2025!
#592

Posted 11 January 2025 - 04:38 PM

Next up is check the drivers side CV boot and get the drivers side quarter window put in.
#593

Posted 02 February 2025 - 05:47 PM
First up was to reattach the bonnet, spot lamps, new alternator and oil filter.

Then put some body trim on back of wheel arches, then offered up a set of 70's Italian mudflaps, very much inspired by Speedwell Custom Blue @Spherix. A small modification needed on the back of the wheel arch to allow it to sit flatter. They came with brackets that attach to the seam and subframe, but only if your running without arches or spacered drums. Attached with rivnuts into valance closing panel.

Then fitted a refurbished chrome passenger door handle, freed up the internal handle mechanism as it had been sticking and not returning to it's closed position.

Need to added some cavity wax before putting door card back on.
Edited by colinf1, 02 February 2025 - 07:19 PM.
#594

Posted 09 February 2025 - 05:53 PM

Rivet nuts were a pain to get in as had to do them without the tool as it's too long to fit in the wheel tub.
Happy with alignment of both sides

Passenger door card and furniture put back on also. List is getting smaller... slightly smaller
#595

Posted 16 February 2025 - 05:34 PM

Engine oil topped up and spun engine over, just sparkplugs to gap and replace, then some fresh petrol and go for a start.
Noticed some corrosion on the alloy body of the new distributor, and on the rotor cap retaining clips, looks like all the zinc plating is gone off them already!

Need to finish wiring up the spot lamps and add a switch, or do I just wire them to the main beams?
#596

Posted 16 February 2025 - 09:01 PM
Here you’re only supposed to have them on with main beams, so you have a switch for the spots, then a signal wire that the main beam is on before they’ll turn on
#597

Posted 16 February 2025 - 10:50 PM
I've wired a switch with three positions (Lucas Mark1/2/early3 type)
OFF altogether for daytime running (so you don't flash people around town with your spot lamps just your headlamps - I feel that's a bit naff personally - also good for MoT time when they are checking the headlight aim)
ON switched by headlamp main beams for general use at night
ON independent but I have hardly ever used that - occasionally round the back lanes at night where there is little to no traffic and I might dip the headlights to illuminate closer to the car
#598

Posted 18 February 2025 - 10:15 PM
A long/joiner M8 nut...a through hole drilled and tapped suit M6...

Pop the bolt through the tab hole, screw on the long nut and point threaded hole at 45degrees...

The attach the clamping bracket with two M6 countersunk screws, tighten up but no need to go mad...

Securely held in place. Just need to get a cover for that positive clamp.
Edited by colinf1, 18 February 2025 - 10:17 PM.
#599

Posted 23 February 2025 - 07:30 AM

Also changed the fuel filter. A few we chips on the underside to touch up and thats it ready to for the road (well a test drive anyway)
#600

Posted 28 February 2025 - 08:12 AM

And opened...

A few tweaks to do, had initially tried magnets to hold the bulkhead cover on, but the side panels cause it to move down slightly and it pinch's the spare wheel, but I think it's a good effort so far.
2 user(s) are reading this topic
0 members, 2 guests, 0 anonymous users


