Jump to content


Photo

Rear Back Panel Lower Replacement


Best Answer Homersimpson , 02 June 2020 - 04:14 PM

The seam is roller welded (like a continuous spot weld) so you can drill it out, the only way to do it is to cut close to the seam with a cutting disc in the grinder and them clean the seam up with a flap disc/fibre disc to get rid of the unwanted layer of metal.


You need to be careful to avoid going through both seams.

Go to the full post


  • Please log in to reply
9 replies to this topic

#1 Mayfair94

Mayfair94

    Stage One Kit Fitted

  • TMF+ Member
  • PipPipPip
  • 63 posts
  • Location: Horsham

Posted 02 June 2020 - 04:07 PM

Hi,


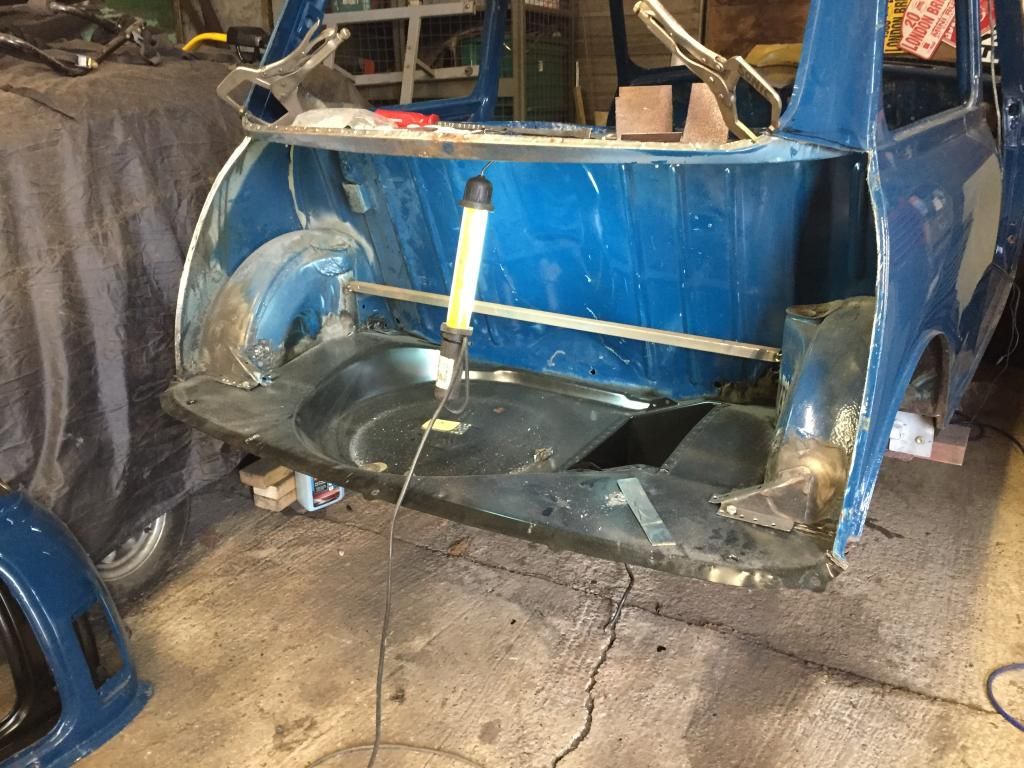
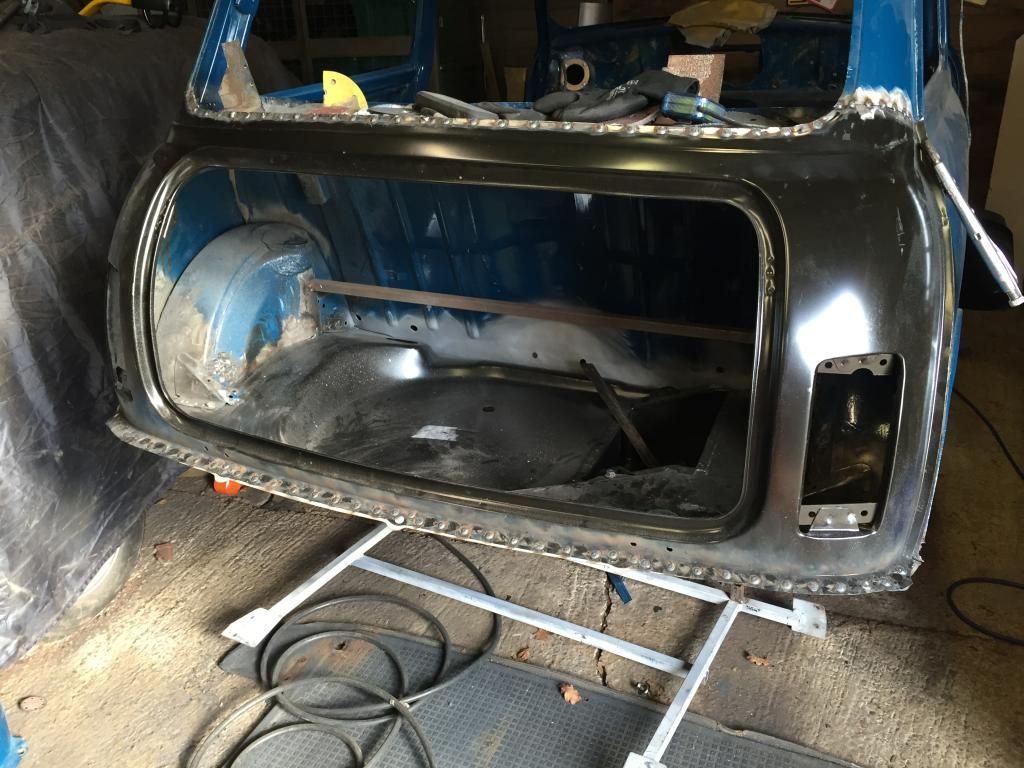
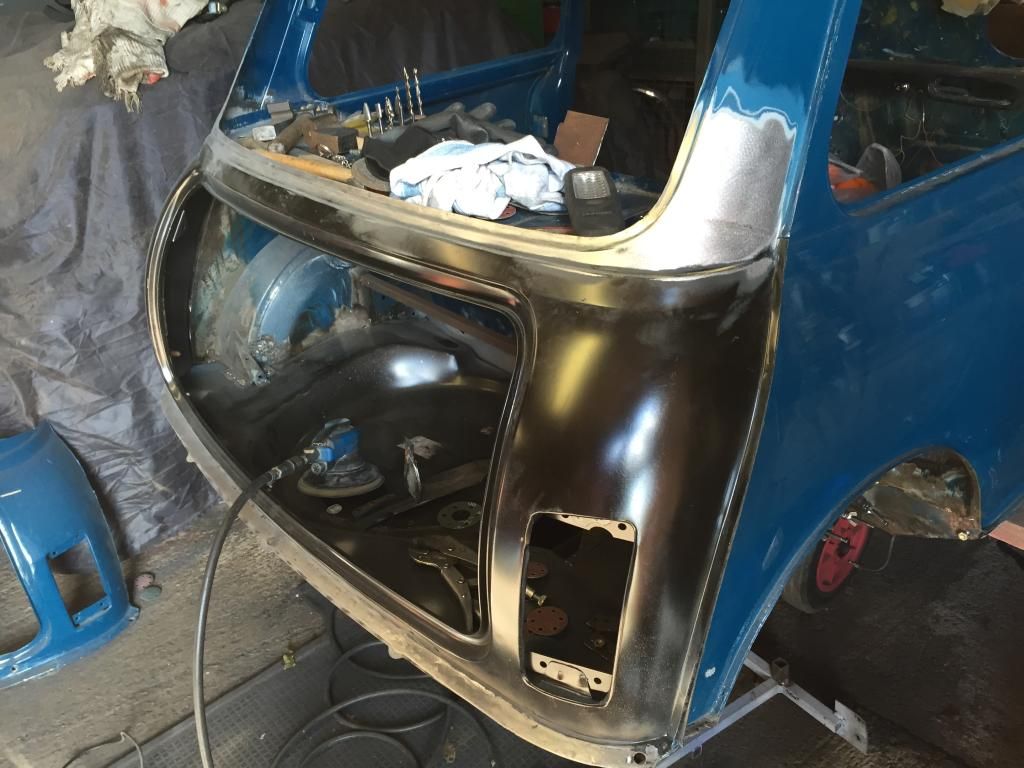
Im going to be replacing the Rear Back Panel lower half with a heritage repair panel. Where the panel meets up and is welded to the rear quarter panel I’m assuming these are spot welded together (see photo).


My question is, how many spot welds am I likely to find (if spot welded?). I can see a few obvious spot welds at the top and bottom, but not so obvious in between.


Has anyone split these panels before and if so, is it spot welds alone and at what approximate distance?


Many thanks in advance.


Chris


Attached File  7D05CDAB-E4AC-4DA0-8130-A46259BF527D.jpeg   40.53K   1 downloads


#2 Homersimpson

Homersimpson

    One Carb Or Two?

  • Members
  • PipPipPipPipPipPipPip
  • 815 posts
  • Location: Redditch

Posted 02 June 2020 - 04:14 PM   Best Answer

The seam is roller welded (like a continuous spot weld) so you can drill it out, the only way to do it is to cut close to the seam with a cutting disc in the grinder and them clean the seam up with a flap disc/fibre disc to get rid of the unwanted layer of metal.


You need to be careful to avoid going through both seams.


#3 Mayfair94

Mayfair94

    Stage One Kit Fitted

  • TMF+ Member
  • PipPipPip
  • 63 posts
  • Location: Horsham

Posted 02 June 2020 - 04:23 PM

Cheers Homersimpson,


Yikes, I didn’t realise they used that, but explains why I can’t see the spot welds.


If that’s the the case, I may just try and replace the rotted bit at the bottom from the panel I have. Sounds quite complex to do the whole panel whilst saving the good seam. It’s only the bit below the lights that is rotten.


Thanks again,


Chris


#4 imack

imack

    Camshaft & Stage Two Head

  • TMF+ Member
  • PipPipPipPipPipPipPipPip
  • 1,982 posts
  • Location: Orpington, Kent

Posted 02 June 2020 - 05:18 PM

A full width lower repair panel is available from heritage, it's nearly as expensive as the 1/2 rear panel. You cut just below the rear lights and into the boot opening.

#5 sonikk4

sonikk4

    Twisted Paint Polisher!!!

  • Admin
  • PipPipPipPipPipPipPipPipPipPipPip
  • 15,983 posts
  • Name: Neil
  • Location: Oxfordshire

Posted 02 June 2020 - 05:49 PM

When you come to welding the panel on and if you do not have a spot welder use 3/16th or 1/4" plug welds spaced an inch apart. Size depends on the width of the flanges.


0b86e482779848a0b38c139ed56697fc566491b6

6fce38ad7ba239635f580459fcc2ac637e0757f7


74a1b63eed1efdb401b483073674589e4b5bdc72


#6 Bdshim

Bdshim

    Mini Mad

  • Just Joined
  • PipPipPipPip
  • 196 posts
  • Location: Suffolk

Posted 02 June 2020 - 06:33 PM

Cheers Homersimpson,


Yikes, I didn’t realise they used that, but explains why I can’t see the spot welds.


If that’s the the case, I may just try and replace the rotted bit at the bottom from the panel I have. Sounds quite complex to do the whole panel whilst saving the good seam. It’s only the bit below the lights that is rotten.


Thanks again,


Chris

when I removed mine there was a fair bit of rust on them seams depends how far you are planning to go


#7 wassupcrew

wassupcrew

    Super Mini Mad

  • Members
  • PipPipPipPipPipPip
  • 502 posts
  • Location: cornwall

Posted 02 June 2020 - 07:01 PM

going from experience i would replace the full lower half as you stated. i found it very hard to line up the boot opening and getting it ground back after welding is a PITA. the full lower half will be much easier in the long run 


#8 MaximMini

MaximMini

    Mini Mad

  • TMF+ Member
  • PipPipPipPip
  • 226 posts
  • Location: Hameln

Posted 03 June 2020 - 07:35 AM

Hi Chris,

The way it worked best for me was to cut the rear panel right beside the flanges and then to grind the remains down until the strip of metal could be peeled away. I hope that makes sense. I found it often helpful to first cut out the bulk of a panel before attacking the remains in an as sensible way as possible.

I gradually developed towards the full lower half of the rear panel with my project because of different reasons. Next time I would replace it right away. It makes access to all the other areas much easier and you will end up with only two reasonable short seam welds.

Stay safe and carry on ..

#9 sonscar

sonscar

    Up Into Fourth

  • Members
  • PipPipPipPipPipPipPipPipPip
  • 2,907 posts
  • Location: crowle
  • Local Club: none

Posted 03 June 2020 - 08:11 AM

Where is it rusty exactly?Being a pauper it would have to be much worse than I can see before localised hand formed repairs were ruled out for me.Good luck whatever your choice.Steve..

#10 Mayfair94

Mayfair94

    Stage One Kit Fitted

  • TMF+ Member
  • PipPipPip
  • 63 posts
  • Location: Horsham

Posted 03 June 2020 - 08:52 AM

Where is it rusty exactly?Being a pauper it would have to be much worse than I can see before localised hand formed repairs were ruled out for me.Good luck whatever your choice.Steve..

The worst of it is on the other side going up to below the light it has gone all the way through. Some really good advice, thanks guys.


1 user(s) are reading this topic

0 members, 1 guests, 0 anonymous users