It's a 3-clock dash from a Rover Mini Spi with A/C. I want to take it out, work on it, and put it back. I have found and undone the three nuts underneath both fresh air openings and the one under the radio. I've run out of swear words and have no more knuckles to sacrifice today so I packed it in. So... those three bolts fasten brackets that are fastened to the back of the dash.... they will have to be pried up to get the bolts out of the holes. Is that what to do? WIll that put no strain in the rest of the piece? And at the top...there doesn't seem to be anything in the way of a permanent fastening but I have found one "wedge" shaped thing on the left side with notches on the top. I suspect there are more. Is this how the top is held in? Should they be freed from the top dash rail before the prying of the brackets? Do I take the binacle off before or after getting the dash ot? (I think I have to disconnect the speedometer cable very early on in this procedure.) I don't want to break anything but I have to get that darn thing out.


Spi Wood Dash Removal Steps
#1

-
- Noobies
-

- 109 posts
Mini Mad
- Location: Victoria BC
- Local Club: Victoria Mini Owners Club
Posted 21 April 2020 - 03:26 AM
#2
-

- TMF+ Member
-
- 976 posts
One Carb Or Two?
- Location: Westwoodside North Lincs
Posted 21 April 2020 - 07:33 AM
Don't know if there are extra fittings on a dash with a/c but on mine I just remove the 3 bolts you already mentioned, reached in the radio slot pulled down on the wedge with teeth to release from the under dash rail and pulled the dash out from the top, almost as if the bottom is on a hinge and then lift away.
The wedge with notches or teeth locates under the upper dash rail and holds the top of the dash in place.
The official Rover workshop manual says you need to remove the steering column! I managed by just removing the steering column cowl laying a towel across the top of steering column to protect the wooden dash from some of the sharp edges.
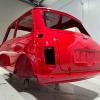
This is what mine looks like at the back:

Edited by MikeRotherham, 21 April 2020 - 07:54 AM.
#3
-
- Members
-
- 1,486 posts
One Carb Or Two?
- Location: Chester
Posted 21 April 2020 - 09:22 PM
The A/C vents are not attached but there's a multi pin plug to the rear of the air con control that you'll need to disconnect. Also the instrument binnacle remains intact when remove the dash.
Stu.
#4
-
- Noobies
-
- 109 posts
Mini Mad
- Location: Victoria BC
- Local Club: Victoria Mini Owners Club
Posted 22 April 2020 - 02:35 AM
Thanks, Mike. I used your technique this afternoon and got it out !. Not as hard as I thought it would be.


1 user(s) are reading this topic
0 members, 1 guests, 0 anonymous users


