Jump to content


Photo
- - - - -

Electrical Fault - No Spark (Standard Points Ignition)


  • Please log in to reply
16 replies to this topic

#1 JonnyAlpha

JonnyAlpha

    Up Into Fourth

  • Members
  • PipPipPipPipPipPipPipPipPip
  • 2,748 posts
  • Location: North Devon
  • Local Club: Exmoor Minis

Posted 28 August 2018 - 03:55 PM

Hi;


Sadly towards the end of the North Devon Legendary Grand Tour Mini Run little Dolly cut out coming up the hill out of Heddon's Mouth (sorry a little artistic scene setting for you). 


Long story short Engine Turns over fine but not firing. No spark at plugs.


RAC (sub contractor) had a go but no joy, spark plug tester connected to the Ignition Coil.


What We Know

1. There is voltage at the points - the point spark if the ignition is on.


2. There is 6v across the coil? 


3. There is continuity from the top of the Dizzy Cap to the Carbon insert. I cannot get continuity with any of the HT leads using a Multimeter, I do get a resistance though? - is this normal?


4. The points looked to be OK but on closer inspection one side had a hole in the middle as it it had burnt out. After watching this video I understand that this could have been caused by a failed condensor :-)


5. The car did this before about a month or so agao but then randomly started OK after about an hour of fiddling.


I don't have a spare Distributor or Dizzy cap but I did have a new set of points and Condensor which I have now fitted. The points seem slightly different and will not close to what I think is the correct gap of 0.40mm and when I fitted them the plastic arm that moves with the distributor shaft seemed to be in a different position when fitted. What I mean was that when I removed the old points the shaft was rotated at the highest point but when I fitted the new points I had to turn the shaft another 1/4 turn? (I have not loosened the Distributor.


What would be the fault finding procedure? I have a Multimeter but no spark plug tester so it is Mk1 Eyeball I am afraid.


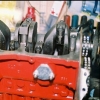
Also having trouble identifying which Distributer is fitted - it is an A+998 (Fork Type Dizzy Bracket).


Was thinking of switching to Electronic but hadn't planned to do so yet as I was going to remove the Engine first - but this winter and funds permitting.


Edited by JonnyAlpha, 28 August 2018 - 04:03 PM.


#2 panky

panky

    Camshaft & Stage Two Head

  • Members
  • PipPipPipPipPipPipPipPip
  • 1,790 posts
  • Location: Cheshire

Posted 28 August 2018 - 04:19 PM

Possibly the rotor arm is at fault. There seems to be a lot of dodgy ones around.


#3 gazza82

gazza82

    Up Into Fourth

  • Members
  • PipPipPipPipPipPipPipPipPip
  • 3,012 posts
  • Location: Bucks
  • Local Club: TMF+

Posted 28 August 2018 - 04:21 PM

If the rotor arm is pointing in the wrong direction, then that will throw out the timing. Sounds like you have the wrong rotor. Put old and new side by side and compare them with the small tag in the same place. (the tag that fits in the dissy shaft cut-out)


6v only across the coil? Even with a suppressed loom I would have thought that should be closer to 9v .. but I'm old school and suppression wasn't around, so I would expect 12v.


Edited by gazza82, 28 August 2018 - 04:23 PM.


#4 JonnyAlpha

JonnyAlpha

    Up Into Fourth

  • Members
  • PipPipPipPipPipPipPipPipPip
  • 2,748 posts
  • Location: North Devon
  • Local Club: Exmoor Minis

Posted 28 August 2018 - 04:52 PM

If the rotor arm is pointing in the wrong direction, then that will throw out the timing. Sounds like you have the wrong rotor. Put old and new side by side and compare them with the small tag in the same place. (the tag that fits in the dissy shaft cut-out)


6v only across the coil? Even with a suppressed loom I would have thought that should be closer to 9v .. but I'm old school and suppression wasn't around, so I would expect 12v.

I didnt change the rotor, its the same old one. I changed the points and condensor. Ill post up some pics details later.


#5 gazza82

gazza82

    Up Into Fourth

  • Members
  • PipPipPipPipPipPipPipPipPip
  • 3,012 posts
  • Location: Bucks
  • Local Club: TMF+

Posted 28 August 2018 - 07:11 PM

OK misread that ... looked like the rotor needs to be moved ... but what you meant was distributor shaft needed to be turned. So my guess is points are wrong type ... but I'm sure you worked that out!

#6 JonnyAlpha

JonnyAlpha

    Up Into Fourth

  • Members
  • PipPipPipPipPipPipPipPipPip
  • 2,748 posts
  • Location: North Devon
  • Local Club: Exmoor Minis

Posted 28 August 2018 - 07:36 PM

The points that I fitted are made by Intermotor part number 23451 (found this link and they look the same). The plastic is blue but the piece that sits against the cambered shaft did not seem as long as the points that came out.


I am a little unsure as to the model of dizzy in this car, it is either a 45D or 59D but because it is an 1982 A+ should it be a 59D?


Condensor is compatible with both:

ylnv2Ao.jpg


And these are the points that came out. They didn't have the small plastic fork on them but in the dizzy there is a metal rod that seems to be where the plastic fork should sit?


oD6EJOP.jpg


And here is the box for the ones that I just fitted:


etliaB7.jpg


Edited by JonnyAlpha, 28 August 2018 - 07:44 PM.


#7 JonnyAlpha

JonnyAlpha

    Up Into Fourth

  • Members
  • PipPipPipPipPipPipPipPipPip
  • 2,748 posts
  • Location: North Devon
  • Local Club: Exmoor Minis

Posted 30 August 2018 - 09:07 AM

Going to perform the tests here to try and isolate the problem.


One issue is that in a separate post here, looking for help with the correct wiring diagram. I have two wires attached to the + side of the coil (as well as two Black / White wires from the - side). The two on the + side are White / Yellow and White / Pink. According to the (possibly correct) wiring diagram mention in the wiring diagram post, the White / Pink wire is a ballast wire?


Is the ballast system newer than the non ballast? This will make a difference when I decide to change to Electronic Ignition as I may have been trying to run a 12v coild off of a 9v supply :-)


#8 JonnyAlpha

JonnyAlpha

    Up Into Fourth

  • Members
  • PipPipPipPipPipPipPipPipPip
  • 2,748 posts
  • Location: North Devon
  • Local Club: Exmoor Minis

Posted 30 August 2018 - 10:30 AM

I traced the White / Yellow cable from the Coil and it appears to be disconnected? I don't believe it has ever been connected? According to the (poss correct wiring diag) this is supposed to connect to the solenoid?


Anyway with B/W cable disconnected from distributor and ignition switched on:


Coil + to Earth = 12.21v

Coil - to Earth = 12.24v

B/W Cable - (For Distributor LT circuit) to Earth = 12.29v

From Brass Connector in Distributor that connect the Condensor to the Points to Earth = 12.26v

Non moving side of points to Earth (with points closed = 12.26v


So I think am getting correct voltages from the LT side of the coil so this means it is either the HT side of the coil, Central HT lead,

Rotor Arm, Distributor Cap, or every HT Lead.


Also, as mentioned earlier in this post, I think the new points are the wrong type. I have rotated the engine to TDC (I can see the piston through a Spark Plug Hole) and the high point of the Cam in the Distributor has not fully opened the points:


RXp0YH7.jpg


The plastic protrusion on the new points is a shorter and its body is a lot thinner than that the old points. The old points however did not have a white plastic V that locates on the bar sticking up from the baseplate of the Distributor. 

Maybe the wrong points were in the car in the first place? And the Distributor has been rotated to suit? Who knows. I just need a solution.


I have a local supplier that may stock a set of points / dizzy cap / rotor arm etc.


Edited by JonnyAlpha, 30 August 2018 - 10:40 AM.


#9 JonnyAlpha

JonnyAlpha

    Up Into Fourth

  • Members
  • PipPipPipPipPipPipPipPipPip
  • 2,748 posts
  • Location: North Devon
  • Local Club: Exmoor Minis

Posted 30 August 2018 - 11:04 AM

So after testing the LT, I reconnected everything and set the points to the correct gap 0.35 - 0.40mm at TDC even though as the cam rotates they will open further after compression has been reached.


I then disconnected the central HT lead from the cap and I get a spark when earthed against a cyl head bolt. When reconnected there is nothing at the spark plug when earthed against the cyl head bolt.


So all I can conclude is new points, new Dizzy Cap and Rotor Arm should resolve the problem?


Although it still doesn't locate the issue - may just be the points. 


Looks like she is running lean as well.


#10 JonnyAlpha

JonnyAlpha

    Up Into Fourth

  • Members
  • PipPipPipPipPipPipPipPipPip
  • 2,748 posts
  • Location: North Devon
  • Local Club: Exmoor Minis

Posted 30 August 2018 - 12:41 PM

Managed to get a pic of the underside of the distributor. Can just make out 59D.

Attached Files


Edited by JonnyAlpha, 30 August 2018 - 12:47 PM.


#11 JonnyAlpha

JonnyAlpha

    Up Into Fourth

  • Members
  • PipPipPipPipPipPipPipPipPip
  • 2,748 posts
  • Location: North Devon
  • Local Club: Exmoor Minis

Posted 30 August 2018 - 02:49 PM

After a bus trip into town, to probably the only parts dealership that might still stock what I was after, I struck lucky. Took a bit of part number finding on my part but I came away with points, dizzy cap, rotor arm and condenser for under £20. The rotor arm was even the one sold by MiniSpares as better performing. GRA2130. The points DSB191C are the same as the ones I have just fitted, not the ones that were in the car when we broke down. I think someone has fitted a different set of points and altered the timing to suit? Problem is now I will need to retard the timing by rotating the distributor shaft to match what I think are the correct points.
I don't have a strobe light so this will be done by ear? And a bit of Duck Duck Go - my (my new choice of search engine for those of us that are fed up with being tracked by Google).


Edited by JonnyAlpha, 30 August 2018 - 05:50 PM.


#12 GraemeC

GraemeC

    Crazy About Mini's

  • TMF+ Member
  • PipPipPipPipPipPipPipPipPipPip
  • 7,438 posts
  • Location: Carnforth

Posted 30 August 2018 - 03:54 PM

Yes you will need to adjust the timing.


Fit the points and adjust the gap to 0.015-0.016" when the heel of the points is on the corner of the square dizzy shaft - ie at the 'most open'.  Don't worry about the engine not being at TDC.

Now rotate the engine until it is about 6deg BTDC (use the second finger on the timing cover to line up with the notch in the pulley when valves 1 & 2 are rocking (ie loose).

Now fit a test lamp into the wire between the coil and the dizzy. If the points are closed it should light up.

Slowly turn the dizzy clockwise until the test lamp goes out.

Refit the rotor arm, it should point to about 2 o'clock


#13 JonnyAlpha

JonnyAlpha

    Up Into Fourth

  • Members
  • PipPipPipPipPipPipPipPipPip
  • 2,748 posts
  • Location: North Devon
  • Local Club: Exmoor Minis

Posted 30 August 2018 - 05:50 PM

Yes you will need to adjust the timing.


Fit the points and adjust the gap to 0.015-0.016" when the heel of the points is on the corner of the square dizzy shaft - ie at the 'most open'.  Don't worry about the engine not being at TDC.

Now rotate the engine until it is about 6deg BTDC (use the second finger on the timing cover to line up with the notch in the pulley when valves 1 & 2 are rocking (ie loose).

Now fit a test lamp into the wire between the coil and the dizzy. If the points are closed it should light up.

Slowly turn the dizzy clockwise until the test lamp goes out.

Refit the rotor arm, it should point to about 2 o'clock

I'll read this in more detail later :-)


#14 JonnyAlpha

JonnyAlpha

    Up Into Fourth

  • Members
  • PipPipPipPipPipPipPipPipPip
  • 2,748 posts
  • Location: North Devon
  • Local Club: Exmoor Minis

Posted 30 August 2018 - 06:01 PM

Post above aside (which I have only just seen).

As soon as I got back I got to work I tried to follow this guide to get the correct points setting however trying to turn the fanbelt with one hand and feel for compression in the chamber with the other was a no go, even with the car out of gear and all plugs out it was impossible. So using a screwdriver I found TDC on piston 1 but did not know if it was the compression or exhaust stroke???

Using the old dizzy cap as a guide I swapped over the HT leads and looking at the rotor arm it appeared to be near enough in the correct position so I thought I would give it a go.  


I loosened the dizzy clamp and rotated the dizzy until the points were at there widest. I then set the points to just under 0.40mm.


With three plugs back in and one out I turned the key to see if I got a spark. Couldn't see a spark but the engine fired first turn anyway  :lol:  :lol:  :lol:


So put the last plug in started the engine and turned the dizzy until I got the highest revs and then took it for a short drive around the block.


Just had a thought whilst typing - I did not tighten up the dizzy clamp all the way  :ohno: - first job tomorrow!!


#15 GraemeC

GraemeC

    Crazy About Mini's

  • TMF+ Member
  • PipPipPipPipPipPipPipPipPipPip
  • 7,438 posts
  • Location: Carnforth

Posted 30 August 2018 - 07:47 PM

Good result.

I don’t like trying to feel for compression, easier to whip the rocker cover off and look at rockers 1&2. If they’re compressing a valve then it’s end of exhaust stroke, if they’re rocking (loose) then it’s top of compression stroke.


1 user(s) are reading this topic

0 members, 1 guests, 0 anonymous users