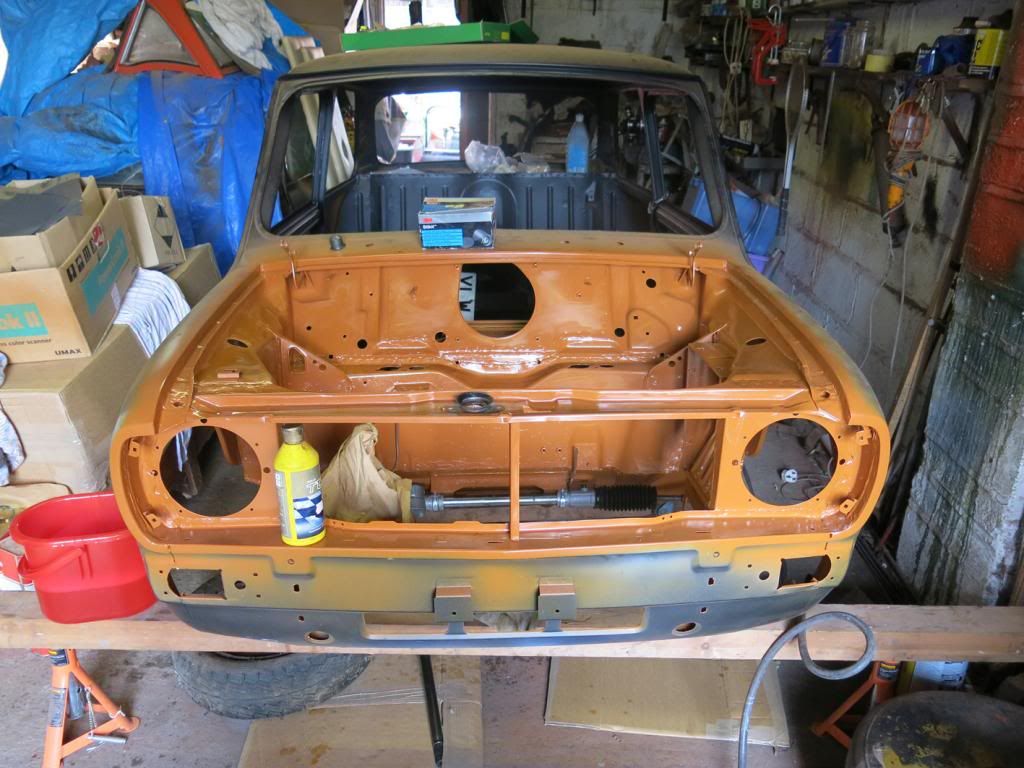
wow! Looks like a new shell from BMH...

1275Gt To Sa Gts Replica @ Mill Road Garage Iow
#91

Posted 03 April 2018 - 07:47 PM
#92

Posted 03 April 2018 - 08:32 PM
wow! Looks like a new shell from BMH...
it's not often a shell comes back from the blasters without big holes and perforations everywhere.
Even the worst pitting on the bulkhead will fill in with a coat of high build primer
#93

Posted 03 April 2018 - 09:34 PM
I feel sick looking at that shell, very jealous
#94

Posted 04 April 2018 - 11:28 AM
what amazing condition.
Seems a shame to lose the origionalitiy but will look spectacular once you guys have done your thing!
#95

Posted 04 April 2018 - 05:36 PM
Work has now started on the panel work.
The sandblaster hadn't been able to completely strip inside the boot because the remaining sealer was causing the sand to bounce off so I will need to do that by hand.
I decided this would be easier with the parcel shelf removed.
First, I cut the bulk out of the way. This then allows me to get the drill in to cut the spot welds


Then after cutting the spot welds, the rest can come out


I quickly trial fitted the new shelf and it fits fine

Before that can be welded in, I want to prep inside the boot and prime it. Access is so much better without the shelf.
I started the prep by removing the remains of the sealer from the rear seams


The residue left behind will be wiped off with solvent.
I then started sanding the floor panel but only got so far before I ran out of time


Tomorrow, I will weld up the various holes in the rear bulkhead and the ariel hole in the back panel and get it primed ready for the parcel shelf to be welded in.
I shall also prime the underside of the new roof and the parcel shelf.
Thanks for looking
Ben
#96

Posted 04 April 2018 - 07:19 PM
it's hard to believe that's a 38 year old shell - my NAD 3130 amp which is 5 years younger has more rust on it's chassis than that and it's never even been outside !!
i'm curious - what's the mileage on it ?
#97

Posted 04 April 2018 - 07:39 PM
it's hard to believe that's a 38 year old shell - my NAD 3130 amp which is 5 years younger has more rust on it's chassis than that and it's never even been outside !!
i'm curious - what's the mileage on it ?
I think it's around 31,000
Cheers
Ben
#98

Posted 04 April 2018 - 09:23 PM
thanks Ben - that makes sense; less than a thousand miles a year, and probably all of that on days when it wasn't raining ![]()
#99

Posted 05 April 2018 - 10:48 AM
Also, will the shell be getting new coats of that sealer stuff? It seems to have worked a treat in protecting the shell for all these years.
#100

Posted 05 April 2018 - 02:48 PM
Is the owner a planning to fit speakers and that was why the new shelf has the speaker holes in it?
Also, will the shell be getting new coats of that sealer stuff? It seems to have worked a treat in protecting the shell for all these years.
Only the new pressings for parcel shelves are available so to fit the correct one would involve finding a good used one and fitting that. In this case, the owner would like to fit speakers so this was the perfect way forward.
The shell will be protected by modern equivalents of those products once it is rebuilt and as long as the car is looked after, It should last another 38 years!
#101

Posted 05 April 2018 - 03:45 PM
Only the new pressings for parcel shelves are available so to fit the correct one would involve finding a good used one and fitting that. In this case, the owner would like to fit speakers so this was the perfect way forward.
Is the owner a planning to fit speakers and that was why the new shelf has the speaker holes in it?
Also, will the shell be getting new coats of that sealer stuff? It seems to have worked a treat in protecting the shell for all these years.
The shell will be protected by modern equivalents of those products once it is rebuilt and as long as the car is looked after, It should last another 38 years!
I didn't know about the parcel shelf panels. Im guessing it would make it quite hard when restoring earlier cars that didn't have speakers fitted.
It's good to hear that it'll be getting that treatment. It definitely deserves to be preserved, especially once you're done with the rebuild.
#102

Posted 06 April 2018 - 06:55 PM
Almost finished with the panel work now and lot has been going on to get there.
Continuing on with the boot, I cleaned off the residue left by the sealer I scraped off last time


And then I made a start welding up the various holes in the rear bulkhead, rear panel and boot floor


And then prepped up the parcel shelf

Not forgetting to transfer this little fella over from the old shelf

And then a quick clean down and into the booth for some primer


And then out again to fit the parcel shelf


With the back end finished, I moved on to welding up the other various holes that have been drilled through the bodywork.
These ones in the steps and B posts were for the anti rust treatment and were previously covered with plastic bungs with a stainless kick strip over the top


And the rest were screw holes and a few larger holes created to pass wiring through. Again, all not needed now


I straightened out the front floor pans which were bent from jacking probably but I only got before photos oddly.
Other than that, the only repair left to do is this

Which I shall sort once it's on the spit.
Before it goes on the spit, I want to get the roof fitted.
First I prepped the underside up

And primed it

And then fitted it to the car. For anyone thinking about doing a roof skin, prepare for a fight as this roof skin did not want to fit. They are not as simple as dropping them into place, they have to almost be forced into the gutters. This is because they have to fit under the roll of the gutter to the edge.
It took 2 of us about 20 minutes to get it to fit in place.
Unfortunately, I did damage the skin slightly, there is an ever so slight depression along the back caused by pushing on it so ill repair this once it's welded.


I had to make custom tips for the spot welded to reach into the gutter without touching the skin or the gutter edge but once they were done, I could start welding it on

That's as far as I got with it today. It's takes a very long time to spot weld on. That bit took around 30 minutes.
To anyone planning on mig welding a skin on, drill the gutter and weld up from underneath to the skin otherwise I can't see you being able to get in properly and grinding back the welds in the gutter would be a real headache.
thanks for looking
Ben
#103

Posted 06 April 2018 - 07:35 PM
Awesome work Ben. I have a question :) I will be priming the inside of my shell soon, I'm guessing I only need to key the black coating and not remove it? Will be using zinc primer.
#104

Posted 06 April 2018 - 07:36 PM

#105

Posted 06 April 2018 - 07:45 PM
1 user(s) are reading this topic
0 members, 1 guests, 0 anonymous users


