I think it's lechler paint. They listed a lot of innocenti colours.
I only asked about the 75 colour az its the one i need for my own innocenti.


1975 Innocenti Cooper 1300 Export Restoration
Started by
InnoCooperExport
, Jan 03 2018 05:14 PM
60 replies to this topic
#16

Shifty
-

- Admin
-

- 13,138 posts
Sponsored by Fosters (tm)
- Name: Sean
- Location: Shropshire(sunny)
- Local Club: TMF
Posted 16 January 2018 - 10:01 AM
#17
InnoCooperExport
-
- Members
-
- 372 posts
Speeding Along Now
- Location: Netherlands
- Local Club: Mini Seven Club Nederland
Posted 16 January 2018 - 04:20 PM
While I was messing with the engine and Mr K wasn't working on any Healeys he got on with the Inno.
Some of the inside needed some repairs as well as the rear seat base seemed to have bent and needed straightening. This also shows the unusual Innocenti sloped companion boxes. This allows the front seats to recline without getting caught on the companion boxes behind.

As longevity is the name of the game here all the seams were all done with seam sealer after priming. Before painting the whole floor will be done in Body Shoes which should stay elastic and will protect it nicely.

The previous owner had also added a number of aerials so those wholes were sealed up as well.

We also noticed the jacking points had been blanked off, which seemed odd to us. So we stuck a camera in through one of the vents in the sill and found it to be completely empty behind!

So the area around the jacking point was cut out and a set of jacking points were bought to fit.

The new jacking point was then fitted and the sill filled in again but now with an exposed jacking point


and cleaned up and primed

The front end was also slowly coming together

The keen eyed among you might have spotted the shine around the seam between the front panel and the wing. One of Mr K's tricks to prevent any water ingress in that seam to prevent it from rotting is to fill them with copper, not unlike fillet brazing. All the front end will have this treatment, it seals it all off without losing the seamed look.
Meanwhile next door I promised you some flywheel fun.
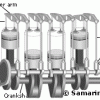
As I mentioned before the car came with a bunch of performance parts, including a lightened flywheel and backing plate. But without much info on either I broke out the scales, turns out the flywheel is an ultralight at 3.8kg (compared to the OE 7.7kg) and the pressure plate is marginally lighter 1.8kg vs the OE 2.6kg.
Although very posh and light I was concerned that the whole assembly together wouldn't really be suitable for a road car, though I did do a test fit for giggles

In the end I decided to compromise by using the OE flywheel with the lightened pressureplate, just to make the engine a bit snappier. However when I was installing this solution I found the bolts that go through the diaphragm and drivestraps to the pressure plate were really hard to tighten, not to mention there were a lot of metal filings floating about... A quick investigation showed the two to be related. Turned out the shoulder on the bolts was bigger than the corresponding hole in the pressure plate, very annoying. So in the end I decided I would forego the lightened gear for now and would just install the all the OE stuff.


And now with the clutch cover bolted down and throwout set etc. I just need a new slave cylinder and then the clutch is done.

#18
InnoCOOPER
-

- Noobies
-
- 86 posts
Stage One Kit Fitted
- Location: Cornwall
Posted 16 January 2018 - 04:50 PM
I think it's lechler paint. They listed a lot of innocenti colours.
I only asked about the 75 colour az its the one i need for my own innocenti.
I think i can get Lechler here if you have the paint code other than ROSSO 74 that would help.
#19
InnoCooperExport
-
- Members
-
- 372 posts
Speeding Along Now
- Location: Netherlands
- Local Club: Mini Seven Club Nederland
Posted 26 January 2018 - 07:03 PM
Slowly but surely the body is coming together and most of the panel work is now done.

All the seams are filled with copper and covered in seam sealer

After this it was time for the Innocenti specific bits to go on. The way the oil cooler was fitted to there was quite different from the conventional Cooper S and, in my opinion, much easier. Rather than modifying the front panel and moving the uprights about they simply added another one with both having captive nuts welded to them. Even though they are simple enough to make I happened upon these factory replacement parts and couldn't resist.


Shown are the oil cooler brackets, the grille mounting tabs and the bracket for the internal bonnet release cable.
Here you can see the oil cooler brackets in place behind the grille

And the grille mounted on the tabs. First time this car has worn one in about 20 years.

After a lot of measuring, comparing to photos and putting very long pieces of metal along the car make sure it all lined up it was time to drill the holes for the typical indicator repeaters.


One of the last real panel jobs is the bootlid. Innocentis are known for their Italian style, square numberplate recess in the bootlid. Unfortunately these things rot just by looking at them, especially at the seam between the frame and the outer skin. As they are NLA and decent ones cost an absolute fortune we decided to buy a double skin mk2 bootlid and transplant the usable part of the skin with the numberplate recess to it.

it's a little rough at the moment but we'll get there in the end.
#20
johnR
-

- Members
-
- 2,297 posts
Up Into Fourth
- Location: Dorset
Posted 26 January 2018 - 07:54 PM
coming along well - interesting to see the differences between Uk & Inno cars
#21
miniireland
-
- Members
-
- 175 posts
Mini Mad
- Location: Ireland
Posted 26 January 2018 - 08:31 PM
Coming along nicely
#22
InnoCooperExport
-
- Members
-
- 372 posts
Speeding Along Now
- Location: Netherlands
- Local Club: Mini Seven Club Nederland
Posted 16 February 2018 - 04:07 PM
Time for an update, it's been a while. First of all thanks for all the positive comments chaps. It really is slowly all coming together.
First off I've been doing some sandblasting. Mostly on the front subframe and load of parts have been done. You don't quite realise how many surfaces and edges there are on a subframe until you start cleaning and sandblasting one.
After a clean with wire brushes and brief spell with a scotchbrite wheel


In the blasting cab

And after a few hours


Then it was back to my own workshop for painting in weldthrough primer

Now it's just waiting to have to cracks in the lips that mate to the toeboard welded up after which I will paint the whole thing in 2K black.
I had blasted a load of suspension bits a while back and painted those up in black Hammerite (it dried a lot less glossy than it looks here which is great)

Meanwhile Mr. K has been working his magic on the bootlid and has done a stunning job


Really looks original. I'm chuffed

It just needs new hinges as these are shot. Then the bonnet needs to be made to fit properly and then it's off to the painters. Through a chap in NL not unknown in Inno circles (Bertus Hengstman) I got the original paintcode for Rosso 74 from Standox (0046). So we will have to see what the painter can do with that info.
Unfortunately the original bonnet had been badly welded in the past and didn't have any strength left in it, so it was decided to put all the Inno bits from the original bonnet onto one from an 1100 Special I had kicking around. For those interested, the difference lies in the bonnet hinges, which are closer to a mk1 location, and the bonnet prop which is in a different place and kept in place with a rubber rather than a metal clip.
Here we have the front end with the original bonnet, unfortunately I don't have a picture of the modified 1100 Special bonnet.

#23
Vinay-RS
-

- Members
-
- 2,115 posts
Put's foolish ideas in peoples heads
- Location: Cape Town
Posted 17 February 2018 - 06:08 AM
Love the work that you've done with the bootlid. It looks good :)
#24
mini-fvr
-

- Members
-
- 338 posts
Speeding Along Now
- Location: New York
- Local Club: Long Island Mini Enthusiasts
Posted 01 March 2018 - 08:27 PM
looks great!! beautiful work fellas!
I just brought an inno an I can't wait for it to arrive!
is there anywhere to find all the info you seam to "just know" about these Innocenti's? would love a reference got to.
#25
InnoCooperExport
-
- Members
-
- 372 posts
Speeding Along Now
- Location: Netherlands
- Local Club: Mini Seven Club Nederland
Posted 03 March 2018 - 10:39 AM
Thanks for the kind words! The best source for Inno knowledge at the moment seems to be Facebook where there are a few Innocenti groups (Innocenti Mini & Cooper for instance) you can join where we have some very sage people who know these cars inside out.
You can also look at getting a copy of John Parnell's Original Mini Cooper & Cooper S book which has segment on Inno coopers (if that's what you bought). And you can of course always send me a message and I will try to help best I can.
Things have been a bit slow on the Inno here lately, Mr K has had an MGC GT in from a client that needed new tyres and a bit of interior work so the Inno is on the backburner, not to mention he has uncovered something rather special for himself (more on that later). But hopefully a new update soon.
#26
mini-fvr
-
- Members
-
- 338 posts
Speeding Along Now
- Location: New York
- Local Club: Long Island Mini Enthusiasts
Posted 03 March 2018 - 11:16 AM
Thank you for the information! Im going to check out those books and find the fb groups. Looking forward to getting this inno home!
Good luck with your project, Ill be watching/following your build!
Good luck with your project, Ill be watching/following your build!
#27
InnoCooperExport
-
- Members
-
- 372 posts
Speeding Along Now
- Location: Netherlands
- Local Club: Mini Seven Club Nederland
Posted 17 May 2018 - 08:56 AM
Been a while, but I have some news. The shell is off to the painters! I should get some samples of the Rosso 74 to assess if I think it´s right. Meanwhile I´ve been finishing off some small jobs on the engine like slave cylinders and breathers etc.
I´ve been stripping the rear subframe and removing all the underseal and bitumen from it. It´s taking forever but it´s coming up really well and should only need sandblasting before priming and spraying in 2K black. I will probably make up a frame to hold them as I paint them so I can do as much as possible in a single sitting. Slowly but surely we´re getting there.
#28
miniQ
-
- Members
-
- 497 posts
Speeding Along Now
- Location: Manchester
Posted 17 May 2018 - 07:04 PM
Please enlighten me more to copper brazing/soldering the seams on the front wings. materials & tools?
Edited by miniQ, 17 May 2018 - 07:04 PM.
#29
InnoCooperExport
-
- Members
-
- 372 posts
Speeding Along Now
- Location: Netherlands
- Local Club: Mini Seven Club Nederland
Posted 19 May 2018 - 06:52 PM
As I understood it basically seam welded the joints but with a CuSi2 rod. This allows it to flow into the seams. The exact method isn't known to me as I didn't do it but that's how he explained it to me. I suppose you could do it with a copper fillet and braze it with a blowtorch as you would do fillet brazing.
#30
InnoCooperExport
-
- Members
-
- 372 posts
Speeding Along Now
- Location: Netherlands
- Local Club: Mini Seven Club Nederland
Posted 26 June 2018 - 09:44 AM
Had an interesting run in at the British Autojumble over here in NL this weekend. While chatting to a fellow Innocenti owner the topic of my restoration came up and it turned out he knew my car well. He was good friends with the previous owner back in the day and sent me a bunch of pictures of my car before it was taken off the road. Seems it attended both IMM in 1993 and 1994. Wonderful to see it as it was, even if it was pretty modified (huge arches that were extended around the front of the car...)
Meanwhile I've been spending most of my time either sandblasting or painting a myriad of parts including the subframes. My POR15 chassis paint should arrive today so I can get stuck in with that soon. I will upload some pictures of all that soon.
Meanwhile I've been spending most of my time either sandblasting or painting a myriad of parts including the subframes. My POR15 chassis paint should arrive today so I can get stuck in with that soon. I will upload some pictures of all that soon.
Edited by InnoCooperExport, 26 June 2018 - 09:45 AM.


2 user(s) are reading this topic
0 members, 1 guests, 0 anonymous users
-
Bing (1)


