Jump to content


Photo
- - - - -

Austin Mini 25Th Anniversary Restoration

roundnose

  • Please log in to reply
109 replies to this topic

#1 Dutchdave's25

Dutchdave's25

    Mini Mad

  • Noobies
  • PipPipPipPip
  • 105 posts
  • Location: Amersfoort

Posted 06 December 2017 - 01:09 PM

Hi All,


Since I truly enjoy reading about all your rebuilds I decided to give you a peek into mine.

I bought this car back in 2008, drove it around for two years and than put it away in garage because rust was making it impossible to keep it roadlegal.

As you can see the car had been redone by a previous owner, not the best work i've seen and missing a lot of the original parts.

the only original interior parts were: the rear seat and the dashboard.


Eventhough i have collected most of the original parts I am not going back to original, the plan is:

1275 SPI engine

black MPI interior (including MPI dash with magnolia cauges)

sportpack wheelarches

13 inch performance supalite

Platinum Sylver ( MNX ) (mini 40)


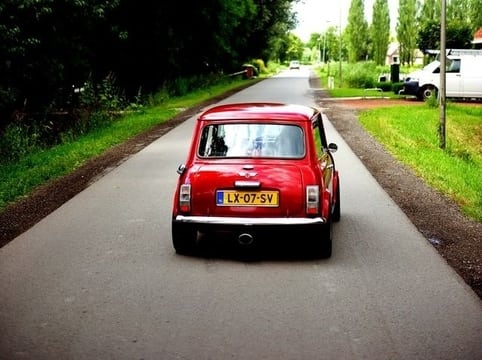
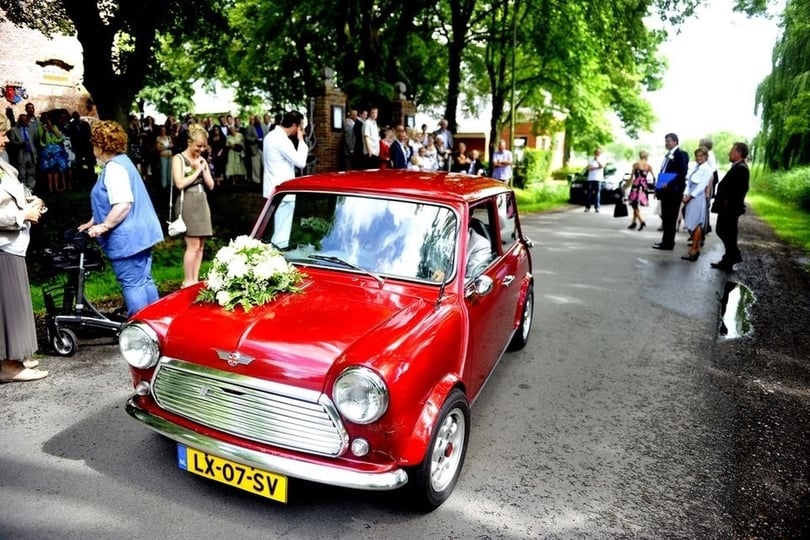
This is what it looked like on its last ride: (not my wedding)
540.jpg


1k0.jpg


started stripping down the car:

540.jpg


540.jpg


540.jpg


540.jpg


Time for some chopping:


540.jpg


540.jpg


540.jpg


540.jpg


first of all a new floor, doorstep, etc.:

540.jpg


540.jpg


540.jpg


540.jpg


540.jpg


540.jpg


540.jpg


540.jpg


fitting door with new door skin:

540.jpg


like i mentioned before, there will be a SPI engine in it, so the bodypanels that go with it are fitted:


540.jpg


540.jpg


540.jpg


from the inside:


540.jpg


540.jpg


540.jpg


front going on:


540.jpg


540.jpg


540.jpg


540.jpg


Edited by Dutchdave's25, 23 July 2018 - 07:08 AM.


#2 Dutchdave's25

Dutchdave's25

    Mini Mad

  • Noobies
  • PipPipPipPip
  • 105 posts
  • Location: Amersfoort

Posted 06 December 2017 - 03:58 PM

onto the rear:


540.jpg


540.jpg


540.jpg


540.jpg


540.jpg


540.jpg


540.jpg


540.jpg


540.jpg


540.jpg


540.jpg


540.jpg


540.jpg


540.jpg


540.jpg


540.jpg


540.jpg


540.jpg


540.jpg


540.jpg


540.jpg


540.jpg


540.jpg


540.jpg


540.jpg


540.jpg


540.jpg


preparing the front wings for sportpack arches:


540.jpg


540.jpg


540.jpg


ready for the sportpack arches:


540.jpg


#3 Dutchdave's25

Dutchdave's25

    Mini Mad

  • Noobies
  • PipPipPipPip
  • 105 posts
  • Location: Amersfoort

Posted 06 December 2017 - 03:58 PM

ready for some coats of paint:


540.jpg


540.jpg


540.jpg


540.jpg


540.jpg


540.jpg


540.jpg


540.jpg


making a start with the inside ( treating it with rx5 and rx10 )


540.jpg


540.jpg


540.jpg


RX10 applied:


540.jpg


540.jpg


540.jpg


540.jpg


540.jpg


same treatment for underneath:


540.jpg


540.jpg


540.jpg


540.jpg


540.jpg


sanding it down for a second coat of rx10:


540.jpg


540.jpg


second coat:

540.jpg


540.jpg


540.jpg


Sanded down the bottom last week ready for epoxy and primer, and yes this side will be in colour.


i am thinking of covering the wheel arches and other vulnerable areas with a clear undercoating, maybe you guys have some suggestions for that?


#4 Northernpower

Northernpower

    Mr. 7-Port

  • Members
  • PipPipPipPipPipPipPipPipPip
  • 2,410 posts
  • Name: Graham
  • Location: North Yorkshire (God's County)
  • Local Club: Its out there somewhere

Posted 06 December 2017 - 04:06 PM

Looks nice work, over what time period has it taken?


#5 MasterD78

MasterD78

    Mini Mad

  • Noobies
  • PipPipPipPip
  • 125 posts
  • Location: Utah

Posted 06 December 2017 - 06:26 PM

Looks fantastic!  Great work.  Like mentioned above how long did this take?  


#6 Dutchdave's25

Dutchdave's25

    Mini Mad

  • Noobies
  • PipPipPipPip
  • 105 posts
  • Location: Amersfoort

Posted 07 December 2017 - 08:05 AM

Thanks! :)

started with the bodywork in 2016, most work has been carried out this year though.


I meant to quote you both, but I worked it out after I posted this :P


Edited by Dutchdave's25, 07 December 2017 - 08:09 AM.


#7 Dutchdave's25

Dutchdave's25

    Mini Mad

  • Noobies
  • PipPipPipPip
  • 105 posts
  • Location: Amersfoort

Posted 12 December 2017 - 01:55 PM

I have finished work on the engine some time ago,

It's a 1275 SPI engine, complete with wiring harness and all injection parts.


Overhauled the gearbox, fitted a central oil pick-up pipe.

faster cilinder head with bigger valves and high lift rockers.

I didnt do any work on the pistons, cilinders or crank. looking at other projects I wonder if I should have..


anyway here's the engine I bought:

540.jpg 


after:

540.jpg 540.jpg


#8 johnR

johnR

    Up Into Fourth

  • Members
  • PipPipPipPipPipPipPipPipPip
  • 2,289 posts
  • Location: Dorset

Posted 12 December 2017 - 03:44 PM

good progress - helps that you've got plenty of room to work in that's well lit!

#9 Dutchdave's25

Dutchdave's25

    Mini Mad

  • Noobies
  • PipPipPipPip
  • 105 posts
  • Location: Amersfoort

Posted 20 December 2017 - 11:16 AM

good progress - helps that you've got plenty of room to work in that's well lit!


it may be well lit, but I live 2 hours away from my car  :shy:


#10 johnR

johnR

    Up Into Fourth

  • Members
  • PipPipPipPipPipPipPipPipPip
  • 2,289 posts
  • Location: Dorset

Posted 20 December 2017 - 03:43 PM

Ahh - not so good!


#11 Poolrev

Poolrev

    Learner Driver

  • Noobies
  • PipPip
  • 12 posts
  • Location: Veenendaal

Posted 21 December 2017 - 01:35 PM

Nice project! Good to see some other projects from The Netherlands here :-) .


I had the same issue with the distance to my Mini, but moved it some while ago to another place, only a few minutes from my home. It has speed up the project significantly :-).


#12 Dutchdave's25

Dutchdave's25

    Mini Mad

  • Noobies
  • PipPipPipPip
  • 105 posts
  • Location: Amersfoort

Posted 29 December 2017 - 07:29 AM

Nice project! Good to see some other projects from The Netherlands here :-) .


I had the same issue with the distance to my Mini, but moved it some while ago to another place, only a few minutes from my home. It has speed up the project significantly :-).


Thanks :)


I guess its easier to move once you have it painted ;)


#13 Dutchdave's25

Dutchdave's25

    Mini Mad

  • Noobies
  • PipPipPipPip
  • 105 posts
  • Location: Amersfoort

Posted 29 December 2017 - 07:43 AM

Been working on something else in the meantime.

I bought a MPI dashboard including magnolia gauges for a 100 euros.

The veneer was not fit for restoring so I striped it all off, forgot to take pictures of this.

i filled in the radio hole with plywood, because radios are ugly things (and from another century).

then sanded the whole thing, needed some filler for the radio hole.

540.jpg


540.jpg


540.jpg


the drilled the two extra holes for the 52mm magnolia gauges. (oil pressure, clock, volts)


540.jpg


540.jpg


I have to say I was more than a bit nerveous drilling these, so worried I wouldnt get them in a straight line...

But I guess you all agree I could not have done a better job ;)  


also the bottom of the car is painted in epoxy and primer, so more on that next time 


#14 Haygate

Haygate

    Mini Mad

  • Noobies
  • PipPipPipPip
  • 115 posts
  • Location: Telford

Posted 29 December 2017 - 08:53 AM

Looking nice 👍

#15 domdee

domdee

    Formally known as dominicdee

  • Members
  • PipPipPipPipPipPipPip
  • 1,183 posts
  • Location: hull
  • Local Club: hull clubs on FB

Posted 29 December 2017 - 06:57 PM

great work


Also tagged with one or more of these keywords: roundnose

1 user(s) are reading this topic

0 members, 1 guests, 0 anonymous users