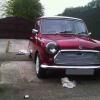
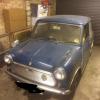
Great work Ben, I can see my Mini waiting it's turn in the background

1969 Mini Cooper S @ Mill Road Garage Isle Of Wight
#106

Posted 27 November 2017 - 07:50 PM
#107

Posted 28 November 2017 - 01:41 PM
amazing work.
You could have your own TV show with the speed you work and the high quality
#108

Posted 28 November 2017 - 09:09 PM
Really great work Ben! Great to see a master of his craft.
I'll have to drop mine off for some tlc!
#109

Posted 29 November 2017 - 06:34 PM
wow! just Wow
#110

Posted 29 November 2017 - 06:56 PM
Updates may be on the light side this week I'm afraid ![]()
I have had to install a new heating system in my spray booth at short notice. It's the wrong time of the year to be without any heating in there!
Ill be back on it ASAP!
Cheers
Ben
#111

Posted 29 November 2017 - 10:36 PM
Someone in the Isle of Wight says they need heating, try living in the Shetland isles!!! Anyway no matter, whatever is required for more updates is fine with me!
#112

Posted 30 November 2017 - 12:25 AM
You can bet that the heating system will be a work of art too ![]()
#113

Posted 30 November 2017 - 09:47 AM
I used to get a hard time from the other guys in the workshop,
when it was cold, they were freezing and I was working in the
spray booth ![]() nice and warm 22deg and 80deg on the bake
nice and warm 22deg and 80deg on the bake
cycle for a quick heat up Happy Days.
Liking the work on the Cooper Ben.
#114

Posted 30 November 2017 - 06:11 PM
You can bet that the heating system will be a work of art too
I'm just installing it.
The only fabrication I'm doing is making up a plenum chamber to suit my old hotch potch booth ![]()
I used to get a hard time from the other guys in the workshop,
when it was cold, they were freezing and I was working in the
spray booth
nice and warm 22deg and 80deg on the bake
cycle for a quick heat up Happy Days.
Liking the work on the Cooper Ben.
I had exactly the same thing today as it happens.
Although the heating system is not completely installed, it is done enough to get the heat in and I worked in there all day (some paintwork on a modern) whilst the others moaned about the cold outside in the workshop ![]()
Mind you, I got plenty of teas bought to me by the guys as they used it as an excuse to come in and warm up ![]()
Cheers
Ben
#115

Posted 30 November 2017 - 07:38 PM
You can bet that the heating system will be a work of art too
I'm just installing it.
The only fabrication I'm doing is making up a plenum chamber to suit my old hotch potch booth
I used to get a hard time from the other guys in the workshop,
when it was cold, they were freezing and I was working in the
spray booth
nice and warm 22deg and 80deg on the bake
cycle for a quick heat up Happy Days.
Liking the work on the Cooper Ben.
I had exactly the same thing today as it happens.
Although the heating system is not completely installed, it is done enough to get the heat in and I worked in there all day (some paintwork on a modern) whilst the others moaned about the cold outside in the workshop
Mind you, I got plenty of teas bought to me by the guys as they used it as an excuse to come in and warm up
Cheers
Ben
I never got tea, my booth was white painters overalls only area! ![]()
#116

Posted 30 November 2017 - 08:01 PM
You can bet that the heating system will be a work of art too
I'm just installing it.
The only fabrication I'm doing is making up a plenum chamber to suit my old hotch potch booth
I used to get a hard time from the other guys in the workshop,
when it was cold, they were freezing and I was working in the
spray booth
nice and warm 22deg and 80deg on the bake
cycle for a quick heat up Happy Days.
Liking the work on the Cooper Ben.
I had exactly the same thing today as it happens.
Although the heating system is not completely installed, it is done enough to get the heat in and I worked in there all day (some paintwork on a modern) whilst the others moaned about the cold outside in the workshop
Mind you, I got plenty of teas bought to me by the guys as they used it as an excuse to come in and warm up
Cheers
Ben
I never got tea, my booth was white painters overalls only area!
Mine is when painting is going on but generally i'm pretty relaxed if I'm masking up
#117

Posted 08 December 2017 - 08:04 PM
Time for an update from the past few days. I have been so busy in the evenings that I haven't had chance to update ![]()
Last time, I had mocked up the heelboard and produced some repair sections for the back edge of the floor.
Here is one of them cut in and clamped up

And then welded in and ground down

The other side only required a much smaller repair


I have only taken these repairs as far as the new inner sill will go which is why there are still gaps either end.
With those complete, the sub frame was dropped back out and the heelboard removed


The floor was given a coat of zinc

And then the heelboard was prepped for welding. I shall be plug welding this on for obvious reasons

The inside was then cleaned back, prepped and also given a coat of Zinc

Then it was screwed back onto the car and the subframe refitted


And then I plug welded as many of the holes as I could with the frame in.
The subframe will now stay in until the sills are fitted so I can use it to put the axle stands under so the rest of the plug welding will be finished once I can take that off


Quick grind up


The last thing to do with the heelboard for now is to spot weld the seat base to the top of the heelboard


Now it's time for the sills.
I have a builder coming in next week to construct a paint mixing room at this end of the workshop so the Mini would need to be moved. Best to do it now before I start cutting again.
So back on it's wheels

#118

Posted 08 December 2017 - 08:06 PM
Move it forward 12 feet and then back in the air

Now I can get cracking.
I didn't know if the step would turn out to be made of cheese so I added a nice lump of steel box to the door aperture to keep things square

And then made my first cut along the top edge of the outer sill

The inner sill repairs look reasonable recent by the freshness of the metal


I guess we solved the mystery of the missing captive nut for the sub frame trunions... ![]()
I also found a broken spot weld drill bit rattling round in there.
The next stage is to remove the remains of the inner sill. I don't think this side is going to come out in one piece like I normally do.
First things first, I need to mark a line to cut to.
1 inch from the first flute is a good starting point

Then I cut along that line right up to the heelboard and up to the flange of the crossmember

As I feared, the ropy old inner sill repairs were going to cause me problems so I decided to remove them

And out

Luckily for me, they were only held in with a few snags of braze which more or less popped off with a slight pry. I'm not sure how they would have held up in a collision bearing in mind that the car flexed hideously when jacked up.
I wonder how it handled??
The spot welds holding the inner sill to the step were located and removed

And the same went for the spot welds holding the inner sill to the bottom of the companion bin
And then the back half of the inner sill could be removed


With that piece removed, I began the same process on the front half


The toeboard and flitch are a horrible mess of patches on patches so I decided to cut it all out in one go


I do still have this to contend with though

And now the bulk is out


Which leads me onto the next job of removing all of the remains from the seams and edges.
This went first


And then the top flanges from the outer sill

This car has two of them due to the last person to fit outer sills leaving the old flange on there instead of removing it which is my pet hate.
I also removed all paint and filler from the step which revealed that it is in serviceable condition

The crossmember end cleaned up fine too so will remain

There is still a bit of cleaning up to do on the underside of the step and crossmember but it's almost ready for me to trial fit the new inner sill.
I shall have to do something with the mess at the front before I can offer it up though.

I left it there for today as it was time to go.
I took this before I left

I think ill have a tidy up in the morning before I do anything more
Quite messy.........
Cheers
Ben
#119

Posted 08 December 2017 - 08:11 PM
Love your write ups Ben, very methodical and detailed! Whats that on the subframe, a blue cylinder on a bracket? Flame kit ![]() ?
?
#120

Posted 08 December 2017 - 08:20 PM
You could've put the tools away......
For a lovely looking car to start with, there's some nasty horrors hidden
1 user(s) are reading this topic
0 members, 1 guests, 0 anonymous users


