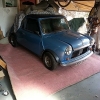
New genuine Nissan sump arrived today, prime for modifying to clear the tie rod.

Home Brewed Micra Mini
#61

Posted 01 September 2016 - 06:19 PM
#62

Posted 03 September 2016 - 12:19 AM
#63

Posted 05 September 2016 - 08:43 AM
Aye, dare say any info would be great, thanks. Picked up a few old tubular manifolds at the weekend, but still need the main 1.5" bends at the top yet if I go the complete home made route.
#64

Posted 05 September 2016 - 11:10 PM
#65

Posted 06 September 2016 - 11:26 AM
I dont suppose you have a pic do you? Theres loads, but they all have the large pre-cat.
#66

Posted 06 September 2016 - 01:07 PM
I dont suppose you have a pic do you? Theres loads, but they all have the large pre-cat.
Most of the ones I've seen use the 4-bolt MGF manifold, you need the lower Rover 200 part as well of course, and some lose the flange.

Edited by Artstu, 06 September 2016 - 01:22 PM.
#67

Posted 06 September 2016 - 01:57 PM
Excellent Artstu! I have found both, a used manifold, and a brand new set of 200 downpipes and flexy! Im pure delighted! Thanks very much.
#68

Posted 06 September 2016 - 03:20 PM
Micramini - only thing to be careful of is that the mounting flange between these pipes comes in 4 stud and 6 stud so make sure you have a match unless you are welding them together.
#69

Posted 06 September 2016 - 09:29 PM
#70

Posted 06 September 2016 - 10:40 PM
Sometimes I wish I'd gone for a removable front end.
#71

Posted 07 September 2016 - 08:43 AM
I must say I will never go back to a regular front end. The steel flip/removable front is brilliant. So much more room to play with. I will make up some inner wings this time though in alloy or similar to keep dirt away.
#72

Posted 09 September 2016 - 07:56 AM
Another evening in the garage and the engine, frame and hubs etc are all stripped off the car and back to a bare frame again ready for more welding this weekend. Also modified my new genuine sump pan that came from ebay using various hammers, beating it carefully into shape to clear the tie rod on the O/S.
I turned my replacement 1.0 crank pulley on the lathe yesterday, and removed the outer section of pulley. This has allowed the engine to move over by another 16mm towards the O/S and allows the N/S driveshaft to be as long as possible then as I was advised to do. (See I do listen to advice! lol)
This weekend I will be plating up the rear area between the mounts, and also plating up the front tie rod mounts on the frame.
I will also be going over some poor welds with my new Mig welder to see how it fares against the dreaded dirt and crud trapped between the plates of the old subframe bits that was blowing holes in my Arc welds. Looks great on first trials though.
Have been getting a steady supply of parcels at home. The exhaust bits have begun to arrive, and my Mpi fuel tank is now on its way here as well. The wife is going nuts! Hahahahaha........ ![]()
#73

Posted 11 September 2016 - 10:09 PM
Frame is finally finished!!
Its been a very busy weekend in the garage, but its worth it.
Here you can see the pics of the 3mm plate I added between the rear floor mounts to beef up that area a wee bit.
I also used 3mm to plate up the front tie rod mounts. They are now tough as old boots.... Should do the job just fine.
I test fitted the frame to the Mini again, and it fits just perfectly.
Attached Files
#74

Posted 11 September 2016 - 10:17 PM
Engine fitted back into the Mini, and chocked into position using 7mm thick wood to get a good fit in all the tight places and ensure even gaps on each side and around the diff casing etc.
I'm now very happy with the location, and the low front crossmember I wanted will allow me to keep the hinge line low as I had it before. This allows the front end to hinge completely vertical, and gives loads of room to work on the engine without removing it.
I have made up some nice cardboard engine mounts so I have some templates to cut out the 5mm plate steel for the mounts.
I then tested the front end back on just to make sure it all fits right before finally making up the mounts this coming week. Main engine plates for the front two mounts are cut out, ready to drill.
Its been a good weekend here! ![]()
Attached Files
Edited by micraminiman, 11 September 2016 - 10:21 PM.
#75

Posted 13 September 2016 - 09:57 AM
Thats the front two engine mounts almost finished, just some gussets to make and add yet. The engine and frame are now back out ready to make some cardboard templates for the rear mount tonight.
Ive also removed the speed sensor from the gearbox, and have cut the top off the connector part and soldered wires directly to the pins, which are now bent flat. This gives more clearance for getting the engine in and out, and stops the sensor hitting the bulkhead. There is now 9mm between the sensor and bulkhead, so Im happy.
Attached Files
2 user(s) are reading this topic
0 members, 2 guests, 0 anonymous users


