Very nice!
Mcmini Micra Conversion
#76

Posted 09 September 2016 - 10:00 PM
#77

Posted 10 September 2016 - 08:53 PM
Looks well smart like. Hope I can get mine looking like that! Its gonna look ace in the mincer like.
Not likely for me tho if keich Ebay dealers have their way.....
I ordered the cleaner you recommended, back on the 5th. I get an email today saying some keich that the postage to the Highlands costs more then the bottle of cleaner itself so they refunded me. Not happy at all.
Have ordered a smaller bottle of similar stuff from a different source. Fingers crossed it will work.
#78

Posted 10 September 2016 - 11:40 PM
I bought some brick cleaner to try as it is supposed to be phosphoric acid but the stuff I bough was caustic so not as good.
I managed to get the gearbox mated. It went on pretty easy when the engine was on the hoist.
Now I'm working on the belt and tensioner. I need to fabricate a few bits to get it all to work.
#79

Posted 12 September 2016 - 10:46 PM
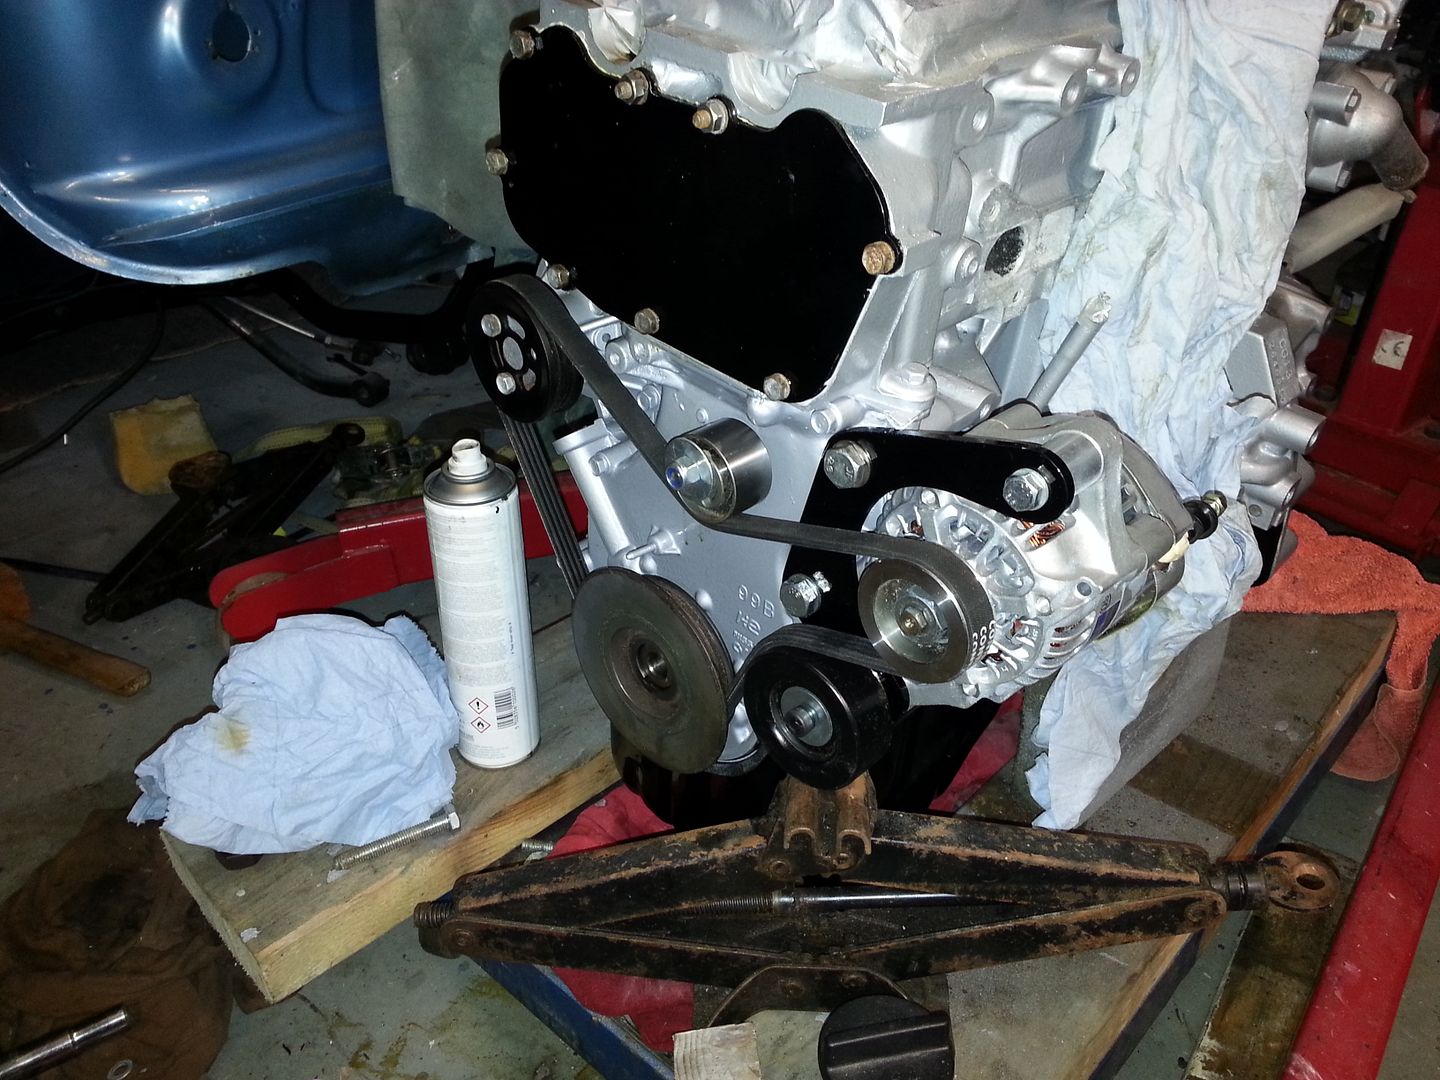
The idler pulley between the water pump and the alternator is adjustable as it has an ex centric fixing. The idler bellow the alternator is on a cam and is the main adjustment. This is the pulley that i think will give me a problem with clearance to the pocket i made on the inner wing. Time will tell!
It also pushes the belt pretty close to the head of a bolt that secures the alternator bracket.
I was also going to add a brace between the rear of the alternator top fixing and a conveniently placed hole on the cylinder head. Thanks Nissan!
#80

Posted 21 September 2016 - 10:59 AM
hi Mc mini 22,
loving your work! just wanted to ask about your belt set up. have you modified the crank pulley? and what are the other two idle/tensioner pulleys off??(ford, Peugeot??) the more info the better.
Keep up the good work
cheers
#81

Posted 21 September 2016 - 01:02 PM
I think the bottom one will stick out too far so I might have to pop the bearing out and use it in a new homemade pulley wheel. When I eventually get around to fitting the engine I will see if it fits! It's been a bit of a pain trying to work out an alternator that fits down the front.
Not done much on the mini this week as I'm spraying some wheels for my volvo. Good practice for that set of KN Mercury wheels I have in the attic of the garage.
#82

Posted 21 September 2016 - 02:23 PM
cheers fella, that's a great help!
#83

Posted 21 September 2016 - 02:49 PM
I appreciate the info on the pulleys too, thanks very much. I like how youve done it. Hopefully my wee alternator will fit just like yours does. I have the tiny 45 amp Nippon Denso from the Dihatsu Charade. Looks the same as yours. I will have to make a pulley for it though, as its currently a V belt pulley thats fitted.
#84

Posted 21 September 2016 - 04:39 PM
#85

Posted 21 September 2016 - 07:51 PM
cheers fella, that's a great help!
No problem.
I take it we are about to see another Micra conversion getting started?
#86

Posted 01 October 2016 - 11:25 PM
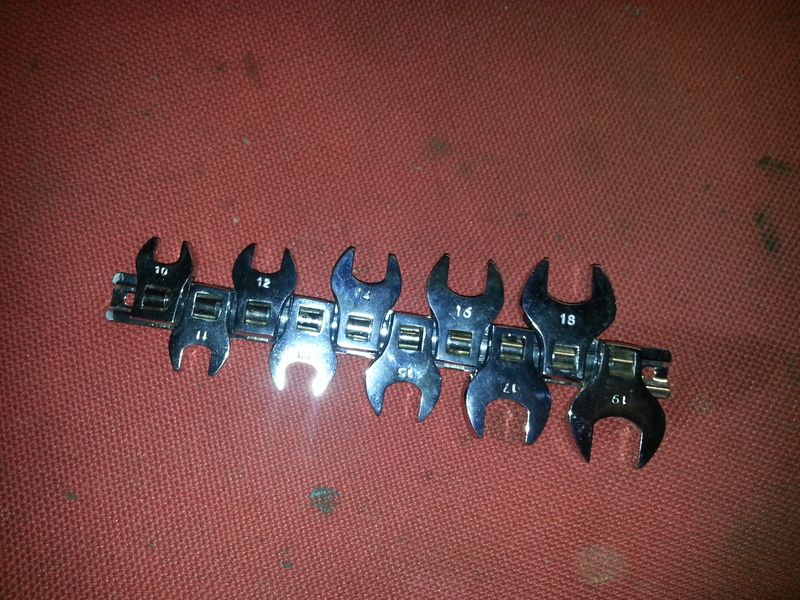
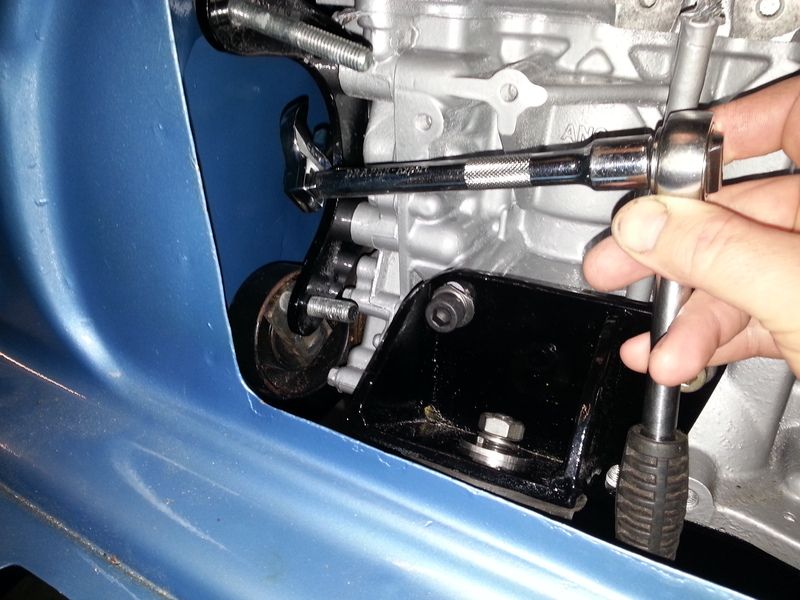
The engine is in and still needs final position sorted as i put loads of adjustment slots on all the mounts. Also have to shorten all my engine mount bolts by 5mm. all 10 off them. These are the wee jobs that soak up the time.
I think I need to start planning a bit better. Time to make up a "to do" list.
#87

Posted 10 October 2016 - 09:36 AM
Not much progress to tell but I thought I'd post up what I have been up to.
Shortening my engine bolts was a nightmare as the bolts were high tensile and just ate hacksaw blades. Ended up using a cutting disc in the angle grinder.
Just the boring stuff I'm afraid -
Stripping and cleaning CV joints before rebuilding the drive shafts.
Shimming my new ball joints. (why are there never enough shims!?)
Cleaning up my rusty brake discs.
Trying to find all the wee bits like bump stops and taper hub washers.
So concentrating on the suspension and driveshafts to let me align the engine properly.
Time is a problem at the moment as all of the family have a nasty cough. Sounds like a TB ward in our house! I'll probably get it next week.
#88

Posted 12 October 2016 - 07:31 AM
Like the idea of shortening the mount bolts. Would make getting the engine in and out a piece easier for me. I remove the two front mounts completely to get the engine out, gives more room to manouver it. Another job to do.....
#89

Posted 12 October 2016 - 08:22 AM
Like the idea of shortening the mount bolts. Would make getting the engine in and out a piece easier for me. I remove the two front mounts completely to get the engine out, gives more room to manouver it. Another job to do.....
The engine bolts were shortened as they were bottoming in the tapped holes on the block and on the gearbox. Shortening them (to 30mm if I remember correctly) was quicker than trying to source the correct length. I also have to remove the engine mounts to get the engine in place so I used socket headed bolts. The hardest job for mounting the engine was to get to the nuts on the bottom of the rubber engine mounts that connect them to the subframe. I was about to drill holes in the front panel when I thought I'd try the crow foot spanners. Managed it but it was still a nightmare.
I have been struggling the last couple of nights to get my driveshafts built up. Turns out that the outer CV boots I had were for drum brakes and were also pretty hard and cracked so I bought new Shaftec ones. The type of steel bands that come with them are rubbish. I am not having much success with the special crimp pliers I bought. They need to be pretty neat to miss the front hub but when I tried to form them they stuck up too far and rubbed against the inner face of the hub. I ended up dressing them up with a hammer. The inner joint on the left hand shaft is also pretty tight for space against the subframe.
I'm thinking that the other type of band would be better. The ones that use a tool that rolls up the excess and then cuts the band to length. These would probably be lower profile but they are a bit more expensive.
#90

Posted 12 October 2016 - 11:16 AM
1 user(s) are reading this topic
0 members, 1 guests, 0 anonymous users


