Mcmini Micra Conversion
#61

Posted 30 August 2016 - 04:45 PM
That is me been on this for 16 months and I now feel I am on the downhill side.
Would I buy a frame to speed things up if I did it again? No chance. Where's the fun in that?
#62

Posted 30 August 2016 - 05:50 PM
Wow this is a fantastic conversion. I really like your subframe - and I'm impressed that you did the axles yourself. I had mine done by an axle shop.
#63

Posted 30 August 2016 - 06:10 PM
Wow this is a fantastic conversion. I really like your subframe - and I'm impressed that you did the axles yourself. I had mine done by an axle shop.
Thanks. It does help that I work for an engineering school and have access to lots of handy equipment. If this wasn't the case then this would probably been a simpler conversion with square tube subframe and a standard manifold. I feel that as I have the tools at my disposal then it would be rude not to make use of it. It's all practice for work after all!
#64

Posted 30 August 2016 - 10:01 PM
I wanted a side exit as I intend to fit a tow bar (I have a plan for a mini pick up style trailer).
Anyhow the plan was to fit the existing RC40 unless i found one. I was looking for a stainless one and if I couldn't find one i was going to make one in stainless. And this came up and it was local. Twenty quid and its solid.
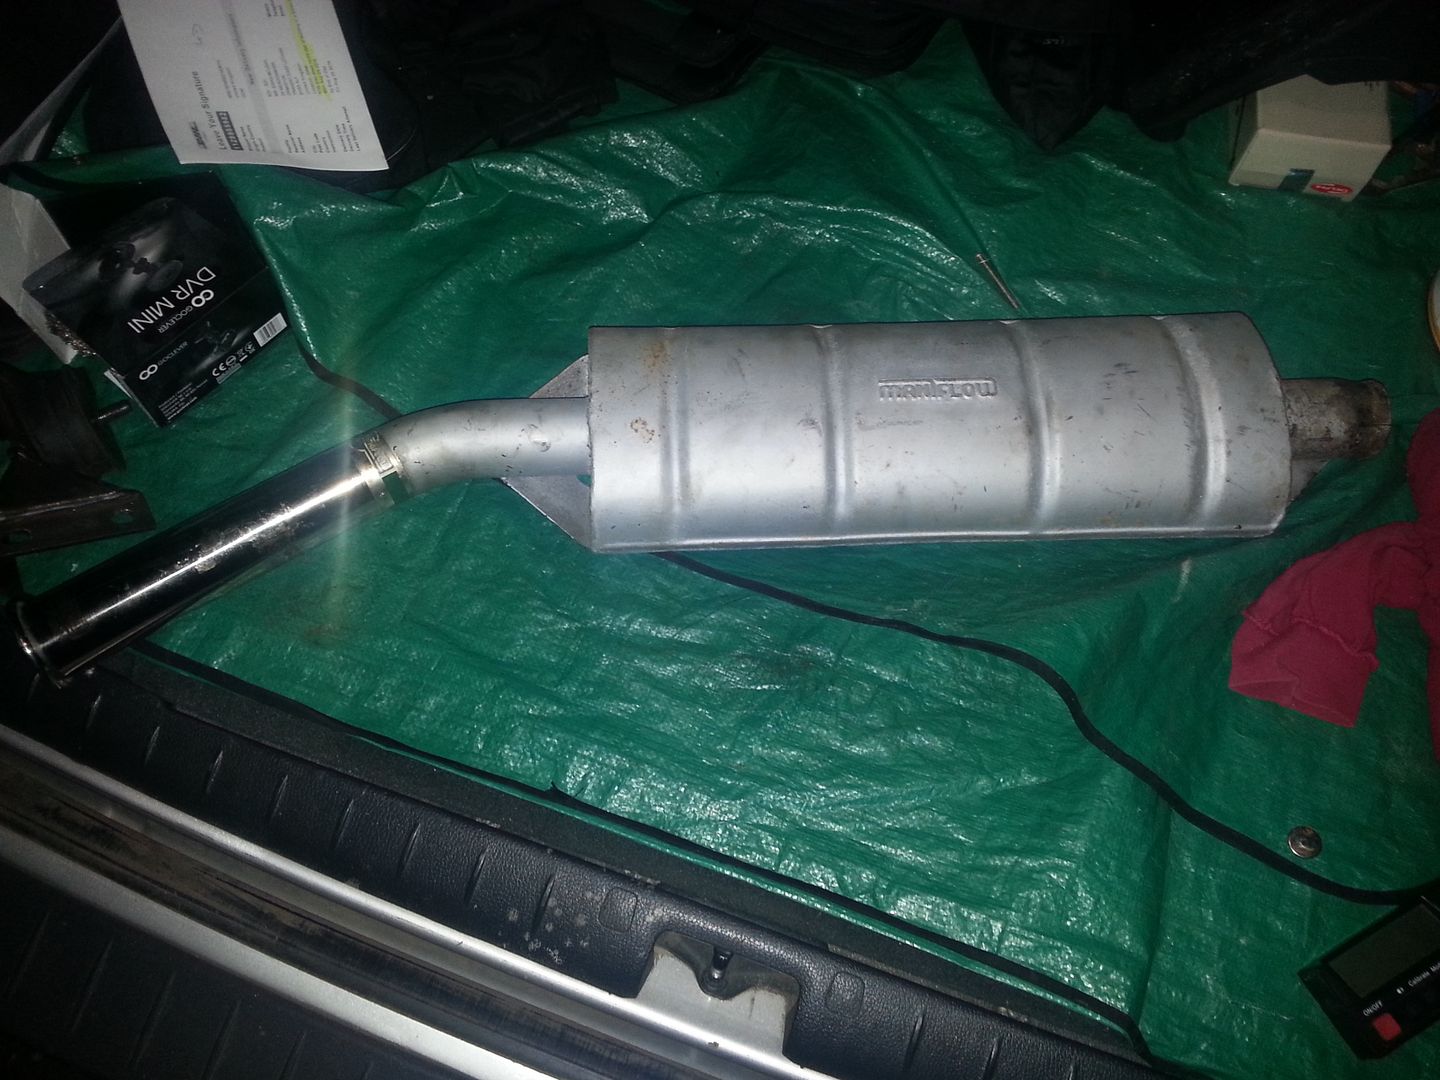
That saves a lot of dicking about!
Still need to make a bend to join it to my stainless centre pipe which should be easy enough.
#65

Posted 04 September 2016 - 05:18 PM
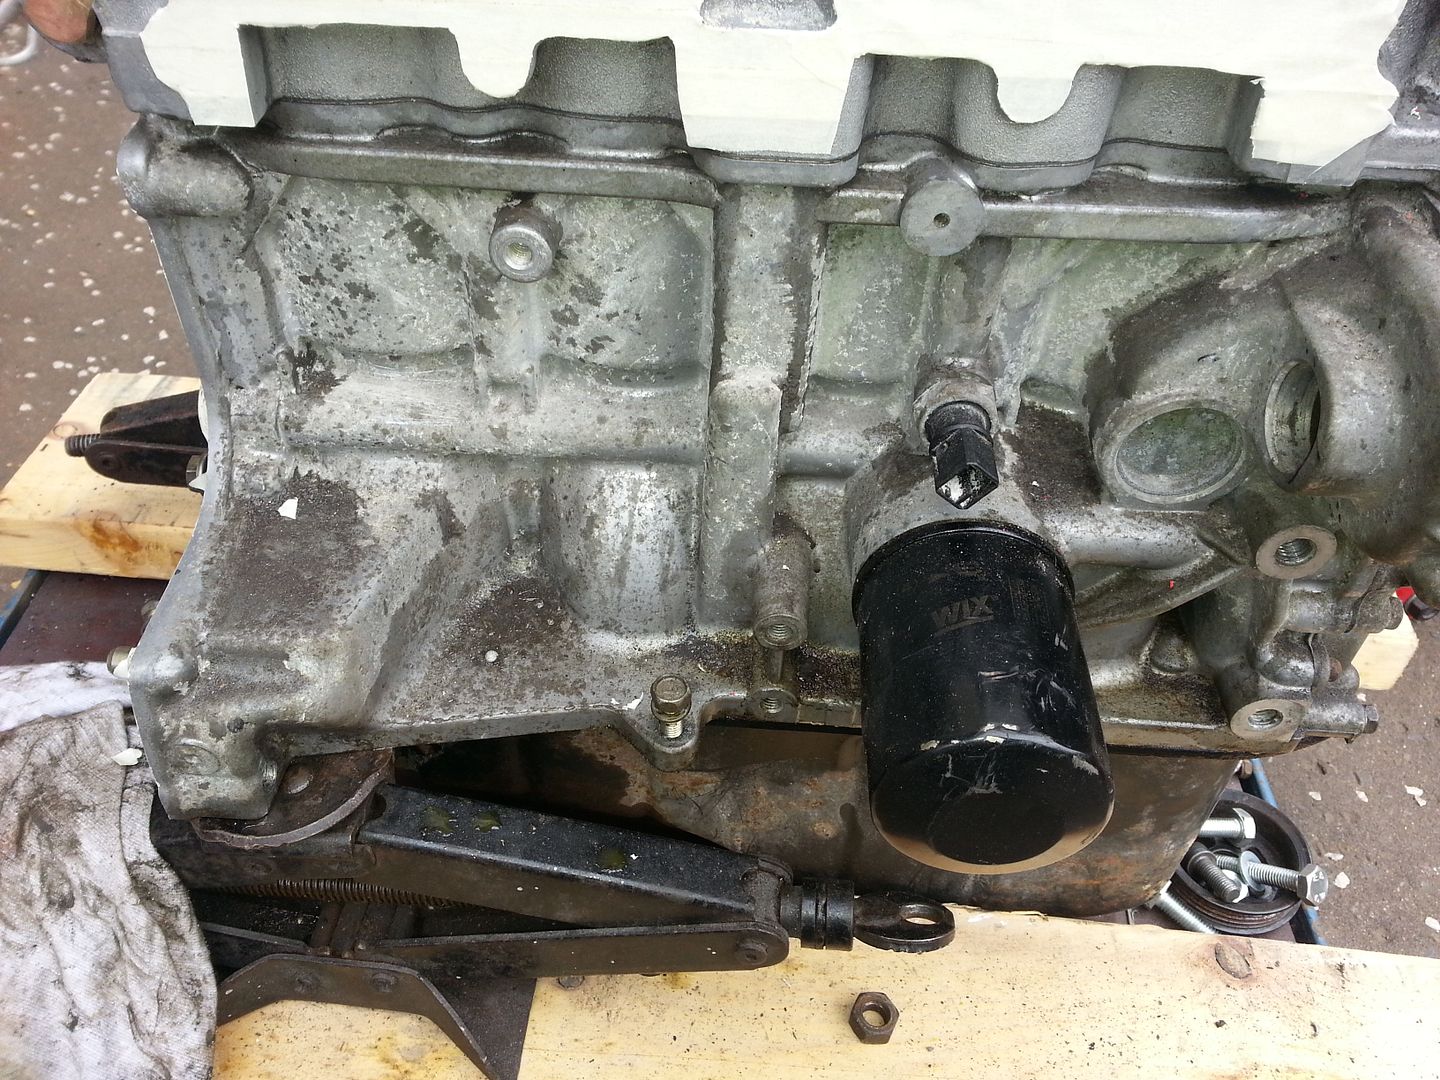
So gloved up i plastered it all over the engine. You have to let it work and keep brushing it. There are bits of the engine that you can't get a wire brush in but a 1/2 inch paint brush gets in there. It took me all day to do the cleaning and masking. And ended up with this.
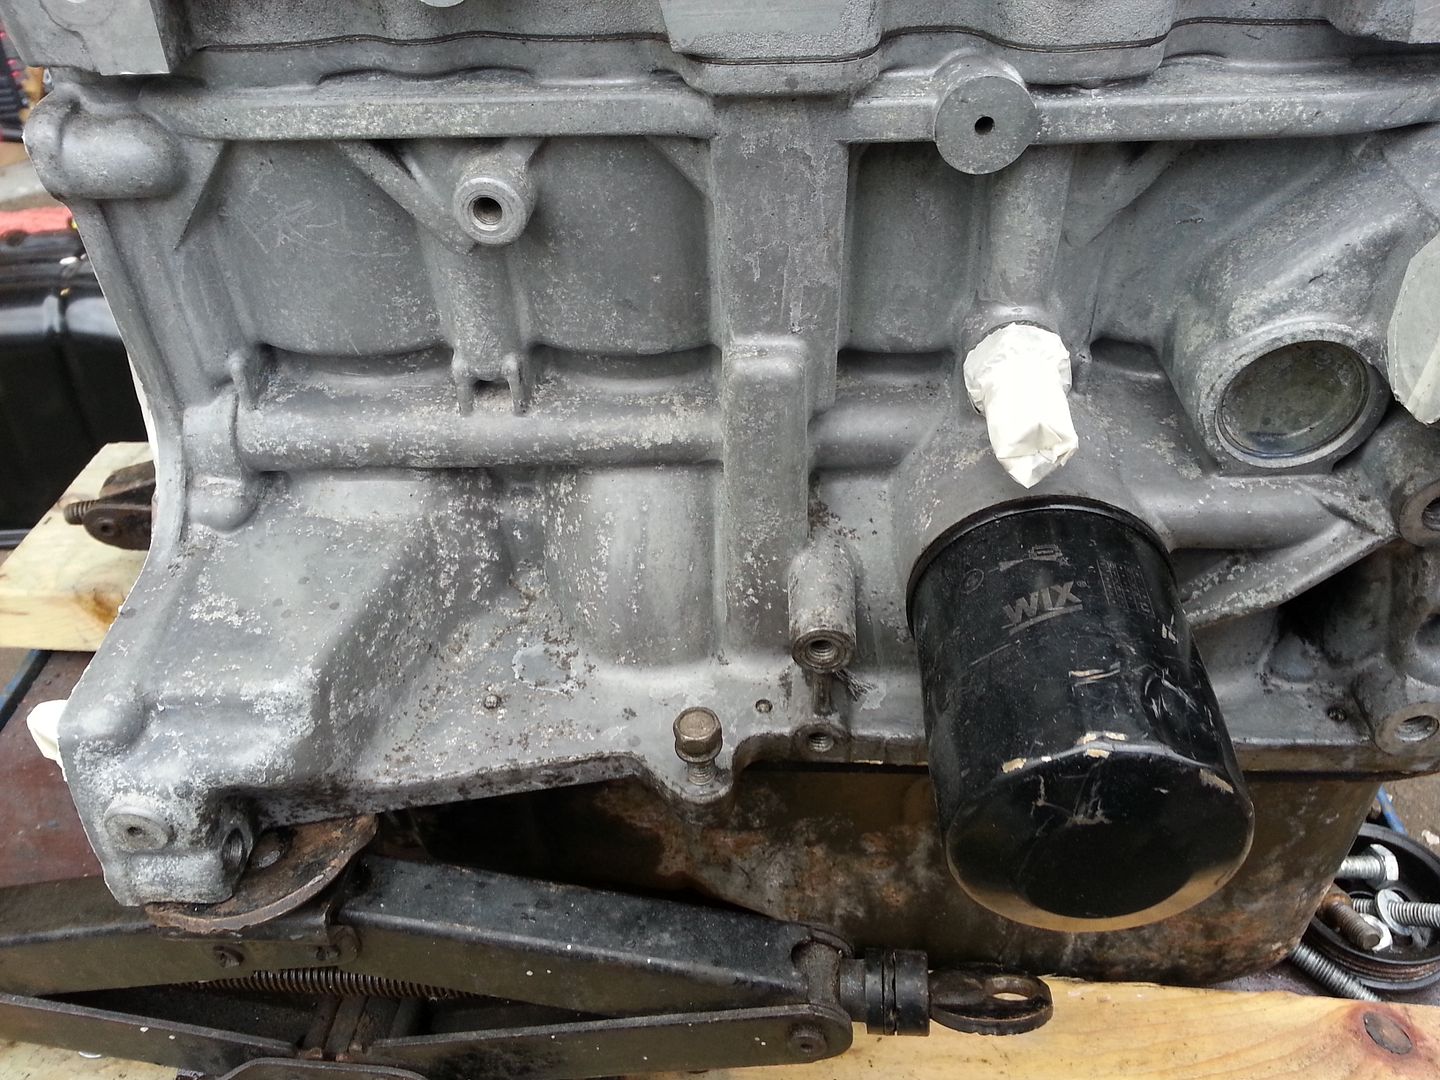
Soda blasting would probably have been better but that would have been a lot of work to set up.
As a side experiment I brushed some of the acid on to some of the rusty steel water pipes. This stuff really shifts the rust. You can smell it and a wee bit smoke comes off as it reacts with the rust.
#66

Posted 04 September 2016 - 10:28 PM
#67

Posted 05 September 2016 - 08:45 AM
Must go and order that stuff just now! Looks ace like.
#68

Posted 05 September 2016 - 09:46 AM
Now I need to find some rusty steel to give it a proper trial!
Managed to get the engine and gearbox primered and painted silver. Photos to come!
Hoping to get the sump and all the other brackets painted black tonight.
#69

Posted 05 September 2016 - 02:59 PM
Yer getting closer then!
I ordered a bottle of the stuff. Not that Im ready to paint the engine yet, but gathering all the gear required prior to needing it aint a bad thing.
#70

Posted 06 September 2016 - 09:38 AM
Yer getting closer then!
I ordered a bottle of the stuff. Not that Im ready to paint the engine yet, but gathering all the gear required prior to needing it aint a bad thing.
You might want to make a start on cleaning the engine as it's pretty slow. Then again if you are painting it then it doesn't have to be perfect.
More progress last night. I got all the brackets, engine mounts, sump, etc sprayed up in gloss black. No photos as my phone was out of charge. That's pretty much the majority of the painting done but there are still a few bits that I will catch later (master cylinder, rear engine mounts etc.)
That should be me ready to start rebuilding the engine and gearbox with all new seals, clutch, lightened flywheel and getting it ready to drop back in.
Heck, I'm so excited I might even take Thursday off to crack on with it!
Now a question for the knowledgeable - What do I need to do/fit before I fit the engine to make my life easier?
Top suspension arms - definitely
Front subframe mounts - definitely
Fuel lines - maybe
Brake lines - maybe
Edited by McMini 22, 06 September 2016 - 09:40 AM.
#71

Posted 06 September 2016 - 11:12 AM
I built the whole front subframe up with the engine before I put it into the car. I'd do fuel lines and brake lines on the car, my front brake lines attach to the front subframe and these were also built up first. I did driveshafts later but I can't see a resale they couldn't be earlier.
Now a question for the knowledgeable - What do I need to do/fit before I fit the engine to make my life easier?
Top suspension arms - definitely
Front subframe mounts - definitely
Fuel lines - maybe
Brake lines - maybe
A couple of bits that might be worth looking at replacing is the o ring at the back of the waterpump as it doesn't like being disturbed and the waterpump itself as the seals seemed to grace hardened over the 5 years I'd been doing the conversion (yes i was slow).
#72

Posted 06 September 2016 - 11:24 AM
I built the whole front subframe up with the engine before I put it into the car. I'd do fuel lines and brake lines on the car, my front brake lines attach to the front subframe and these were also built up first. I did driveshafts later but I can't see a resale they couldn't be earlier.
Now a question for the knowledgeable - What do I need to do/fit before I fit the engine to make my life easier?
Top suspension arms - definitely
Front subframe mounts - definitely
Fuel lines - maybe
Brake lines - maybe
A couple of bits that might be worth looking at replacing is the o ring at the back of the waterpump as it doesn't like being disturbed and the waterpump itself as the seals seemed to grace hardened over the 5 years I'd been doing the conversion (yes i was slow).
Unfortunately my inner wings are staying standard (except a pocket for the alternator and a couple of light bends) which will make it very difficult to lower the car onto the engine/subframe. And I don't want to scratch the hell out of everything!
I think I'll go for fitting the pipes once it's all in but I may regret that decision. I was planning to use Kunifer for brake lines and also for the fuel lines. It will last longer than steel and is pretty easy to form (and better than copper). I take it 6mm for fuel feed and for return pipe will be ample?
As for the o ring. I had planned to replace this as I am making up a stainless pipe from the radiator to the pump. I had heard of others having a problem with this o ring so I do learn from others mistakes or misfortunes!
#73

Posted 06 September 2016 - 02:14 PM
#74

Posted 06 September 2016 - 02:14 PM
#75

Posted 09 September 2016 - 02:04 PM
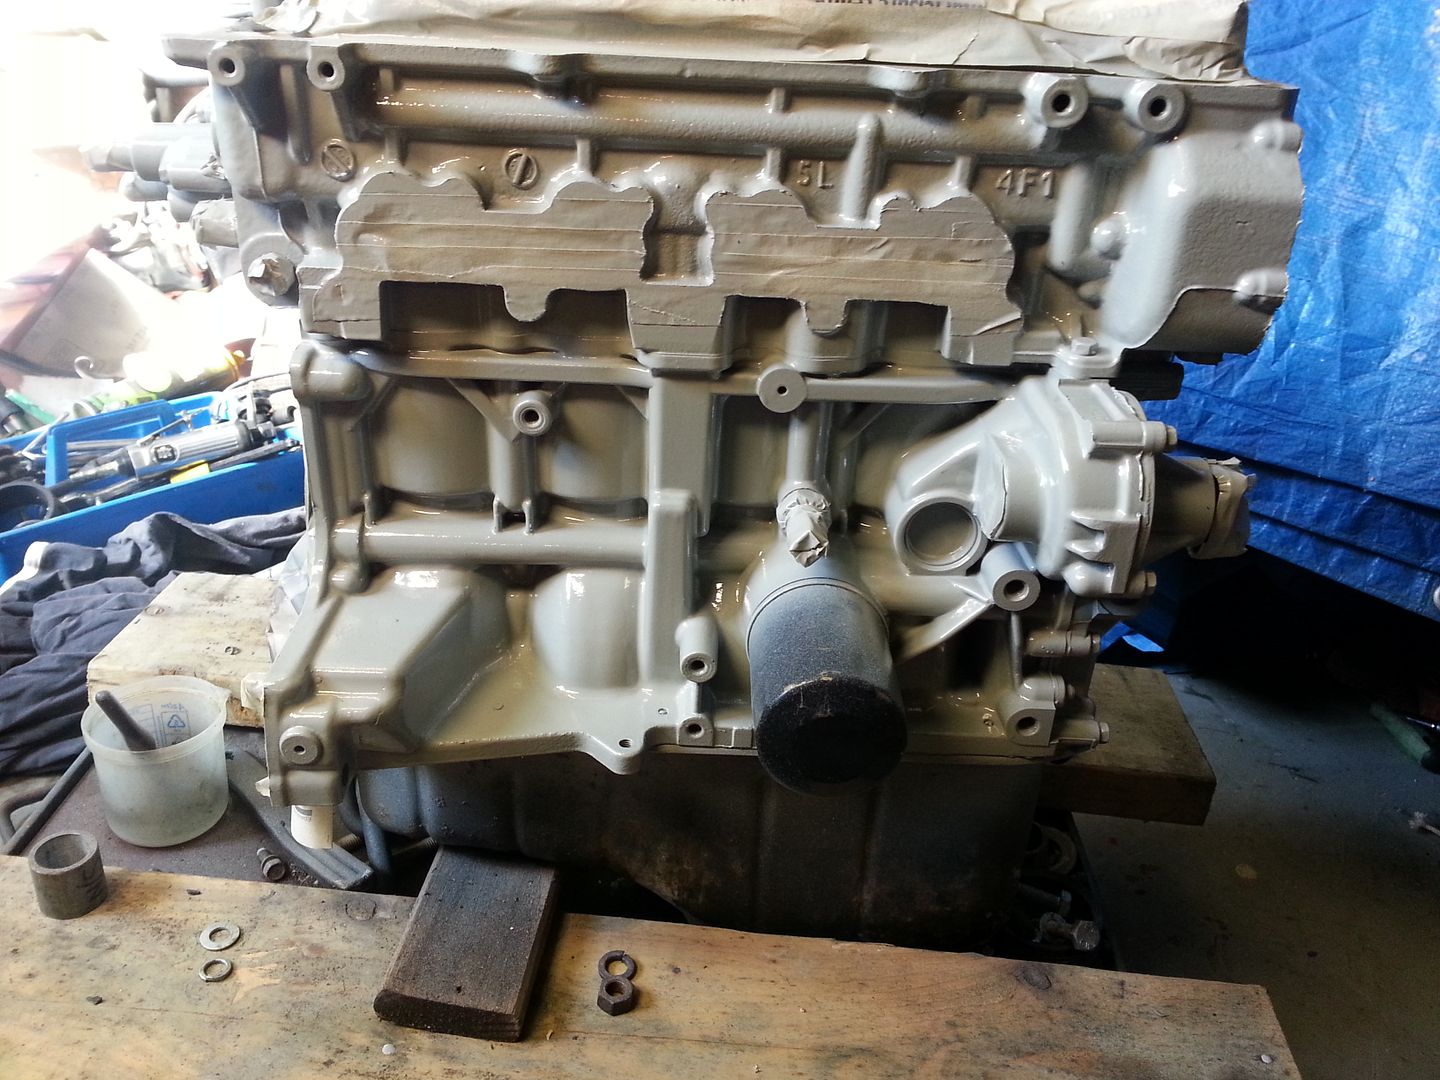
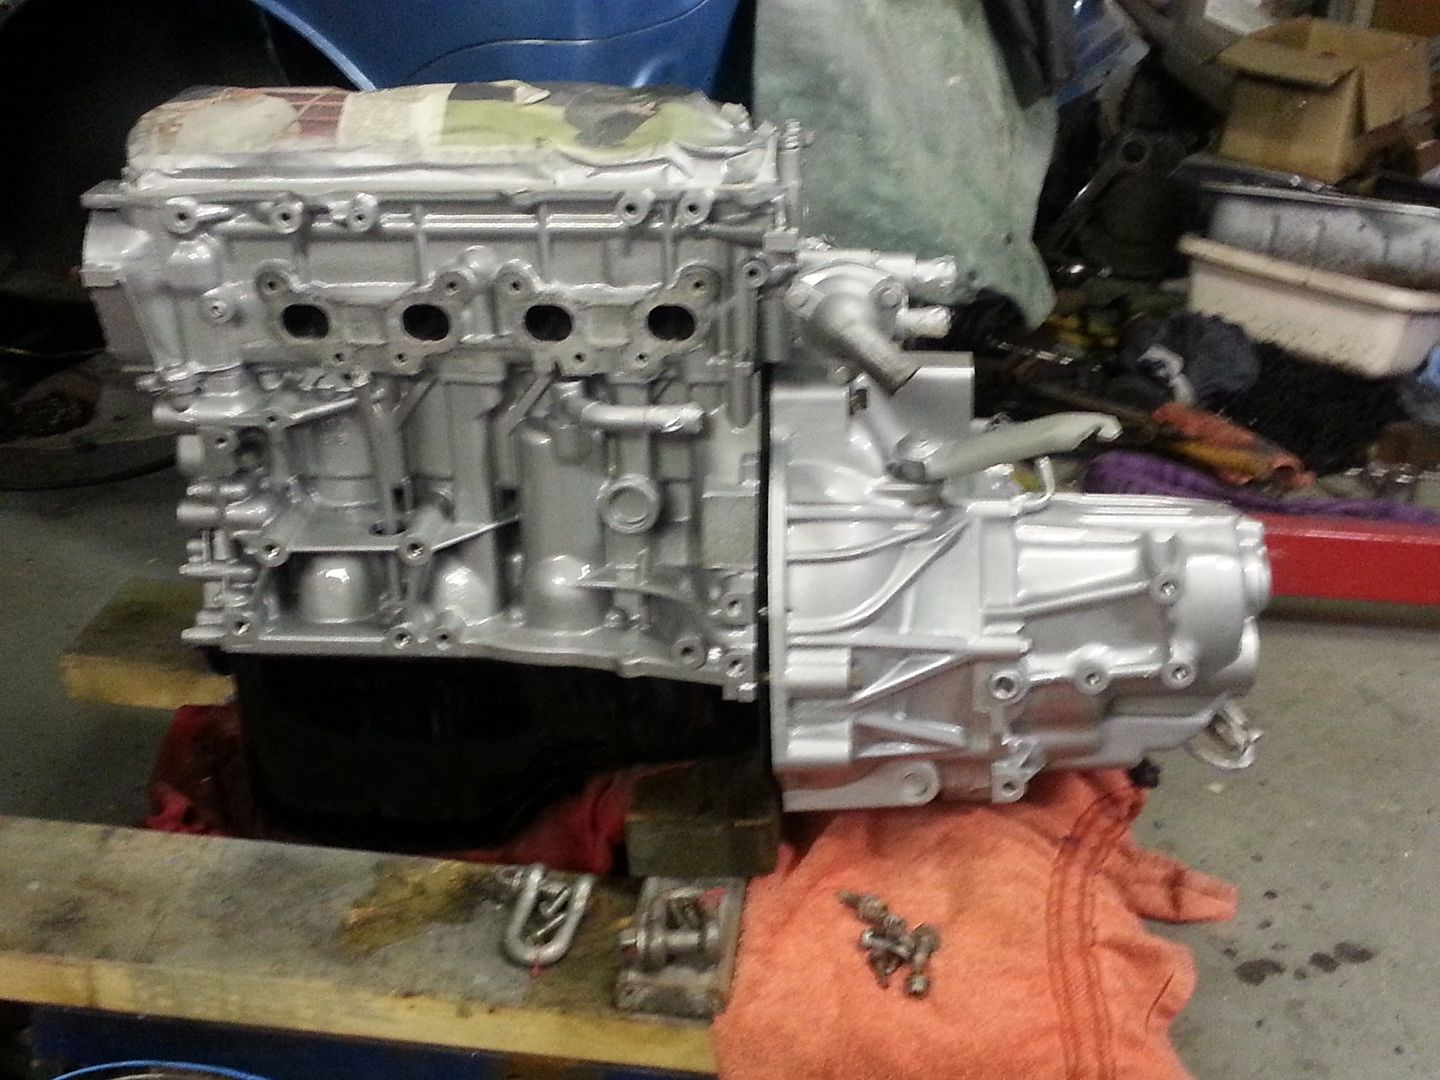
This is the engine after cleaning and painting with epoxy primer. The primer covered up any "bad bits" in the block.
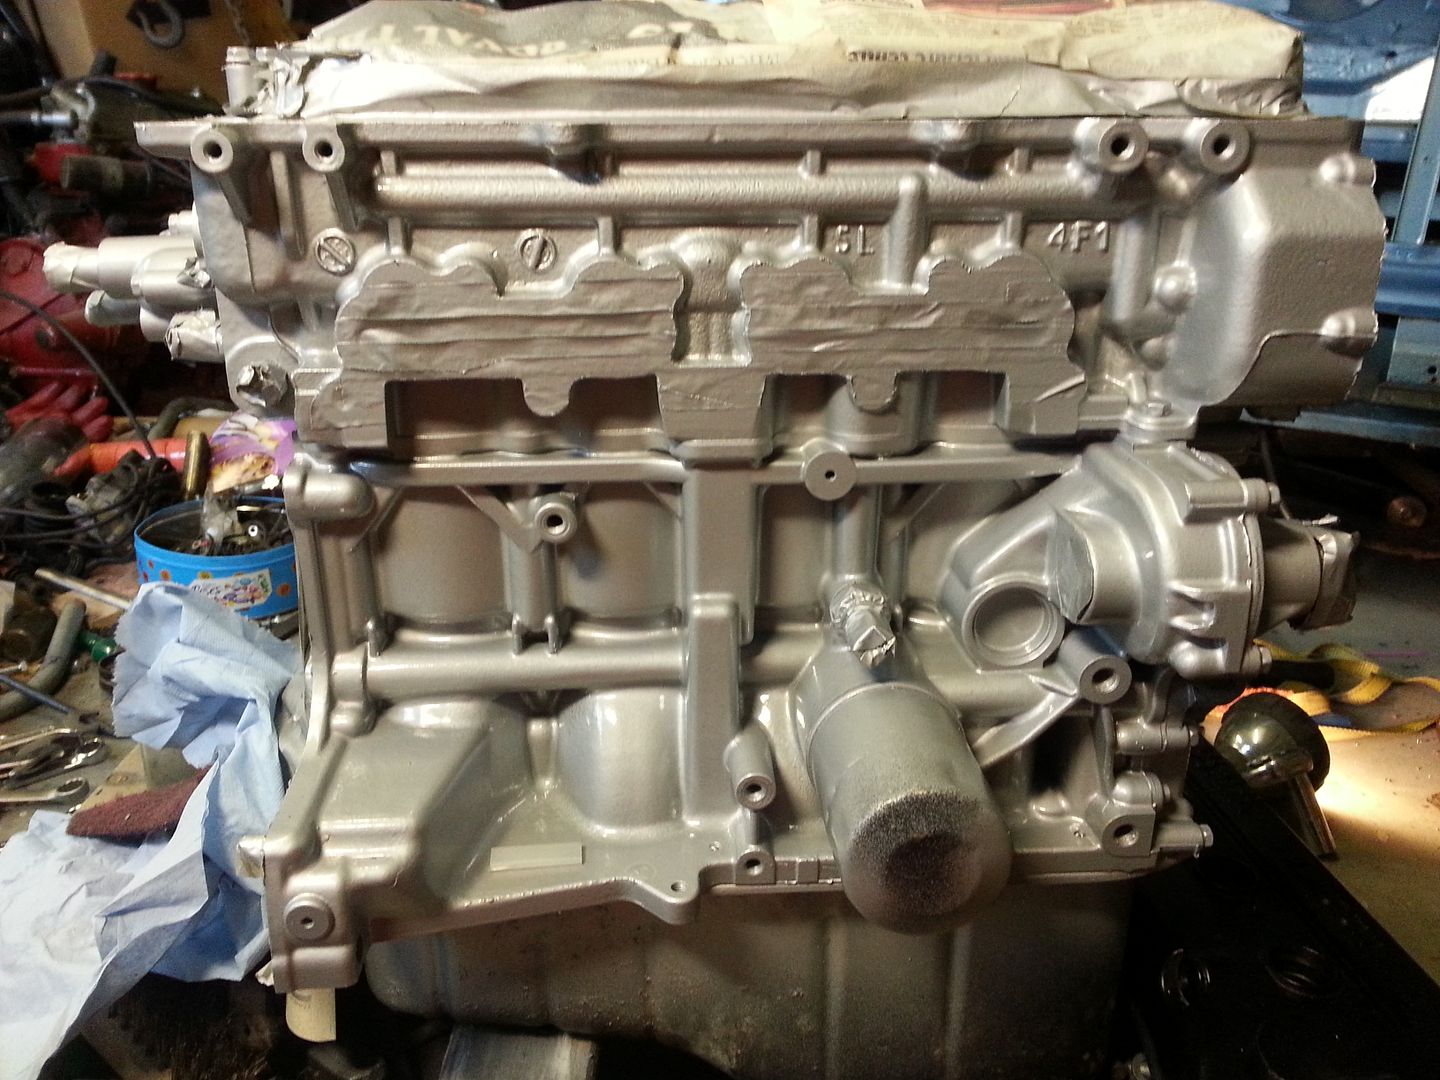
And this is it after a couple of coats of 2 pack silver. The paint I used is a generic gloss silver but it is more like a metalic grey. Good enough for the job and I've used it already on my brake callipers.
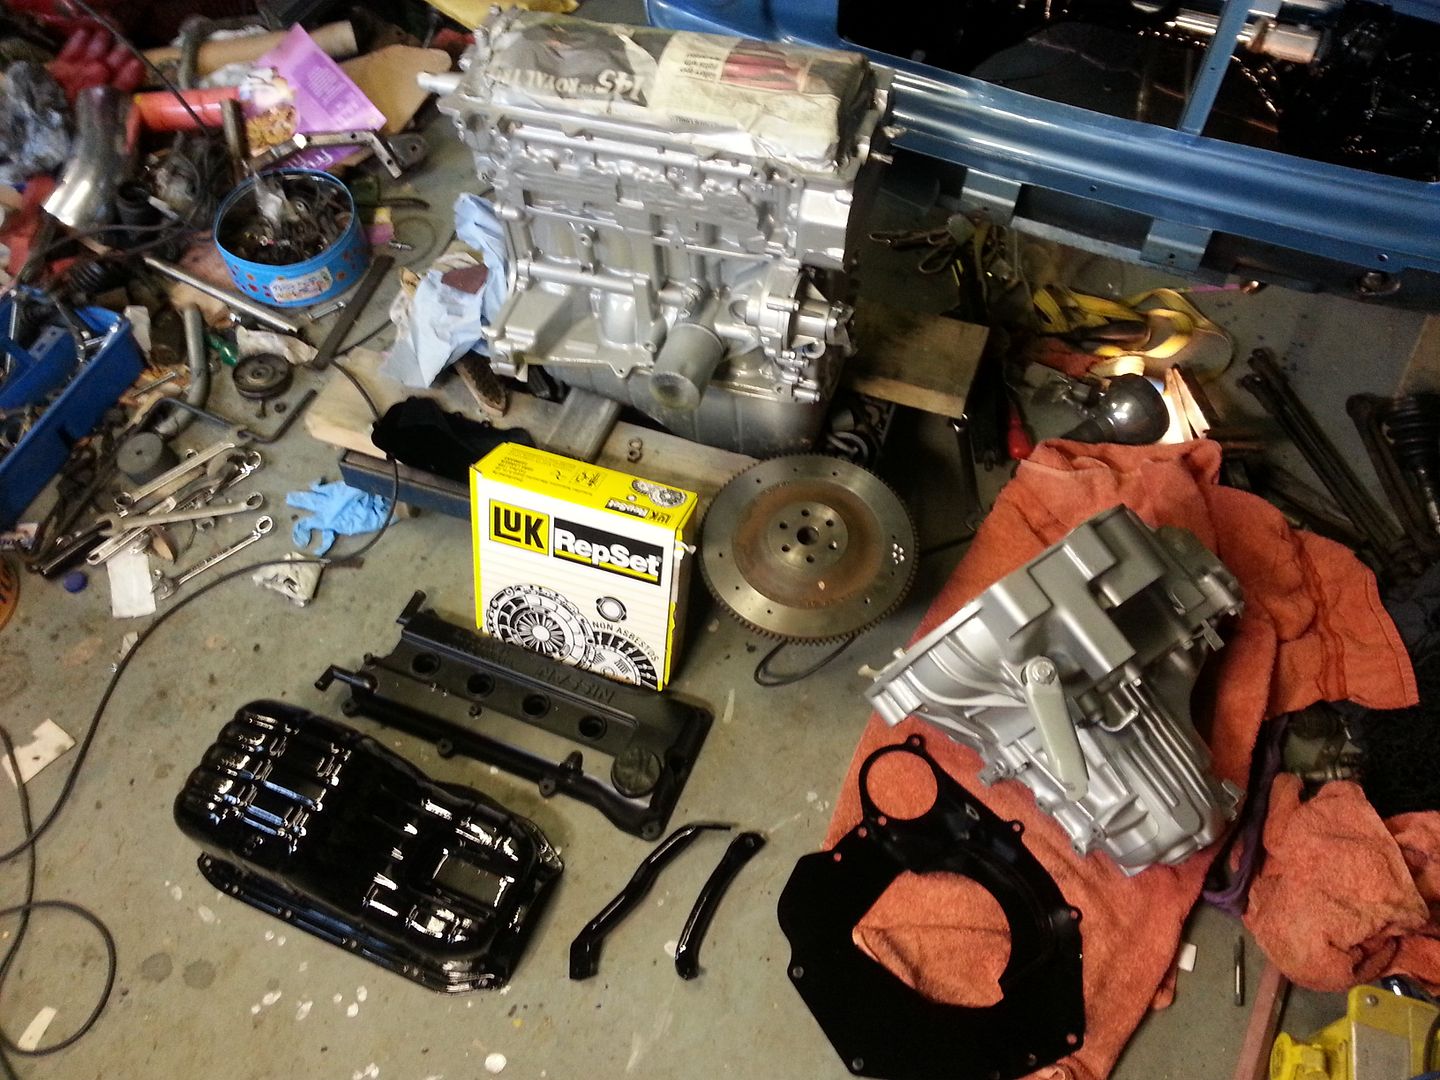
I have a few days holiday to use up so I took yesterday off to assemble my engine and gearbox. It's great to have a ME day every now and again! So I had the entire day to assemble this lot together.
New -
Crankshaft seals
3 piece Clutch
Sump
Sump seals
Diff driveshaft seals
It's the scraping off all the old gasket and getting it spotless that takes all the time.
And this is as far as I got before bed time. I can't quite get the gearbox on properly as I don't have a clutch alignment tool. I did find a long socket that was a pretty good fit so it's not a million miles away. I made up new engine lifting brackets so I'll get it up on the hoist and have another go. The colour of the Engine and box look different in this photo but it's just a trick of the light.
3 user(s) are reading this topic
0 members, 3 guests, 0 anonymous users


