Jump to content


Photo
- - - - -

Mcmini Micra Conversion


  • Please log in to reply
308 replies to this topic

#241 McMini 22

McMini 22

    Mini Mad

  • Members
  • PipPipPipPip
  • 289 posts
  • Location: East lothian

Posted 19 May 2017 - 03:32 PM

Nice! I have two old Singer sewing machines. I use them for making sails, as I have a wee yacht and sailing dinghy. They go through anything using a denim needle.

Need to re-trim my rear seat using the old seat I have to match my front seats out of a Pug 106 Gti.

 That was a lucky find you had there!


After doing a bit checking I will need a proper leather needle as it has a chisel point to cut through the leather.  This would be bad on a woven fabric!

The machine I have is a Singer 201K from 1957.  Stripped it and refurbished it and it works a treat.  No fancy stitches, just forward, reverse and variable length stitches.  When you strip one of these down they are an amazing piece of engineering and manufacture.

I picked up a set of Alfa 147 seats (fabric) and like you I will modify and recover the rear seat.


#242 McMini 22

McMini 22

    Mini Mad

  • Members
  • PipPipPipPip
  • 289 posts
  • Location: East lothian

Posted 20 May 2017 - 01:41 PM

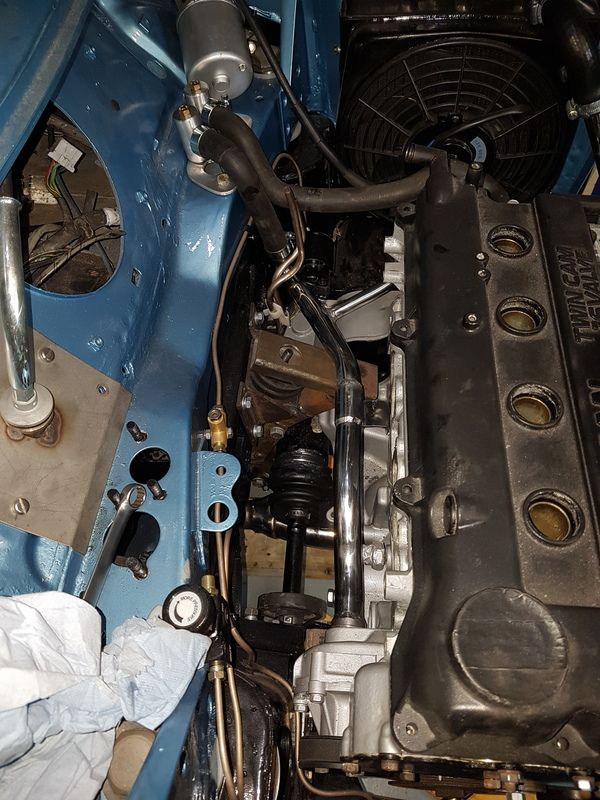
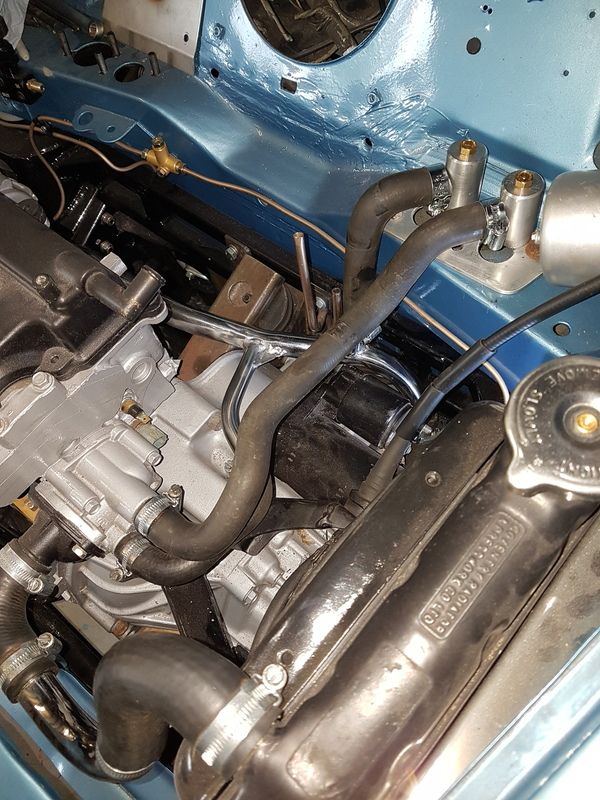
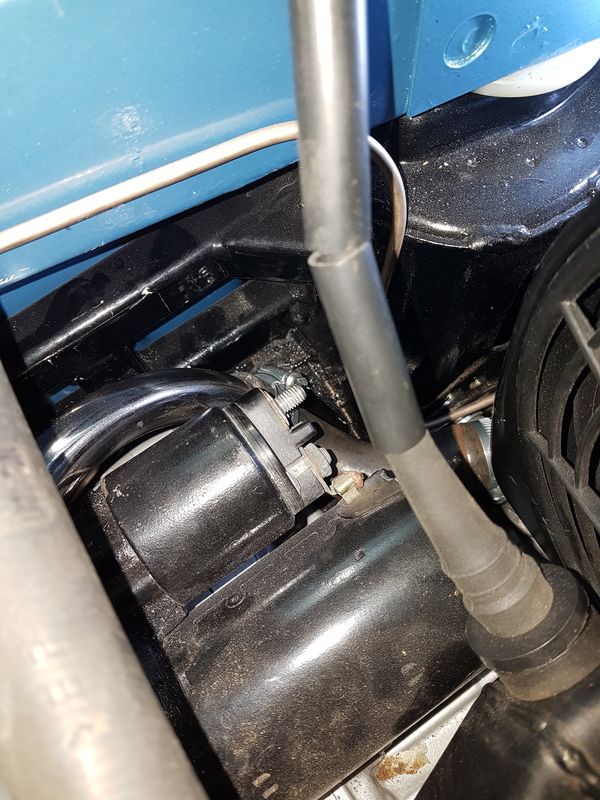
The coolant and heater pipes are finalised and I just need to finish off the bulkhead fitting.
The bulkhead fitting has a couple of radiator bleed valves fitted at the highest point. Should make for an air free system.

20170520_132948.jpg
20170520_132438.jpg
20170520_132507.jpg

#243 McMini 22

McMini 22

    Mini Mad

  • Members
  • PipPipPipPip
  • 289 posts
  • Location: East lothian

Posted 21 May 2017 - 08:50 AM

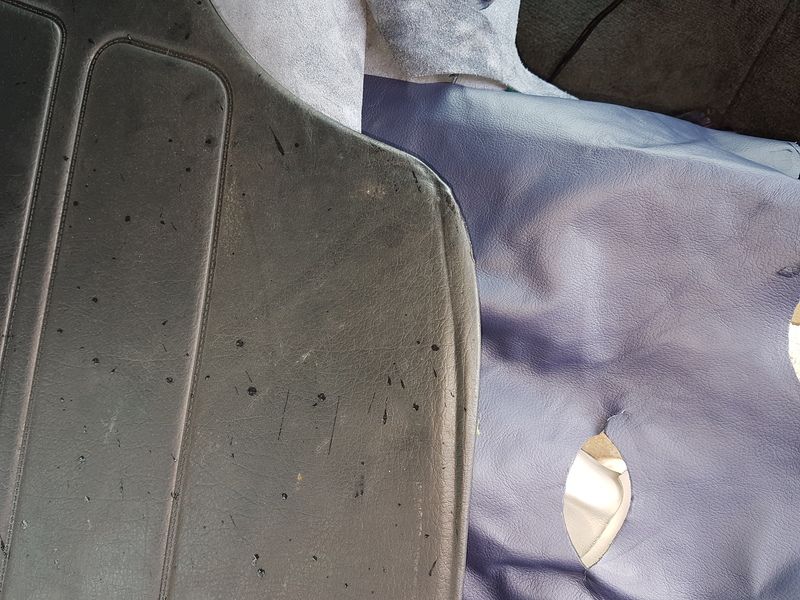
I did a wee comparison with the leather I scored and the door cards. It's quite a bit lighter. The door cards are almost black but I think it will look ok. Miles away from doing this anyway.

20170520_152224.jpg

#244 McMini 22

McMini 22

    Mini Mad

  • Members
  • PipPipPipPip
  • 289 posts
  • Location: East lothian

Posted 26 May 2017 - 10:21 AM

I now have the loom off the Micra. It's a lot bigger than I thought.
Decisions need to be made where the main components will be fitted.

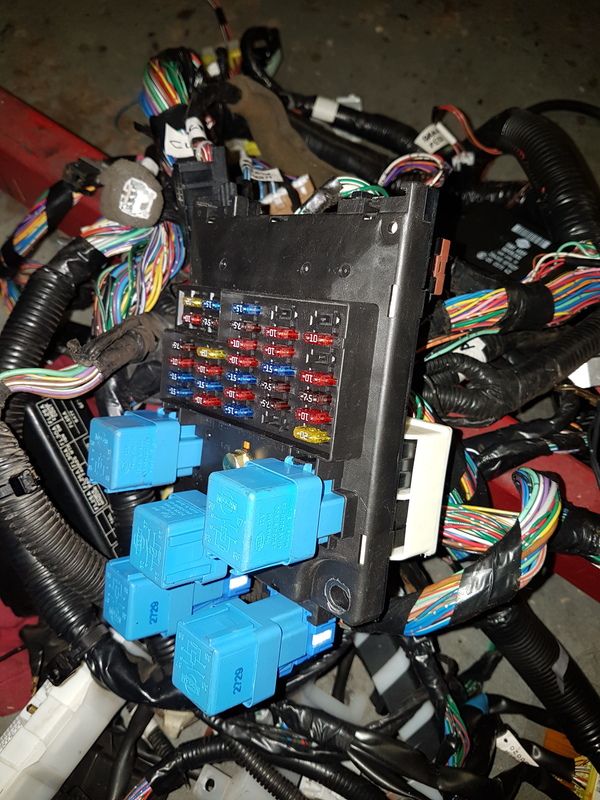
This is the main passenger fuse board.
20170525_230959.jpg

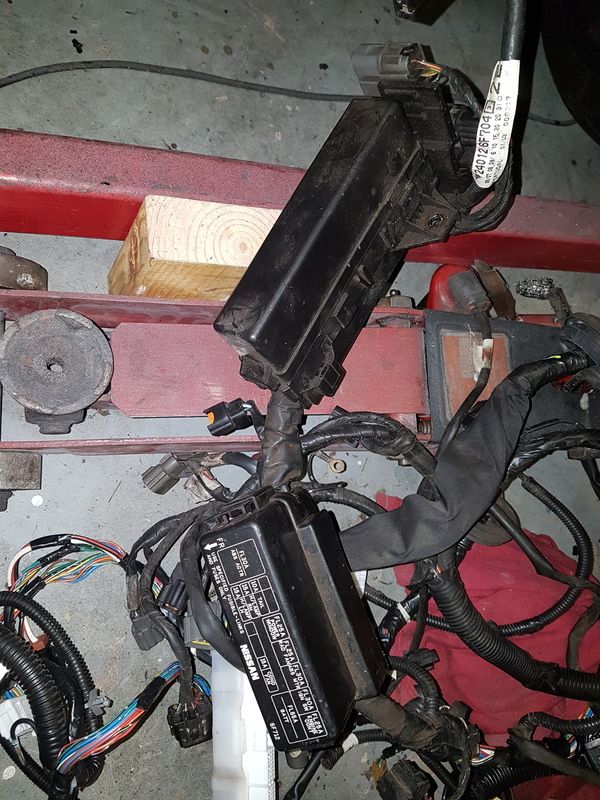
And then there is the engine loom fuse/relay boxes.

20170525_231223.jpg

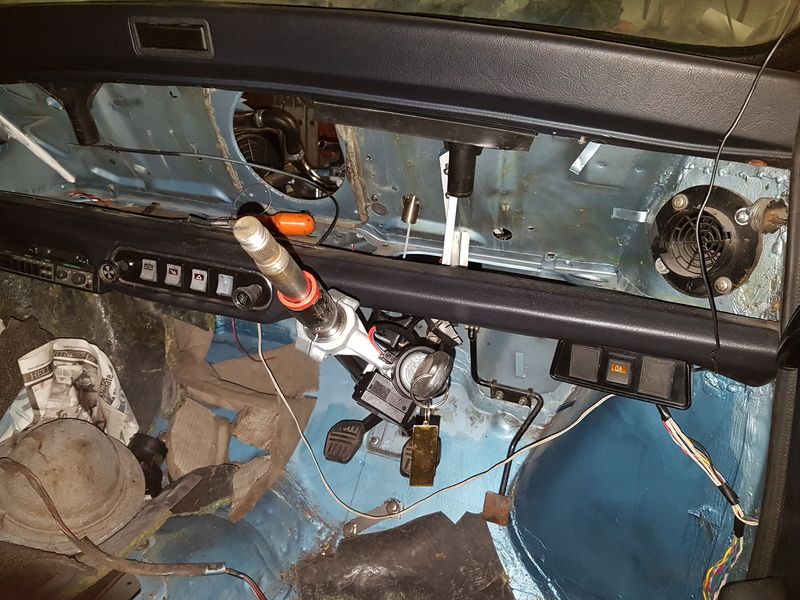
It will be all fitting in behind the dash which will be a homemade wooden dash with Micra clocks fitted.

20170525_230750_1.jpg

So passenger fuses will go on the right hand side. Unfortunately this will need Speedo out to change fuses.
The engine fuses will be on the left and will be accessible through the glove box.

The ECU will fit under the dash on the left where the radio currently is mounted.

Any wiring not required (air con etc.) will be removed after the car is running.

#245 micraminiman

micraminiman

    Mini Mad

  • Members
  • PipPipPipPip
  • 151 posts
  • Location: Scottish Highlands

Posted 26 May 2017 - 11:30 AM

Im at the same stage. Its a LOT of loom to fit into a small space. Good luck!!

I just fitted a multicore cable to feed the rear of the car, and will connect to it.


#246 McMini 22

McMini 22

    Mini Mad

  • Members
  • PipPipPipPip
  • 289 posts
  • Location: East lothian

Posted 26 May 2017 - 06:48 PM

Im at the same stage. Its a LOT of loom to fit into a small space. Good luck!!
I just fitted a multicore cable to feed the rear of the car, and will connect to it.


And most of it is not required!
I don't want to start cutting until I get the car running.
I think I'll be using the Micra loom for the rear. As far as I can see it's
Lights
Tank
Heated rear window
Speakers
Light for the boot

I have bought a load of spiral wrap which should make a neat job.

The Heynes manual is pretty good for wiring diagrams but strangely enough it does not have a diagram for the ECU wiring for a 2000 on model. I contacted Haynes and they emailed me copy within an hour!

#247 fuzzy-hair-man

fuzzy-hair-man

    Mini Mad

  • Members
  • PipPipPipPip
  • 181 posts
  • Location: Armidale NSW
  • Local Club: Minis in the Gong

Posted 27 May 2017 - 07:54 AM

I went through the wiring diagram and removed everything not related to running the engine, it trimmed it down significantly, I got rid of the main fuse box and only run the engine bay box I was also able to get rid of the relay box as well with just a couple of relays for headlamps and the fan in the engine bay ECCS relay I was able to put in a spare spot in the engine bay fuse box, clicks right in.
Basically I have 2 looms mini, everything but engine, and engine loom which from memory is 2 separate looms. The mini and engine looms meet at the ignition and the instrument panel basically. Fuel pump relay is in the boot(no point running power forward then back again.

#248 McMini 22

McMini 22

    Mini Mad

  • Members
  • PipPipPipPip
  • 289 posts
  • Location: East lothian

Posted 27 May 2017 - 11:44 AM

I went through the wiring diagram and removed everything not related to running the engine, it trimmed it down significantly, I got rid of the main fuse box and only run the engine bay box I was also able to get rid of the relay box as well with just a couple of relays for headlamps and the fan in the engine bay ECCS relay I was able to put in a spare spot in the engine bay fuse box, clicks right in.
Basically I have 2 looms mini, everything but engine, and engine loom which from memory is 2 separate looms. The mini and engine looms meet at the ignition and the instrument panel basically. Fuel pump relay is in the boot(no point running power forward then back again.


I was trying to make my life easy by using all of the fuse/relay boxes from the Micra.
From what you are saying, that might not be the easiest solution.
After a bit of searching there are generic fuse boxes and relay boxes available which may offer a neater solution.
Having something that is easy and cheap to fit is one thing but this is a car to be used and having to struggle to reach fuses may end up a real pain in the arse!

Time to do a bit more procrastinating and work out how many fuses and relays I actually need.

#249 fuzzy-hair-man

fuzzy-hair-man

    Mini Mad

  • Members
  • PipPipPipPip
  • 181 posts
  • Location: Armidale NSW
  • Local Club: Minis in the Gong

Posted 27 May 2017 - 10:39 PM

There were a fair few vacant pins on the large plug going to the ecu (I think) by using these I was able to get rid of 1 of the 3 micra engine looms. (driver's side front I think) and I have a little 4 slot fuse box on the underside of the dash rail.
Doing this means it's easier to get the loom in but you'll have the whole thing unwrapped on the floor wondering if it will ever work again. 😁
You are planning on using a lot more of the micra switch gear and ignition barrel than I did though. Means you'll loose all the mini loom and be better integrated...

Edited by fuzzy-hair-man, 27 May 2017 - 10:43 PM.


#250 McMini 22

McMini 22

    Mini Mad

  • Members
  • PipPipPipPip
  • 289 posts
  • Location: East lothian

Posted 28 May 2017 - 01:00 PM

I don't think I will be using any of the mini loom. Might need to use a couple of connectors though.
Latest plan is to place the Micra fuse boxes roughly where I want them and get it running. Then I can replace the Micra fuse board with something neater and smaller. There is a Land Rover one that is 20 fuses and pretty small and cheap. That should replace the main fuse box.

I am currently spending most of my time under the car sorting the gear linkage and the exhaust manifold. Also work in the garden to be done!

#251 McMini 22

McMini 22

    Mini Mad

  • Members
  • PipPipPipPip
  • 289 posts
  • Location: East lothian

Posted 29 May 2017 - 11:44 PM

Well that's the majority of the heavy work done on the garden. Raised bed for the vegetable plot had rotted away so needed renewed. Minis are not the only thing that rotts with time and the British weather.

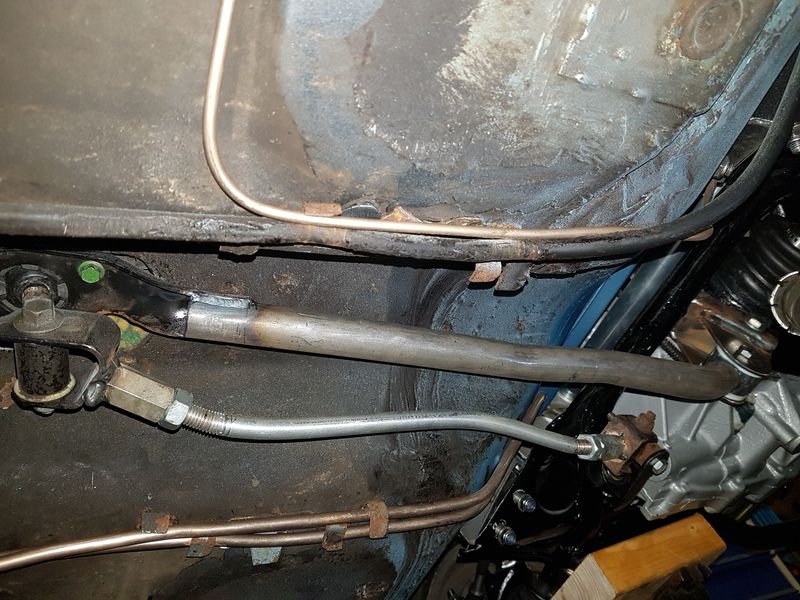
I remade the gear linkage steady bar as I was not happy with the cut and shut Micra one. I also turned up a bush for the gearbox end. Photos tomorrow.

I have a lot of misalignment between the end of the manifold and the start of the centre exhaust section. It's going to take some creative fabrication and a fair bit of TIG welding.

#252 McMini 22

McMini 22

    Mini Mad

  • Members
  • PipPipPipPip
  • 289 posts
  • Location: East lothian

Posted 08 June 2017 - 11:00 PM

The exhaust manifold Y piece is coming on. The output has to taper from a (not very round) 2" down to 1 3/4". Also has to kick down and towards the centre of the car.

20170531_213747.jpgt

My gear linkage. The linkage is currently aluminium but will be copied in steel. The nuts will get tack welded when I'm happy with the adjustment.
20170530_220503.jpg

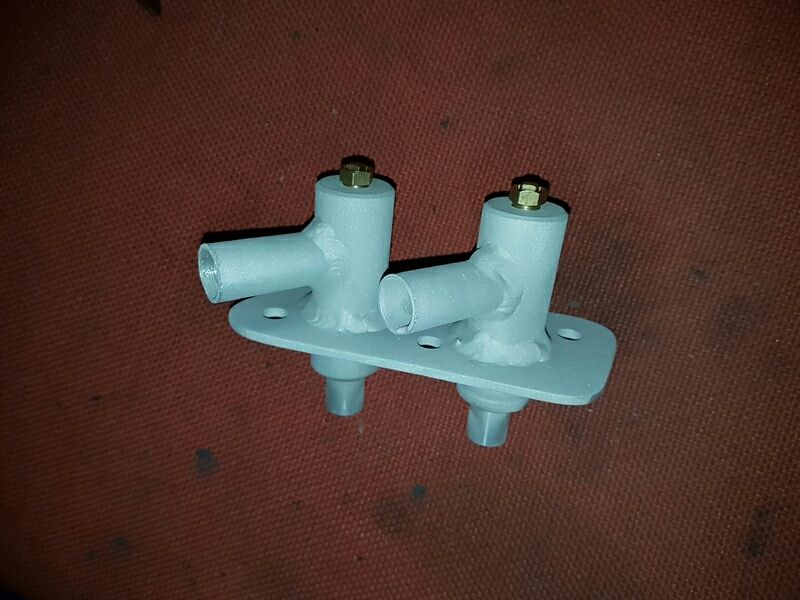
Also I have finished the bulkhead heater hose glands. My welding was not great so I shot blasted it so I think I'll paint it instead of polishing it. I had ordered a length of 16mm heater hose to mate up to the heater but it's pretty heavy duty and does not bend well. So I ordered up some 16mm silicone bends and I'll make the rest up with some 16mm stainless tube. The heater control valve is also getting located up under the dash so it will be a challenge to keep it all tidy.
20170608_215843_edit_1496961064828.jpg

#253 lawrence

lawrence

    One Carb Or Two?

  • Members
  • PipPipPipPipPipPipPip
  • 1,330 posts

Posted 09 June 2017 - 05:08 PM

Exhaust looks good and should flow nicely. Not thought of fitting a flex joint? Helps with the alignment

#254 McMini 22

McMini 22

    Mini Mad

  • Members
  • PipPipPipPip
  • 289 posts
  • Location: East lothian

Posted 10 June 2017 - 03:47 PM

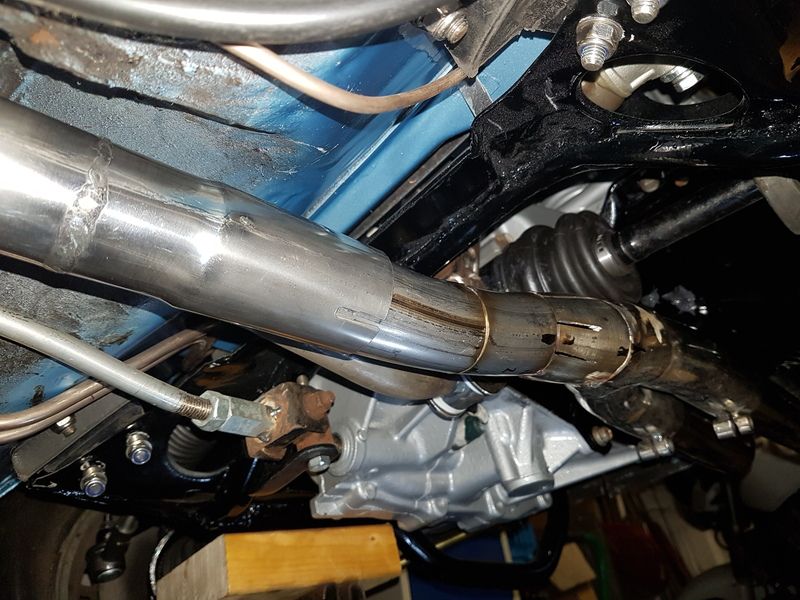
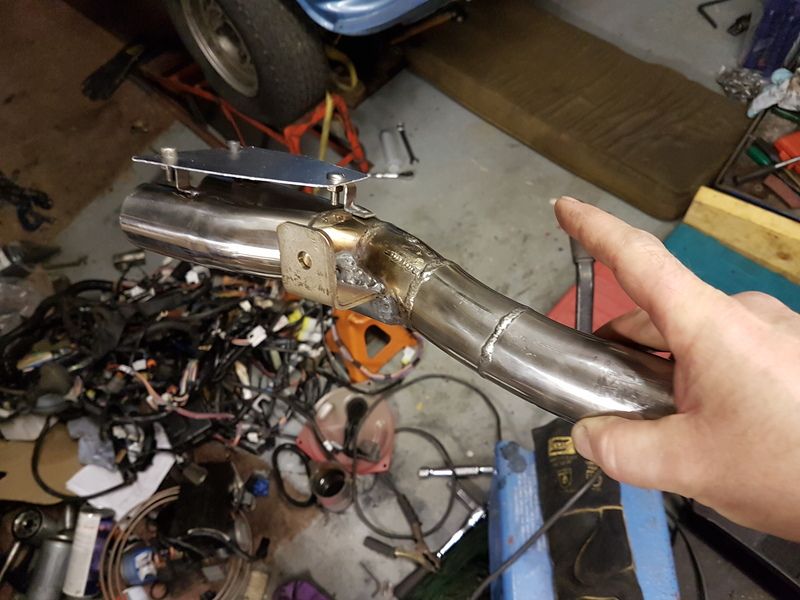
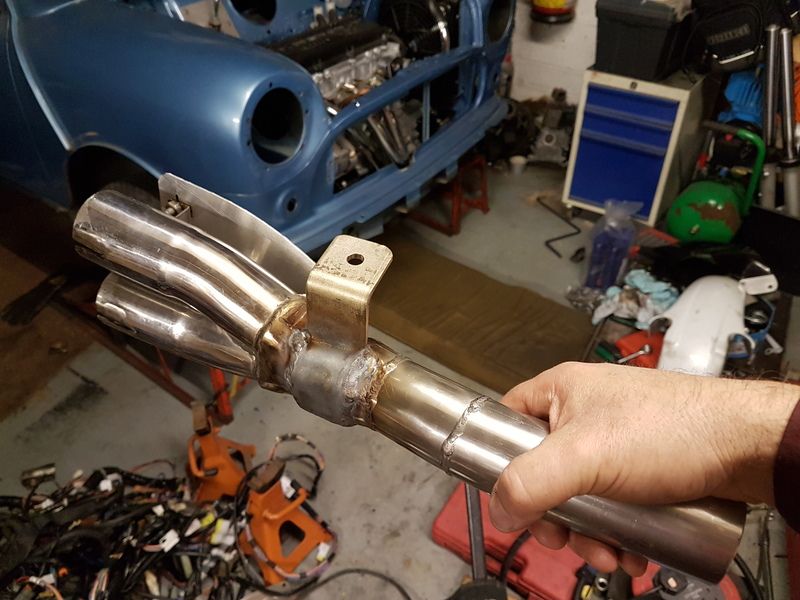
I did think of using a flexi joint but they are usually the weak point in an exhaust system. It would also have been too easy and I like to make thinks difficult for myself. So I came up with this.
20170609_223512.jpg
20170609_223538.jpg

It needs a bit of finishing off and a polish. The Heat shield is to protect the CV boot an needs a bit of a dip in it to clear the boot but you get the idea.

#255 McMini 22

McMini 22

    Mini Mad

  • Members
  • PipPipPipPip
  • 289 posts
  • Location: East lothian

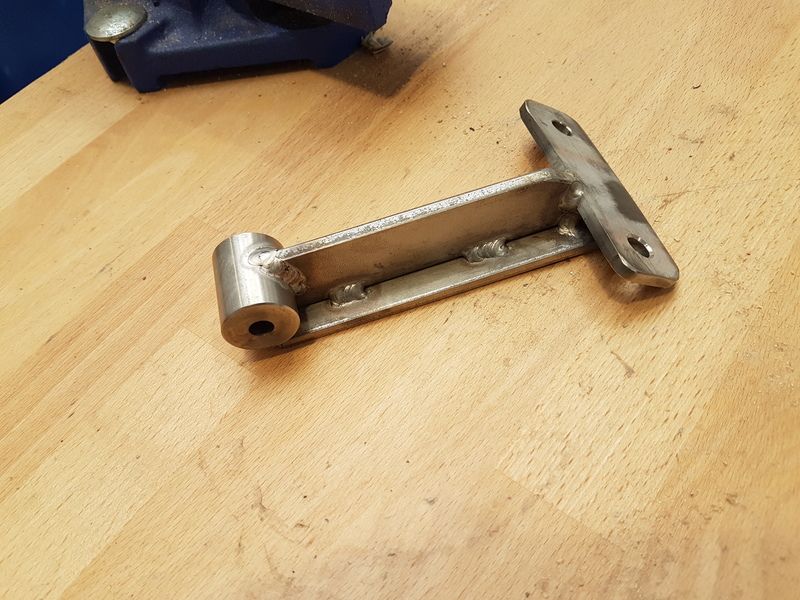
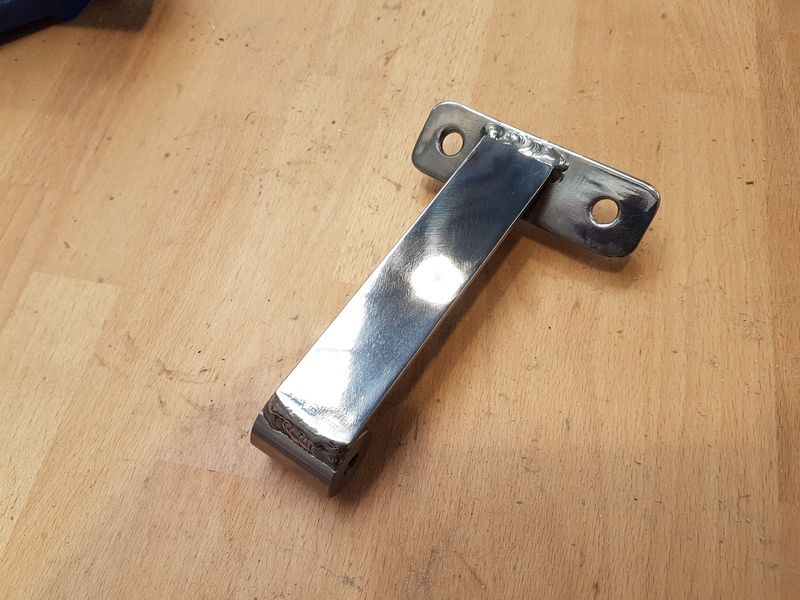
Posted 15 June 2017 - 02:47 PM

Ok. Guess what this is.

20170615_152502.jpg

20170615_152451.jpg


1 user(s) are reading this topic

0 members, 1 guests, 0 anonymous users