Jump to content


Photo
- - - - -

Webasto Tudor Roof


  • Please log in to reply
9 replies to this topic

#1 finch661

finch661

    Up Into Fourth

  • Members
  • PipPipPipPipPipPipPipPipPip
  • 2,339 posts
  • Location: Kirkwall
  • Local Club: none

Posted 29 March 2016 - 01:29 PM

Hello all, thought i would share a few photos of my project. My mini has a webasto tudor fabric roof, but was looking very tired (as was the headliner) and wanted to get it sorted. The thing would leak in the rain, and the wind noise was really bad. When i removed it I found one cable had snapped inside and one of the spacer bars had also snapped.  Sadly i couldnt afford the £350 to have the roof recovered (as much as i wanted to), so decided to make my own outer skin (vinyl), inner headliner and refurb the bars)
 
20160202_201623_zpswmhiew6t.jpgGetting the inner headlining sorted (all sewing done by my wife!)
 
20160208_205915_zpsdh3m5bl3.jpg
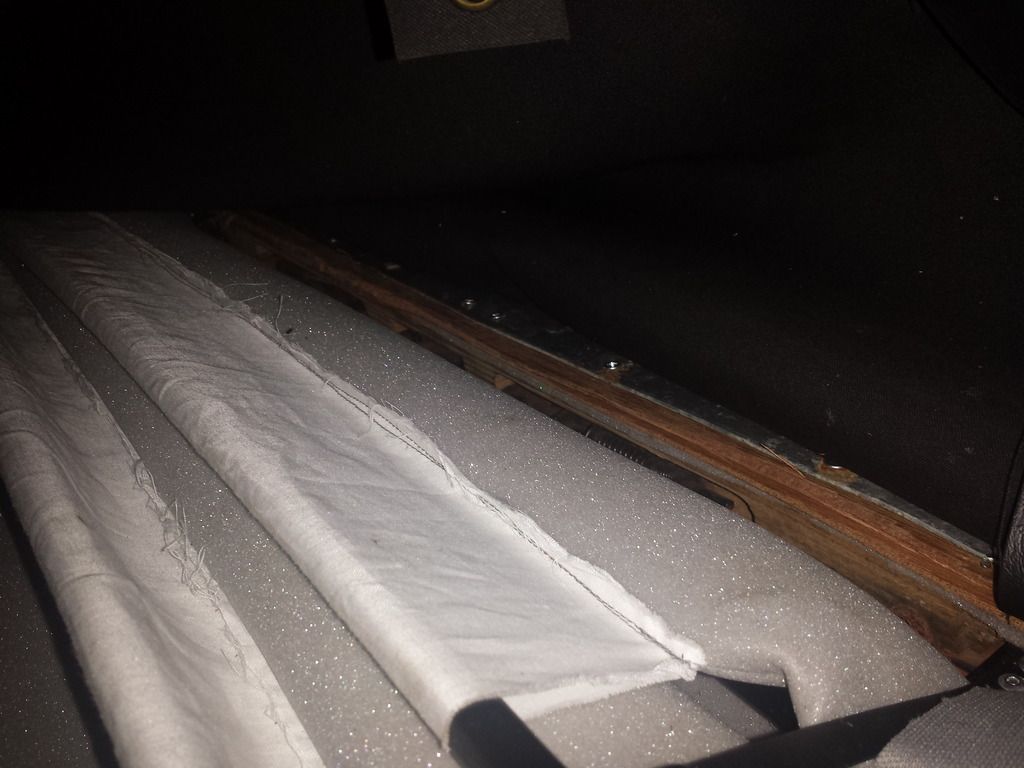
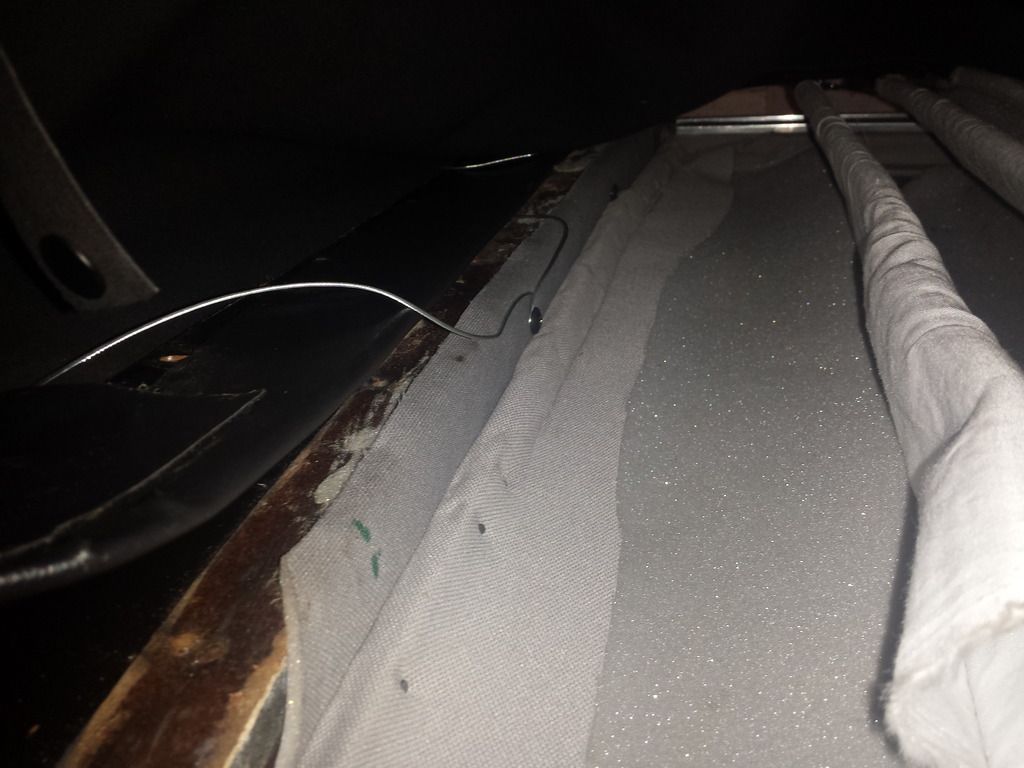
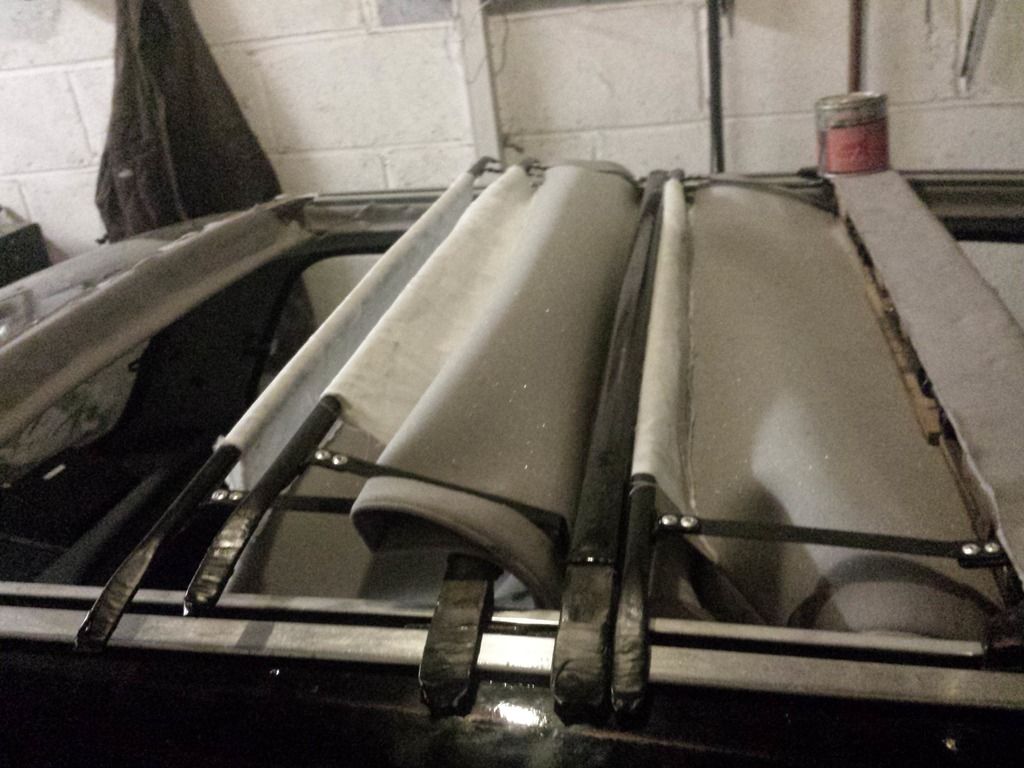
All the roof bars were cleaned up and painted. here is the bars and inner headlining test fitted
20160322_204829_zpss3d90tmr.jpg
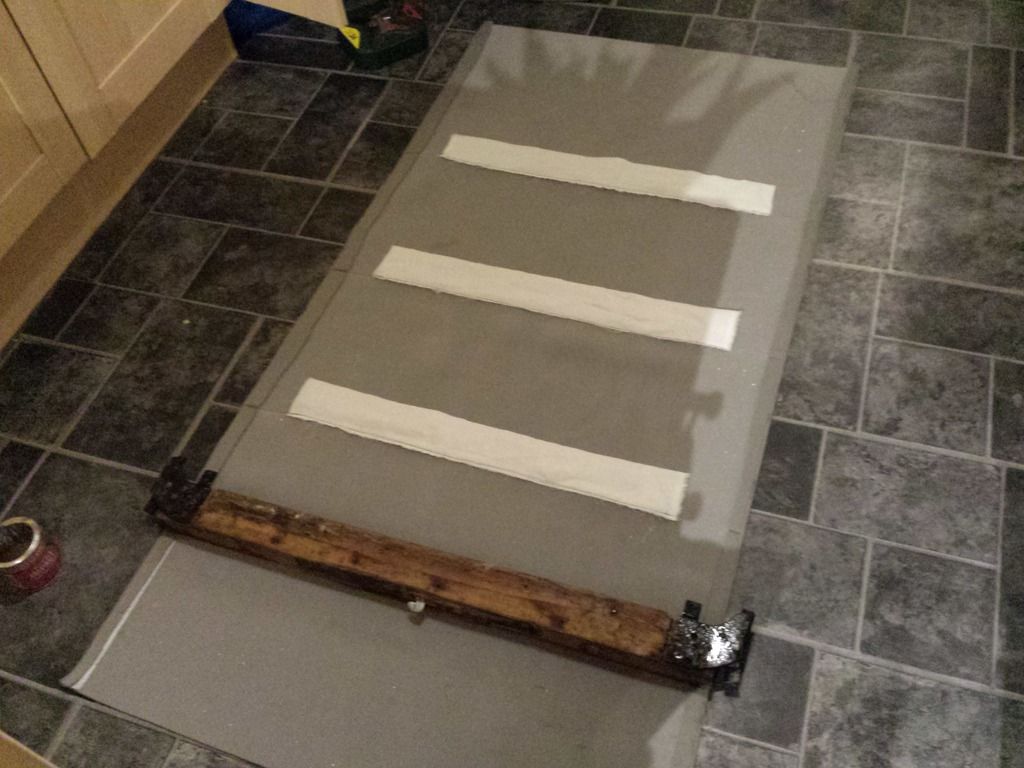
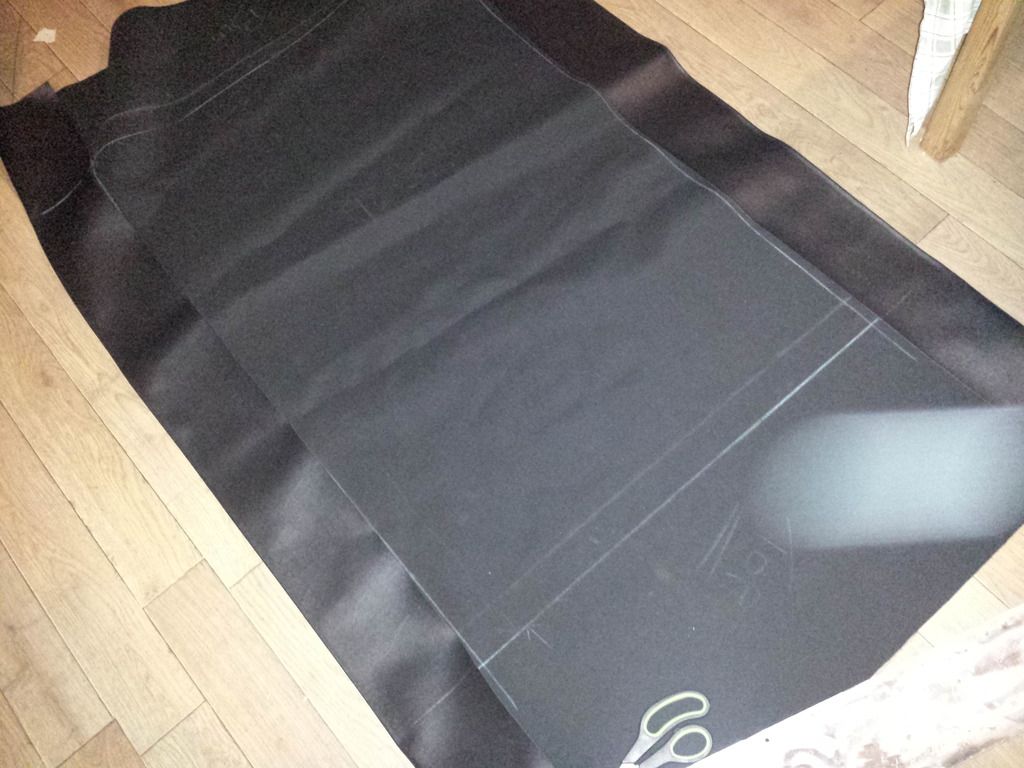
New fabric measured and sewed
 
20160325_131909_zpsantlxcay.jpg
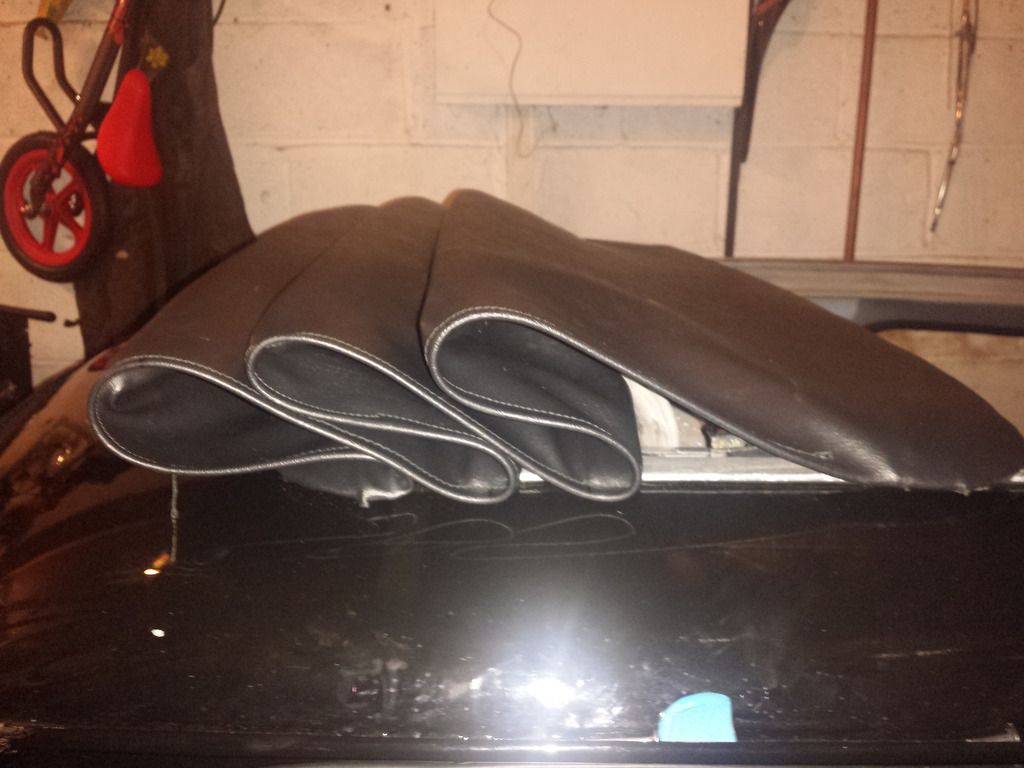
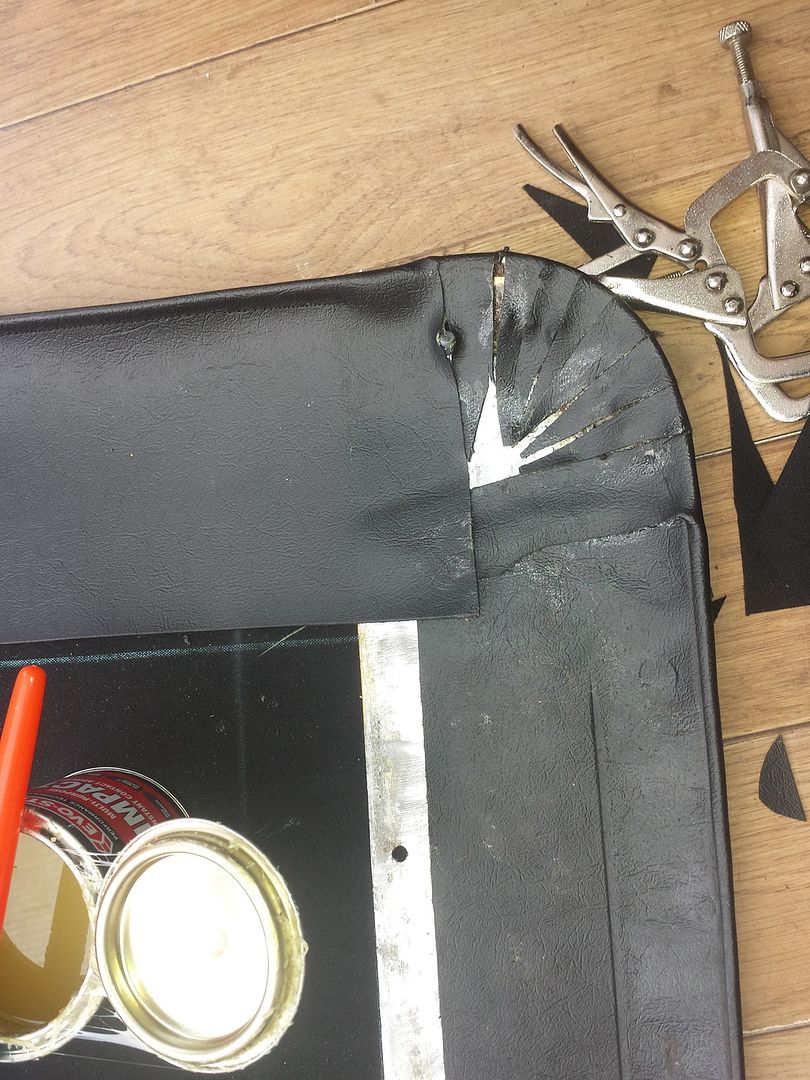
getting the corners cut (not the prettiest, but there are patches to add in)
 
20160326_095330_zpskgssvu0q.jpg
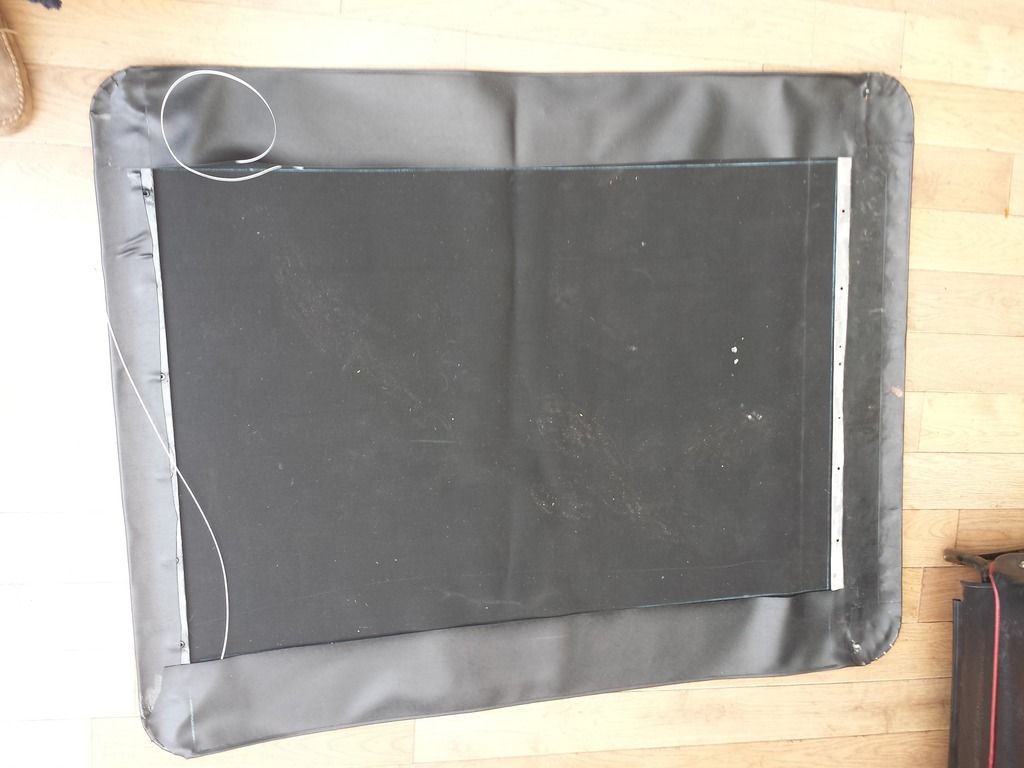
all complete with patches on the front underside (and my sons footprints....)
 
20160326_152452_zpsnvbgkbqr.jpg
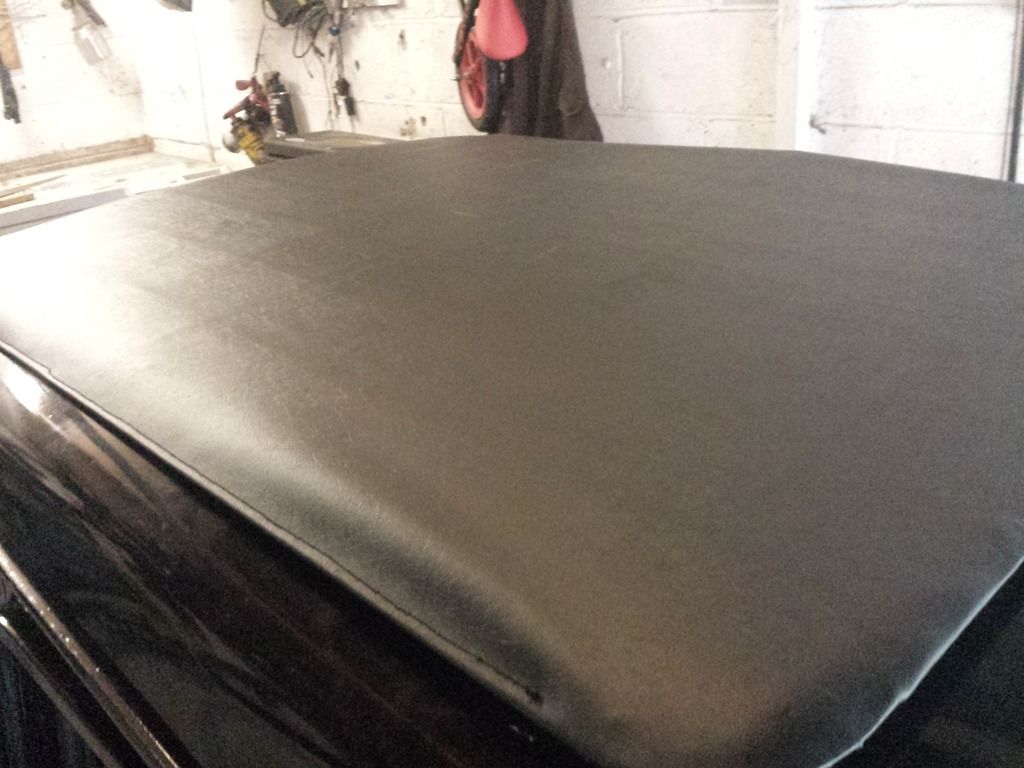
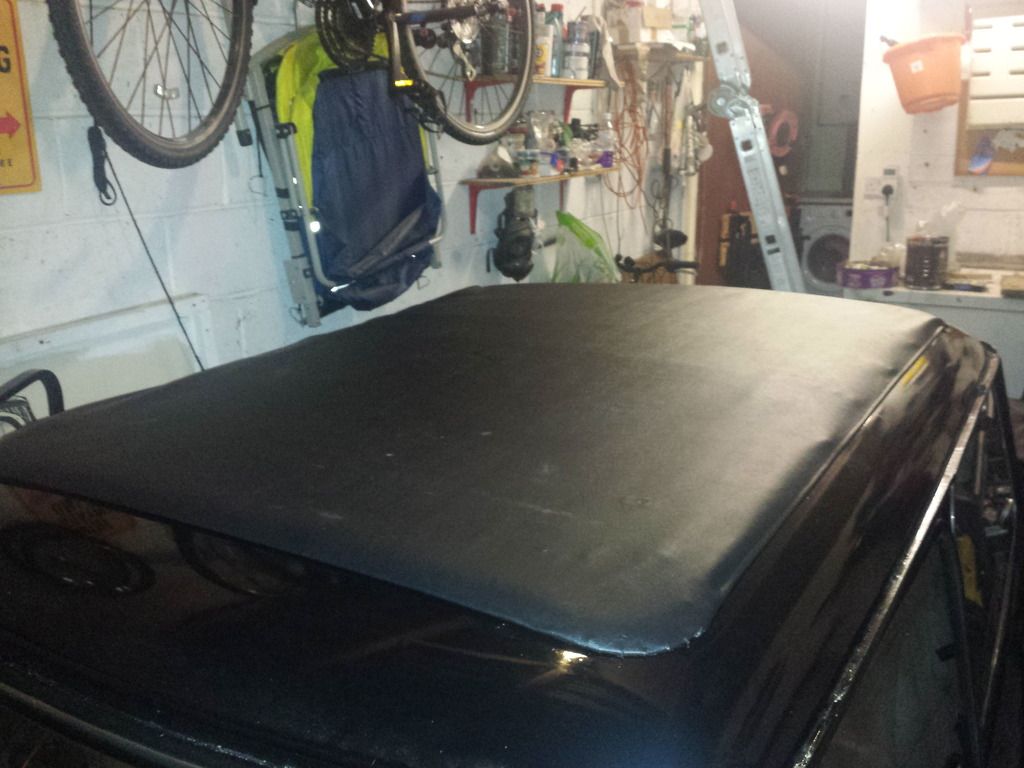
Initial fitting to see if  it all fits. It fits really well, just needs a few tweaks
 
20160326_152457_zps0bn8yo1y.jpg
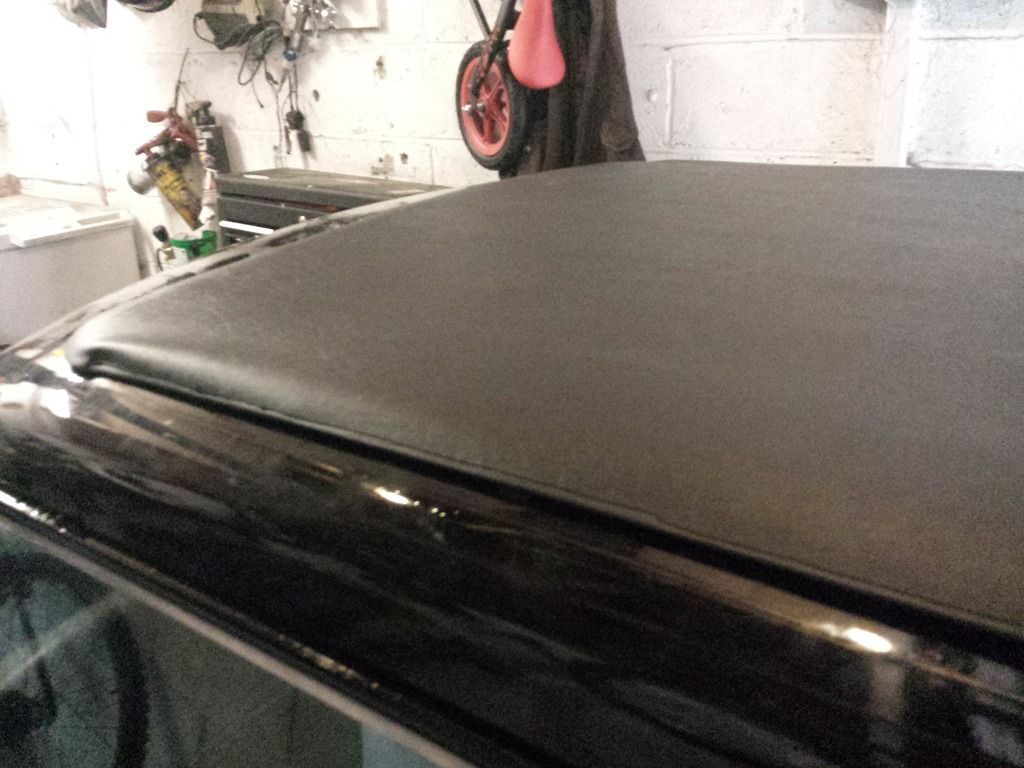
I have only held it down with a few screws and the cables havent been tensioned. I have also added the bits that hold the roof against the spacer bars and cut slits in the roof for the bars.
 
still lots to do to get it right, but i am very happy with the results. Its not perfect, but as a first attempt (and for a fraction of the cost), it will do me!
 

I'll try and get a guide written if anyone is interested
thanks
 
 
Rich
 

Edited by finch661, 29 March 2016 - 01:43 PM.


#2 cp2708

cp2708

    Mini Mad

  • Just Joined
  • PipPipPipPip
  • 171 posts
  • Location: London
  • Local Club: LSMOC

Posted 31 March 2016 - 11:54 AM

Looks good, I wouldn't mind a sunroof in mine.

#3 finch661

finch661

    Up Into Fourth

  • Members
  • PipPipPipPipPipPipPipPipPip
  • 2,339 posts
  • Location: Kirkwall
  • Local Club: none

Posted 31 March 2016 - 12:26 PM

Looks good, I wouldn't mind a sunroof in mine.

Cheers buddy, its cracking when the sun is out and on a back road or town.


Though i have realised that my project would have been finished months ago if i didnt have this roof!


#4 cp2708

cp2708

    Mini Mad

  • Just Joined
  • PipPipPipPip
  • 171 posts
  • Location: London
  • Local Club: LSMOC

Posted 01 April 2016 - 07:15 PM

Looks cool though!

#5 finch661

finch661

    Up Into Fourth

  • Members
  • PipPipPipPipPipPipPipPipPip
  • 2,339 posts
  • Location: Kirkwall
  • Local Club: none

Posted 12 April 2016 - 12:55 PM

Few more pics. spent a good hour or so getting the roof tension right.


after the roof was screwed in to the front plate

20160409_195415_zpsholge6w1.jpg


And the rear, two cables are tensioned to keep the roof tight against the ends of the roof bars. This creates a seal (hopefully)


20160409_195411_zpsykhgzkob.jpg


And finally the sliding and rising bars can be tucked into the roof


20160409_204627_zpsky3beqgi.jpg


and bingo, even folds back


20160409_204705_zpsjv3omce0.jpg


#6 Woolfie 640

Woolfie 640

    Stage One Kit Fitted

  • Noobies
  • PipPipPip
  • 52 posts
  • Location: Ayr
  • Local Club: Mini Moke club

Posted 12 April 2016 - 10:20 PM

Well done mate a real good looking job .More people should try jobs like this before spending a fortune buying new . You must have got a lot of job satisfaction out of this

#7 finch661

finch661

    Up Into Fourth

  • Members
  • PipPipPipPipPipPipPipPipPip
  • 2,339 posts
  • Location: Kirkwall
  • Local Club: none

Posted 13 April 2016 - 06:32 AM

cheers mate! it was good fun, though incredibly frustrating at times. now i know how the roof works and comes apart, should be a bit simpler next time!

for me i just couldn't afford to have it professionally refurbed!

#8 miniman86

miniman86

    Camshaft & Stage Two Head

  • Members
  • PipPipPipPipPipPipPipPip
  • 1,939 posts
  • Location: Near Southend, Essex!
  • Local Club: smag, Waltham Abby

Posted 06 November 2019 - 05:02 PM

Fantastic job! How easy was the roof to actually get apart? I have one, but it needs repairing before I can recover it. Would be nice to see how it comes apart if you have any photos?

Alex

#9 Chris1275gt

Chris1275gt

    One Carb Or Two?

  • TMF+ Member
  • PipPipPipPipPipPipPip
  • 938 posts
  • Location: Reading

Posted 06 November 2019 - 06:37 PM

Fantastic job! How easy was the roof to actually get apart? I have one, but it needs repairing before I can recover it. Would be nice to see how it comes apart if you have any photos?

Alex


Hi if you go to this old website and download part 1 & 2 these are the full original instructions on how to install a Tudor webasto sunroof just reverse for taking apart.

http://www.tudorwebastosunroofs.com/

#10 miniman86

miniman86

    Camshaft & Stage Two Head

  • Members
  • PipPipPipPipPipPipPipPip
  • 1,939 posts
  • Location: Near Southend, Essex!
  • Local Club: smag, Waltham Abby

Posted 06 November 2019 - 06:46 PM

Thanks mate, I will have a look through that tomorrow. Would be nice to be able to change the vynil on the outside of mine.

Alex


1 user(s) are reading this topic

0 members, 1 guests, 0 anonymous users