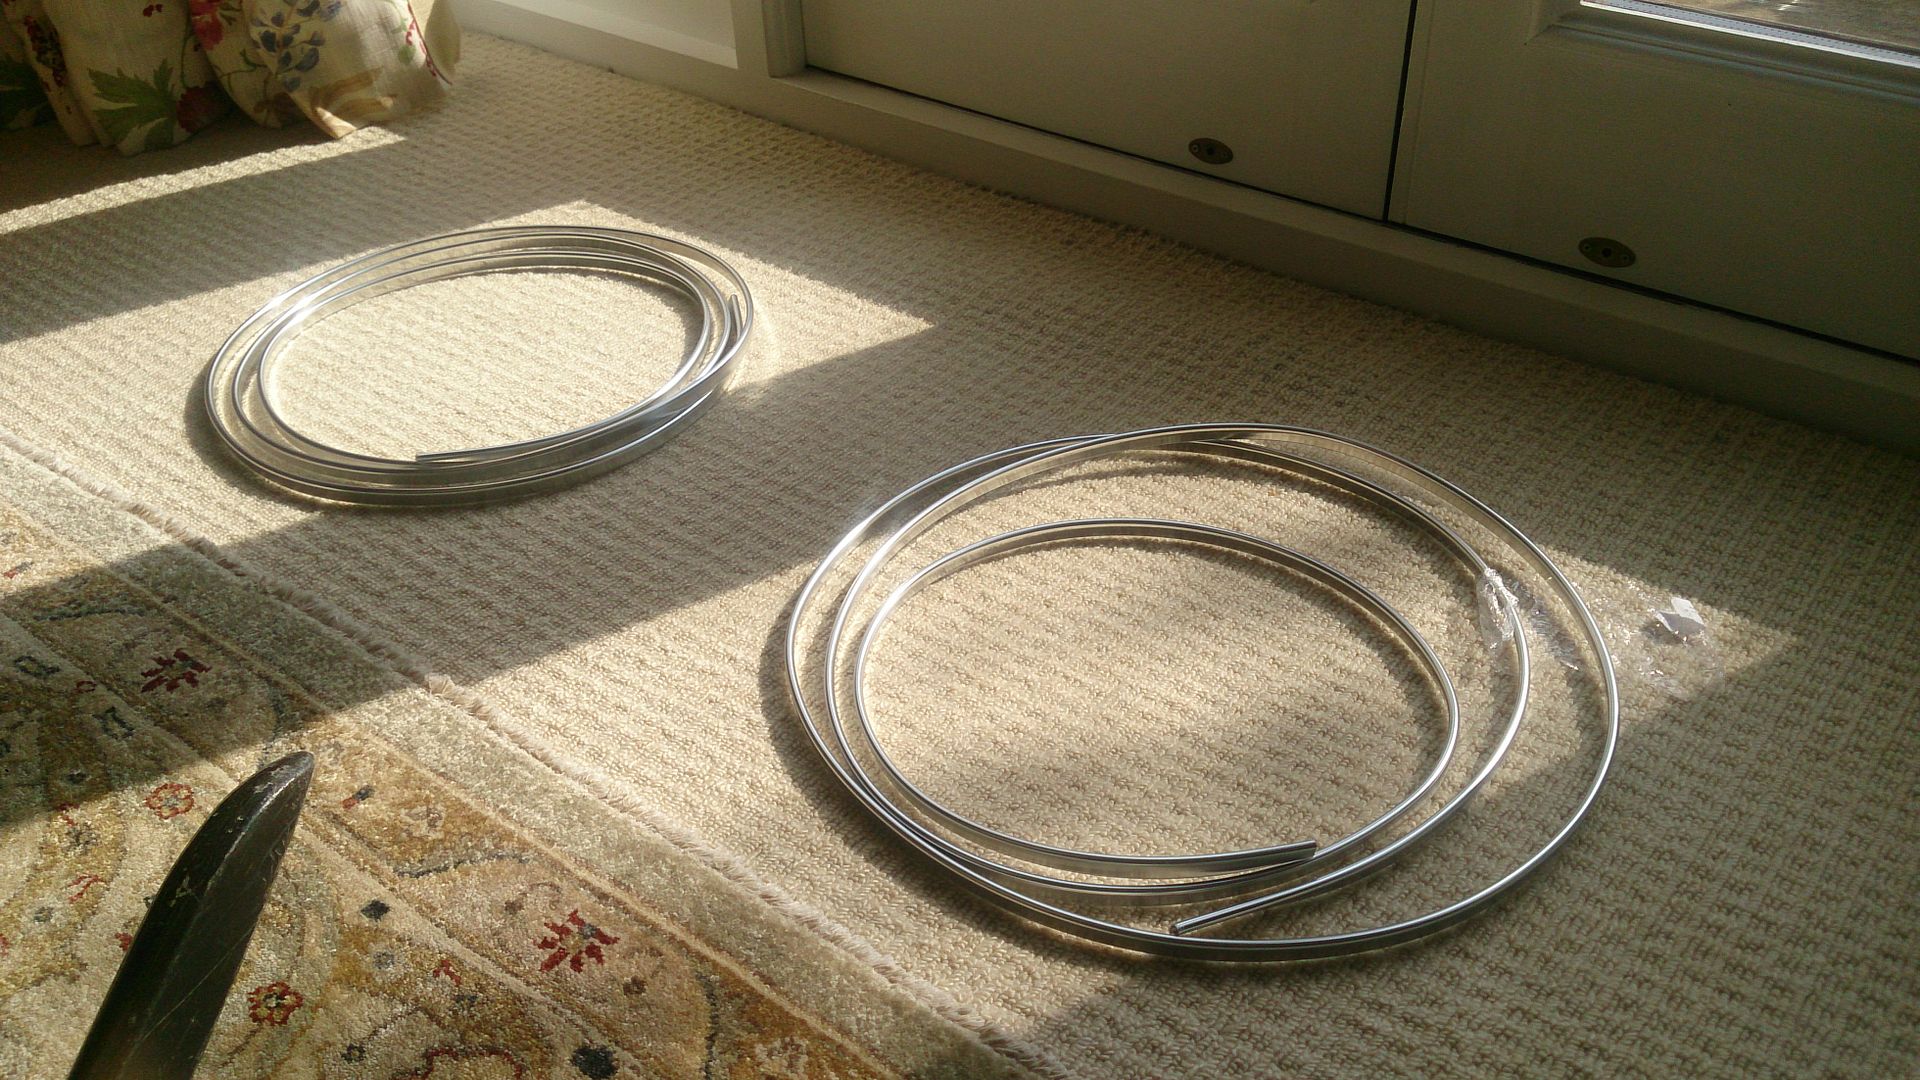
Going to have a go at fitting the chromed plastic trim on both sides of my 1972 850, i bought the deluxe trim from minispares as i was told thats the easiest and best to fit. I need some fitting tips, do i put it in boiling water or use a heatgun/ hairdryer or just fit it as is, I know I start at the back, it looks like there are 2 problem areas each side, the curve after the rear arch and before the front arch, I will be doing this in a heated garage, any advice greatly appreciated, I have rebuilt the whole car but left this job till last!!!! Cheers Mart.
Plastic Chrome Sill And Wheelarch Trim Fitting.
Started by
bikenutmart
, Feb 25 2016 08:47 PM
13 replies to this topic
#1

bikenutmart
-
- Members
-

- 579 posts
Super Mini Mad
- Location: Bierton Bucks
Posted 25 February 2016 - 08:47 PM
#2
Hedgey
-

- Members
-
- 179 posts
Mini Mad
- Location: Yorkshire
Posted 25 February 2016 - 09:22 PM
I used a heat gun which worked nicely although it can be quite easy to melt the trim if you don't pay attention. The hot water technique didn't work for me at all but I was doing mine outside
#3
tiger99
-

- Members
-
- 8,584 posts
Crazy About Mini's
- Location: Hemel Hempstead
Posted 25 February 2016 - 09:42 PM
I suggest not using the heat gun as they are far too hot. There is a very serious risk of seriously burning your fingers, which will never fully recover their sense of touch (which you will need, as a Mini owner, just as if you were a surgeon), as well as burning the trim strip and paintwork. The hair dryer will be less risky. Heating the entire length of strip in nearly boiling water first does no harm, but shake out the water carefully, as again there is a personal hazard.
I strongly recommend filling the back of any type of edge trim strip with thick Waxoyl before fitting, as otherwise there is a strong incentive for rust to start at the edges within. But in your case a dry fitting first, leaving it on the car for a week or so to permanently acquire the shape, may be more practicable. Then take them off, add Waxoyl and refit, which will be easier second time around. Or you could fill the back with an appropriate adhesive such as Sikaflex to provide a seal to keep water out, and the trim on, again only when it has acquired its shape.
Many (not all?) Minis with plastic trim came out of the factory with a pop rivet at each end of the sill trim to help prevent it coming off at the ends. The alternative pre-shaped steel trim needs a lot of preparatory work to avoid rust problems, but does usually fit.
Personally I find these strips, of all varieties, an utter abomination, but it is a legal necessity to use something, and I agree with that. It can be rubber, easy to fit but ugly.
#4
72clubman
-
- Members
-
- 443 posts
Speeding Along Now
- Location: Leicestershire
- Local Club: Charnwood Minis
Posted 25 February 2016 - 09:44 PM
I went with the flat trim as I prefer the look but the method I'm assuming is very similar.
It comes in tight rolls which I have to say makes it a complete arse to fit. But you can use it to your advantage. I attempted fitting these a few months ago using a heat gun, this over heated the trim and caused it to kink immediately. I then tried boiling water on the other side and again had the same problem.
I also used the natural curve of the trim to form over the arch. This initially worked, but when you try and reverse the curve for the A panel it again would kink.
The key is to go against the natural curve of the roll for the wheel arches and use the natural kink for the A panel return and the curve before the rear arch.
On my second attempt I waited for a warm day and used hot water from the tap, hot but not boiling and left the roll to warm up. Keep refreshing the water to keep the temperature up.
Before you start working the trim measure the distance from where you want to start, eg. the beginning of the lip on the wing along the lip, to where you believe the curve of the arch ends and the reversed curve of the A panel begins. Then from where this curve ends along the car to the return curve on the rear wing.
I then marked the areas of these curves and didn't touch them.
All the other areas you then need to begin working.
Working the trim, I gently pulled it straighter. From the initial size you want the roll to be around 2-3 times larger than it began.
The key is don't force the trim as this will again kink it, once it's gone it's ruined.
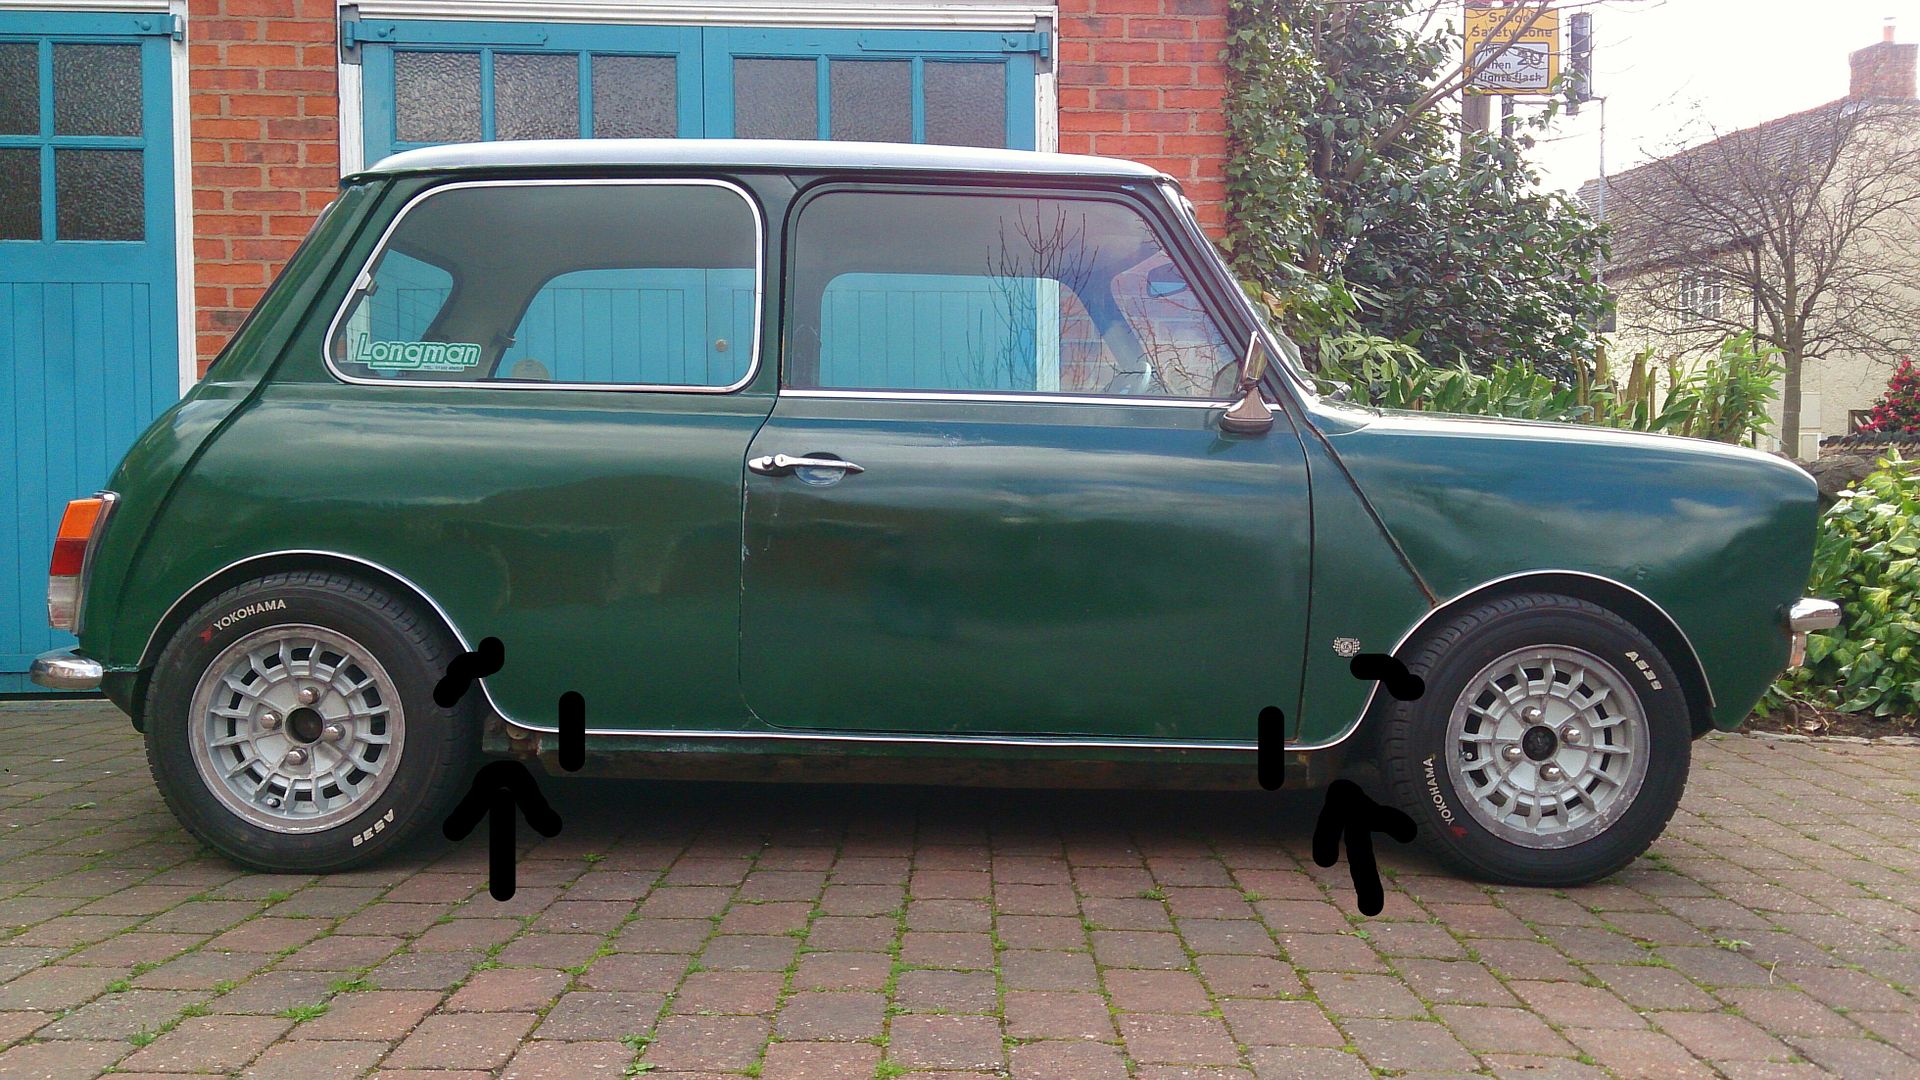
Before you offer up the trim you want to ensure your sill lip hasn't got any notches in it as this will really help you fit it, also any ripples in the lip will show in the trim.
Fitting over the arches is the easy part if you put the time in as it's only a single lip. keeping the trim warm is key, I had a bucket of warm water and kept pouring water over the trim to keep it warm, this will really help.
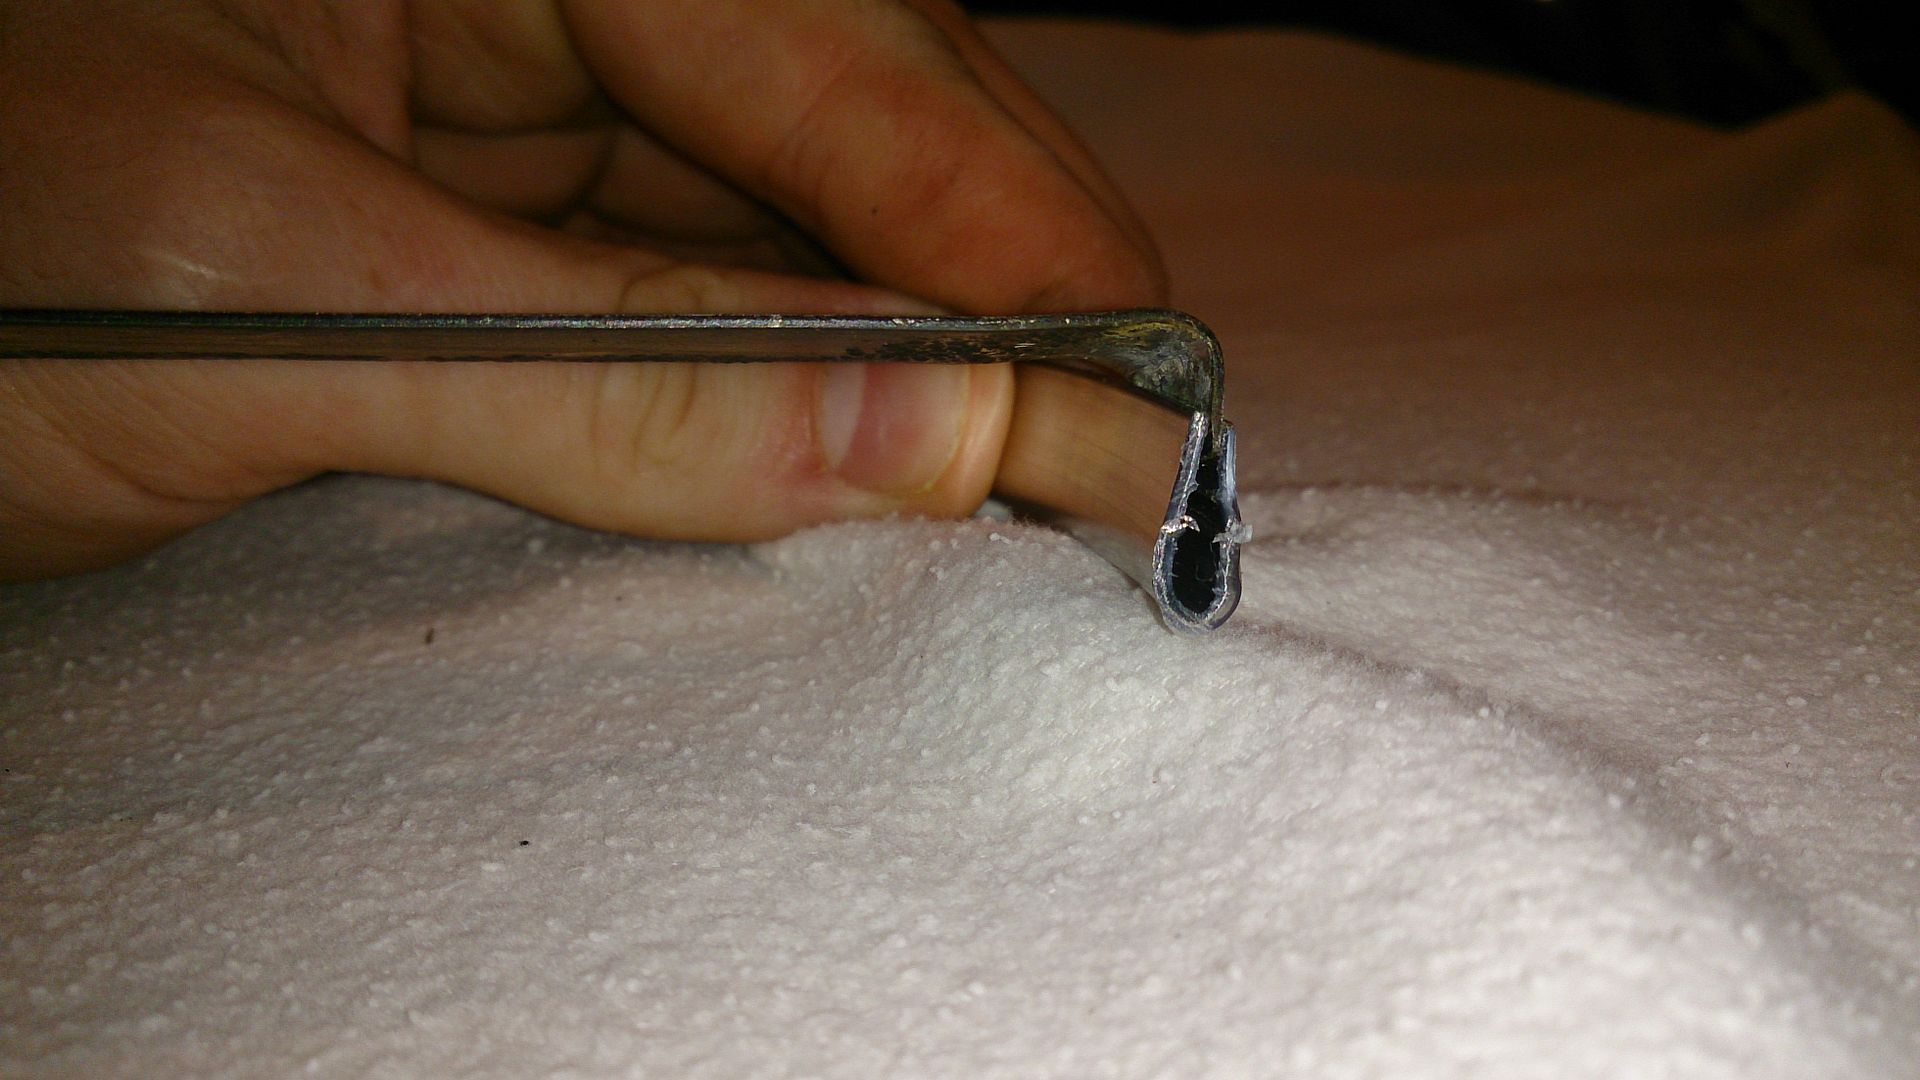
Sometimes the trim gets stuck, especially with the sandwich of panels on the door step. To help ease the trim over these areas I made a tool ( a bent piece of mild steel) to put in the trim to work it over troublesome areas. I put this tool inbetween the trim away from the troublesome areas and pulled it along to help over.
The trim was around 8 inches too long, so once I had it almost fitted at the rear I cut it to size.
It's very difficult, I spent an hour on each side working the trim and around another hour fitting per side.
I hope this helps you, and goodluck!
If you have any questions I'm happy to help.
Joe
It comes in tight rolls which I have to say makes it a complete arse to fit. But you can use it to your advantage. I attempted fitting these a few months ago using a heat gun, this over heated the trim and caused it to kink immediately. I then tried boiling water on the other side and again had the same problem.
I also used the natural curve of the trim to form over the arch. This initially worked, but when you try and reverse the curve for the A panel it again would kink.

The key is to go against the natural curve of the roll for the wheel arches and use the natural kink for the A panel return and the curve before the rear arch.
On my second attempt I waited for a warm day and used hot water from the tap, hot but not boiling and left the roll to warm up. Keep refreshing the water to keep the temperature up.
Before you start working the trim measure the distance from where you want to start, eg. the beginning of the lip on the wing along the lip, to where you believe the curve of the arch ends and the reversed curve of the A panel begins. Then from where this curve ends along the car to the return curve on the rear wing.
I then marked the areas of these curves and didn't touch them.

All the other areas you then need to begin working.
Working the trim, I gently pulled it straighter. From the initial size you want the roll to be around 2-3 times larger than it began.
The key is don't force the trim as this will again kink it, once it's gone it's ruined.
Before you offer up the trim you want to ensure your sill lip hasn't got any notches in it as this will really help you fit it, also any ripples in the lip will show in the trim.
Fitting over the arches is the easy part if you put the time in as it's only a single lip. keeping the trim warm is key, I had a bucket of warm water and kept pouring water over the trim to keep it warm, this will really help.
Sometimes the trim gets stuck, especially with the sandwich of panels on the door step. To help ease the trim over these areas I made a tool ( a bent piece of mild steel) to put in the trim to work it over troublesome areas. I put this tool inbetween the trim away from the troublesome areas and pulled it along to help over.

The trim was around 8 inches too long, so once I had it almost fitted at the rear I cut it to size.
It's very difficult, I spent an hour on each side working the trim and around another hour fitting per side.
I hope this helps you, and goodluck!

If you have any questions I'm happy to help.
Joe
Edited by 72clubman, 25 February 2016 - 09:48 PM.
#5
bikenutmart
-
- Members
-
- 579 posts
Super Mini Mad
- Location: Bierton Bucks
Posted 26 February 2016 - 11:44 AM
Very helpful everyone, patience is the key then! Will give it a go at the weekend, wish me luck. Mart.
#6
Hedgey
-
- Members
-
- 179 posts
Mini Mad
- Location: Yorkshire
Posted 26 February 2016 - 01:49 PM
Some good suggestions about filling the trims cavity with wax, I will be doing the same on my project. However don't worry about a heat gun being too hot, just keep the gun moving and and heat it up a little at a time until you find the optimum temp. The seam trim is always supplied a little over size so you could trim 40mm off before you start and put the heat gun over it to see how long it takes to soften or melt. As long as you have a little common sense you're not going to burn your fingers.
Good Luck
#7
62S
-

- Members
-
- 1,243 posts
One Carb Or Two?
- Local Club: You must be joking!
Posted 26 February 2016 - 11:07 PM
You can't use the go against the curve method with the deluxe trim unless you put it on upside down. With deluxe trim it goes on much more easily if you spend time pulling it straight it beforehand.
#8
bikenutmart
-
- Members
-
- 579 posts
Super Mini Mad
- Location: Bierton Bucks
Posted 27 February 2016 - 03:09 PM
Good point 62S! would you advise spending time pulling it straight as is or with some gentle heat? Mart.
#9
johnR
-

- Members
-
- 2,297 posts
Up Into Fourth
- Location: Dorset
Posted 27 February 2016 - 03:57 PM
I've been putting this job off too - I've got group 2 arches to deal with to add further complication.
Is there any way of getting the trim to follow the arches 'round the tight curves into the front and back valances or does everyone stop them where the curve tightens?
JohnR
Is there any way of getting the trim to follow the arches 'round the tight curves into the front and back valances or does everyone stop them where the curve tightens?
JohnR
#10
62S
-
- Members
-
- 1,243 posts
One Carb Or Two?
- Local Club: You must be joking!
Posted 28 February 2016 - 09:05 AM
Gentle heat is rarely a bad thing when trying to fit deluxe trim, as with so many things patience and careful preparation produce the best result.Good point 62S! would you advise spending time pulling it straight as is or with some gentle heat? Mart.
You can follow the curves on Group 2 arches.
There was recently a pair of used but nicely curved deluxe trims on eBay that sold for over £40!
#11
bikenutmart
-
- Members
-
- 579 posts
Super Mini Mad
- Location: Bierton Bucks
Posted 28 February 2016 - 06:04 PM
Thanks 62S. Mart.
#12
Shifty
-

- Admin
-
- 13,138 posts
Sponsored by Fosters (tm)
- Name: Sean
- Location: Shropshire(sunny)
- Local Club: TMF
Posted 28 February 2016 - 06:21 PM
I use hot water and a piece of thin steel to form the curve.
Get a bit of thin sheet about 6" long, offer the trim up to the car and insert the steel into the bit if the trim you want to bend. The steel will act as a former to stop it from kinking while you bend. Leave the steel in and pour hot water over the area you want to bend, take it nice and steady and all will be well.
#13
bikenutmart
-
- Members
-
- 579 posts
Super Mini Mad
- Location: Bierton Bucks
Posted 28 February 2016 - 08:53 PM
Shifty, great idea!! bit like a bending spring in a piece of pipe. Mart.
#14
Shifty
-
- Admin
-
- 13,138 posts
Sponsored by Fosters (tm)
- Name: Sean
- Location: Shropshire(sunny)
- Local Club: TMF
Posted 28 February 2016 - 09:19 PM
Shifty, great idea!! bit like a bending spring in a piece of pipe. Mart.
Exactly like that!!
I used to struggle to get nice bends until I tried this method. No kinks and dead easy as well


1 user(s) are reading this topic
0 members, 1 guests, 0 anonymous users


